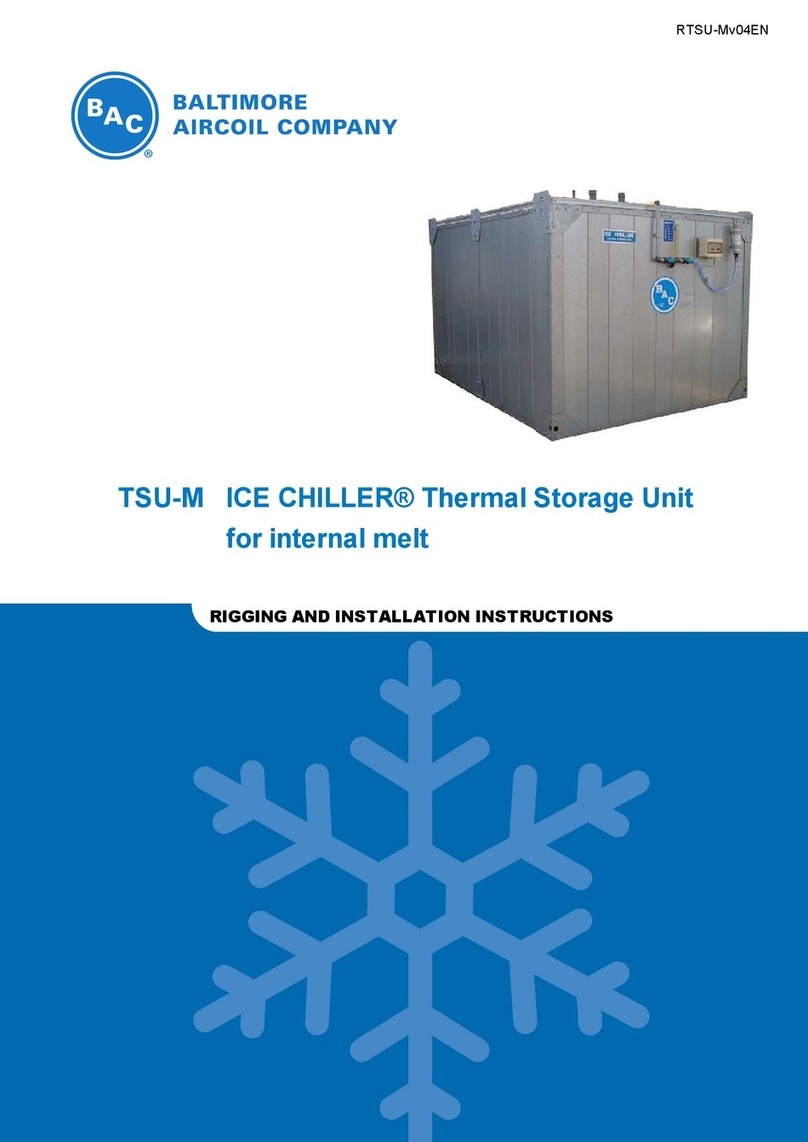
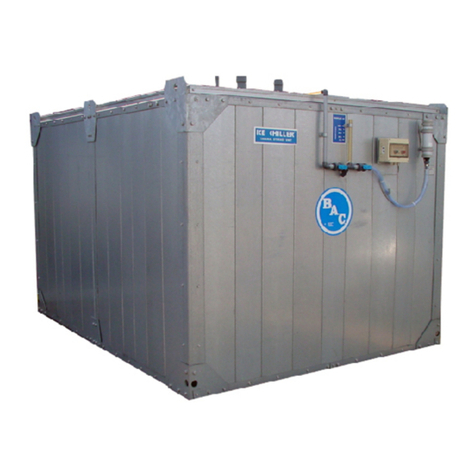
Baltimore Aircoil Company ICE CHILLER TSC-C-D Manual

TSC-C-D ICECHILLER® Thermal Storage Coil only
OPERATING AND MAINTENANCE INSTRUCTIONS
MTSC-CDv09EN

Recommended maintenance and
monitoring programme
Baltimore Aircoil Company's Ice Chiller®Thermal Storage Units and Thermal Storage Coils have been developed
for long, trouble-free service when installed, operated and maintained properly. To ensure optimal performance and
maximum equipment life for your Ice Chiller®Thermal Storage Unit, it is important that a regular
inspection/maintenance program be developed and implemented. This manual is provided as a guide to unit
operation and establishing an effective maintenance program for Ice Thermal Storage systems.
Included in the manual are start-up and shutdown procedures, maintenance procedures and a schedule of
maintenance items and their recommended frequency for the Ice Chiller®Thermal Storage Unit and its related
components. An illustration of the Thermal Storage Unit, with its major components identified, is provided in "Ice
Chiller®" on page4. All inspections, maintenance and monitoring actions should be recorded in a cooling system
logbook.
As part of your maintenance record, it is advisable to have a copy of the unit's certified drawing available for
reference during inspection and maintenance. If you do not have a copy of this drawing, or need further information
about the unit, contact your local BAC Service provider. You can find name, e-mail and phone number on the
website www.BACService.eu.
Inspections and monitoring Start-Up Monthly Quarterly Every 6 months Annually Shutdown
General condition X X
Ice Chiller®tank X X
Ice Chiller®water (1)
- Quality
- Level
X
X
X
X
Ice thickness X X
Coil X
Ice Logic™ Ice Quantity controller:
- condition of sensor
- conductivity of tank water
X
X
X
X
Air pump
- Air filter replacement
X X
X
Refrigerant:
- Glycol quality
- NH3purge oil
X
X
Air distribution piping X
Cleaning procedures Start-Up Monthly Quarterly Every 6 months Annually Shutdown
Mechanical cleaning
- Air filter
X
X X
X X
Disinfection X X X
Notes
1. Water treatment and auxiliary equipment integrated in the cooling system may require additions to the table
above. Contact suppliers for recommended actions and their required frequency.
2. Recommended service intervals are for typical installations. Different environmental conditions may dictate
more frequent servicing.
3. When operating in ambient temperatures below freezing, the unit should be inspected more frequently.
W W W . B A L T I M O R E A I R C O I L . E U
2

Table of contents
OPERATING AND MAINTENANCE INSTRUCTIONS
1 Construction details 4
Ice Chiller® 4
2 General information 5
Operating conditions 5
Connecting pipework 5
Safety precautions 5
Disposal requirements 6
Non-walking surfaces 7
Modifications by others 7
Warranty 7
3 Operating instructions 8
Start-up and shutdown procedures 8
Daily operating guidelines 10
Ice Logic® Ice Quantity Controller 12
4 Water Care 15
About water care 15
Passivation 15
Special water treatment considerations 16
5 Cold Weather Operations 17
About cold weather operation 17
Insulation of piping 17
Protection against coil freezing 17
Ice due to subfreezing ambients 18
6 Maintenance Procedure 19
Inspections and corrective actions 19
Cleaning procedures 21
7 Comprehensive Maintenance 22
About comprehensive maintenance 22
Prolonged outdoor stay 22
8 Further Assistance & Information 23
Assistance 23
More information 23
W W W . B A L T I M O R E A I R C O I L . E U
3

W W W . B A L T I M O R E A I R C O I L . E U
CONSTRUCTION DETAILS
Ice Chiller®
EXTERNAL MELT APPLICATION
1. Tank
2. Insulation
3. Exterior panels
4. Air pump
5. Covers
6. Galvanised steel coil
7. Ice Logic™ Ice Thickness Controller (not shown)
8. Air distribution
4
TSC-C-D
1
1 Construction details

2 General information
2 General information W W W . B A L T I M O R E A I R C O I L . E U
5
GENERAL INFORMATION
Operating conditions
BAC cooling equipment is designed for the operating conditions specified below, which must not be exceeded
during operation.
•Wind Load: For safe operation of unshielded equipment exposed to wind speeds above 120 km/h installed at a
height above 30 m from the ground, contact your local BAC-Balticare representative.
•Seismic Risk: For safe operation of equipment installed in moderate and high hazard area's contact your local
BAC-Balticare representative.
• The coils are manufactured from black steel and hot dip galvanised after fabrication and may contain certain
contaminants, such as carbon, iron oxide or welding particles.
• The installer must take the necessary precautions on site to safeguard the operation of sensitive components
in conjunction with the coils.
PURGE REQUIREMENTS
The installer of BAC equipment must ensure proper system purging of air prior to operation. Entrained air can
obstruct the proper flow of glycol solution, resulting in higher operating pressures than design and reduced thermal
storage capacity.
Connecting pipework
All piping external to BAC cooling equipment must be supported separately.
The equipment outlet piping must be installed under the operating level of the equipment to prevent air suction and
pump cavitation.
All connections in the external pipework (installed by others) must be leak free and tested accordingly.
Safety precautions
All electrical, mechanical and rotating machinery constitutes a potential hazard, particularly for those not familiar
with its design, construction and operation. Accordingly, adequate safeguards (including use of protective
enclosures where necessary) should be taken with this equipment both to safeguard the public (including minors)
from injury and to prevent damage to the equipment, its associated system and the premises.
If there is doubt about safe and proper rigging, installation, operation or maintenance procedures, contact the
equipment manufacturer or his representative for advice.
When working on operating equipment, be aware that some parts may have an elevated temperature. Any
operations on elevated level have to be executed with extra care to prevent accidents.
Air piping between air pump and TSC can have temperatures above 40°C. Insulate the piping if necessary to
prevent personal injury.
TSC-C-D
2

AUTHORIZED PERSONNEL
The operation, maintenance and repair of this equipment should be undertaken only by personnel authorized and
qualified to do so. All such personnel should be thoroughly familiar with the equipment, the associated systems
and controls and the procedures set forth in this and other relevant manuals. Proper care, personal protective
equipment, procedures and tools must be used in handling, lifting, installing, operating, maintaining and repairing
this equipment to prevent personal injury and/or property damage. Personnel must use personal protective
equipment where necessary (gloves, ear plugs, etc...)
MECHANICAL SAFETY
Mechanical safety of the equipment is in accordance with the requirements of the EU machinery directive.
Depending upon site conditions it also may be necessary to install items such as bottom screens, ladders, safety
cages, stairways, access platforms, handrails and toe boards for the safety and convenience of the authorized
service and maintenance personnel.
At no time this equipment should be operated without all access cover panels and access doors in place.
For more information consult your local BAC Balticare representative.
ELECTRICAL SAFETY
All electrical components associated with this equipment should be installed with a lockable disconnect switch
located within sight of the equipment.
In the event of multiple components, these can be installed after a single disconnect switch but multiple switches
or a combination thereof are also allowed.
No service work should be performed on or near electrical components unless adequate safety measures are
taken. These include, but are not limited to the following:
• Isolate the component electrically
• Lock the isolation switch in order to prevent unintentional restart
• Measure that no electrical voltage is present anymore
• If parts of the installation remain energized, make sure to properly demarcate these in order to avoid confusion
Fan motor terminals and connections may have residual voltage after unit shut-down. Wait five minutes after
disconnecting the voltage at all poles before opening the fan motor terminal box.
LOCAL REGULATIONS
Installation and operation of cooling equipment may be subject to local regulations, such as establishment of risk
analysis. Ensure regulatory requirements are consistently met.
Disposal requirements
Dismantling of the unit and treatment of refrigerants (if applicable), oil and other parts must be done with respect to
the environment whilst protecting workers from potential risks related to exposure to harmful substances.
National and regional legislation for material disposal and protection of workers should be taken into account with
regard to:
• Appropriate handling of construction and maintenance materials when dismantling the unit. In particular when
dealing with materials that contain harmful substances, such as asbestos or carcinogenic substances.
• Appropriate disposal of the construction and maintenance materials and components such as steel, plastics,
refrigerants and waste water according to local and national requirements for waste management, recycling
and disposal.
W W W . B A L T I M O R E A I R C O I L . E U
6

Non-walking surfaces
Access to and maintenance of any component needs to be performed in accordance with all local applicable laws
and regulations. If the proper and required access means are not present, temporary structures need to be
foreseen. Under no circumstance can one use parts of the unit, that are not designed as an access mean, unless
measures can be taken to mitigate any risks that might occur from doing so.
Modifications by others
Whenever modifications or changes are made by others to the BAC equipment without written permission of BAC,
the party who has done the modification becomes responsible for all consequences of this change and BAC
declines all liability for the product.
Warranty
BAC will guarantee all products to be free from manufactured defects in materials and workmanship for a period of
24 months from the date of shipment. In the event of any such defect, BAC will repair or provide a replacement.
For more details, please refer to the Limitation of Warranties applicable to and in effect at the time of the
sale/purchase of these products. You can find these terms and conditions on the reverse side of your order
acknowledgement form and your invoice.
W W W . B A L T I M O R E A I R C O I L . E U
7
2 General information

W W W . B A L T I M O R E A I R C O I L . E U
OPERATING INSTRUCTIONS
Start-up and shutdown procedures
START-UP PROCEDURE
Before initial start-up or after prolonged shutdown, the BAC Ice Chiller®Thermal Storage Units should be
thoroughly inspected and cleaned:
1. Clean all debris from the interior of the tank.
2. Flush the Ice Chiller®tank with water, then drain to remove any accumulated dirt.
3. Visually inspect the air pump for damage.
4. Connect the motor using a thermal overload motor starter.
5. Start the air pump and check for correct rotation. Also check for any unusual noise or vibration.
6. Check the voltage and current of the air blower. The current should not exceed the nameplate rating.
7. Inspect the PVC air distribution piping for cracks or other signs of damage.
8. Check the Ice Logic™ ice thickness control to be sure it is securely mounted and has not been damaged.
Check control wiring for proper connections.
9. Caulk around the base of the tank (caulk is provided with the unit).
10. Inspect and leak test all the components and piping of the refrigerant and/or secondary coolant system.
11. Fill the ice tank with good quality water ("About water care" on page15) to a height of at least 25 mm above the
coil. Start the water circulation pumps and check the water level again. Add water until it is at least 25 mm
above the coil, which is the appropriate level when there is no ice in the tank.
CAUTION
Do not overfill!
Overflowing the tank may damage the insulation and/or cause the operating controls to
malfunction.
12. If using a secondary coolant, charge the system with the proper industrial grade inhibited glycol solution
("Protection against coil freezing" on page17) and ensure all air is purged from the system. Do not attempt to
mix the glycol solution in the Ice Chiller®unit coil.
8
TSC-C-D
3
3 Operating instructions

13. If using refrigerant, evacuate the system and charge with the specified refrigerant.
CAUTION
Do not close both inlet (liquid supply) and outlet (wet return) valves on the Ice Chiller®Coils
without the use of a by-pass relief around the valves. This will prevent an excess build-up of
pressure in the coils as a result of expansion of the refrigerant as the coils warm up.
14. Inspect the Baltibond®Hybrid Coating finish on the unit.
15. If the unit will be subjected to subfreezing ambient conditions, heat tape the drain and drain ball valve to prevent
cracking.
AFTER 24 HOURS
After 24 hours of operational load, proceed as follows:
1. Check the air pump for any unusual noise or vibration.
2. Examine ice build along the tubes for even thickness and distribution after the ice build is complete. If ice build
along the coil is significantly uneven, adjust glycol or refrigerant flow through each coil.
At full ice build, the ice layer on the tubes will be slightly conical, particularly for glycol feed systems.
3. Check the water level and adjust if required.
CAUTION
Do not overfill!
Overflowing the tank may damage the insulation and/or cause the operating controls to
malfunction.
4. Adjust water distribution using balancing valves on each water inlet connection (valves to be provided by
others):
- Start with the valves on the two outermost inlets closed so all warm water is guided through the central
water inlet connection.
- Run the unit for a few cycles of ice built/melt.
- Determine areas of ice bridging (if any).
- If bridging occurs in certain areas, open the appropriate valves to direct more water flow to the areas of
bridging. The central inlet brings warm water to the opposite of the tank, while the outermost (smaller) inlets
bring warm water to the near end of the tank.
- Readjust the valves if necessary after a few cycles, until a quite uniform melt-out ice shape is obtained.
The final position of the valves depends strongly on the water flow rate and the load profile.
(SEASONAL) SHUT-DOWN PROCEDURE
The following procedures should be performed when the Ice Chiller®Thermal Storage Unit is to be shutdown for an
extended period of time.
1. If using direct refrigerant, pump out the Ice Chiller®Thermal Storage Coils and store the refrigerant in the high
pressure receiver.
W W W . B A L T I M O R E A I R C O I L . E U
9
3 Operating instructions

2. Allow any ice present on the tubes of the Ice Chiller®Coils to melt. If the tank is located outdoors or in an
unheated area and there is a possibility of the water in the tank freezing, drain the tank and all exposed water
piping. If freezing is not a problem, the tank does not need to be drained and full melt out is not necessary.
3. If the tank is drained, leave the drain connection open to allow any water that might enter the tank to drain out.
4. Properly position the insulated tank covers to minimize dirt and debris accumulation within the tank.
Daily operating guidelines
The Ice Chiller®Thermal Storage Coils typically run in either an Ice Build or Ice Melt mode of operation. On
external melt applications, the BAC Ice Logic™ ice thickness controller is provided to control compressor/glycol
chiller operation as a function of ice thickness. The basic sequence of operation and control points for each of
these modes is described below. Each system design is unique and variations in the operating modes may occur.
If you have any questions about application of the operating sequences listed below, please contact your BAC
Balticare representative to review your specific application.
Since the Ice Logic™ ice quantity controller can only measure the ice thickness at the point where the sensors are
installed, it is necessary to regularly inspect if the ice is built evenly on all the ice coils. During ice melt-out, it is
typical to see some non-uniformity of the ice pattern. The ice pattern can be considered normal when no significant
horizontal bridging (blockage) is apparent in the unit at the end of the ice build cycle and when low leaving
temperatures are obtained.
ICE BUILD - DIRECT REFRIGERANT FEED
1. Begin the ice build cycle upon receiving a signal from the plant control system. Usually, this signal is triggered
by a time clock indicating the start of the available ice build time.
2. Turn on the air agitation blower(s) feeding the ice storage tank.
3. On coils fed by pump recirculation, open the wet suction return valves, then any liquid feed valves installed at
the Ice Chiller®Coils.
4. Turn on the compressors and refrigerant feed system.
5. After the first three hours of ice build, it is suitable to turn off the air agitation blower(s).
6. In response to a signal from the plant control system, stop the ice build cycle. The signal to end the ice build
cycle can come from a number of sources. Typical examples follow:
- The ice thickness control
The ice thickness control is a safety control and must override all other controls to prevent damage
to the coils.
- A control system time clock.
7. Close the refrigerant feed valves, then close the refrigerant suction or wet return valves.
8. Turn off the refrigeration system.
9. The Ice Chiller®Coils are now charged and available to provide cooling.
ICE BUILD - SECONDARY COOLANTS
1. Begin the ice build cycle upon receiving a signal from the plant control system. Usually, this signal is triggered
by a time clock indicating the start of the available ice build time.
2. Open any glycol inlet and outlet valves installed at the Ice Chiller®Unit Coils.
If both inlet and outlet glycol valves are used on the Ice Chiller®Coils, the design must allow for a
bypass relief around the valves. This will prevent an excess build-up of pressure in the coils as a result
of the expansion as glycol in the coils warms up.
3. Turn on the glycol circulating pump(s) to establish flow between the glycol chiller(s) and the Ice Chiller®Unit.
4. Turn on the air agitation blower(s) feeding the ice storage tank.
5. Once glycol flow has been established, turn on the glycol chiller(s). Follow the chiller manufacturer's start-up
procedures and safeties.
W W W . B A L T I M O R E A I R C O I L . E U
10
6. After the first three hours of ice build, it is suitable to turn off the air agitation blower(s).
7. In response to a signal from the plant control system, stop the ice build cycle. The signal to end the ice build
cycle can come from a number of sources. Typical examples follow:
- The ice thickness control
The ice thickness control is a safety control and must override all other controls to prevent damage
to the coils.
- A control system time clock.
- A kW counter that indicates a stored input equal to the preceding day's melted output.
8. Turn off the glycol chiller(s) and glycol pump(s) and close the inlet valves to the Ice Chiller®Coils.
If both inlet and outlet glycol valves are used on the Ice Chiller®Coils, the design must allow for a
bypass relief around the valves. This will prevent an excess build-up of pressure in the coils as a result
of the expansion as glycol in the coils warms up.
9. The Ice Chiller®Coils are now charged and available to provide cooling.
ICE MELT
1. Begin the ice melt cycle upon receiving a signal from the plant control system. Usually, this signal is triggered
by a cooling load to be handled by the stored ice.
2. Open any chilled water inlet and outlet valves installed at the ice storage tank.
3. Turn on the air agitation blower(s) feeding the ice storage tank.
4. Turn on the circulating chilled water pump(s) to establish flow between the ice storage tank and the cooling
load.
5. Upon receiving a signal from the plant control system to stop the ice melt cycle, turn off the chilled water pump
(s) and the air agitation blower(s), and close the chilled water inlet and outlet valves to ice storage tank.
6. The signal to end the melt cycle can come from a number of sources. Typical examples follow:
- A time clock.
- A signal that the cooling load has been satisfied.
- A kW counter that indicates the maximum cooling for the day has been drawn from the storage tank.
7. The Ice Chiller®Coils are now ready to be recharged following the ice build procedures above.
Full melt-out after every cycle results in minimum energy consumption.
When the required melt performance cannot be obtained due to significant horizontal ice bridging, melt the ice
completely during the next cycle. Full melt-out can be detected by 0% ice display on the Ice Logic™ Ice Thickness
Controller combined with a rapidly increasing water leaving temperature.
To minimize the possibility for ice bridging, operating according to the following guidelines:
• Limit the cooling load through the TSU-C/D during ice build to less than 15% of the installed compressor
capacity.
• Maintain a constant high water flow on the TSU-C/D during melt-out. The corresponding temperature difference
between entering and leaving water should be kept as low as possible to minimize conical met-out pattern
(10°C maximum).
• Try to melt out the TSU-C/D completely at the end of each cooling cycle by limiting the amount of ice build to
the expected cooling load. For multiplier TSU-C/D installations, a melt-out in sequence assures at least one full
melt-out at regular intervals. Full melt can be detected by 0% ice display on the Ice Logic™ Ice Thickness
Controller combined with a rapidly increasing leaving water temperature.
• To increase control flexibility, use 1 additional Ice Logic™ Ice Quantity Controller on a 4 coil unit (available as
an option).
W W W . B A L T I M O R E A I R C O I L . E U
11
3 Operating instructions

Ice Logic® Ice Quantity Controller
The ice quantity in the Ice Chiller®Unit will be measured by means of a sensor measuring the ice thickness. The
measurement is done in steps of 20%: 0, 20, 40, 60, 80 and 100% of the nominal ice storage capacity of the ICE
CHILLER®unit.
Ice Logic™
The control panel at the connection end of the unit has following features:
• A maximum ice quantity setting knob to select the maximum required ice quantity.
• A minimum ice quantity setting knob to select the minimum ice quantity before the chiller should start again.
• An override switch to start/stop cooling machine.
• Ice quantity indication LED's to show ice quantity available.
Other control devices such as time clocks and water temperature sensors must be provided by others.
ICE LOGIC™ SENSOR
A series of accurately positioned electrodes detect the ice thickness on the coil tube. The measurement is based
on the difference in electrical conductivity between ice and water. The Ice Logic™ ice quantity controller combined
with this sensor permits to limit the maximum ice thickness to typically 35 mm.
ICE LOGIC™ CONTROL PANEL
The Ice Logic™ ice quantity controller can be operated either manually, by remote control using the 6 NO contacts,
or by using an analog output signal of 4-20 mA (available as an option).
W W W . B A L T I M O R E A I R C O I L . E U
12

Manual Control
The required ice quantity for the next cooling cycle can easily be set from the control panel in steps of 20%. In
addition, the minimum ice quantity, before the cooling equipment should start again, can be set from the minimum
% ice knob. If a minimum of 0% is selected, the compressor will not be allowed to start before all ice is melted.
Use contact 22/23 NO or 23/24 NC to start or stop the compressor as a function of predetermined minimum and
maximum ice quantity.
An additional switch on the control panel allows to force a compressor start or stop, when actual ice quantity is
between preset minimum and maximum level. Instead of using the switch, the contacts 25/26/27 can be used. A
short circuit of 1 sec. between 25/27 makes the compressor start, a short circuit between 26/27 makes the
compressor stop.
Remote Control via PLC or Computer
The Ice Logic™ ice quantity controller has six output contacts (NO) which can be used to control the cooling
equipment. These contacts are normally open and will close when the desired ice quantity is reached.
• contact 10-11 closes at 0% ice and more
• contact 12-13 closes at 20% ice and more
• contact 14-15 closes at 40% ice and more
• contact 16-17 closes at 60% ice and more
• contact 18-19 closes at 80% ice and more
• contact 20-21 closes at 100% ice
Contacts open again when the % ice is below the corresponding level.
W W W . B A L T I M O R E A I R C O I L . E U
13
3 Operating instructions

Remote Control with 4-20 mA Output Signal (Option)
Instead of 6 output signals for remote control, an analog output signal of 4-20 mA can be generated using contacts
28/29. The customer must provide a 24 VDC supply voltage with a loop resistance of max. 600 Ohms (see R). In
that case contacts 10 to 21 are no longer available. Contact 28 should be connected to the positive, 29 to the
negative signal of the supply voltage.
The analog signal can have only 7 different values:
4 mA no ice
4.5 mA 0-20 % ice
7.2 mA 20-40 % ice
10.4 mA 40-60 % ice
13.6 mA 60-80 % ice
16.8 mA 80-100 % ice
20 mA 100 % ice
There will be no intermediate mA output as measurement is based on a 6 step measurement only.
Electrical specification
Control panel: IP55 execution
Supply voltage: 230 VAC (220/240 VAC)/10 VA, max. cable section 2.5 mm².
Output contacts:
1. to automatic control system:
- 6 NO contacts close if corresponding ice quantity is reached (0, 20, 40, 60, 80, 100%)
- 110 VAC/0.5 A or 24 VDC/1 A, max. cable section 1.5 mm².
2. for manual compressor/chiller control:
- NO/NC contact closes/opens if compressor or chiller operation is required.
- 380 VAC/10 A or 24 VDC/10 A, max. cable section 2.5 mm².
W W W . B A L T I M O R E A I R C O I L . E U
14

4 Water Care
4 Water Care W W W . B A L T I M O R E A I R C O I L . E U
15
WATER CARE
About water care
In the near freezing temperatures of the Ice Chiller®Thermal Storage Unit, scale and corrosion are naturally
minimized. Therefore, for the tank water side of the units, a water treatment program to prevent scale or corrosion
is not normally needed, unless the water is corrosive in nature. To control biological growth, a biocide may be
needed on a periodic basis to prevent the growth of corrosive bacteria. In general, BAC recommends the following
guidelines. (See table below).
Recommended tank water quality
pH 7.0 to 9.0 *
Hardness (as CaCO3) 90 to 500 mg/l
Alkalinity (as CaCO3) 500 mg/l max.
Total dissolved solids 1000 mg/l max.
Chlorides 125 mg/l max.
Sulfates 125 mg/l max.
Conductivity 100-700 µS/cm
Water quality guidelines
* Tank water pH of 8.2 or higher will require periodic passivation of the galvanized steel coils to prevent "white rust", the accumulation of white,
waxy, non-protective zinc corrosion products on galvanized steel surfaces.
CAUTION
Do not treat the tank water with chemicals that alter the freeze point of water.
Passivation
When new systems are first commissioned, special measures should be taken to ensure that galvanized steel
surfaces are properly passivated to provide maximum protection from corrosion. Passivation is the formation of a
protective, passive, oxide layer on galvanized steel surfaces.
TSC-C-D
4

To ensure that galvanized steel surfaces are passivated, for the first 6-8 weeks of operation, the pH of the tank
water should be maintained between 7.0 and 8.2 and calcium hardness maintained between 100 and 300 mg/l (as
CaCO3). The passivation is complete and effective when the new zinc surfaces turn dull grey in colour. If white
deposits form on galvanized steel surfaces after the pH is returned to normal, this is a sign of white rust, and
therefore, the passivation process should be repeated to insure proper passivation and maximum corrosion
resistance.
In case that your water quality does not allow the pH to remain below 8.2, then you should consult a water
treatment specialist for advice on pH reduction or special passivation agents to promote proper passivation.
Special water treatment considerations
ICE TANK WATER
• Since ice tanks can be on and off during the course of the year, it is possible for microbiological growth to
develop. Therefore, the best practice hygiene recommendation is for a dosage of non-oxidizing biocide
once/year. If the unit is an external melt, the biocide should be added after the unit is brought down for cleaning
and during the refill process, to insure proper mixing.
• Following passivation, if the tank water is corrosive in nature (low hardness, low pH or alkalinity), the addition
of a corrosion 'non-precipitating' corrosion inhibitor is recommended. Examples of 'non-precipitating' corrosion
inhibitors are nitrites, molybdates and silicate based blends. Care must be taken not to use corrosion inhibitors
that raise the conductivity > 700 µS/cm, or alter the freezing point of the water. Therefore, such decisions need
to be taken with the advice of a water treatment specialist. For example, if the ice water needs food grade
approval because it could contaminant food products, then the silica based treatment programme is normally
used, if it meets food grade regulations.
GLYCOL SIDE OF THE ICE COIL
• Only use "inhibited" glycol that contains pH buffers. Never use industrial grade ethylene glycol. The reason for
this recommendation is that over time, glycol degrades and produces "glycolic acid" as a result. These acids
reduce the pH of the circulating water, and this will cause corrosion of steel materials of construction.
• As an added protection, the glycol loop should be treated with a nitrite, molybdate or silicate-based corrosion
inhibitor to promote metal passivation, and provide additional alkalinity to raise the pH above 9.0. Always
consult a water treatment specialist for recommendations on which corrosion inhibitor is most effective for your
specific water quality
W W W . B A L T I M O R E A I R C O I L . E U
16

5 Cold Weather Operations
5 Cold Weather Operations W W W . B A L T I M O R E A I R C O I L . E U
17
COLD WEATHER OPERATIONS
About cold weather operation
BAC equipment can be operated in subfreezing ambient conditions provided the proper measures are taken:
1. Insulation of piping.
2. Protection against coil freezing.
3. Elimination of ice due to sub-freezing ambient.
Listed below are general guidelines which should be followed to minimize the possibility of freeze-up. As these
guidelines may not include all aspects of the anticipated operation scheme, system designer and operator must
thoroughly review the system, location of the equipment, controls and accessories to ensure reliable operation at
all times.
Insulation of piping
Precautions must be taken to protect the associated piping from freezing conditions. Heat tracing and insulation
should be installed on all piping connected to the unit to prevent cracking.
Protection against coil freezing
When operated with a fluid as heat transfer medium, TSU Ice Thermal Storage coil(s) must be protected from
damage by freezing of the fluid inside the coil(s) when in operation. Freeze protection must be obtained by the use
of ethylene or propylene glycol or other anti-freeze solutions in appropriate concentrations.
TSU Ice Thermal Storage units typically use a 25% (by weight) solution of industrially inhibited ethylene glycol for
both corrosion and freeze protection. The systems lowest operating temperature should be at least 3°C to 4°C
above the anti-freeze solution freeze point. Uninhibited ethylene glycol and automotive antifreeze solutions are
NOT to be used in TSU Ice Thermal Storage coil(s).
The table below indicates the freeze protection range for various ethylene glycol concentrations (% by volume).
% Ethylene Freeze protection
20% -10°C
30% -16°C
40% -25°C
50% -39°C
Freeze protection of ethylene glycol solutions
TSC-C-D
5

Glycol systems require specific inhibitors compatible with the materials of construction they come into
contact with.These inhibitors generally come pre-mixed with the glycol additive for the cooling circuit.
Ice due to subfreezing ambients
Ice Chiller®tanks that have been exposed to severe or sustained subfreezing ambient temperatures, should be
checked before initiating an ice build cycle. Ice created by subfreezing ambient temperatures which accumulates
at the top of the tank and around the walls must be melted out before initiating a build cycle. This ice can prevent
normal water displacement during the build cycle, possibly leading to physical damage to the coil and tank walls.
W W W . B A L T I M O R E A I R C O I L . E U
18

6 Maintenance Procedure
6 Maintenance Procedure W W W . B A L T I M O R E A I R C O I L . E U
19
MAINTENANCE PROCEDURE
Inspections and corrective actions
GENERAL CONDITION OF THE EQUIPMENT
The inspection should focus on following areas:
• damage of corrosion protection
• signs of scale formation or corrosion
• accumulation of dirt and debris
• presence of biofilms
Smaller damages of the corrosion protection MUST be repaired as soon as possible to prevent the damage from
getting bigger. For Baltibond®hybrid coating use kit (part number RK1057). Larger damages should be reported to
the local BAC Balticare representative.
If there is evidence of scale formation (more than 0,1 mm) or corrosion, water treatment regime must be checked
and adjusted by the supplier.
Any dirt and debris need to be removed following the "Cleaning Procedures" on page1 .
If there is evidence of biofilms the system, including piping should be drained, flushed and cleaned of slimes and
other organic contamination. Refill system with water and apply biocide shock treatment. Check pH value and
functionality of ongoing biocide treatment.
ICE CHILLER® TANK
All Ice Chiller®Thermal Storage Units are provided with sectional insulated tank covers, which, when kept in
place, will minimize the accumulation of trash or debris in the tank.
However, an ICE CHILLER®unit installed outdoors may be susceptible to dust infiltration. Therefore, it is
necessary to inspect the tank regularly to determine whether or not it needs to be cleaned. To clean the tank, drain
it and flush with fresh water.
ICE CHILLER® WATER LEVEL
On a monthly basis and at seasonal start-up, inspect the water level in the Ice Chiller®tank. To properly check the
water level in the tank, the ice must be completely melted.
The water level in the Ice Chiller®tank should be maintained 25 mm above the height of the coil (no ice on coil). As
ice is built on the Ice Chiller®coil, the level of the water in the tank will rise slightly.
Therefore, the level of water should be observed at its lowest point, when there is no ice on the coil. If the tank
level drops to less than 25 mm above the height of the coil, use the make-up connection provided (see certified
print) to bring the water level in the tank up to the recommended operating level.
COIL
The coil should be observed when there is no ice on the coil.
1. Inspect the coil for
- obstructions
TSC-C-D
6

- damages
- corrosion
- fouling
2. Remove any obstructions from the coil
Any damages or corroded areas need to be repaired. Call your local BAC representative for assistance.
Minor fouling can usually be removed chemically or by temporary changes to the water treatment programme.
Contact your water treatment supplier for advice. Major fouling requires cleaning and flushing according to the
"Cleaning procedures" on the facing page
Regular checking of the total aerobic bacteria count (TAB) and maintaining it within acceptable levels are the key
to prevent fouling.
ICE LOGIC™ ICE QUANTITY CONTROLLER
Check monthly the control sensors for any visual signs of damage.
AIR PUMP
The air pump assembly is designed to provide air to the Ice Chiller®Thermal Storage Unit for tank water agitation.
The air pump should run as a minimum during the first 3 hours of ice build to ensure a homogenous water
temperature in the tank. For applications with limited cooling requirements during the ice build (< 15% of installed
compressor capacity), the air pump must run continuously during the ice build. To ensure high melt out rates,
continuous air pump operation during melt off is required.
The air blown in the Ice Chiller®Unit will entrain in the water piping and can accumulate in the upper part if the
outlet piping is located above the operating water level. In these installations an air vent must be provided at the
highest point of the piping.
The air pump is designed to require little maintenance, but some guidelines should be followed to assure trouble-
free operation.
1. Do not run the blower with air supply line closed or low flow condition. This will cause a temperature rise in the
blower casing. Allow adequate space around the air pump for unobstructed flow of air.
2. Check and clean the air filter once a month and change the filter every 3000 operating hours or at least every
year.
3. The air pump bearings are permanently greased and sealed and require no maintenance.
GLYCOL
Every six months, or at the seasonal start-up, draw a sample of the glycol solution from the system and check the
concentration using a refractometer. If necessary, adjust the concentration using the proper type of industrially
inhibited glycol.
W W W . B A L T I M O R E A I R C O I L . E U
20
Table of contents
Other Baltimore Aircoil Company Chiller manuals
Popular Chiller manuals by other brands

Johnson Controls
Johnson Controls YORK YVAM installation guide

York
York R123 operating & maintenance manual

Trane
Trane Sintesis RTAF-SVX002D-EN Installation, operation and maintenance

York
York YD A Operating & Maintenance

Skope
Skope SK650-2 Operating and service manual

Parker Hiross
Parker Hiross Hyperchill ICE001 user manual

McQuay
McQuay MCW200 Technical manual

Trane
Trane CVRD Installation

Zanussi
Zanussi 110719 Specifications

Trane
Trane R Series Diagnostic troubleshooting repair

Carrier
Carrier AQUASNAP 30RBP Series Installation, operation and maintenance instructions

Beko
Beko BEKOBLIZZ LC 480 Instructions for installation and operation