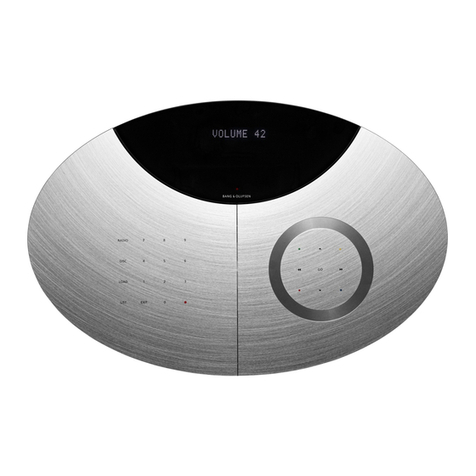
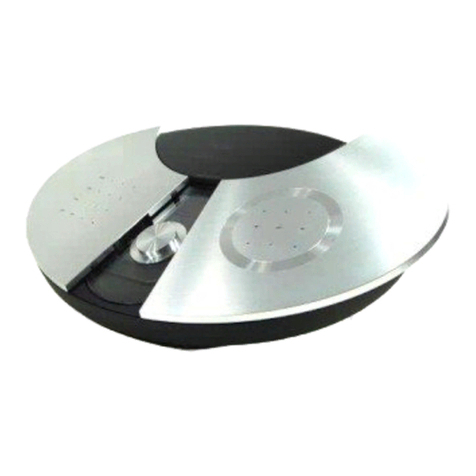
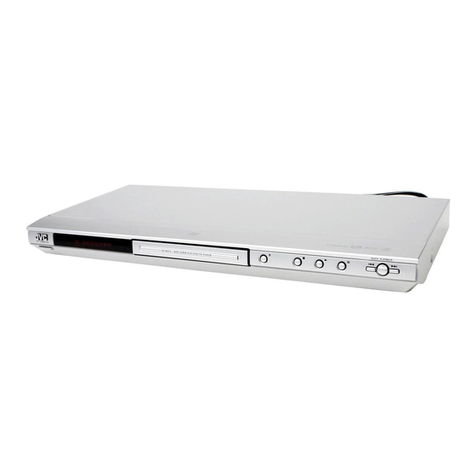
Bang & Olufsen DVD 1 User manual

DVD 1
Guide

NOTE: This equipment has been tested and found
to comply with the limits for a class B digital
device, pursuant to part 15 of the FCC Rules. These
limits are designed to provide reasonable
protection against harmful interference in a
residential installation.
This equipment generates, uses and can radiate
radio frequency energy and, if not installed and
used in accordance with the instructions, may
cause harmful interference to radio
communications. However, there is no guarantee
that interference will not occur in a particular
installation. If this equipment does cause harmful
interference to radio or television reception, which
can be determined by turning the equipment off
and on, the user is encouraged to try to correct
the interference by one or more of the following
measures:
– Reorient or relocate the receiving antenna
– Increase the separation between the equipment
and receiver
– Connect the equipment into an outlet on a
circuit different from that to which the receiver
is connected
– Consult the retailer or an experienced radio/TV
technician for help
CAUTION: To reduce the risk of
electric shock, do not remove
cover (or back).
No User-serviceable parts
inside. Refer servicing to
qualified service personnel.
WARNING: To prevent fire or electric
shock, do not expose this appliance
to rain or moisture.
This symbol indicates that a
dangerous voltage constitut-
ing a risk of electric shock is
present within this unit.
This symbol indicates that there
are important operating and
maintenance instructions in the
literature accompanying this
unit.
This product fulfils the conditions stated in the
EEU directives 89/336 and 73/23.
The label on the compact disc player serves as a
warning that the apparatus contains a laser
system and is classified as a class 1 laser product.
In case any difficulties arise with the compact disc
player, please contact a Bang & Olufsen retailer.
The apparatus must be opened by qualified
service personnel only.
CAUTION: The use of any controls, adjustments or
procedures other than those specified herein may
result in hazardous radiation exposure.
CAUTION: The use of optical instruments with
this product will increase eye hazard. As the laser
beam used in this CD/DVD Player is harmful to
eyes, do not attempt to disassemble the cabinet.
Refer servicing to qualified personnel only.
CAUTION: Laser radiation when open. Do not
stare into beam. This label is located on the rear
enclosure.
This product incorporates copyright protection
technology that is protected by claims of certain
US patents and other intellectual property rights
owned by Macrovision Corporation, and other
rights owners. Use of this copyright protection
technology must be authorized by Macrovision
Corporation, and is intended for home and other
limited viewing uses only unless otherwise
authorized by Macrovision Corporation. Reverse
engineering or disassembly is prohibited.
Manufactured under license from Dolby
Laboratories. “Dolby” and the double-D symbol
are trademarks of Dolby Laboratories.
Confidential unpublished works. Copyright
1992-1997. All rights reserved.
The DVD Video logo is a registered trademark.
For the Canadian market only:
CAUTION: To prevent electric shock do not use
the polarized plug, attached to this apparatus,
with an extension cord, receptacle or other outlet
unless the blades can be fully inserted to prevent
blade exposure.
This class B digital apparatus meets all requirements
of the Canadian Interference-Causing Equipment
Regulations.
CLASS 1
LASER PRODUCT

3
Key to using this Guide
Buttons on the Beo4 remote control are
represented by the following symbols in
the Guide:
Contents of the Guide
Placement and connections
4DVD 1 placement guidelines
5Connect DVD 1 to your television
First-time setup of DVD 1
6Enter language, picture format and
country settings
Your key to using DVD 1
8Load a DVD or CD and start playback
8Use the close-up operation panel
9Use the Beo4 remote control
Daily operations
10 Play a DVD – start, pause or stop
10 Step to a new title or chapter on a DVD
11 Search through a DVD
11 The DVD disc menu
11 Play an audio CD
12 The on-screen tool bar
Change picture, sound and
language settings
14 How to select menu settings
15 Change picture shape and colour pattern
15 Change sound type
15 Select menu, subtitle and audio
language
Access Control
16 Enter a Child Lock PIN-code
17 Authorise viewing of a disc
18 Change your PIN-code
18 The Parental Control function
19 Change the country setting
The socket panel on the rear
20 Overview of the rear socket panel
20 The switch options
Taking care of your DVD 1
21 Day-to-day care of DVD 1
If you have…
22 …a Beo1 remote control
Button on Beo4:
MENU MENU
▲
ss tt
▼
GO
Guide symbol:
GO

4
Follow the guidelines and procedures
on these pages when setting your
DVD 1 up for the first time.
To ensure proper ventilation, allow for at least
5 centimetres (2”) of space at the sides of DVD
1 and 10 centimetres (4”) above it.
Placement and connections
The program list for TV is now called up. It pro-
vides you with an overview of all your available
TV programs.
DVD 1 placement guidelines
Place DVD 1 on a solid, level surface. Do not
place any items on top of DVD 1.
Place DVD 1 away from radiators and direct
sunlight.
Do not place DVD 1 on a carpeted surface, as
carpet blocks the ventilation holes in the
base.
Condensation can occur if DVD 1 is moved
from cold to warm surroundings. This may
interrupt playback. Before using DVD 1, let
the player stand someplace warm for one to
two hours, until the moisture evaporates.
DVD 1 is intended for indoor use in dry,
domestic environments only, with a
temperature range of 10–35° C (50–95° F).

5
Connect your TV cables
To the mains To TV To TV
Connection using a 21-pin AV cable…
> Connect the socket marked AV on DVD 1 to
the socket marked AV on your television via the
21-pin AV cable.
> If your television is equipped with a built-in
Dolby Digital module, connect the socket
marked DIGITAL OUTPUT on DVD 1 to the
INPUT 1 socket on your television. If the
required cable is not enclosed, it is available
from your Bang & Olufsen retailer.
If your television is equipped with the built-in
Dolby Digital module, you must also set the
option DIGITAL OUTPUT to ‘ALL’ in the DVD 1
‘Sound’ menu. Please refer to page 15 for more
information.
> Set the switch marked Y/C-RGB-CVBS on the
rear of DVD 1 to the correct position
(depending on your particular model of
Bang & Olufsen TV – refer to page 20 in this
Guide).
> Finally, connect your DVD 1 to the mains with
the enclosed cable. Your DVD 1 is now in
stand-by mode – indicated by the red light in
the display panel.
Connection without a 21-pin AV cable…
Follow the procedure below to connect your
DVD 1 to your Bang & Olufsen television:
> Connect the DATA socket on DVD 1 to the
CTRL socket on your television.
> Connect the Y/C socket on DVD 1 to the
S-VIDEO socket on your television.
> Connect-the CVBS socket on DVD 1 to the
VIDEO socket on your television.
> Connect the DIGITAL OUTPUT socket on DVD 1
to the COAX socket on your television.
> Connect the AUDIO L and AUDIO R sockets for
left and right channel audio output on DVD 1
to the R and L sockets on your television.
> Check that the switch on the rear of DVD 1 –
marked Y/C-RGB-CVBS – is set to RGB.
> Finally, connect your DVD 1 to the mains with
the enclosed cable. Your DVD 1 is now in
stand-by mode – indicated by the red light in
the display panel.
Connect DVD 1 to your television
DVD 1 is constructed for connection to a
Bang & Olufsen television via a 21-pin AV
cable, but other cables are used in some
countries. If 21-pin AV cables are not used in
your country, then you can follow the
procedure described below to connect DVD 1
to your Bang & Olufsen television. For an
overview of the DVD 1 socket panel, please
refer to page 20.
NOTE! Register all equipment connected to your
TV system, including DVD 1. This is done via your
television’s SETUP menu. Refer to the User’s Guide
included with your Bang & Olufsen television to
ensure proper connection and registration of
extra equipment.
To the mains

6
DVD 1 will prompt you to choose
settings for menu language, subtitle
language, audio language, picture
format and country when you first
switch it on.
These settings can be changed at any
later time. Please see Change picture,
sound or language settings on page
14 for information about how to
choose setting options.
Subtitle and audio language settings
are preferred language settings
which will not be played by DVD 1 if
these languages are not provided on
the DVD being played.
First-time setup of DVD 1
*NOTE! If your Beo4 remote control does not
have a DVD button, press LIST until CDV is shown
in the Beo4 display and press GO. Refer to the
Guide included with your Beo4 for information
about how to add CDV to the Beo4 list. If you
have a Beo1 remote control, please refer to
page 22 for information about how to use DVD 1
functions.
First-time setup of DVD 1 begins the moment
you connect DVD 1 to the mains and switch it
on. An on-screen menu guides you through
the process.
Auto Configuring in Progress
To set up DVD 1 before first-time use…
> Connect your DVD 1 to your television and to
the mains as shown on the preceding page.
> Turn on your television and press DVD on your
Beo4 remote control*. ’Auto Configuring In
Progress’ appears briefly on the screen.
> The VIRGIN MODE menus appear on the screen
and prompt you to choose from the options
displayed. These include menu language,
subtitle language, audio language, picture
format and country.
> Press
▲
or
▼
on your Beo4 to navigate through
each of the menus.
> Press GO to enter each of your choices.
English
Español
Français
Portuguès
Italiano
Menu language
Virgin Mode

7
What’s on the Virgin Mode menus…
AUDIO LANGUAGE… Choose the language for
audio playback from the 16 languages shown.
your preferred language is available on your
DVDs, then audio playback will be in that
language.
SUBTITLE LANGUAGE… Choose your preferred
subtitle language from the 16 languages shown,
and if subtitles in your preferred language are
available on your DVDs, then subtitles will be
shown in that language.
MENU LANGUAGE… Choose the menu language
from the 8 languages shown.
TV SHAPE… Choose the picture format from the
following list: 16:9 for a wide-screen TV, 4:3
LETTERBOX to show a wide screen picture on a
regular TV screen, and 4:3 PAN SCAN. With 4:3
PAN SCAN, the picture scrolls right and left to
ensure that the most important events in the
picture are always shown.
COUNTRY… Find the name of your country on the
list provided. This affects the Access Control
function (See page 16, Access Control, for
further information).
Set up DVD 1 with your particular television…
The procedure described below will ensure that your
DVDs are played with the proper picture format,
regardless of the type of television you have. DVD 1
must be switched on before you perform this ‘once
only’ operation.
Press LIST on Beo4 until
V.SETUP appears in the Beo4
display
Press GO to display TUNE
Press 1 if your DVD 1 is
connected directly to a
BeoVision MX television. Press 2
if your DVD 1 is connected to a
BeoVision MX via an AV 2
Expander box, or if it is
connected to any other Bang &
Olufsen television
Press GO to store the setup
LIST
V.SETUP
GO
TUNE
1
2
GO

8
In this chapter you will find instructions
explaining how to gain access to
DVD 1 functions via the close-up
operation panel on the front of
DVD 1 and via the Beo4 remote
control.
Your key to using DVD 1
Load a DVD or CD and start
playback
To load a DVD or CD for playback, press EJECT
on the close-up operation panel. To start
playback, press PLAY.
To load a disc…
> Press EJECT on the close-up operation panel.
The loader slides out.
> Place a disc in the loader. DVD, video CD and
audio CD are valid disc types.
> Press the DVD button on Beo4 or PLAY on the
close-up operation panel to close the loader
and start playback.
You can load a disc for playback at a later time.
Press EJECT from stand-by mode, place a disc in
the loader, and press EJECT again. DVD 1 will
remain in stand-by mode.
Use the close-up operation panel
The close-up operation panel allows you to
load and unload discs, to start, pause or stop
playback, to cue forward or backward on a
disc or to view the elapsed playing time.
The close-up operation panel
EJECT
Press to open or close the loader.
ss tt
Press to cue forward or backward during playback.
PLAY
Press to start playback. Press again to pause
playback at the current still picture or audio track.
STAND-BY
Press to switch DVD 1 to stand-by mode. Stops
playback without switching to stand-by if pressed
during playback or pause mode.
DISPLAY
The display to the right shows the elapsed playing
time of a DVD or the current track number being
played on an audio CD. Switching DVD chapters
causes the appropriate chapter number to be
shown in the display for a few seconds.
EJECT PLAY

9
TV LIGHT RADIO
SAT DVD CD
V TAPE RECORD A TAPE
789
456
TEXT 0MENU
123
LIST EXIT
STOP
GO
The display window shows you the sources
available, as well as the current source.
Press to select DVD as your source and begin
playback of a loaded disc.
Use the number buttons to select DVD titles
and chapters or to select a specific disc menu.
Press and hold to bring up the DVD 1 on-
screen tool bar. You can also gain access to
this function by pressing the blue button.
Press to cue forward or backward during
playback, or to move from menu to menu.
Press GO to begin playback or to select a
menu option. Press and hold GO to bring up
the DVD disc menu on the screen.
Press to change chapters, to move slowly
forward and backward in pause mode, or to
move through menu choices.
Press to select a subtitle language*.
Press to bring up the DVD disc menu.
Press to select another audio language*.
Press to bring up the DVD 1 on-screen tool
bar.
Press to exit on-screen menus.
Press to enter pause mode from playback, or
to stop playback entirely from pause mode.
DVD
0 –9
MENU
ss tt
GO
▲
▼
EXIT
STOP
*NOTE! Alternative subtitle and audio languages
are only available on some discs. Functions not
available on your disc will not be highlighted in
on-screen menus.
Use the Beo4 remote control
Use the Beo4 remote control to operate
DVD 1. The functions affected by the
particular buttons are described below.

10
This chapter describes how to play
DVDs and CDs on DVD 1, and
describes the functions available to
you during playback of a disc.
While playing a DVD, you can search
at varying speeds, step to a new spot
on the disc, or bring up a DVD disc
menu. You can also resume playback
of a DVD where you left off the last
time the disc was played.
The on-screen tool bar gives you
quick access to additional DVD
functions. Zoom in on a paused
screen picture, play in slow motion
or start playback from a specific
moment in elapsed time. You can
also use extra functions such as
alternative camera angles, if these
are available on the disc being
played.
While playing a CD, you can pause
playback, switch to a new track, cue
back and forth at different speeds or
select a track by its number.
Daily operations
Play a DVD – start, pause or stop
Select DVD as your source to start playing a
loaded DVD. If you wish to resume playback
after a short pause, press GO.
While a DVD is loaded…
Press the DVD button on Beo4*
to start playing a DVD
Press STOP to pause playback
Press STOP again to stop
playback completely, or…
…press GO to resume playback
If you begin playback of a loaded DVD after an
interruption, DVD 1 will prompt you to resume
playback where you left off via a small window in
the upper left corner of the screen. RESUME is
shown. To resume playback, press GO. Playback
will start at the beginning of the disc if GO is not
pressed. Press DVD if playback is not resumed.
Step to a new title or chapter on a
DVD
There can be several titles on the same DVD,
e.g. multiple versions of the same film, and a
single title may contain several chapters. DVD
chapters are similar to individual tracks on an
audio CD.
1 1 1 1 no off
The on-screen tool bar at the top of the screen
allows you to step to another title (T) on a DVD.
Please refer to pages 12–13 for more
information about the on-screen tool bar.
DVD
STOP
STOP
GO
▲
▼
0 –9
GO
▲
▼
0 –9
To step to another title on the same DVD…
Press the blue button on Beo4
to bring up the on-screen tool
bar
Press
▲
or
▼
to step to another
title on the disc, or press the
number of the title you want
Press GO to resume playback
To step to another DVD chapter…
Press to step to another chapter
on a DVD
You can also press the number
of the desired chapter
Playback of the new chapter
begins when the step is made
*NOTE! If you do not have a DVD button on your
Beo4 remote control, press LIST until CDV is
shown in the Beo4 display, and then press GO. If
CDV is not available, you must add it to the Beo4
list of functions. Please refer to Beo4‘s own
Guide for further instruction.

11
To search ahead or in reverse…
Press
ss
or
tt
during playback
to search forward or backward
Press again to change speed
Press GO to resume playback
ss tt
ss tt
ss tt
GO
While DVD is selected…
Press and hold GO until the disc
menu appears on the screen.
You can also press the yellow
button on Beo4
Press
▲
,
▼
,
ss
or
tt
to move
from function to function on
the disc
Press GO to enter your choice
If you wish to step to another chapter or use other
player functions, then exit the DVD disc menu
before bringing up the on-screen tool bar.
GO
▲
▼
ss tt
GO
Search through a DVD
You can find a particular scene on a DVD by
searching forward or backward. You can also
search at your own speed.
The DVD disc menu
DVDs often contain on-screen menus which
give you access to special features such as
information about the making of a film,
interviews or specially edited scenes.
With DVD 1 and your TV in stand-by…
Press DVD on Beo4 to play a CD
Press to change tracks
Press the track number on Beo4
to step directly to a track
Press to wind or rewind, and
press again to change speed
Press once to pause playback,
and press again to stop
playback completely, or…
…press to resume playback
Press to switch DVD 1 to
stand-by
You can play a CD from stand-by with no menu by
pressing LIST on Beo4 until AV is shown in the
display, and then pressing DVD. Note, however,
that this is only possible if your television is set to
Option 2. Please refer to your television’s own
Guide for information about Option programming.
DVD
▲ ▼
0 –9
ss tt
ss tt
STOP
STOP
GO
•
Play an audio CD
When you load an audio CD, the Audio Disc
Mode menu appears on the screen and
playback starts automatically. You can also
play an audio CD without activating the
television screen.
Audio Disc Mode
0.54.26
total time
13
total tracks
00.00.9
time
1
trackplay
On Off
1 23456789
>
fts
track
program
Clear all
The menu shows you the status of a loaded CD,
the current track number, the time elapsed, the
total number of tracks, and the total play time.

12
The on-screen tool bar
The main functions of the DVD player are
accessible via a tool bar along the top of the
screen. Change chapters or titles, cue back
and forth on a disc or change the sound
settings. Current settings are shown under
the tool bar symbols.
>> Daily operations
The Feedback window at the far left end of the
tool bar informs you of the current status of
particular features.
The Feedback window
Alternate camera angle in use. This
is a disc feature which is only
available on certain DVDs.
Parental Control active. Refer to
Access Control on page 16 for
more information about Parental
Control.
Child safe. The disc has been
checked for offensive scenes and
deemed suitable for children.
Playback of a disc resumes from
the point where playback was
previously interrupted.
Action is not valid.
To use the tool bar…
Press the blue button on Beo4.
The tool bar appears along the
top of the screen
Press to move from function to
function
Press
▲
or
▼
to view setting
choices for a particular
function*. If a particular setting
is numbered, like chapter
number, you can choose it by
pressing the desired number on
Beo4
Press to store your choice and
resume playback
ss tt
▲
▼
0 –9
GO
1 1 1 1 no off
off st
1 1 1 1 no off
locked
safe
resume

13
The tool bar symbols
Personal Preferences menu
You can change settings for picture, sound,
language and the Parental Control feature via this
menu. Refer to the following chapter, Change
picture, sound or language settings, for more
information about the Personal Preferences menu.
Title number
Change to another title by pressing
▲
or
▼
.
Chapter number
Each chapter in a DVD film will contain one
definable scene, much like individual tracks on an
audio CD. Change tracks during playback by
pressing
▲
or
▼
on Beo4.
Playback language*
The dialogue in a DVD film may be dubbed in
several different languages, all stored on the disc.
Choose from the languages available on your
particular disc. Press the red button on Beo4 to
be able to change playback language during
playback.
Subtitle language*
Subtitles in different languages are often
available on DVD discs. Choose a subtitle language
available on your disc, or choose not to view
subtitles. Press the green button on Beo4 to be
able to change subtitles during playback.
Camera angle*
It is possible on some DVD discs to change to a
different camera angle.
Zoom
Allows you to zoom in on a section of the paused
video picture and pan back and forth. Choose
the magnification, press GO to enter your choice
and use the arrow keys to pan back and forth.
Press GO to resume playback.
Favourite Track Selection (FTS)
Allows you to identify favourite tracks on a
particular DVD disc and store them in the player’s
memory.
Sound settings
Allows you to choose between Stereo
(recommended) and Dolby Surround Sound.
Pause
Pressing
▼
from this symbol on the tool bar
pauses playback on a particular frame and allows
you to move to the previous or following frames.
Press
ss
and
tt
to move between frames, and
press GO to resume playback.
Slow motion
Allows you to slow playback down to a chosen
speed. Press
▼
to pause playback and
ss
or
tt
to
start slow motion. Press again to adjust the speed
and press GO to resume playback. You can also
start slow motion without calling up the tool bar
first. Press GO to pause playback, and
▲
or
▼
to
choose a slow motion speed.
Fast motion
Allows you to increase playback speed to a
chosen level. Press
▼
to pause playback and
ss
or
tt
to start fast motion. Press
ss
or
tt
to
adjust speed and press GO to resume playback.
Time search
Allows you to start playback from a point in
elapsed time on the disc. Use the numeric key
pad on Beo4 to enter the desired start time. For
example, if you wish to begin playback from a
point in time one hour into a film, enter 1:00:00
in the numeric field.
*NOTE! If a function is inactive for your player
setup, or if the disc does not contain a particular
option (such as camera angle on some DVDs), the
function symbol and current setting will not be
highlighted, and
▼
or
▲
for changing settings
will not appear.

14
You can change the settings for
picture, sound, language and the
‘Access Control’ feature at any time
using the ‘Personal Preferences’
menu.
Choose your preferred picture format,
change the sound type and enter
your preferred languages for subtitles
and audio playback.
If you’re concerned about what your
children should or should not watch,
you can lock certain DVDs completely
with a security code or just lock out
individual scenes.
See the following pages for more
information about the Access
Control feature.
Change picture, sound or language settings
How to select menu settings
The Personal Preferences menu allows you to
store settings for picture, sound, language
and the Access Control feature.
The Personal Preference menu icons appear along
the left-hand side of the screen. The icons are
explained below.
To use the Personal Preferences menu…
> Press and hold the blue button on Beo4 during
playback to bring up the on-screen tool bar at
the top of the screen.
> Press
ss
or
tt
to move the cursor to OSD and
press GO. The Personal Preferences menu
appears along the left-hand side of the screen.
> Press
▲
or
▼
to move through the features in
the menu. As you move, feature-related menus
open on the screen.
> Press
tt
to move over to one of the sub-menus.
Available settings appear in a highlighted
square to the right of the current menu.
> Press
tt
to move over to the available settings.
> Press
▲
or
▼
to move through the list of
available settings.
> Press
ss
to store your choices and move back
through the previous menus.
1 1 1 1 no off
Picture settings
Sound settings
Subtitles
Other functions

15
What’s on the Sound menu…
The Sound menu enables you to choose the sound
setup that corresponds to the digital or analog
audio equipment DVD 1 is connected to. The
following options are available:
DIGITAL OUTPUT… Options are ON, OFF, PCM
and ALL. If your television is equipped with a
Dolby Digital module, select ALL. Otherwise, set
DIGITAL OUTPUT to OFF.
ANALOG OUTPUT… Options are STEREO
(recommended) and DOLBY SURROUND.
NIGHT MODE… Optimises the sound dynamic
during playback at low volume. Options are ON
and OFF.
KARAOKE VOCAL… Activates or deactivates
music vocals for karaoke playback. Options are
ON and OFF.
What’s on the Language menu…
The Language menu allows you to select your
preferred languages for on-screen menus, audio
playback and subtitles. The following options are
available:
AUDIO LANGUAGE… Choose the language for
audio playback from the 16 languages shown,
and if your preferred language is available on
your DVDs, then audio playback will be in that
language.
SUBTITLE LANGUAGE… Choose your preferred
subtitle language from the 16 languages shown,
and if your preferred language is available on
your DVDs, then subtitles will be shown in that
language*.
MENU LANGUAGE… Choose the menu language
from the 8 languages shown.
What’s on the Functions menu…
The Functions menu lets you decide who has
access to your DVDs as well as the degree of
access.
ACCESS CONTROL… Child Lock and Parental
Control settings can be adjusted here. Refer to
page 16 for further information about the
Access Control settings.
STATUS WINDOW… Activates or deactivates the
window at the left edge of the screen showing
elapsed playing time and loader status. Options
are ON and OFF.
LOW POWER STANDBY… Set to OFF.
PBC (PlayBack Control)… Activates or deactivates
a special menu for playback of SVCD (Super
Video CD) discs. Options are ON and OFF.
What’s on the Picture menu
The Picture menu allows you to select a screen
format, select a colour setting, centre the picture
on the screen or change the picture contrast. The
following options are available:
TV SHAPE… Choose the picture format. Options
include: 16:9 (wide screen), 4:3 LETTERBOX (for
a wide screen picture on a standard-size screen,
with black bars on the top and bottom of the
screen), and 4:3 PAN SCAN (the picture scans
horizontally to ensure that the most important
screen action is shown)..
BLACK-LEVEL SHIFT… Adjusts the color dynamic
to ensure sharp contrast. Options are ON and
OFF.
VIDEO SHIFT… Allows you to center the picture
horizontally on the screen by pressing
ss
or
tt
.
*NOTE! Some DVDs will require you to choose a
subtitle language from a disc menu, even if you
have previously selected a default subtitle
language from the LANGUAGE menu.

16
*NOTE! If you forget your PIN-code, you can
annull the code and enter a new one. Load an
audio CD – not a DVD – in DVD 1 and call up the
‘Access Control’ menu as described above. When
the menu prompts you for your PIN-code, press
STOP four times. Press the number buttons on
Beo4 to enter a new PIN-code, and enter the
code one more time to confirm it.
Access Control
Enter a Child Lock PIN-code
Enter a Child Lock code to either prevent
playback of a disc, authorise a single playback
of a disc or authorise all viewing of a disc.
To activate or deactivate Child Lock…
> Press the blue button on Beo4 to bring up the
on-screen tool bar.
> Press
ss
to move to OSD and
▼
to bring up the
Personal Preferences menu.
> Press
▼
to move down to .
> Press
tt
to move over to the Functions menu.
ACCESS CONTROL is already highlighted.
> Press
tt
to be able to enter a four-digit PIN-code.
> Use the number keys on Beo4 to enter your
code.
> Enter the code one more time to confirm it.
> Press
tt
to move over to Child Lock.
> Press
▲
to activate Child Lock or
▼
to
deactivate Child Lock.
The Access Control functions give
you the ability to decide what DVDs
your children may or may not watch.
You can do this in two ways:
– Enter a four-digit PIN (Personal
Identification) code to activate the
Child Lock function. This code
must be entered to play those
DVDs you have not personally
approved.
– The Parental Control feature
prevents offensive DVD scenes
from being shown.
1 1 1 1 no off
Access control
Status window
Low power standby
Child lock
Parental level
Change country
Change code

17
Authorise viewing of a disc
Enter the Child Lock code to authorise either
a single playback or unlimited playback of a
loaded disc.
Access Control
Choose 'Play always' for inserting disc in the
child-safe list
locked
Play once [ ] [ ] [ ] [ ]
Play always [ ] [ ] [ ] [ ]
When you load a new DVD…
The CHILD PROTECT menu is shown*.
> To authorise a single playback of the loaded
disc, press
▲
or
▼
to move the cursor to
‘Play once’.
> To authorise unsupervised playback of a loaded
disc, move the cursor to ‘Play Always’.
> Use the number buttons on Beo4 to enter your
PIN-code.
To cancel a previous authorisation…
> Begin playback of the disc.
> Press STOP when the ‘SAFE’ message is
displayed in the Temporary Feedback window.
The ‘Child Protect’ menu is shown.
> Press
▲
once to cancel a previous authorisation
or
tt
to confirm it.
DVD 1 can store up to 120 DVD titles. A title is
added to the list when ‘Play always’ is chosen on
the ‘Child Protect’ menu. If the list is full and a
new title is added, the oldest title entry is
removed from the list. All discs in a multi-disc set
must be approved to make the whole set child
safe.

18 >> Access Control
Parental Control
DVDs are rated on a nationally defined scale
of suitability for children. Parental Control
prevents scenes deemed less suitable for
children from being shown.
Change your PIN-code
You can change your PIN-code at any time via
the ACCESS CONTROL menu.
1 1 1 1 no off
Access control
Status window
Low power standby
[ ] [ ] [ ] [ ]
Enter code
1 1 1 1 no off
Access control
Status window
Low power standby
Child lock
Parental level
Change country
Change code
2
To change your PIN-code…
> Press the blue button on Beo4 to bring up the
on-screen tool bar.
> Press
ss
to move to OSD and
▼
to bring up the
Personal Preferences menu.
> Press
▼
to move down to and press
tt
to
move over to the Functions menu.
ACCESS CONTROL is already highlighted.
> Press
tt
to move to ENTER CODE.
> Use the number keys on Beo4 to enter your
code.
> Press
▼
to move down to CHANGE CODE and
press
tt
to be able to enter the new code.
> Enter the new four-digit PIN-code.
> Re-enter the PIN-code to confirm it.
> Press GO to exit the menus or
ss
to move back
through previous menus.
. . . . .

19
Change the country setting
Changing the COUNTRY setting in the
ACCESS CONTROL menu can affect the rating
levels used by Parental Control.
1 1 1 1 no off
Access control
Status window
Low power standby
Child lock
Parental level
Change country
Change code
To activate Parental Control…
> Press the blue button on Beo4 to bring up the
on-screen tool bar.
> Press
ss
or
tt
to move to OSD and
▼
to bring
up the Personal Preferences menu.
> Press
▼
to move down to and press
tt
to
move over to the Functions menu.
ACCESS CONTROL is already highlighted.
> Press
tt
to move to ENTER CODE.
> Use the number keys on Beo4 to enter your
code.
> Press
▼
to move down to PARENTAL LEVEL and
press
tt
to be able the choose a suitability level.
> Press
▲
or
▼
to choose a filter level between 1
(for most suitable) and 8 (for least suitable).
> Press GO to enter your choice and exit the
menus or press
ss
to move back through
previous menus.
DVD scenes rated higher than your chosen level
will not be shown. If alternative scenes at or
below your chosen level are available on the disc,
these will be shown instead. Set the filter level to
0 to deactivate Parental Control.
To change the country setting…
> Press the blue button on Beo4 to bring up the
on-screen tool bar.
> Press
ss
or
tt
to move to OSD and
▼
to bring
up the Personal Preferences menu.
> Press
▼
to move down to and press
tt
to
move over to the Functions menu.
ACCESS CONTROL is already highlighted.
> Press
tt
to move to ENTER CODE.
> Use the number keys on Beo4 to enter your
code.
> Press
▼
to move down to CHANGE COUNTRY
and press
tt
to be able the choose a country
setting.
> Press
▲
or
▼
to choose a country from the list.
> Press GO to enter your choice and exit the
menus or press
ss
to move back through
previous menus.
. . . .

20
You can connect DVD 1 to your
television via the socket panel on the
rear of DVD 1.
Please consult the User’s Guides
enclosed with externally connected
equipment to ensure that it is
connected in the proper manner.
Refer to Placement and Connections
on page 4 for more information
about how to connect DVD 1 to your
Bang & Olufsen television.
The socket panel on the rear
Overview of the rear socket panel
~ (mains)
Socket for connection to the mains.
DIGITAL OUTPUT
AUDIO L
AUDIO R
Audio signals are sent from DVD 1 to your
television via these three sockets. All three
sockets are used when you connect DVD 1 to
a Bang & Olufsen television which does not
use a 21-pin video cable. The DIGITAL OUTPUT
socket is also used when connecting DVD 1 to
any Bang & Olufsen television equipped with
a Dolby Digital module.
AV
21-pin socket for connection to the Bang &
Olufsen TV set.
DATA – Y/C – CVBS
Video signals are sent from DVD 1 to your
television via these sockets. The sockets are
used to connect DVD 1 to a Bang & Olufsen
television which does not use a 21-pin video
cable.
The switch options
CVBS
This switch setting is used when you connect
DVD 1 to an AV 9000, BeoVision LX,
BeoVision MS or BeoVision MX television.
RGB
This switch setting is used when you connect
DVD 1 to any other Bang & Olufsen television.
Y/C
This switch setting is used when you connect
DVD 1 to a BeoVision Avant 50 Hz television.
DIGITAL OUTPUT
AUDIO L
AUDIO R AV
DATA Y/C CVBS
CVBS
RGB
Y/C
Table of contents
Other Bang & Olufsen DVD Player manuals

Bang & Olufsen
Bang & Olufsen DVD 1 MKII Service manual

Bang & Olufsen
Bang & Olufsen BeoMedia 1 User manual

Bang & Olufsen
Bang & Olufsen UG4 User manual

Bang & Olufsen
Bang & Olufsen BeoCenter 2 Assembly instructions

Bang & Olufsen
Bang & Olufsen BeoCenter 2 MK II User manual

Bang & Olufsen
Bang & Olufsen DVD 2 User manual

Bang & Olufsen
Bang & Olufsen DVD 2 User manual