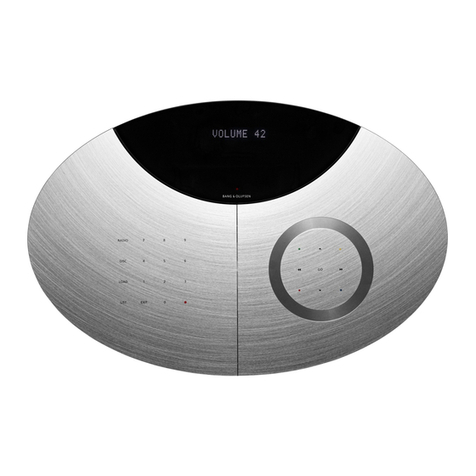
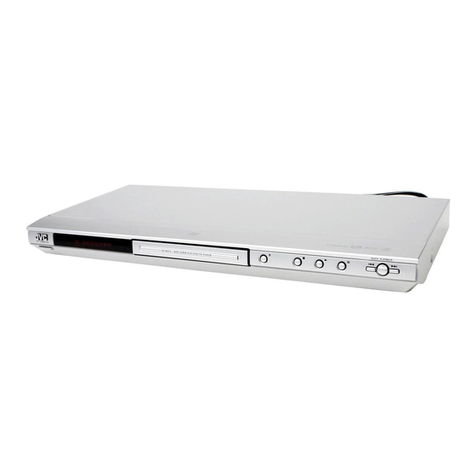
Bang & Olufsen DVD 2 User manual

DVD 2
Guide

GUIDE Plus+, SHOWVIEW, VIDEO Plus+,
G-LINK are (1) registered trademarks or
trademarks of, (2) manufactured under license
from and (3) subject of various international
patents and patent applications owned by, or
licensed to, Gemstar-TV Guide International,
Inc. and/or its related affiliates.
GEMSTAR-TV GUIDE INTERNATIONAL, INC.
AND/OR ITS RELATED AFFILIATES ARE NOT
IN ANY WAY LIABLE FOR THE ACCURACY OF
THE PROGRAM SCHEDULE INFORMATION
PROVIDED BY THE GUIDE PLUS+ SYSTEM.
IN NO EVENT SHALL GEMSTAR-TV GUIDE
INTERNATIONAL, INC. AND /OR ITS RELATED
AFFILIATES BE LIABLE FOR ANY AMOUNTS
REPRESENTING LOSS OF PROFITS, LOSS OF
BUSINESS, OR INDIRECT, SPECIAL, OR
CONSEQUENTIAL DAMAGES IN CONNECTION
WITH THE PROVISION OR USE OF ANY
INFORMATION,EQUIPMENT, OR SERVICES
RELATING TO THE GUIDE PLUS+ SYSTEM.
SHOWVIEW is a registered trademark of Gemstar
Development Corporation.
The SHOWVIEW system is manufactured under
license from Gemstar Development Corporation.
VIDEO Plus+ and PlusCode are registered trade-
marks of Gemstar Development Corporation.
The VIDEO Plus+ system is manufactured under
license from Gemstar Development Corporation.
G-Code is a registered trademark of Gemstar
Development Corporation.
The G-Code system is manufactured under license
from Gemstar Development Corporation.
WARNING: To reduce the risk of fire or
electric shock, do not expose this appliance
to rain or moisture. Do not expose this equip-
ment to dripping or splashing and ensure
that no objects filled with liquids, such as
vases, are placed on the equipment.
To completely disconnect this equipment
from the AC Mains, disconnect the mains
plug from the wall socket. The disconnect
device shall remain readily operable.
The lightning flash with arrowhead symbol
within an equilateral triangle, is intended
to alert the user to the presence of un-
insulated “dangerous voltage” within the
product’s enclosure that may be of sufficient
magnitude to constitute a risk of electric
shock to persons.
The exclamation point within an equilateral
triangle is intended to alert the user to the
presence of important operating and main-
tenance (servicing) instructions in the
literature accompanying the product.
CAUTION
RISK OF ELECTRIC SHOCK
DO NOT OPEN
CAUTION: To reduce the risk of
electric shock, do not remove
cover (or back).
No User-serviceable parts inside.
Refer servicing to qualified service
personnel.

Contents
Introducing the DVD player, 4
Find out how to operate the hard disc recorder and DVD player with the Beo4
remote control and bring up the menus on your television screen.
Daily use, 11
Find out how to play DVD discs, record and play back programmes, how to view
the list of hard disc content and the list of timed recordings. This chapter also
contains information about how to pause and replay an on-going programme.
Advanced operation, 31
Find out how to use advanced operations such as how to activate Child Lock,
divide recordings and how to make preference settings. The chapter also contains
information about how to edit DVD discs.
Placement, settings and connections, 45
Find out how to place, connect and set up your product. This chapter also contains
an overview of the connection panels and settings available.
Maintenance, 57
Index, 58
3

DVD 2 is both a DVD player and a
hard disc recorder. With both DVD
and high capacity hard disc in the
same DVD player, you have the
flexibility to keep recordings on the
hard disc or copy to a recordable
DVD disc for safekeeping or later
viewing. The hard disc functionality
also has a Replay buffer, which
allows you to pause an on-going
programme and after a short break
carry on where you left off.
The DVD player has a built-in GUIDE Plus+
system. This system offers a free programme
listings guide for all supported television
channels available in your area. You can also
use the GUIDE Plus+ system to programme the
DVD player to record your favourite television
programmes. Not all television channels are
supported by the GUIDE Plus+ system.
Note that in some countries the programme
listings guide is not available.
Depending on what the main function of
your DVD player is to be, you can set it up in
three different ways. However, you can access
all functionalities of the DVD player regardless
of the configuration.
If the main function is to play back DVD discs, make
sure that your DVD player is registered as ‘DVD’
in the CONNECTIONS menu of your television. For
further information about playback of DVD discs,
refer to ‘Play discs’ on page 12.
However, if the main function of your DVD player
is hard disc recording, it must be registered as
‘V MEM’* in the CONNECTIONS menu of the tele-
vision. You should also register your DVD player as
‘V MEM’, if it is connected to a system that already
has a DVD player. The DVD button on your Beo4
remote control will in this case be occupied by the
other DVD player and therefore it can not be used
for DVD 2. For further information about hard disc
recording, refer to ‘Record here and now’ on page
20 and ‘Timer recording’ on page 16.
If the main function of your DVD player is to record
here and now, it must be registered as V.AUX2 in
the CONNECTIONS menu of your television. If
registered as V.AUX2, the DVD player will start
op in tuner mode. For further information about
recording, refer to ‘Record here and now’ on
page 20.
The registration in the CONNECTIONS menu also
determines which Beo4 button activates the DVD
player; DVD, V MEM or V.AUX2.
Introducing the DVD player
DVD player and hard disc recorder
DVD
VMEM
4
*NOTE! On some Beo4 remote controls, the DTV
button is called SAT and the V MEM button is
called VTAPE.
If your DVD player is registered as ‘DVD’, you press
the DVD button to switch it on. When you press
the DVD button an inserted DVD disc will start
playback automatically.
If your DVD player is registered as ‘V MEM’, you
press the V MEM button to switch it on. When you
press the V MEM button the hard disc content menu
will appear on the television screen.

Record programmes
The DVD player gives you the opportunity to
record and store television, satellite (DTV*) and
set-top box programmes on the hard disc.
You decide whether to store them temporarily or
permanently. The instant and timed recordings
you make are stored in HARD DISC CONTENT, and
the on-going programmes you pause and replay
are put temporarily in a six-hour Replay buffer. If
you wish, you can move saved programmes from
the buffer to the HARD DISC CONTENT. You can
also record the programmes stored on the hard
disc on a DVD disc.
With this DVD player, you do not have to clutter up
your home with piles of video tapes. You can store
your recordings on the hard disc and bring up an
overview of recordings on your television screen
at any time.
In order to ensure that recordings are not deleted
from the hard disc, you can protect them from
automatic deletion. Refer to ‘Protect a recording’
on page 28.
The close-up operation panel
> Press the load button to open or close the
loader.
To load a disc …
Press on the front of the top panel to get access
to the close-up operation panel.
> Press the load button on the close-up operation
panel. The loader slides out.
> Place a disc in the loader.
When switched on from standby, the DVD player
takes up to 40 seconds to start up.
The status display …
The status display to the right shows the elapsed
playing time of a DVD disc or a recording or the
current track number being played on an audio
CD. Switching DVD chapters causes the appropriate
chapter number to be shown in the display for a
few seconds.
The indicator light …
The DVD player has an indicator light on the right
side of the front panel, which shows its different
modes.
ORANGE … The DVD player is recording. When
the DVD player receives a record command the
orange colour flashes on and off for some
seconds before switching to constant orange.
While the light indicator flashes on and off the
DVD player searches for a matching signal, and
you can not switch channel until the signal is
found. If you do so, the DVD player will not
record the programme you wish to record.
GREEN … The DVD player is on, but not recording.
RED … The DVD player is in standby.
5
Loader
Load button
Status display
Indicator light

TV LIGHT RADIO
DTV DVD CD
V MEM RECORD A MEM
7 8 9
4 5 6
TEXT 0 MENU
1 2 3
LIST EXIT
STOP
GO
Introducing the DVD player and Beo4
Using the Beo4 remote control
The Beo4 remote control included with your
television gives you access to all functions.
When a function is in use, you are informed
via displays on Beo4, on the DVD player or on
the television screen.
Switch on the DVD player. On some Beo4 remote
controls, the V MEM button is called V TAPE
Move through menu options. During playback,
move to the next or previous chapter in a
recording. Step between frames while playback is
paused
Enter data in on-screen menus or change the
speed of playback. In combination with GO step
backward or forward in playback
Access play mode and accept and store
instructions and settings
Reveal additional functions in the Beo4 display,
such as V.AUX2
Pause an on-going programme. Press to pause
playback of a recording, and press again to stop
playback completely
The Beo4 display window shows the source you
have selected
Press to start a manual recording of the selected
source, such as television
Enter data in on-screen menus, select a channel
number
Bring up the menu overlay
The coloured buttons give you access to different
functions, depending on the source you have
selected. In combination with GO they give you
access to different on-screen menus
Exit menus*
Adjust sound volume; press in the middle to mute
the sound
Switch the DVD player and the television to standby
DVD
RECORD
0 – 9
MENU
EXIT
•
DVD
V MEM
GO
LIST
STOP
6
*NOTE! To exit the EDIT menu, you must press GO
then 3.

On-screen menus allow you to adjust settings
and give you access to playback and recording
functions.
While the DVD player is
switched on …
Press GO then 0 to bring up the
DVD main menu
Press to move between the
different menu options and to
enter data in the menus
Press to reveal different settings
Press to enter data in the menus
Press to store a setting you have
made
Press to select an option in the
information bars
Press to leave the menu system
and return to the current source
The DVD main menu.
Using the menu system
An explanation of symbols in
the Guide
Buttons on the Beo4 remote
control
Display on the Beo4 remote
control
GO
0
0–9
GO
GO
EXIT
HARD DISC
SOURCE
Hard Disc
DVD
[EXIT]
CONTENT
Video
Audio
Photo
TV
LIST
FORMAT
7

>> Introducing the DVD player and Beo4
To see which Beo4 buttons activate specific
services or functions, bring up the menu
overlay on the screen.
Press MENU then GO in the
television menu to bring up the
menu overlay
Press the number button that
activates the function you want,
or …
… press one of the coloured
buttons to activate a function
The menu overlay offers you a
shortcut to various functions.
When you access these functions
outside the menu overlay, you
must press GO before pressing a
number button or a coloured
button.
The Beo4 buttons are shown to the left on the
menu overlay, and the functions they control are
shown to the right. Enclosed with this User Guide
you find a Quick Guide that you can use as
guidance, especially when you are in a link room,
where you cannot access the menu overlay.
Menu overlay
MENU
GO
1 – 9
DISC MENU
HDD CONTENT
TUNER
INFO
BROWSER
SYSTEM
TIMER
EDIT
BACK
CAM
TV/HDD
JUMP BACK
T/C
JUMP FORWARD
0
1
2
3
4
5
6
7
8
9
DISC MENU
HDD CONTENT
TUNER
INFO
BROWSER
SYSTEM
TIMER
EDIT
BACK
CAM
TV/HDD
JUMP BACK
T/C
JUMP FORWARD
0
1
2
3
4
5
6
7
8
9
8
NOTE! When you press 0 for browser, the hard
disc menu will be brought up.

GUIDE Plus+ system
After the GUIDE Plus+ setup and data
download is completed, you can start to
explore the different features and areas of
the GUIDE Plus+ system.
> Press and hold GO on the remote control for a
couple of seconds.
> Use , , or to navigate in the menu and
follow the instructions on the screen.
The GUIDE Plus+ system is divided in six
screen components:
Information Panels … Display instructions on the
GUIDE Plus+ system, programme promotions
and advertisements.
Picture Window … Shows the picture of the
current television programme. You can continue
to watch the current programme while entering
the GUIDE Plus+ system.
Action Bar … Displays the available functions. The
action buttons are activated directly with the
respective coloured buttons on the remote
control.
Information Field … Displays short programme
descriptions or help menus.
Menu Bar … Displays the GUIDE Plus+ menus and
your current selection.
Grid/Tiles … Displays the TV listings information
by channel and time, seven days in advance.
If certain channels are missing, go to the EDITOR
screen to check and change the channels. In the
GUIDE Plus+ menu, press to go to the menu
bar and then repeatedly to highlight EDITOR.
Press to access the EDITOR menu.
20-May 16:47
A Place by the Sea: Presented by Seetha Hallet.
Stevie McCullum’s dad used to drive the family down
from Glasgow for their summer holidays in north
ITV [P 03] 16:00 (60 Min)
Welcome!
What to do
first!
Record
Grid
Wed, 1 16:00 17:00
A Place by the Sea
Heartbeat
Neighbours
Get a New Life
Friends
Home and Away
Hollyoaks
Family Affairs
Emmerdale
The Agents
The Agents
Weeko
Heartbeat
Room for improv
The Secret
Homes Polic
Search ScheduleMy TV
Channels Home
Action bar
Picture window
Information
panels
Information fiel
d
Menu bar
Grid/Tiles
9

10

Daily use
This chapter describes the features
you might use on a daily basis, such
as how to play DVD discs, record
programmes and play them back and
finally how to edit recordings. With
the hard disc recorder you also have
the possibility to pause on-going
television programmes.
Play discs, 12
• During playback of a disc, 12
• Use DVD on-screen menus, 13
• Use the toolbar options, 14
Record a programme, 16
• Timer recording, 16
• Edit Timers, 19
• Record here and now, 20
Pause and replay a programme, 22
• Pause a programme, 22
• During replay, 23
• Replay buffer, 24
Play a recording, 26
• Select the genre of a recording, 26
• Play a recording, 26
• While playing a recording, 27
Edit recordings, 28
• Protect a recording, 28
• Rearrange the list of recordings, 28
• Delete a recording, 29
• Copy a recording, 30
• Name a recording, 30
11

Play discs
If your DVD player is registered as
DVD, playback starts automatically,
when you load a disc. If your DVD
player is registered as V MEM you
must activate playback yourself.
While playing a DVD disc, use the
Beo4 remote control to search at
varying speeds, step through the disc
or bring up a DVD disc menu. You
can resume playback of a DVD disc
where you stopped last time.
While playing a CD disc, you can
pause playback, switch to a new
track or select a track by its number.
Note: The DVD player is set for region 2 from
the factory. Discs from other regions will not
play on the DVD player as long as it is set for
region 2. If you need to have the region
changed, contact your retailer. Some discs can
not be played on the DVD player due to the
configuration, condition of recording or
characteristics of the disc.
When playing a disc you have the possibility
to change chapters or tracks, pause and stop
the disc and play it back in slow motion.
Play and change chapters or
tracks on a disc
Load a DVD or CD disc and press
GO then the red button to start
playing the disc, or …
… load a DVD or CD disc and
press GO then 0 to bring up the
main menu
Then press to highlight DVD
then GO to start playing the disc
Press to step between titles,
chapters or tracks
Press repeatedly to move to
another title, chapter or track on
the disc
Enter the title, chapter or track
number
Press GO then 8 to change
between chapter step and title
step
Press GO then 7 to move back in
a chapter or title on the disc
Press GO then 9 to move
forward in a chapter or title on
the disc
Press to wind backwards or
forwards during playback of a
DVD disc. Press again to change
speed
Press STOP to stop winding and
GO to resume playback
Pause, slow or stop a disc
Press to pause playback
Press and hold to start slow
playback. Press again to change
speed
Press again to stop playback
completely, or …
… press to resume playback
During playback of a disc
GO
GO
0
GO
0–9
GO
8
GO
7
GO
9
STOP
GO
STOP
STOP
GO
12
NOTE! The factory setting for moving back and
forward is five minutes. To change this interval,
refer to page 55 in the chapter ‘Adjust the system
setup‘.

In DVD disc menus, you can navigate through
different functions and options.
While the DVD player is
switched on …
Press GO then 0 in the television
menu to bring up the DVD main
menu
Press GO then the red button to
bring up the disc menu*
Use the arrow keys to move
between options in the menus
Press GO twice to accept your
choice or setting
Press to remove the disc menu
*Not all discs contain a disc menu.
Use DVD on-screen menus
The DVD main menu.
For optimal performance it is recommended not
to use larger JPEG files than approximately one
megapixel. For further information about JPEG
pictures, refer to ‘Create a slideshow playlist’ on
page 38.
GO
0
GO
GO
GO
EXIT
Disc formats
Your DVD player is designed to play back
different disc formats. Supported formats are:
– DVD-Video
– Audio CD
– Video CD
– Super Video CD
– CD-R/RW
– DVD-R/RW, provided that these are recorded
using the DVD Video format and that the disc
is finalised.
– Discs containing mp3 files are supported if
the sampling frequency is set to 32, 44.1 or
48 Khz. When playing discs with mp3 files,
use and to change folders.
– Discs containing JPEG files are supported if
the file extension is ‘*.JPG’ and not ‘*.JPEG’.
The DVD player can only display DCF-
standard still pictures or JPEG pictures, such
as TIFF.
HARD DISC
SOURCE
Hard Disc
DVD
[EXIT]
CONTENT
Video
Audio
Photo
13
NOTE! If the pincode entry dialogue appears on
the television, this means that the Child Lock was
activated for the inserted disc. You have to enter
your four-digit pin code. Refer to ‘Limit access to
recordings – Child Lock’ on page 40.

Use the toolbar options
Depending on the disc type you can access
different functions and options, such as
soundtrack language, via the system menu.
> During playback, press GO then 1 on the
remote control to bring up the DVD player’s
system menu.
> At TOOLBAR, press to highlight OPTIONS.
The available options might vary depending on
the situation and disc type.
> Use or to highlight the setting you want to
adjust and press .
> Use to highlight an option.
> Press GO twice to store the setting and leave
the menu, or …
> … press to store the setting and proceed to
another setting.
> Press EXIT to leave the menu.
If the selection in the menu is greyed out, it
means the feature is not available or can not be
changed in the current state.
The System menu.
>> Play discs
03 TV2 TV2 05-OCT-2006 12 . . . PAUSE
Toolbar
Preferences
Setup
Navigate to menu item.
Options
14

Change subtitle language …
This operation works only on DVD discs with
multiple subtitle languages. You can change to
the language you want while playing the DVD
disc. This function can also be accessed via the
green button on the remote control.
> Press to highlight SUBTITLE and press to
enter its options.
> Press repeatedly until the language you want
is highlighted, then press to store the setting.
The languages may be numbered or abbreviated,
such as ‘En’ for English.
Some DVD discs allow subtitle language changes
only via the DVD disc menu. To access the disc
menu, press GO then the red button.
Change audio soundtrack language …
This operation works only on DVD discs with
multiple soundtrack languages or VCDs with
multiple audio channels. This function can also be
accessed via the red button on the remote control.
> Press to highlight AUDIO and press to enter
its options.
> Press repeatedly until the audio language you
want is highlighted, then press to store the
setting. The languages may be numbered or
abbreviated, such as ‘En’ for English.
Some DVD discs allow soundtrack language
changes only via the DVD disc menu. To access
the Disc Menu, press GO then the red button.
Switch camera angles …
This option is only available with DVD discs that
contain sequences recorded from different
camera angles. This allows you to view the picture
from different angles.
> Press to highlight ANGLE and press to
enter its options. The camera angles available
for selection appear.
> Use or to highlight the camera angle you
want to switch to, then press to store the
setting.
Zoom in …
This option allows you to enlarge the picture on
the television screen and to pan through the
enlarged picture.
> Press to highlight ZOOM and press to enter
zoom in mode. The zoom status bar appears
and displays the zoom factor.
> Press the blue button on the remote control to
zoom in or the yellow button to zoom out.
> Use , , or to pan through the zoomed
picture.
> Press the red button to exit zoom mode.
Search by time …
This option allows you to skip to a specific point in
the current disc.
> Press to highlight TIME SEARCH and press
to enter the time field (hours : minutes :
seconds).
> Use 0–9 to enter the time where playback
should start and press GO twice to store the
setting. Playback skips to the time entered.
15

Record a programme
You can make your DVD player record
an available source or programme at
any time you specify. Set a Timer in
the GUIDE Plus+ system menu. Your
DVD player starts and stops the
recording automatically.
You can enter as many as 25 Timers
at one time and up to six hours for
each Timer. You can edit or delete
your Timers.
To ensure that your Timers are
executed correctly, set the built-in
clock to the correct time and date.
For further information about time
and date settings, refer to
‘Preference settings’ on page 42.
Timer recording
You can make Timer recordings in three
different ways. You can make a manual Timer,
you can use a programme listings guide* or
you can use a third system, which is called
either ShowView, G-Code or Video Plus+
depending on the country you live in.
Manual Timer recording …¨
> Switch on the television to the correct channel
number for the DVD player.
> Switch on the DVD player.
> Press GO then 2 on the remote control to bring
up the GUIDE Plus+ schedule screen.
> Press the green button on the remote control
for MANUAL. The recording date appears.
> Use , , or or the 0–9 to enter the
recording date, start and stop time.
> Press the green button to store each setting
and move to the next menu item.
> When ‘TUNER 01’ appears on the display,
highlight the source and enter the channel.
To select an external input, highlight ‘TUNER”
in the menu and use or to highlight EXT1,
EXT2 or CAM1.
To select an internal television channel,
highlight ‘01’ in the menu and use 0–9 to enter
the channel.
> Press the green button to store and move to
the next menu item. A virtual keyboard appears
on the television. Here you can enter the name
of the recording.
> Once complete, press the green button to store
the setting. The Timer recording will be
displayed.
> The recording settings are displayed in the pink
tile. To make changes, press the matching
coloured button on the remote control.
> Press GO then 2 to store and exit the menu.
TIMER will be shown in the display if a timer
recording is set.
To repeat the recording …
> Press the red button on the remote control
repeatedly to select the repeat recording setting
(Once, Weekly, M-F).
To extend the recording …
> Press the green button on the remote control
repeatedly to select adding extra time (+0, +10,
+20, +30) to the end of recording or select VPS/
PDC (V-P) function. For further information on
the VPS/PDC function, refer to page 17.
16
*NOTE! In some countries the TV programme listings
are not available and therefore the programme
listings guide cannot be used to make Timer
recordings. However, you can still program Timers
manually and with the ShowViev, G-Code or
Video Plus+ recording system.

An example of a manually programmed Timer.
If the DVD player is not in standby mode, a
notification message will appear before the timer
recording begins. If you ignore the message,
the DVD player will automatically switch to
the respective channel and start recording.
During timer recording you cannot change
channel in the DVD tuner.
Note that you can not record programmes
copy-protected by Macrovision.
The VPS/PDC function
The VPS/PDC function ensures that a
programme accompanied by the VPS/PDC
signals will be recorded in its full length – even
if the programme is delayed or prolonged.
20-May 16:47
Frequency: ONCE
Timing: +0
Recordings set: 1/25. VPS/PDC set: 0/25
Record Schedule Freq Timing
Welcome!
What to do
first!
Frequency
Schedule Info SetupEditor
Timing Home
21-May The Agents ONCE +0
17

Timer recording (programme listings guide) …
> While the television is switched on, switch on
the DVD player and press GO then 2 on the
remote control to bring up the GUIDE Plus+
schedule screen.*
> Use or to highlight a desired television
channel and use or to highlight a
programme.
> Press GO then or to scroll up or down a
page at a time. Press GO then or to go
directly to a day before or the next day TV
listings.
> Press the red button on the remote control for
RECORD.
> Press EXIT to leave the menu.
* If the GUIDE Plus+ setup menu appears, it means
that this DVD player has not been installed with
the GUIDE Plus+ programme data yet. For further
information, refer to ‘GUIDE Plus+ system setup’
on page 52.
Timer recording (ShowView/G-Code/Video
Plus+ system) …
Enter the ShowView, G-Code or Video Plus+
programming number associated with your
television programme. You can find this number
in your TV listings magazine.
> While the television is switched on, switch on
the DVD player and press GO then 2 on the
remote control to bring up the GUIDE Plus+
schedule screen.
> Press the red button on the remote control to
bring up the ShowView, G-Code or Video Plus+
entry screen.
> Use 0–9 to enter the ShowView, G-Code or
Video Plus+ programming number and press
GO twice to store the setting. If an incorrect
programming number is entered, you have to
select the correct programme number manually.
Follow the instructions on the television to edit
the date and time.
> The recording settings are displayed in the pink
tile. Press the matching coloured button on the
remote control to make changes.
> Press GO and 2 to store and exit the menu.
TIMER will be shown in the display if a timer
recording is set.
For information on how to repeat and extend a
recording, refer to page 16.
>> Record a programme
18
NOTE! In some countries the TV programme listings
are not available and therefore the programme
listings guide cannot be used to make Timer
recordings. However, you can still program Timers
manually and with the ShowViev, G-Code or Video
Plus+ recording system.

You can check the Timers that are waiting to
be executed, as well as edit or delete them. If
the Timers overlap, this is indicated when the
Timer is stored.
> While the television is switched on, switch on
the DVD player and press and hold GO on the
remote control to bring up the GUIDE Plus+
menu.
> Press to highlight a Timer which you want to
delete or edit.
To edit the Timer programme …
> Highlight the Timer and press the green button
on the remote control for EDIT, and follow the
instructions on the television to make the
necessary changes.
> Press GO and 2 to store and exit the menu
To edit the frequency or timing …
> Highlight the respective tile in the menu and
press the red button to change the frequency
or the green button to change the timing.
> Press GO and 2 to store and exit the menu.
To delete a Timer …
> Highlight the Timer and press the red button
on the remote control for DELETE
> Press GO and 2 to store and exit the menu.
If programmed Timers overlap, it will be indicated
when you store the Timer. Only partially overlapping
Timers are stored, and the second Timer will not
begin until the first has finished.
Your programmed Timers are listed after start time.
Each Timer is identified by source, name (if avail-
able), start and stop time and date or weekdays.
Abbreviations for days of the week:
M … Monday
T … Tuesday
W … Wednesday
T … Thursday
F … Friday
S … Saturday
S … Sunday
Edit Timers
20-May 16:47
‘Schedule’ displays programmes you have Set to Record.
Press to use. Press the green button for manual
recording. Press to view ‘My TV’. Press to view
‘Info’
Record Schedule Freq Timing
Welcome!
What to do
first!
Frequency
Grid SearchScheduleMy TV
Timing Home
21-May 18:42 02:25 P01 ONCE +0
21-May The Agents M-F +0
21-May 20:00 21:00 P12 ONCE +0
19

You can make a recording here and now. You
have the possibility to record one programme
and at the same time watch another programme
on the hard disc, watch a DVD disc or simply
watch another television programme. However
in some situations it is not possible to switch
to another source or programme.
Record from the DVD tuner and watch
another source at the same time …
> While the DVD player is switched on, press GO
then the yellow button on the remote control
to bring up the DVD tuner.
> Use or or 0–9 to select a channel number.
> Press RECORD twice*. The DVD player begins
recording the current programme, up to a
maximum of six hours, and you can switch to
another source:
Watch a hard disc recording
> Press GO then the green button to switch to
the hard disc.
> Use or to highlight a recording in the
HARD DISC CONTENT menu and press GO to
start playback.
Watch a DVD disc
> Press the load button on the DVD player and
load in a disc to start playback.
Watch television
> Press TV to switch to television mode.
> Press GO then the yellow button to return to
the DVD tuner after you have watched.a
recording or a disc, or …
> … press DVD to return to the DVD player. Then
press GO then the yellow button to return to
the DVD tuner after you have watched television.
> Press STOP twice to stop a recording.
> Press the standby button to switch the system
to standby.
If your DVD player is registered as V MEM or V.AUX2
and not as DVD, you must choose V MEM or V.AUX2
instead of DVD.
During recording you cannot change channel in
the DVD tuner.
>> Record a programme
Record here and now
20
*NOTE! On some Bang & Olufsen televisions you
just need to press RECORD once to start recording.
When the DVD player receives a record command,
it will start a six-hour recording. If you press RECORD
again, it will start a 30 minutes recording instead.
And each time you press RECORD, 30 minutes will
be added to the recording until you reach six hours
again.
Other manuals for DVD 2
1
Table of contents
Other Bang & Olufsen DVD Player manuals

Bang & Olufsen
Bang & Olufsen DVD 1 MKII Service manual

Bang & Olufsen
Bang & Olufsen DVD 2 User manual

Bang & Olufsen
Bang & Olufsen BeoCenter 2 MK II User manual

Bang & Olufsen
Bang & Olufsen DVD 1 User manual

Bang & Olufsen
Bang & Olufsen BeoCenter 2 Assembly instructions

Bang & Olufsen
Bang & Olufsen BeoMedia 1 User manual

Bang & Olufsen
Bang & Olufsen UG4 User manual