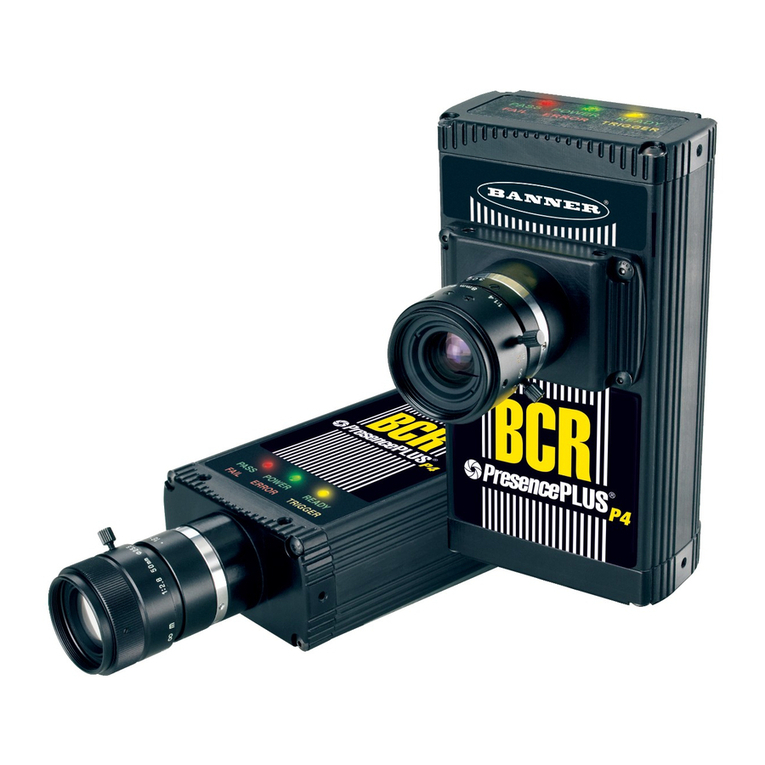
Banner IVU BCR Series User manual

iVu Barcode Reader (BCR)
Instruction Manual
Original Instructions
B_089425 Rev. B
18 March 2014

Contents
1 Overview of the Sensor ...................................................................................................4
1.1 Installation ...............................................................................................................................4
1.1.1 Components ................................................................................................................... 4
1.1.2 Cable Connections ...........................................................................................................5
1.1.3 Installing and Connecting the Sensor ................................................................................ 8
1.2 Home Screen ..........................................................................................................................10
1.2.1 Inspection Statistics .......................................................................................................11
1.3 Live Mode Overview .................................................................................................................12
1.3.1 Read/No Read, Pass/Fail, Match/No Match .........................................................................12
1.3.2 Trigger Modes ...............................................................................................................12
1.3.3 Compare Data ...............................................................................................................12
1.3.4 Output 1 and Output 2 .................................................................................................. 12
1.3.5 Remote Teach ...............................................................................................................13
2 Main Menu Reference ....................................................................................................14
2.1 Main Menu ..............................................................................................................................14
2.2 System Menu ..........................................................................................................................15
2.2.1 Sensor Mode .................................................................................................................15
2.2.2 System Configuration .....................................................................................................15
2.2.3 System Information ....................................................................................................... 16
2.2.4 Lock sensor ................................................................................................................. 16
2.2.5 Communications ............................................................................................................17
2.2.6 Discrete I/O ..................................................................................................................20
2.2.7 Display Settings ............................................................................................................ 22
2.2.8 Reboot Sensor ...............................................................................................................23
2.2.9 Firmware Update ...........................................................................................................23
2.3 Imager Menu ..........................................................................................................................23
2.3.1 Auto Exposure ...............................................................................................................24
2.3.2 Exposure ......................................................................................................................24
2.3.3 Gain ............................................................................................................................ 24
2.3.4 Trigger .........................................................................................................................25
2.3.5 Focus ...........................................................................................................................26
2.3.6 Strobe ..........................................................................................................................26
2.3.7 FOV (Field of View) ........................................................................................................27
2.4 Inspection Menu ......................................................................................................................28
2.4.1 Barcode Menu ............................................................................................................... 28
2.5 Logs Menu ..............................................................................................................................34
2.5.1 Inspection Logs .............................................................................................................34
2.5.2 System Logs .................................................................................................................36
2.5.3 Communication Logs ......................................................................................................36
3 Display Modes ...............................................................................................................37
3.1 Display/Hide Annotations ......................................................................................................... 37
3.1.1 Inspection Statistics .......................................................................................................38
4 Setting up an Inspection ...............................................................................................40
4.1 Acquiring a Good Image ...........................................................................................................40
4.2 Setting Up a Barcode Application ...............................................................................................42
4.3 Setting up for Data Compare .................................................................................................... 43
5 Communications Guide ................................................................................................ 45
5.1 Command Channel .................................................................................................................. 45
5.2 Setting Up Serial Communications .............................................................................................46
5.3 Testing and Troubleshooting iVu Command Channel Communications .............................................47
5.3.1 Using the Port Status Screen for Testing RS-232 Communications ........................................47
5.3.2 Understanding the Communication Log .............................................................................47
5.3.3 Using the iVu Command Channel Sample Application or a Terminal Program for Testing ..........48
5.3.4 Verifying Basic Receive Functionality ................................................................................ 48
5.3.5 Verifying Basic Transmit Functionality ...............................................................................49
5.4 Command Channel Commands ..................................................................................................49
5.4.1 Command Flow .............................................................................................................50
5.4.2 String Delimiters and Escaping ........................................................................................ 50
5.4.3 Command Channel Command Synopsis ............................................................................ 50
5.5 Examples .............................................................................................................................. 53
5.5.1 Conventions Used for Examples .......................................................................................53
5.5.2 How to Trigger the Sensor and Retrieve Barcode Data using the Command Channel ............... 53
5.5.3 How to Modify Barcode Compare Data Using the Command Channel .....................................54
5.6 Command Channel Reference .................................................................................................. 55
iVu Barcode Reader (BCR)
5.6.1 BCR_INPUT Command Group .......................................................................................... 55
5.6.2 BCR_RESULT Command Group ........................................................................................55
5.6.3 History Command Group .................................................................................................56
5.6.4 Info Command Group .....................................................................................................56
5.6.5 Inspection Command Group ............................................................................................57
5.6.6 Status Command Group ................................................................................................. 58
5.6.7 System Command Group ................................................................................................58
5.6.8 Teach Command ............................................................................................................58
5.6.9 Trigger Command Group ................................................................................................ 58
5.6.10 Command Channel Error Codes ......................................................................................59
6 Debugging Inspections ................................................................................................ 61
6.1 iVu Emulator ...........................................................................................................................61
6.2 How to Round-Trip Debug Using the Emulator .............................................................................61
6.2.1 How to Debug Using the Emulator from a PC .....................................................................61
6.2.2 How to Debug Using the Emulator from the USB Flash Drive ...............................................62
7 Updating the Sensor .................................................................................................... 63
7.1 Update Process .......................................................................................................................63
7.2 How to Set or Modify a Device Name ..........................................................................................63
7.3 How to Reset the Sensor Password ............................................................................................64
7.4 How to Use Bitmap Image Files with the iVu Emulator ..................................................................64
8 LED Indicator Troubleshooting ..................................................................................... 66
8.1 Errors ....................................................................................................................................66
8.2 Warnings ............................................................................................................................... 66
9 Product Support and Maintenance ................................................................................ 67
9.1 Product Support ......................................................................................................................67
9.2 Maintenance ...........................................................................................................................67
9.3 Banner Engineering Corp Limited Warranty ................................................................................68
iVu Barcode Reader (BCR)

1 Overview of the Sensor
The iVu BCR sensor reads a wide variety of barcodes. The package consists of sensor, lighting, lens, and display. Cables
and mounting brackets can be ordered for each application. Additionally, other lenses, filters, and external lights are
available. Installation, setup, and configuration can be done quickly without requiring a PC.
• No PC required to configure the sensor
• USB port for uploading and downloading of inspections and log files for easy updating and diagnostics
• Image processing expertise is not required
• Integrated or remote color touch screen display
• High speed processing
The iVu BCR reads the following barcode types:
• DataMatrix (ECC 200) barcodes
• QR Code (QR and Micro QR)
• Linear barcodes: Code128, Code39, CODABAR, Interleaved 2 of 5, EAN13, EAN8, UPCE, Postnet, IMB, and
Pharmacode
1.1 Installation
1.1.1 Components
iVu with Integrated Display
The iVu Series sensor comes fully assembled with the lens and an integrated ring light if so ordered. The integrated
touchscreen display has a plastic cover to protect the display. Remove this cover when setting up the sensor. When the
display is not in use be sure to keep the display covered to protect it.
If an integrated ring light is not used, another light source is needed. Various lights are available from Banner. Operating
in external trigger mode requires a triggering source (for example, the Banner WORLD-BEAM®QS18VN6D sensor).
1 Focusing Window
2 Focusing Window Locking Clip
3 LED - Green: Ready; Red: Error
4 LED - Green: Pass; Red: Fail
5 Integrated Display
A 8-pin Euro-style (M12) female USB Cable Connector
B 12-pin Euro-style (M12) male Power and I/O Cable Connector
C Mounting Bracket Mounting Holes (uses supplied three M4 x 4 mm
screws)
iVu Barcode Reader (BCR)
4

iVu with Remote Display
The iVu sensor for use with a Remote Display comes fully assembled with the lens and an integrated ring light if so
ordered. Although the Remote Display is not required for normal sensor operation, it is needed to set up the sensor and to
monitor inspections.
If an integrated ring light is not used, another light source is needed. Various lights are available from Banner. Operating
in external trigger mode requires a triggering source (for example, the Banner WORLD-BEAM®QS18VN6D sensor).
1 Focusing Window
2 Focusing Window Locking Clip
3 LED - Green: Ready; Red: Error
4 LED - Green: Pass; Red: Fail
C
A
B
A USB Connector
B Remote Display Connector
C Power I/O Connector
Mounting Bracket Mounting Holes (uses supplied three M4 x 4 mm screws)
1.1.2 Cable Connections
Cable Connections for iVu BCR with Integrated Display
The power and I/O cable for the iVu BCR sensor is available in 2, 5, 9, and 15 m (6, 15, 30, 50 ft) lengths. The connector
on the sensor is shown below (B).
iVu Barcode Reader (BCR)
5

B
BPower I/O Connector
NOTE: Micro video lens model shown. C-Mount model
connections are identical.
Power I/O Connections
Pin # Wire Color Description Direction
1 White Output 1 Output
2 Brown 10-30V dc Input
3 Green Output 2 Output
4 Yellow Strobe Out (5V dc only) Output
5 Gray Remote Teach Input
6 Pink External Trigger Input
7 Blue Common (Signal Ground) Input
8 Red Ready Output
9 Orange Not used N/A
10 Light Blue RS-232 TX Output
11 Black RS-232 Signal Ground Output
12 Violet RS-232 Rx Input
Cable Connections for the iVu BCR with a Remote Display
The cable connections on the iVu sensor are shown below, and power I/O connections (B) are defined in the Power I/O
Connections table below.
ARemote Display Connector
BPower I/O Connector
CUSB Connector
NOTE: Micro video lens model shown. C-Mount model
connections are identical.
Power I/O Connections
Pin # Wire Color Description Direction
1 White Output 1 Output
2 Brown 10-30V dc Input
3 Green Output 2 Output
4 Yellow Strobe Out (5V dc only) Output
5 Gray Remote Teach Input
6 Pink External Trigger Input
7 Blue Common (Signal Ground) Input
iVu Barcode Reader (BCR)
6

Power I/O Connections
Pin # Wire Color Description Direction
8 Red Ready Output
9 Orange Not used N/A
10 Light Blue RS-232 TX Output
11 Black RS-232 Signal Ground Output
12 Violet RS-232 Rx Input
iVu Trigger, Remote Teach, and I/O Waveforms
The iVu has two input signals—Trigger and Remote Teach. The default setting is to detect the low to high transition. This
setting can be changed in the Main Menu > System > Discrete I/O > Input Polarity screen on the sensor.
PNP (Low-to-High) Trigger and Remote Teach Input Waveforms
Power up
Trigger
Remote
Teach
Pink
Wire Color Function
Gray
The sensor triggers from low to high, and Remote Teach behaves electrically like trigger.
NPN (High-to-Low) Trigger and Remote Teach Input Waveforms
Trigger
Remote
Teach
Pink
Wire Color Function
Gray
Power up
The sensor triggers from high to low, and Remote Teach behaves electrically like trigger.
iVu Barcode Reader (BCR)
7

NOTE: If the device used to trigger or remote teach the iVu BCR is a sinking device, these are the
options regarding the use of a pull-up resistor:
Option 1: Put a pull-up resistor, rated approximately 1k ohm, between the sensor's positive (+)
voltage and the sensor's input as shown below.
Trigger Input
Remote Teach Input
iVu
Pullup Resistor 1k ohm
NPN
VCC
Sinking
iVu Output Waveforms
Ready
(Pass) (Fail) (Pass)
Function
Strobe Out
(Configure as External
& Expose Based)
Outputs 1,2, and 3
(Set as Active Pass)
Outputs 1, 2, and 3
(Set as Active Fail)
Figure 1. PNP Outputs
Ready
(Pass) (Fail) (Pass)
Strobe Out
(Configure as External
& Expose Based)
Outputs 1, 2, and 3
(Set as Active Pass)
Outputs 1, 2, and 3
(Set as Active Fail)
Function
Figure 2. NPN Outputs
1.1.3 Installing and Connecting the Sensor
The iVu BCR sensor requires a bracket for mounting. Three brackets are available from Banner. The brackets allow the
sensor to be mounted either perpendicular to the part or at an adjustable angle.
iVu Barcode Reader (BCR)
8

Thread three M4 x 4mm screws through the bracket into the mounting holes in the bottom of the sensor. Tighten all three
screws.
Table 1: iVu Brackets
SMBIVURAL SMBIVURAR SMBIVUU
Installing a Filter on iVu Series Sensors
Installing a Filter on the Micro Video Lens Model
To install a filter on the iVu Series sensor with Micro Video Lens, use the illustration as a guide and follow the steps
listed below.
CAUTION: Failure to follow these instructions may cause damage to your iVu Series sensor.
Micro Video Lens Models
A Lens
B Focusing Window
C Locking Clip
D Locking Screw
E Filter Cap
F Filter
1. Remove the Focusing Window locking screw (D) using the 1/16 in. hex key.
NOTE: The Locking Clip (C) inserts in a groove near the top of the Focusing Window (B).
When removing the window, the Locking Clip will be loose. Be careful not to lose the clip
while removing the window.
2. Unscrew the Focusing Window by turning it clockwise approximately 5 complete turns or until the Focusing
Window disengages from the light/lens assembly.
NOTE: The light/lens assembly may include an integrated ring light or a blank disk if an
integrated ring light is not used. Be careful that the light/lens assembly does not pull out
when removing the Focusing Window. Give a slight tug on the Focusing Window when you
think you've unscrewed it far enough. If the lens assembly moves with the window,
continue to rotate the window clockwise until the lens assembly does not move.
3. Set the Focusing Window aside. Be careful not to get any debris on the window's O-ring.
4. If present, remove the protective covering on the filter.
5. Place the filter into the Filter Cap and press the cap onto the lens.
iVu Barcode Reader (BCR)
9

6. After the filter is installed, place the Focusing Window back into the housing while inserting the Locking Clip into
the groove as shown.
C
B
Groove
7. Press the Focusing Window onto the housing to make sure that it seats correctly (no gap between the window
and housing). Rotate the window counter-clockwise at least two turns.
8. Replace the locking tab screw but do not tighten until you have set up and focused the sensor again.
Installing a Filter on the C-Mount Lens Model
To install a filter on the iVu Series sensor with C-Mount Lens, use the illustration as a guide and follow the steps listed
below.
CAUTION: Failure to follow these instructions may cause damage to your iVu Series sensor.
C-Mount Lens Models
DC
A
B
E
C
A C-Mount Lens
B Lens Enclosure
C Retainer Ring (optional)
D Filter (optional)
E Filter Retainer Ring Tool
NOTE: Filter Kits are available separately.
1. Remove the Lens Enclosure and Lens.
2. Install filter behind the retainer ring. Make sure it is fully seated.
3. Using the provided retainer ring tool, thread the retainer ring into the sensor until it firmly seats the filter.
4. Replace the Lens and Lens Enclosure on the camera.
CAUTION: Electrostatic Discharge
Avoid the damage that electrostatic discharge (ESD) can cause to the Sensor.
Always use a proven method for preventing electrostatic discharge when installing a lens or
attaching a cable.
1.2 Home Screen
The Home screen on the iVu Series sensor display is used to monitor inspections and to configure the sensor. Normally,
the part being inspected is centered on the screen.
iVu Barcode Reader (BCR)
10

A
B
C D E
F
G
A Main Menu
B Field of View
C Display Modes
D Decoded Barcode
E Help Button
F Zoom In (+) Zoom Out (-)
G Manual Trigger
1.2.1 Inspection Statistics
To access the Inspection Statistics, click the Display mode icon .
The Inspection Statistic mode has two pages:
•History
• Inspection Result
Click the arrow to access the other page.
History
The History screen shows inspection history from sensor reboot, or the last time the statistics were reset, including:
• Count Range—minimum and maximum number of objects observed
• Passed—running total of parts that passed inspection
• Failed—running total of parts that failed inspection
• Missed triggers—running total of missed triggers
• Time Range—minimum and maximum inspection times observed
Click the Reset button to reset statistics.
Inspection Results
The Inspection Result screen shows data about the current inspection being viewed, including the
• last Frame number
• Barcode Count
• Inspection Time
• read Barcode Data
iVu Barcode Reader (BCR)
11

1.3 Live Mode Overview
The iVu BCR can be configured to evaluate one or more of the supported barcode types and can look for a specific number
of barcodes from 1 to 10. The barcode types are selected on the integrated touch screen by accessing Main Menu >
Inspection > Barcode Type. The barcode count is selected on the touch screen by going to Main Menu > Inspection >
Barcode Count.
1.3.1 Read/No Read, Pass/Fail, Match/No Match
• A Read condition occurs when the configured number of barcodes are found in a scan. These barcodes must be
error-free.
• A No Read condition occurs when the configured number of barcodes are not found in a scan.
• If the sensor is configured where Data Compare is disabled, Pass and Fail are the same as Read and No Read.
• If the sensor is using the Data Compare feature, Pass indicates that a good barcode was found and the data
compared.
• If the sensor is using the Data Compare feature, Fail indicates that either no good barcode was found or the data
did not compare.
• A Match condition occurs when the required number of barcodes are found and the compare is successful.
• A No Match condition occurs when the required number of barcodes are found, but the compare is not successful.
1.3.2 Trigger Modes
The iVu BCR has four trigger modes that determine how the sensor captures and processes images:
• External - Single
• Continuous
• External - Gated
• Command
1.3.3 Compare Data
The iVu BCR has a data compare feature for comparing read barcode data against reference data. Data can be manually
entered by navigating to the Main Menu > Inspection > Data Compare > Set Data screen. Data of up to 3200
characters can be entered. Additionally, the data compare feature provides for masking characters within the data.
There are two other ways to enter compare data:
• Importing the last read data while viewing the Set Data screen. The new data is effective on the first trigger that
occurs after this action.
• Using Remote Teach.
The sensor tries to compare full length of this string with the data read from the barcode. If not equal, the inspection is
marked as Fail.
NOTE: If the sensor reads more than one barcode in the field of view, only the first barcode data that
the sensor reads can be compared.
1.3.4 Output 1 and Output 2
The sensor has two output signals that you can configure for Pass, Fail, Read, No Read, Match, No Match, System Error,
and Missed Trigger. The default settings are Pass for Output 1, Fail for Output 2.
iVu Barcode Reader (BCR)
12

NOTE: For all outputs, the default setting is Latched, which means that the signal is active until the
results of an inspection cause a change in the signal output. If Pulsed is selected, the default pulse
width is 50 ms.
1.3.5 Remote Teach
The Remote Teach function is a method of remotely updating inspection parameters while the iVu sensor is running. The
sequence of events for executing a Remote Teach are:
1. With the sensor Ready (see Installation on page 4), pulse the Remote Teach line.
2. The sensor recognizes that the Remote Teach line has been pulsed and waits for the next valid trigger.
3. At the next valid trigger, Ready goes inactive (the Green Ready LED shuts OFF), and the sensor acquires a new
image.
iVu Barcode Reader (BCR)
13

2 Main Menu Reference
2.1 Main Menu
The Main Menu has four sections. Inspection—to modify inspection settings. Imager—to run the Auto Exposure routine
and to make adjustments to functions like exposure, gain, and strobe. System—to set output signals, communication
channel parameters and to manage the device. Logs—to configure and view System and Inspection Logs.
Imager
Strobe
Auto Exposure
Exposure
Gain
Trigger
Focus
External
Internal
FOV Maximize FOV
Modify FOV
Locked Inspection Logs
System Logs
Communication Logs
Unlock Sensor
Logs Inspection Logs
System Logs
Communication Logs Industrial Ethernet
Data Export
Image Export
Locked Sensor Menus
View Logs
Setup
Command Channel
View Logs
Setup
Select
Add New
Startup
Delete
Stored Inspections
Inspection
Properties
Scan Time Limit
Inspection Name
Barcode Barcode Type
Barcode Count
Data Compare Compare
Set Data
Inspection ID
Set Name / ID
System
Live Mode
Demo Mode
Sensor Information
Sensor Mode
Save to USB
Load from USB
Reset to Defaults
Sensor Configuration
Lock Sensor
Ethernet I/O
Serial I/O
CommandChannel
Communications
Connection
Delimiters
Input Polarity
Input Pullup
Output Type
Output 1
Discrete I/O
Fail Hold Time
LCD Timeout
Touch Calibration
Advanced
Display Settings
Output 2
Output 3
Reboot Sensor
Firmware Update
Data Export
Image Export
Connection
Data to Export
Output Format
Advanced
Connection
Image Type
Industrial Ethernet Connection
Status
View Logs
Advanced
iVu Barcode Reader (BCR)
14

2.2 System Menu
Main Menu > System
The System menu icon is on the Main Menu, and is used to manage the sensor. The System menu provides for selecting
Sensor Mode, updating sensor firmware, backing up and restoring sensor Configuration, and other general system-level
operations.
2.2.1 Sensor Mode
Main Menu > System > Sensor Mode
The sensor has two operating modes:
• Live Mode, which is the normal operating mode where the sensor captures live images, scans, and verifies
barcodes
• Demo Mode, where inspections are run on stored images and inspection parameters.
The first time the device is powered up it starts in Demo Mode. Demo Mode uses stored images and inspection
parameters that demonstrate how the sensor is set up without having to worry about focus, lighting, or triggers. In
this mode, practice making adjustments while observing how the adjustments affect the results. To exit Demo
Mode go to Main Menu > System > Sensor Mode and select Exit Demo Mode. Upon exit, the sensor reboots
into its normal operating mode with default settings.
2.2.2 System Configuration
Main Menu > System > Sensor Configuration
The Sensor Configuration menu options are:
• Save sensor Configuration to the USB flash drive
• Load sensor Configuration from the USB flash drive
• Set Scan Time Limit
• Reset the sensor Configuration to defaults
• Update sensor firmware
iVu Barcode Reader (BCR)
15

Save to USB
Main Menu > System > Sensor Configuration > Save to USB
The Save to USB screen allows the sensor Configuration to be saved to a USB flash drive. The saved configuration
information can be used as a backup or as a way to clone configuration information for other sensors.
NOTE: On the Emulator, this option is Save Configuration.
Load from USB
Main Menu > System > Sensor Configuration > Load from USB
The Load from USB screen allows the sensor Configuration to be restored from a USB flash drive. This operation removes
all existing inspections and replaces them with inspections contained in the configuration file on the USB flash drive.
NOTE: On the Emulator, this option is Load Configuration.
Reset to Defaults
Main Menu > System > Sensor Configuration > Reset to Defaults
Resets all sensor configurations to the factory defaults. This operation will remove all existing inspections and replace them
with factory default settings.
2.2.3 System Information
Main Menu > System > Sensor Information
The Information screen displays the following sensor information:
• Serial Number
• Firmware Version
• Boot Number
• Up Timer—the time elapsed since last boot of the sensor
• Hour Count—the total hours of operation in the sensor's lifetime
• Model Number
• Device Name
Click the right-arrow next to the Sensor Name field to display a software keyboard that allows you to change the Sensor
Name.
2.2.4 Lock sensor
Main Menu > System > Lock sensor
This option provides for locking the sensor to prevent accidental modification of settings. When locked, the sensor only
provides access to pass/fail statistics, as well as the ability to view logs and to save them to a USB device. A lock icon in
the upper left corner of the sensor display indicates that the sensor is locked. Note that the sensor can be locked with or
without a password. If a password is not used, unlock the sensor by clicking on the Unlock sensor menu. When a password
is used, it must be 4 digits entered using the software keypad. If the password is lost, use the Password Reset Utility
software provided on the CD to obtain a Reset Key.
iVu Barcode Reader (BCR)
16

NOTE: This menu option is not available in the Emulator.
2.2.5 Communications
Main Menu > System > Communications
The Communications menu is used to configure the serial I/O channel. There are three menu options:
• Serial I/O for configuring the Serial port
• Command Channel for sending commands to get specific data through Serial or Ethernet channels.
• Data Export Channel for enabling or disabling the channel for data export only
NOTE: Either Data Export Channel OR Command Channel can be enabled at a time.
Serial I/O
Main Menu > System > Communications > Serial I/O
Set Serial I/O settings for Baud Rate, Data Bits, Parity Control and Stop Bits on this screen. Clicking Status displays
recent bytes transmitted through this channel.
Port Status
Main Menu > System > Communications > Serial I/O > Status
The Port Status screen can be used to ensure data is entering and exiting the sensor. This can be useful for debugging
issues such as improper wiring, mismatched baud rates, or other serial I/O issues.
iVu Barcode Reader (BCR)
17

Data Export Channel
Main Menu > System > Communications > Data Export Channel
When the Data Export Channel is enabled, the sensor will transmit selected inspection data when triggered.
Connection
Main Menu > System > Communications > Data Export > Connection
The Connection screen is used to enable or disable the Data Export Channel.
Data To Export
Main Menu > System > Communications > Data Export > Data To Export
The options in the Data To Export screen are used to determine what barcode data is exported via the serial port.
NOTE: Grab the edge of the Data to Export menu and pull down to allow all information to show.
iVu Barcode Reader (BCR)
18

Output Format
Main Menu > System > Communications > Data Export > Output Format
In the Output Format screen, use the drop-down lists to select Start and End Strings as well a Delimiter. In the field at the
bottom of the screen is an example of how the data will look when it is output.
Command Channel
Main Menu > System > Communications > Command Channel
The iVu command channel is a bi-directional communication protocol that currently supports ASCII via the RS-232 serial
interface, and enables other devices to remotely control the iVu sensor and to access sensor results.
Connection
Main Menu > System > Communications > Command Channel > Connection
The Connection screen is used to enable or disable the Command Channel.
Delimiters
Main Menu > System > Communications > Command Channel > Delimiters
In the Delimiters screen, there are three delimiter options that you can set:
• Field Delimiter, which determines what is used to separate data that the sensor is sending out to a remote device.
• End of Frame, which determines the delimiter used to indicate the end of a frame.
• String Delimiter, which determines what is used to enclose a string field during both input and output operations.
Use the drop-down lists to select the appropriate delimiter. The example at the lower part of the screen displays how the
data will look in the output or input streams.
iVu Barcode Reader (BCR)
19

2.2.6 Discrete I/O
Main Menu > System > Discrete I/O
The Discrete I/O options are used to adjust iVu input and output settings.
Input Polarity
Main Menu > System > Discrete I/O > Input Polarity
The iVu has two input signals—Trigger and Remote Teach. The operation of these signals is dependent on the Input
Polarity setting.
•Low To High - The Trigger and Remote Teach are detected on a low to high transition of the signal.
•High To Low - The Trigger and Remote Teach are detected on a high to low transition of the signal.
The default setting for a PNP sensor is Low To High, and for an NPN sensor it is High To Low. The user can change the
setting on the Input Polarity screen.
Input Pullup
Main Menu > System > Discrete I/O > Input Pullup
iVu Barcode Reader (BCR)
20
Table of contents
Other Banner Barcode Reader manuals

Banner
Banner ABR 7000 Series User manual

Banner
Banner TCNM-AD User manual

Banner
Banner ABR 3000 series User manual

Banner
Banner ABR 3000 series User manual

Banner
Banner ABR 3000 series User manual

Banner
Banner TCNM AD/EX User manual

Banner
Banner ABR 7000 Series User manual

Banner
Banner Barcode Reader P4 BCR User manual

Banner
Banner TCNM-AD Manual

Banner
Banner ABR7109-RSE2 User manual