manuals.online logo
Brands
  1. Home
  2. •
  3. Brands
  4. •
  5. Barco
  6. •
  7. Projector
  8. •
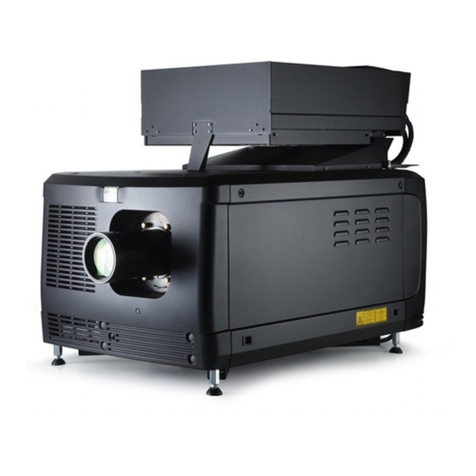
  9. Barco HDQ 4K35 User manual

Barco HDQ 4K35 User manual

R5905854 Rev. 00
IMPORTANT
• Remove the lens before transporting
the projector.
• Remove lamp house before
transporting the projector.
• To save lamp lifetime, first switch the
projector to standby mode and wait
until the after cooling is finished to
switch off the main power.
• Ensure that the projector is operating
with clean filters.
• Do not block the ventilation in and
outlets.
• Laser light can cause severe damage
to the DMD. This damage is not
covered by warranty.
Printed on FSC certified paper (www.fsc.org)
HDQ 4K35 Quick start guide
Mounting the lens
Additional vertical shift
Mounting the lamp house
A
B
1
1
• Remove the plastic cap in the lens
opening.
• Place lens holder in unlock position.
Handle A towards socket B.
• Gently insert the lens in such a way that
the lens connector matches the socket B.
• Insert the lens until the connector seats
into the socket.
• Secure the lens in the lens holder. Move
handle A into the lock position (away
from socket B).
• Check if lens touches the front plate
of the lens holder.
• Check if the lens is really secured by
trying to pull the lens out of the lens
holder.
• Place the 2 lens fixation brackets (1)
into position and secure with a nut on
each bracket.
1
2
2
• To extend lens shift in a specific
direction.
• Loosen the 4 screws (1) until
central part of lens holder
becomes loose.
• Shift the central part up or
down.
• Lowermost, middle and
uppermost shift positions are
marked on the lens holder (2).
• Tighten the 4 screws.
1
1
2
3
1
Before installing the Lamp
House, disconnect the power to
the projector mains terminals
and unplug the power cord at
the UPS INLET for removal of all
power from the projector.
• Remove housing on lamp house side.
• Grip the lamp house by both handles (1)
• Place the lamp house on the base plate
inside the lamp compartment.
• Line up the foot of the lamp house with the
slots on the base (2).
• Push the lamp house fully in.
• Secure both retaining screws.
• Mount the housing
Quick Setup and operation
The following summarizes HDQ setup and operation. For
errorfree installation always refer to the “User and Installation
manual”.
Connect power. Ensure that the power is properly
connected to the power input sockets.
Y-Δ (wye-delta) configuration possible.
Connect available sources to the appropriate input terminal.
Switching on. Turn the mains switch to on.
Start up sequence starts. Communicator on touch panel
starts up.
Press standby key on te local keypad.
Image of the latest selected input appears.
Adjust the lens settings via the local keypad keys or via
Communicator.
Orientation of the unit is set as standard in table front
projection mode. Change the projector set up with
Communicator (Installation - Advanced settings - Misc.
settings.
If geometrical distortion occurs this can be corrected with
Communicator (Configurator - Screen).
Lamp management in Communicator (Installation - Lamp)
Switching off the unit can be done by pressing the STBY
button for 3 sec. An aftercool up to 300 sec will start.
1
2
3
4
5
6
7
8
9
10
11
Communicator Touch Panel: Lens settings
To open the lens settings, click Configuration.
Select Lens.
Select Lens settings.
Adjust lens zoom, lens focus and lens shift.
1
2
3
4
Communicator Touch Panel: Orientation
To open the Image orientation settings, click Installation.
Select Advanced.
Select Misc. settings.
Select the correct Image orientation.
1
2
3
4
Communicator Touch Panel: Distortion
Communicator Touch Panel: Lamp manage
To adjust the distortion, click Configuration.
Select Screen.
Select Resizing or masking.
1
2
3
To manage the lamp, click Installation.
Select Lamp.
Select the desired lamp function.
1
2
3
C
M
Y
CM
MY
CY
CMY
K
R5905854_00_userguide.pdf 1 1/09/2014 11:04:29
WARNINGS
• Do not cover the lens while projecting.
• Do not look into the lens.
• Exhaust box becomes very hot when projector is on.
• When projector is used in portrait mode, floor covering can become very hot and must be resistant
to a temperature of 90°C (194°F)
HDQ series Quick start guide
Input & Communication ports
1 2 3 4
GENERAL PURPOSE IN/OUT
DVI ADVI B
DVI INPUT
SEL
SYNC OK
SEL
SYNC OK
10 / 100 / 1000 BASE-T
RS232 IN 3D INTERFACE PERIPHERAL PORT
1
23
5 6 7 8 9
Input ports:
3G-SDI input: SMPTE 292/424 input, port A
3G-SDI input: SMPTE 292/424 input, port B
DP input, port A, up to 2048x2160@60Hz + HDCP compatible, up to 12bpc
DP input, port B, up to 2048x2160@60Hz + HDCP compatible, up to 12bpc
1
2
3
4
5
6
7
8
9
1
2
3
4
5
6
7
8
1
2
3
4
5
6
7
1
2
1
2
3
4
5
6
1 2 3 4 5
6
7
8
Local keypad
Touch panel connection
Marker area for macro name
Numeric keyboard
Standby key
Dowser open/close button
Test pattern toggle button
Lens shift up/down, left/right
Lens focus
Lens zoom
Communicator Touch Panel
Connect your touch panel as described in the installation instructions. The touch panel starts up with a serial connection. To
speed up the control, an IP connecton is preferred. Connect the touch panel and the projector to an IP network.
Login as Service Technician to set up an IP connection. Click
on User selection icon at the bottom left.
Select Service Technician and enter the password. Click
OK to continue.
Click Touch panel and select Communication.
In projector connection properties, click Edit to open the
network settings.
Enter the IP address or click on Device scan.
The Touch panel’s IP address must be within the same
subnet as the Projector’s IP address in order to make the
communication pssobie. That requires a check of the
Projector’s and Touch panel’s subnet mask setting.
If Device scan was selected, select the desired
projector and click OK.
Connection is made with the projector.
For more information about the use of the Touch panel,
consult the Communicator’s user guide which can be
downloaded from Barco’s web site.
Communication ports:
10/100/1000 base-T
RS232IN
General purpose input/output (GPIO)
3D interface
Peripheral port
Connect the circular plug of the multi
cable with the circular socket at the rear
side of the projector.
Connect the DC plug, the RJ45 Ethernet
plug and the D-SUB plug into their
respective sockets on the touch panel
interface.
C
M
Y
CM
MY
CY
CMY
K
R5905854_00_userguide.pdf 2 1/09/2014 11:04:30

Other manuals for HDQ 4K35

2

Other Barco Projector manuals

Barco CLM HD8 R9050130 User manual

Barco

Barco CLM HD8 R9050130 User manual

Barco RLM R6+ Performer User manual

Barco

Barco RLM R6+ Performer User manual

Barco DP2K Series User manual

Barco

Barco DP2K Series User manual

Barco SLM R8 User manual

Barco

Barco SLM R8 User manual

Barco OV-708 User manual

Barco

Barco OV-708 User manual

Barco DP2K-6E User manual

Barco

Barco DP2K-6E User manual

Barco UDM User manual

Barco

Barco UDM User manual

Barco FLM R20+ Performer User manual

Barco

Barco FLM R20+ Performer User manual

Barco G60 Series User manual

Barco

Barco G60 Series User manual

Barco F85 User manual

Barco

Barco F85 User manual

Barco Cine 8 User manual

Barco

Barco Cine 8 User manual

Barco FLM series User manual

Barco

Barco FLM series User manual

Barco HDF W22 User manual

Barco

Barco HDF W22 User manual

Barco BarcoReality 909 Split Pack R9040040 User manual

Barco

Barco BarcoReality 909 Split Pack R9040040 User manual

Barco NW-12 User manual

Barco

Barco NW-12 User manual

Barco PGWU-61B User manual

Barco

Barco PGWU-61B User manual

Barco DP2K-10SLP Owner's manual

Barco

Barco DP2K-10SLP Owner's manual

Barco HDF W series User manual

Barco

Barco HDF W series User manual

Barco DP4K-P User manual

Barco

Barco DP4K-P User manual

Barco OVERVIEW D 50" User manual

Barco

Barco OVERVIEW D 50" User manual

Barco F10 AS3D User manual

Barco

Barco F10 AS3D User manual

Barco SLM R6 Executive User manual

Barco

Barco SLM R6 Executive User manual

Barco R9002120 User manual

Barco

Barco R9002120 User manual

Barco RLM-W12 User manual

Barco

Barco RLM-W12 User manual

Popular Projector manuals by other brands

Mitsubishi Mini-mits XD20A Specification sheet

Mitsubishi

Mitsubishi Mini-mits XD20A Specification sheet

Optoma H79 Service manual

Optoma

Optoma H79 Service manual

Imprexsions MP-100 quick start guide

Imprexsions

Imprexsions MP-100 quick start guide

Panasonic PT-EX16KE operating instructions

Panasonic

Panasonic PT-EX16KE operating instructions

Anker Nebula Prizm II Pro user manual

Anker

Anker Nebula Prizm II Pro user manual

Casio XJ-A235V SERIES Function guide

Casio

Casio XJ-A235V SERIES Function guide

Optoma ML500 Specifications

Optoma

Optoma ML500 Specifications

Acer P1173 user manual

Acer

Acer P1173 user manual

BenQ Installation Series PB8250 user manual

BenQ

BenQ Installation Series PB8250 user manual

Panasonic LB80U - XGA LCD Projector operating instructions

Panasonic

Panasonic LB80U - XGA LCD Projector operating instructions

SMART UF55 user guide

SMART

SMART UF55 user guide

Epson ActionPrinter 4000 Specifications

Epson

Epson ActionPrinter 4000 Specifications

ViewSonic PJD6221 - 2700 Lumens XGA DLP Projector user guide

ViewSonic

ViewSonic PJD6221 - 2700 Lumens XGA DLP Projector user guide

Dukane ImagePro 8944 Specifications

Dukane

Dukane ImagePro 8944 Specifications

Epson PowerLite 1761W Quick setup

Epson

Epson PowerLite 1761W Quick setup

Optoma ZU606TSTe user manual

Optoma

Optoma ZU606TSTe user manual

3M MPro 120 Specifications

3M

3M MPro 120 Specifications

Mitsubishi Electric UD8850U Information

Mitsubishi Electric

Mitsubishi Electric UD8850U Information

manuals.online logo
manuals.online logoBrands
  • About & Mission
  • Contact us
  • Privacy Policy
  • Terms and Conditions

Copyright 2025 Manuals.Online. All Rights Reserved.