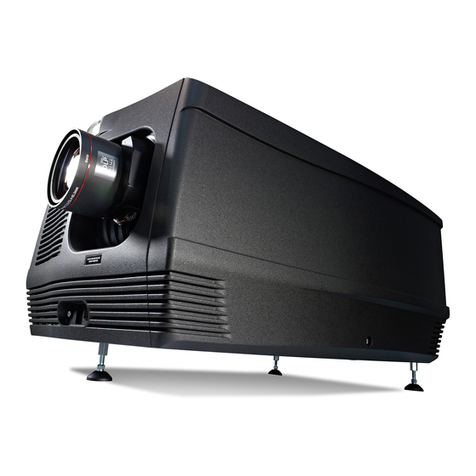
Barco PHWU-81B Operating manual

PHxx series
User and Installation manual
R5905597/02
20/05/2014

Barco nv
Noordlaan 5, B-8520 Kuurne
Phone: +32 56.36.82.11
Fax: +32 56.36.883.86
Support: www.barco.com/esupport
Visit us at the web: www.barco.com
Printed in Hyogo Japan

Trademark, Registered trademark
• DLP®, Digital Micromirror Device, DMD and BrilliantColor™ are all trademarks of Texas Instruments.
• HDMI, the HDMI logo and High-Definition Multimedia Interface are trademarks or registered trademarks of HDMI Licensing LLC.
• Microsoft, Windows and Windows Vista are either registered trademarks or trademarks of Microsoft Corporation in the United States
and/or other countries.
• Mac is a registered trademark of Apple Inc.
• The trademark of PJLink is trademark applied for registration or registered trademark in Japan, the United States, and other countries
and areas.
• Crestron RoomView Connected is a trademark of Crestron Electronics, Inc.
• Other brand or product names are trademarks or registered trademarks of their respective holders.
Copyright ©
All rights reserved. No part of this document may be copied, reproduced or translated. It shall not otherwise be recorded, transmitted or
stored in a retrieval system without the prior written consent of Barco.
Federal Communications Commission (FCC Statement)
This equipment has been tested and found to comply with the limits for a class A digital device, pursuant to Part 15 of the FCC rules.
These limits are designed to provide reasonable protection against harmful interference when the equipment is operated in a commercial
environment. This equipment generates, uses, and can radiate radio frequency energy and, if not installed and used in accordance with
the instruction manual, may cause harmful interference to radio communications. Operation of this equipment in a residential area may
cause harmful interference, in which case the user will be responsible for correcting any interference at his own expense
Changes or modifications not expressly approved by the party responsible for compliance could void the user’s authority to operate the
equipment
EN55022/CISPR22 Class A ITE (Information Technology Equipment)
Class A ITE is a category of all other ITE which satisfies the class A ITE limits but not the class B ITE limits. Such equipment should not
be restricted in its sale but the following warning shall be included in the instructions for use:
Warning : This is a class A product. In a domestic environment this product may cause radio interference in which case the user may be
required to take adequate measures.


Table of contents
TABLE OF CONTENTS
1. Safety................................................................................................................. 5
1.1 General considerations............................................................................................................... 5
1.2 Using projector in Europe ............................................................................................................ 6
1.3 Compliance notice of FCC ........................................................................................................... 6
1.4 Important safety instructions ......................................................................................................... 6
2. Preparing the projector...........................................................................................11
2.1 Projector accessories................................................................................................................ 11
2.2 Terminology overview ...............................................................................................................12
2.3 Installation of the batteries into the remote control.................................................................................14
2.4 Using the remote control ............................................................................................................15
2.5 Projector configurations .............................................................................................................16
2.6 Location of ceiling mounting holes ..................................................................................................17
2.7 Screen setup......................................................................................................................... 17
2.8 Screen size and projection distance ................................................................................................17
2.9 Correcting skewed or distorted image ..............................................................................................20
2.10 About fine streaks on the screen....................................................................................................20
3. Connections........................................................................................................21
3.1 Removing the covers................................................................................................................21
3.2 Power connection . . .................................................................................................................22
3.3 Connecting the projector to a computer . . . . ........................................................................................23
3.4 Connecting the projector to video equipment.......................................................................................24
3.5 Installing the covers ................................................................................................................. 27
4. Getting started.....................................................................................................29
4.1 Basic Remote control, indications. ..................................................................................................29
4.2 OSD Lite navigation results .........................................................................................................30
4.3 Projecting images. . . .................................................................................................................32
4.4 Stop projecting images ..............................................................................................................33
4.5 Adjusting the position of the projected image ......................................................................................34
4.6 When the projected image is distorted or a trapezoid. . ............................................................................35
4.7 Blanking the screen temporarily .. ..................................................................................................36
4.8 Auto position mode..................................................................................................................37
5. Advanced menu ...................................................................................................39
5.1 Starting the advanced menus .......................................................................................................39
5.2 Advanced menus overview..........................................................................................................40
5.3 Image menu .........................................................................................................................42
5.4 Installation 1 menu ..................................................................................................................44
5.5 Installation 2 menu ..................................................................................................................45
5.6 Multi-Screen menu ..................................................................................................................46
5.7 FEATURE menu .....................................................................................................................47
5.8 SIGNAL menu .......................................................................................................................49
5.9 NETWORK menu....................................................................................................................51
5.10 INFORMATION menu ...............................................................................................................52
6. Adjustments with the ADVANCED menu......................................................................55
6.1 To adjust the brightness (CONTRAST and BRIGHTNESS) .......................................................................55
6.2 To adjust the color (COLOR and TINT).............................................................................................55
6.3 To sharpen or soften the projected image (SHARPNESS) ........................................................................55
6.4 To adjust the tone of white (COLOR TEMP.) .......................................................................................55
6.5 Color Enhancer ......................................................................................................................56
6.6 Adjusting the fineness of the image (SUPER RESOLUTION) . ....................................................................57
6.7 Adjusting the tone of each color (COLOR MATRIX) ...............................................................................57
6.8 Setting the screen size ..............................................................................................................58
6.9 Setting the aspect ratio..............................................................................................................58
6.10 Adjusting the detailed setting of ASPECT ..........................................................................................60
6.11 Saving the setting in the SIGNAL MEMORY .......................................................................................61
6.12 Adjusting a computer image ........................................................................................................62
6.13 How to adjust the image supplied from the computer using the menu ............................................................63
6.14 Simple method to adjust the image position ........................................................................................64
6.15 LPF (Progressive filter)..............................................................................................................64
6.16 Image displayed on the multi-screen, joints ........................................................................................64
6.17 Adjusting the color variations........................................................................................................66
6.18 Resetting the settings ............................................................................................................... 67
6.19 When the projected image is distorted..............................................................................................68
6.19.1 Adjust using Keystone mode .................................................................................................68
6.19.2 Adjustment using the CORNERSTONE mode...............................................................................69
6.19.3 Adjustment using the CURVED mode .......................................................................................70
6.20 Changing the AUTO POWER OFF setting .........................................................................................72
6.21 Setting IMAGE REVERSE ..........................................................................................................72
6.22 Displaying TEST PATTERN.........................................................................................................73
R5905597 PHXX SERIES 20/05/2014 1

Table of contents
7. Initial network settings ...........................................................................................75
7.1 Setting Projector Name..............................................................................................................75
7.2 Enabling or disabling the network certification .....................................................................................76
7.3 Network Password Settings.........................................................................................................76
7.4 IP Settings ...........................................................................................................................77
7.4.1 Start up........................................................................................................................77
7.4.2 Setting or Clearing DHCP ....................................................................................................77
7.4.3 IP Address Settings...........................................................................................................78
7.4.4 Subnet Mask Settings ........................................................................................................78
7.4.5 Default Gateway Settings.....................................................................................................79
7.4.6 Saving IP CONFIG Settings..................................................................................................79
7.5 Setting the control system...........................................................................................................80
7.6 Initialization of Network Settings ....................................................................................................80
7.7 How to Use Network Function ......................................................................................................80
8. Lamp relay..........................................................................................................81
8.1 Setting the lamp relay interval, LAMP SELECT is set to DUAL....................................................................81
8.2 Setting the lamp relay interval, LAMP SELECT is set to SINGLE.................................................................83
9. Advanced features................................................................................................85
9.1 Password function................................................................................................................... 85
9.1.1 Enabling the password function ..............................................................................................85
9.1.2 Cancel the password function ................................................................................................86
9.2 Split ..................................................................................................................................86
9.3 Picture in Picture (PIP) ..............................................................................................................87
9.4 Supervising and controlling by computer ...........................................................................................88
9.5 Monitoring and control using SERIAL terminal.....................................................................................90
9.6 Control by a control panel, etc.......................................................................................................91
10. Lamp replacement ................................................................................................93
10.1 Lamp replacement warnings ........................................................................................................93
10.2 Interval of lamp replacement ........................................................................................................93
10.3 Lamp replacement. . .................................................................................................................94
10.4 Reset of the lamp operation time ...................................................................................................96
11. Maintenance........................................................................................................99
11.1 Cleaning of the projector and the vents. . . . . ........................................................................................99
11.2 Cleaning of the lens .................................................................................................................99
11.3 Automatic cleaning filter.............................................................................................................99
11.3.1 Setting the cleaning interval ..................................................................................................99
11.3.2 How to clean the automatic cleaning filter ..................................................................................101
12. Troubleshooting ................................................................................................. 103
12.1 No image appears on the screen . .................................................................................................103
12.2 Images are not displayed correctly ................................................................................................104
12.3 Other problems .....................................................................................................................105
12.4 Led ..................................................................................................................................106
13. Specifications.................................................................................................... 107
13.1 Specifications of PHXG-91B .......................................................................................................107
13.2 Specifications of PHWX-81B.......................................................................................................108
13.3 Specifications of PHWU-81B.......................................................................................................109
13.4 Specification of RGB signals in each computer mode of the projector For PHWU-81B .........................................110
13.5 Specification of RGB signals in each computer mode of the projector, For PHWX-81B.........................................111
13.6 Specification of RGB signals in each computer mode of the projector, For PHXG-91B .........................................113
13.7 Specification of RGB signals in each computer mode of the projector ...........................................................115
13.8 Dimensions .........................................................................................................................116
13.9 Connectors. . . .......................................................................................................................116
A. Option lens H LENS 0.8-1.0, 2.8-4.5 or 4.5-8.7 ............................................................... 119
A.1 Lens mounting procedure . . ........................................................................................................119
A.2 Focus correction function...........................................................................................................120
A.3 Check after mounting the lens .....................................................................................................121
A.4 Cleaning of the lens ................................................................................................................121
A.5 Specifications H LENS 0.8-1.0.....................................................................................................121
A.6 Specifications H LENS 2.8-4.5.....................................................................................................123
A.7 Specifications H LENS 4.5-8.7.....................................................................................................124
B. Optional lens H LENS 1.3-1.8................................................................................... 127
B.1 Lens mounting procedure . . ........................................................................................................127
B.2 Specifications H LENS 1.3-1.8.....................................................................................................128
B.3 Specifications H LENS 2.2-2.7.....................................................................................................129
C. Environmental information ..................................................................................... 133
C.1 Disposal information................................................................................................................133
C.2 Rohs compliance ...................................................................................................................133
2R5905597 PHXX SERIES 20/05/2014

Table of contents
4R5905597 PHXX SERIES 20/05/2014

1. Safety
1. SAFETY
About this chapter
Read this chapter attentively. It contains important information to prevent personal injury while installing and using a PHxx series
projector. Furthermore, it includes several cautions to prevent damage to the PHxx series projector. Ensure that you understand and
follow all safety guidelines, safety instructions and warnings mentioned in this chapter before installing your PHxx series projector.
After this chapter, additional “warnings” and “cautions” are given depending on the installation procedure. Read and follow these
“warnings” and “cautions” as well.
The User Manual is very important. Please read the User Manual before using the product. Keep the manual
for reference.
Access to User Manual
The User Manual is available on the CD which is shipped with the product. Perform the following to access the User Manual from
the CD:
1. Insert the CD into the CD-ROM drive of a computer.
2. Browse to the root folder of the CD and click on “startup.exe” (only in case the CD doesn’t start automatically). As a result an
HTML window will open in the Internet Browser.
3. Select your product and navigate to the User Manual.
4. Click on the PDF link to open the User Manual.
About the term PHxx series
The following projectors are included in the term PHxx series : PHWU-81B, PHWX-81B and PHXG-91B
1.1 General considerations
Safety labels
The lightning flash with arrowhead symbol within an equilateral triangle is intended to alert the user to
the presence of uninsulated “dangerous voltage” within the product’s enclosure that may be of sufficient
magnitude to constitute a risk of electric shock.
The exclamation point within an equilateral triangle is intended to alert the user to the presence of important
operating and maintenance (servicing) instructions in the literature accompanying the appliance.
2000m
Do not use above 2000m above sea level.
Do not look into the projector’s lens when the lamp is on. The bright light may hurt and damage your
eyes.
WARNING:Ensure you understand and follow all the safety guidelines, safety instructions, warnings and
cautions mentioned in this manual.
WARNING:To prevent fire or shock hazard, do not expose the projector to rain or moisture.
R5905597 PHXX SERIES 20/05/2014 5

1. Safety
WARNING:To prevent electric shock, do not use this (polarized) plug with an extension cord; receptacle or
other outlet unless the blades can be fully inserted to prevent blade exposure.
CAUTION:Not for use in a computer room as defined in the Standard for the Protection of Electronic Com-
puter/ Data Processing Equipment, ANSI/NFPA 75.
1.2 Using projector in Europe
Compliance notice
This projector complies with the requirements of the EC Directive 2004/108/EC “EMC Directive” and 2006/95/EC “Low Voltage Di-
rective”.
Warning
This is a EN55022 Class A product. In a domestic environment this product may cause radio interference in which case the user
may be required to take adequate measures.
This product may cause interference if used in residential areas. Such use must be avoided unless the user takes special measures
to reduce electromagnetic emissions to prevent interference to the reception of radio and television broadcasts.
Maschinenlärminformations-Verordnung - 3. GPSGV, der höchste Schalldruckpegel beträgt 70 dB(A) oder weniger gemäss EN ISO
7779
1.3 Compliance notice of FCC
FCC notice
This equipment has been tested and found to comply with the limits for a Class A digital device, pursuant to Part 15 of the FCC
Rules.
These limits are designed to provide reasonable protection against harmful interference when the equipment is operated in a com-
mercial environment.
This equipment generates, uses and can radiate radio frequency energy and, if not installed and used in accordance with the in-
struction manual, may cause harmful interference to radio communications. Operation of this equipment in a residential area is likely
to cause harmful interference in which case the user will be required to correct the interference at his own expense.
Any changes or modifications not expressly approved by Barco could void the user’s authority to operate this equipment.
1.4 Important safety instructions
General
• All the safety and operating instructions should be read before operating the projector.
• The safety and operating instructions should be retained for future reference.
• All warnings on the projector and in the operating instructions should be adhered to.
• All operating instructions must be followed.
6R5905597 PHXX SERIES 20/05/2014

1. Safety
To prevent personal injury
•Mercury Vapor Warnings: Keep the following warnings in mind when using the projector. The lamp used in the projector
contains mercury. In case of a lamp rupture, explosion there will be a mercury vapor emission. In order to minimize the potential
risk of inhaling mercury vapors:
- Ensure the projector is installed only in ventilated rooms.
- Replace the lamp module before the end of its operational life.
- Promptly ventilate the room after a lamp rupture, explosion has occurred, evacuate the room (particularly in case of a preg-
nant woman).
- Seek medical attention if unusual health conditions occur after a lamp rupture, explosion, such as headache, fatigue, short-
ness of breath, chest-tightening coughing or nausea.
• Caution: High pressure lamp may explode if improperly handled. Refer servicing to qualified service personnel. The customer
should never attempt to disassemble the lamp casing or to dispose of the lamp casing other than by returning it to Barco.
• Do not place this projector on an unstable cart, stand, tripod, bracket or table. Use only with a cart, stand, tripod bracket, or table
recommended by the manufacturer or sold with the projector. Any mounting of the appliance should follow the manufacturer’s
instructions and should use a mounting accessory recommended by the manufacturer.
• An appliance and cart combination should be moved with care. Quick stops, excessive force and uneven surfaces may cause
the appliance and cart combination to overturn.
• Do not place the projector on uneven surface. Place the projector on a leveled and stable surface only. Please do not place
the projector on unstable surfaces. The product may fall, causing serious damage to it and possible injury to the user.
• Warning: high intensity light beam. Do not look into the lens when it is operating. It may hurt your eyes. Never let children look
into the lens when it is on.
• Do not touch the exhaust vents and bottom plate, which become hot. Do not touch them or put other equipment in front of the
exhaust vents. The exhaust vents and bottom plate, when heated, may cause injury or damage to other equipment. Also, do
not set the projector on the desk which is easily affected by heat.
• Do not look into the exhaust vents when projector is operating. Heat, dust, etc. may blow out of them and hurt your eyes.
• Do not insert your fingers in the space between the lens and the cabinet. The lens may shift causing injury or damage to the
projector.
•Exposure to UV radiation: Some medications are known to make individuals extra sensitive to UV radiation. The American
Conference of Governmental Industrial Hygienists (ACGIH) recommends occupational UV exposure for an-8hour day to be
less than 0.1 microwatts per square centimeters of effective UV radiation. An evaluation of the workplace is advised to assure
employees are not exposed to cumulative radiation levels exceeding these government guidelines.
•Warning: Protection from ultraviolet radiation: Do not look directly in the light beam. The lamp contained in this product is
an intense source of light and heat. One component of the light emitted from this lamp is ultraviolet light. Potential eye and skin
hazards are present when the lamp is energized due to ultraviolet radiation. Avoid unnecessary exposure. Protect yourself and
your employees by making them aware of the hazards and how to protect themselves. Protecting the skin can be accomplished
by wearing tightly woven garments and gloves. Protecting the eyes from UV can be accomplished by wearing safety glasses
that are designed to provide UV protection. In addition to the UV, the visible light from the lamp is intense and should also be
considered when choosing protective eye wear.
To prevent fire hazard
• Do not place flammable or combustible materials near the projector!
• Do not face the projector lens to the sun. It can lead tofire.
• Slots and openings in the cabinet are provided for ventilation, ensuring reliable operation of the projector and to protect it from
overheating. Do not block these openings or allow them to be blocked by placing the projector on a bed, sofa, , carpet, rug, or
bookcase. Ensure that there is adequate ventilation and that the manufacturer’s instructions have been adhered to.
• Use correct voltage. If you use incorrect voltage, it can lead to fire.
• Do not connect multiple electrical appliances to a single wall outlet. It can lead to fire.
• Do not extend the power cord. It can lead to fire.
• Do not use flammable solvents (benzene, thinner, etc.) and flammable aerosols near the projector. Flammable substances
may ignite causing fire or breakdown because the temperature inside the projector rises very high while the lamp is illuminating.
• Be sure to unplug the power cord from the wall outlet if the projector will not be used for a long period of time. Otherwise, it
may cause fire. Important safeguards (continued)
• Do not use the projector in the following locations and manners, which may cause fire or electric shock.
- In a dusty or humid place.
- In a sideways position, or with the lens facing down.
- Near a heater.
- In an oily, smoky, or damp place such as a kitchen.
- In direct sunlight.
- Where the temperature rises high, such as in a closed cabinet.
- Where the temperature is lower than +41ºF (or +5ºC) or higher than +104ºF (or +40ºC).
• Do not cover the lens with the lens cap while the lamp is on.
R5905597 PHXX SERIES 20/05/2014 7

1. Safety
To prevent the risk of electrical shock
• Never add any attachments and/or equipment without the approval of the manufacturer as such additions may result in the risk
of fire, electric shock or other personal injury.
• Use 100-240 V AC 50/60 Hz to prevent fire or electric shock.
• The power cords for use in the U.S., Europe or China are included with this projector. Use the appropriate one for your country.
• This apparatus must be grounded (earthed) via the supplied 3 conductor AC power cable. If none of the supplied power cables
are the correct one, consult your dealer.
• This projector should be operated only from the type of power source indicated on the marking label. If you are not sure of the
type of power, please consult your appliance dealer or local power company.
• Power-supply cords should be routed so that they are not likely to be walked on or pinched by items placed upon or against
them. Pay particular attention to cords at plugs, convenience receptacles, and points where they exit from the appliance. Do
not put the power cord under a carpet.
• This projector uses the power plug of 3-pin grounding type. Do not take away the grounding pin from the power plug. If the
power plug doesn’t fit your wall outlet, ask an electrician to change the wall outlet.
• The provided power cord for the U.S. is rated at 120 V. Never connect this cord to any outlet or power supply using other
voltages or frequencies than rated. If you use a power supply using other voltage than rated, prepare an appropriate power
cord separately.
• If the power cord should be damaged, contact your dealer for replacement because it may cause fire or electric shock.
• Do not modify or alter the power cord. If the power cord is modified or altered, it may cause fire or electric shock.
• Do not overload wall outlets and extension cords as this can result in a fire or electric shock.
• In order to ensure the safety in case of trouble with the projector, use an electrical outlet having an earth leakage breaker to
supply the power to the projector. If you do not have such outlet, ask your dealer to install it.
• Plug in the power cord firmly. When unplugging, hold and pull the power plug, not the power cor
• Do not plug in or out the power cord with your hand wet. It may cause electric shock.
• When you move the projector, turn off the power, unplug the power cord from the wall outlet, and then remove the connected
cords. Otherwise, the power cord may be damaged, resulting in fire or electric shock.
• If dust or metallic substance is on or around the pins of the power plug, unplug the power cord and clean it using a dry cloth.
If you continue to use the projector without cleaning, it may result in fire or electric shock. Clean the power plug periodically at
least once a year.
• Never push objects of any kind through openings of this projector as they may touch dangerous voltage points or short-out
parts that could result in a fire or electric shock.
• Never spill liquid of any kind on the projector.
• Do not operate if smoke, strange noise or odor comes out of your projector. It might cause fire or electric shock. In this case,
unplug immediately and contact your dealer.
• This projector contains high voltage circuitry. An inadvertent contact may result in an electric shock. Except as specifically
explained in the User Manual do not attempt to service this product by yourself. Please contact your dealer when you want to
fix, adjust or inspect the projector.
• Do not modify this equipment. It can lead to fire or electric shock.
• Do not keep using the damaged projector. If the projector is dropped and the cabinet is damaged, unplug the projector and
contact your dealer for inspection. It may lead to fire if you keep using the damaged projector.
• Be sure to unplug the power cord from the wall outlet if the projector is fractured or deformed. Otherwise, it may result in fire
or electric shock. Ask your dealer for repair.
• Do not place a container containing water or other liquid on the projector. If water spills on or enters the projector, it may result
in fire or electric shock.
• Keep foliage plants and pets away from the projector. The temperature around the exhaust vents and that of the cabinet on the
top of the exhaust vents become high. Take special care for small children.
• The attached power cord is to be used exclusively for this product. Never use it for other products.
• The socket-outlet shall be installed nearby the equipment and shall be easily accessible.
• Use the attached specified power supply cord. If you use another power supply cord, it may cause interference with radio and
television reception.
8R5905597 PHXX SERIES 20/05/2014

1. Safety
To prevent projector damage
• Unplug this projector from the wall outlet before cleaning it. Do not use liquid aerosol cleaners. Use a damp soft cloth for
cleaning.
• Do not use this projector near water or in contact with water.
• Do not use the projector with condensation on it. It can lead to breakdown or other failure.
• Never place the projector in direct sun light. Sun light on the lens can severely damage the Digital Mirror DevicesTM in which
case there is a loss of warranty.
• Do not block the intake and exhaust vents. If they are blocked, heat may be generated inside the projector, causing deterioration
in the projector quality and fire.
•Special care for Laser Beams: Special care should be used when DLP® projectors are used in the same room as high power
laser equipment. Direct or indirect hitting of a laser beam on to the lens can severely damage the Digital Mirror DevicesTM in
which case there is a loss of warranty.
• Save the original shipping carton and packing material. They will come in handy if you ever have to ship your equipment. For
maximum protection, repack your set as it was originally packed at the factory.
• For safety’s sake, refrain from setting the projector at any place subjected to high temperature and high humidity. Please
maintain an operating temperature, humidity, and altitude as specified below.
- Allowable operating temperature is +41°F (+5°C) to +104°F (+40°C).
- Operating humidity: between 30% and 90%
- Be sure to use this projector at an altitude of less than 2000 meters.
2000m
• Never put any heat-producing device under the projector so that the projector does not overheat.
• Do not attach the projector to a place that is unstable or subjected to vibration.
• Do not install the projector near any equipment that produces a strong magnetic field. Also refrain from installing near the
projector any cable carrying a large current.
• Place the projector on a solid, vibration free surface; otherwise it may fall, causing serious injury to a child or adult, and serious
damage to the product.
• Do not stand upright the projector; it may fall, causing serious injury and damage to the projector.
• Slanting the projector more than ±10° (right and left) or ±15° (front and rear) may cause trouble or explosion of the lamp.
• Do not place the projector near air-conditioning unit, heater, or humidifier to avoid hot or moist air to the exhaust and ventilation
hole of the projector.
• Do not place the projector in the following places. Otherwise, a short circuit, heat generation, or melting of the power cord
coating may occur, causing fire, electric shock, product failure, or deformation.
- Outdoors or non air-conditioned place.
- Place where a gas such as a hydrogen sulfide is generated (i.e. hot spring).
- Place where there is too much salt such as near the coast.
• Do not put any object that is heavy or larger than the outer frame on the projector. Otherwise, the object may fall losing its
balance and cause injury.
• Do not subject the projector to strong shocks or vibrations. Do not handle the projector roughly. The projector may be damaged,
resulting in fire or electric shock.
• Do not replace the lamp immediately after using the projector because the lamp would be extremely hot and it may cause burns.
• Depending on the installation conditions, warm air that is emitted from the exhaust vents may flow into the intake vent, causing
the projector to display “HIGH TEMP WARNING” and then stop projecting images.
• Placing the projector directly on a carpet impairs ventilation by the fans, causing damage or failure. Put a hard board under the
projector to facilitate ventilation.
• Place the projector at least 50 cm (or 20 inches) away from the wall to prevent the intake vents and the exhaust vents that emit
hot air from being blocked.
R5905597 PHXX SERIES 20/05/2014 9

1. Safety
About batteries
• Use of a battery of wrong type may cause explosion.
• Only Carbon-Zinc or Alkaline-Manganese Dioxide type batteries should be used.
• For disposal of used batteries, always consult federal, state, local and provincial hazardous waste disposal rules and regulations
to ensure proper disposal.
• Before you dispose of the batteries, insulate them by placing insulation tape on the positive (+) and negative (-) terminals. If
you dispose of the batteries together with other conductive objects such as a metal piece, they may short out, resulting in fire
or explosion.
• Batteries may explode if misused. Do not recharge, disassemble, or heat the batteries, or put them into fire or water.
• Be sure to handle the batteries according to the instructions.
• Load the batteries with its positive (+) and negative (-) sides correctly oriented as indicated on the remote control.
• Keep batteries out of reach of children and pets. If children swallow the battery, see a doctor immediately.
• Remove the batteries, if the remote control is not used for a long time.
• Do not combine a new battery with an old one.
• If the solution of batteries comes in contact with your skin or clothes, rinse with water. If the solution comes in contact with your
eyes, rinse them with water and then consult your doctor.
• Do not carry or store the batteries together with metallic ballpoint pens, necklaces, coins, or hairpins. Otherwise, they may
short out, causing explosion or liquid leakage and resulting in fire or injury.
• Do not store the batteries where they are exposed to direct sunlight or subjected to high temperature and high humidity. High
temperature and high humidity may cause corrosion or liquid leakage.
On servicing
• Do not attempt to service this projector by yourself. Refer all servicing to qualified service personnel.
• Unplug this product from the wall outlet and refer servicing to qualified service technicians under the following conditions:
- When the power cord or plug is damaged or frayed.
- If liquid has been spilled into the equipment.
- If the product has been exposed to rain or water.
- If the product does not operate normally when the operating instructions are followed. Adjust only those controls that are
covered by the operating instructions since improper adjustment of the other controls may result in damage and will often
require extensive work by a qualified technician to restore the product to normal operation.
- If the product has been dropped or the cabinet has been damaged.
- If the product exhibits a distinct change in performance, indicating a need for service.
• Replacement parts: When replacement parts are required, be sure the service technician has used original replacement parts
or authorized replacement parts which have the same characteristics as the original part. Unauthorized substitutions may result
in degraded performance and reliability, fire, electric shock or other hazards. Unauthorized substitutions may void warranty.
• Safety check: Upon completion of any service or repairs to this projector, ask the service technician to perform safety checks
to determine that the product is in proper operating condition.
10 R5905597 PHXX SERIES 20/05/2014

2. Preparing the projector
2. PREPARING THE PROJECTOR
Overview
• Projector accessories
• Terminology overview
• Installation of the batteries into the remote control
• Using the remote control
• Projector configurations
• Location of ceiling mounting holes
• Screen setup
• Screen size and projection distance
• Correcting skewed or distorted image
• About fine streaks on the screen
2.1 Projector accessories
Delivered accessories
• One power cord
• One remote control
• Two R03 batteries (size AAA)
• Lens cap attached to the projector
• CD-ROM
• Safety manual
• Quick start guide
The delivered power cord has to be used exclusively for this product. Never use them for other products.
R5905597 PHXX SERIES 20/05/2014 11

2. Preparing the projector
2.2 Terminology overview
Remote control
1
4
2
6
7
3
5
Image 2-1
1ON/OFF / POWER key (ON/STANDBY)
The status is changed between ON and STANDBY.
2 Transmission windows
3 Indicators
4▲,►,▼,◄keys
5OK/ENTER key
6HOME/MENU key
7Battery compartment
Top and side projector
2 3
6 87 9 10
4 51
9 9
Image 2-2
1Remote control sensor (front)
2STATUS Led
3Indicators (inside of the top cover)
12 R5905597 PHXX SERIES 20/05/2014

2. Preparing the projector
4Intake vent/Filter cover (inside of the side cover)
5Intake vent
6 Lens
7Terminal panel (inside of the rear cover)
8Remote control sensor (rear)
9 Exhaust vent
10 Lamp cover (inside of the slide cover)
Bottom side projector
2
1
3
Image 2-3
1 Lock bar (SECURITY ANCHOR)
Attach a chain, etc. to this lock bar to anchor the projector.
2Adjustment feet
3 Exhaust vent
Terminal panel projector
1
9
23 4 56 87
13
10
11
12
Image 2-4
1VIDEO IN terminal (BNC)
2S-VIDEO IN terminal
3COMPUTER/COMPONENT VIDEO IN-1 terminal (mini D-SUB 15-pin)
4COMPUTER/COMPONENT VIDEO IN-2 terminals (R/PR, G/Y, B/PB, H/HV, V) (BNC)
R5905597 PHXX SERIES 20/05/2014 13

2. Preparing the projector
5HDMI IN terminal (HDMI 19-pin)
6COMPUTER/COMPONENT VIDEO DVI-D IN (HDCP) terminal (DVI-D 24-pin)
7SDI IN terminal (for PHWU-81B only)
8 LAN terminal
9REMOTE1 IN terminal (D-SUB 9-pin female)
10 SERIAL IN and OUT terminals (D-SUB 9-pin male)
11 REMOTE 2 IN and OUT terminals
Do not use these terminals.
12 Kensington Security Lock Standard connector
13 Power jack
2.3 Installation of the batteries into the remote control
Read carefully the battery safety instructions, see "Important safety instructions", page 6
Necessary parts
Two size-AAA batteries (R03).
How to insert
1. Slide and remove the rear lid of the remote control.
1
3
2
Image 2-5
Batteries insertion
2. Check the polarity (+), (-) of the batteries, and set them correctly, inserting their (-) side first.
Note: If the battery is inserted from the (+) side first, inserting the (-) side is difficult because the coil spring end hits on the
battery side. If the battery is forced to insert in this way, the outer label of the battery may get ripped and it may cause a
short-circuit and heating.
3. Attach the rear lid.
Replace the 2 batteries with new ones when the remote control is slow to operate.
Removing the batteries from the remote control
Slide and remove the back lid of the remote control and take out the batteries.
14 R5905597 PHXX SERIES 20/05/2014

2. Preparing the projector
2.4 Using the remote control
Operational range
Direct pointing
Operate the remote control within a distance of 15 m (49.2 feet) from the projector, pointing the light beam at the remote control
photo-sensor (front or rear) of the projector.
± 30°
± 30°
± 30°
± 30°
Image 2-6
Front and back control
• Keep the remote control sensor out of direct sunlight or fluorescent lamp light.
• Keep the remote control sensor at least 2 m (6 feet) away from fluorescent lamps. Otherwise, the remote control may malfunc-
tion.
• If there is an inverter-operated fluorescent lamp near the remote control, the remote control operation may become unstable.
• When you use the remote control too close to the remote control sensor, the remote control may not work correctly.
Indirect pointing
Image 2-7
You can control the projector by the remote control signals reflected on the screen. However, the remote control distance may be
restricted by the light reflection loss due to the screen characteristics.
Reception angle, vertical direction
± 20°
± 20°
± 5°
± 20°
± 20°
Image 2-8
R5905597 PHXX SERIES 20/05/2014 15

2. Preparing the projector
2.5 Projector configurations
Front projection
The projector is installed, either in a table mount or ceiling mount configuration, at the same side of the screen as the audience.
Image 2-9
For ceiling mounting, you need the ceiling mount kit designed for this projector. Ask a specialist for installation. For details, consult
your dealer.
Take the following things in mind for ceiling mount installations:
• The warranty on this projector does not cover any damage caused by use of any non-recommended ceiling mount kit or instal-
lation of the ceiling mount kit in an improper location.
• When using the projector mounted on the ceiling, set IMAGE REVERSE in the INSTALLATION 1 menu to MIRROR INVERT.
• When the projector is mounted on the ceiling, images may appear darker than those projected in the case of tabletop mounting.
This isn’t a product malfunction.
• Ask your installation specialist to provide a breaker. When you do not use the projector, be sure to shut down the main power
by the breaker.
• Do not install the projector where the exhaust vents are exposed to air emitted by an air conditioning. Such installation may
cause a breakdown.
• Do not install the projector near a fire alarm because it emits hot air from its exhaust vents.
• Installation must be done by a qualified professional.
• When the projector is installed on the ceiling using the ceiling mount kit, it is recommended to hold the mount kit and the projector
using metal bars or wires in addition to the mount kit fixing screws to prevent the projector from falling due to an earthquake
or other cause. For that purpose, use metal bars, wires, or screws that bear a load of at least 260 kgf. When using metal
wires, secure one end to the adjustment foot of the projector and the other end to the mount kit. In this case, make sure that
no electrical current is flowing in the mount kit due to current leakage or other cause.
Rear projection
The projector is installed, either in a table mount or ceiling mount configuration, at the other side of the screen opposite the audience.
Image 2-10
Ask a specialist for installation. For details, consult your dealer.
Take the following in mind:
• For rear projection, set IMAGE REVERSE in the INSTALLATION 1 menu to MIRROR.
• The same points as for a front ceiling should be kept in mind during the installation.
16 R5905597 PHXX SERIES 20/05/2014
This manual suits for next models
4
Table of contents
Other Barco Projector manuals

Barco
Barco SLM R12 Plus User manual

Barco
Barco SP2K-C User manual

Barco
Barco UDX 4K32 User manual

Barco
Barco F22 Series User manual

Barco
Barco BarcoData 1209S User manual

Barco
Barco FS40 - 4K User guide

Barco
Barco RLM-W12 User manual

Barco
Barco R9002370 User manual

Barco
Barco ZEUS User guide

Barco
Barco R9898170 User manual

Barco
Barco Wodan User manual

Barco
Barco IQ-Graphics 300 User manual

Barco
Barco R9001290 User manual

Barco
Barco GRAPHICS 808s User manual

Barco
Barco R9040171 User manual

Barco
Barco HDF W series User guide

Barco
Barco R9001390 User manual

Barco
Barco R5976907/00 User manual

Barco
Barco R9000901 User manual

Barco
Barco Thor Series User manual