manuals.online logo
Brands
  1. Home
  2. •
  3. Brands
  4. •
  5. Barco
  6. •
  7. Projector
  8. •
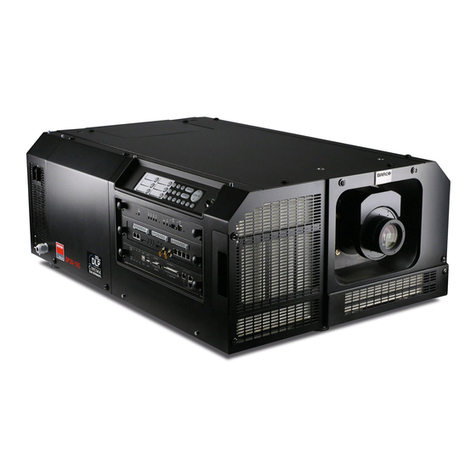
  9. Barco R9000901 Operating and safety instructions

Barco R9000901 Operating and safety instructions

Date: 06/02/98
R9000901
R9000908
GRAPHICS
Replacement of a picture tube 1
808S
Replacement of a picture tube
The picture tube encloses a high vacuum and care must be taken
not to bump or to scratch the picture tube as this may cause the
tube to implode resulting in personal injury and property damage.
Shatterproof goggles must always be worn by individuals while
handling the CRT or installing it in the projector. Do not handle the
CRT by the neck.
WARNING: CRT HANDLING
Attention
Howtoaccessthe
picturetubesforre-
moval
Thefollowingpartsoftheprojectorhavetoberemovedtogainaccesstothepicture
tubes: -topcover(totalremoval)
-topcoverplate,coveringthepicturetubeassembly.
How to open top cover Toopenthetopcover,proceedtothefollowingstep:
Step Action
1Power down the projector and pull out the power cord from the wall outlet.
2Turnthe lockscrew witha screwdriveror acoin ahalf turncounter clock-
wise
3Liftupthetopcoverand carefullypivotitvertically(attention:nocover
supportprovided).
toopen 2
3
Nocoversupport Thetopcoverisnotsecuredwithanincorporatedsupport.Ifacompleteturnoveris
required,weadvisetoremovethetopcovertotally.
to be continued on next page
Illustration how to open
topcover
Date: 06/02/98
R9000901
R9000908
GRAPHICS
Replacement of a picture tube 2
808S
How to remove top
cover Toremovethetopcover,proceedtothefollowingstep:
Step Action
1Standbehindtheprojector
2Grip the top cover by the front and turn it until it stands vertical.
3Hit the bottom of the cover on the right side to dislocate the hinge joint.
4Removethetopcover.
2
Illustrationtopcover
removal
Date: 06/02/98
R9000901
R9000908
GRAPHICS
Replacement of a picture tube 3
808S
Removing the Picture tube cover
Picturetubecover
assembly Thepicturetubecoverassemblyexistof:
- a bridge metallic plate, securing the position of the three CRT blocks in the main
frame.
-ametallic cover, coveringthethree CRTunitsin themainframe
Necessarytool for the fixation metallic plate: pot nut runner of 8mm & 7mm
for the metallic cover: pot nut runner of 7mm
How to remove the
metallic cover Themetalliccoverconsistsoftwoparts:
- a fixed plate, secured in position by 6 screws and
- a hinged cover, pivoting on the fixed part, and locked on the main frame by 4
screws.
Toremovethecoverassembly,continuewiththefollowingsteps:
Step Action
1Loosenthe4screwslockingthehingedcovertotheframe.
2Loosen the 4 screws securing the fixed plate on the top of the main frame.
3Removethe 2 screwssecuring the fixedplate on theside of themain
frame.
4First lift up (A) the cover and then slide (B) the complete assembly back-
wardstoremove.
Illustration metallic
coverremoval
1
fixed plate
hinged cover
1
1
2
A
B
Date: 06/02/98
R9000901
R9000908
GRAPHICS
Replacement of a picture tube 4
808S
Removing the Picture tube cover
How to remove the
bridge metallic plate Toremovethecoverassembly,continuewiththefollowingsteps:
Step Action
1Removethe6 screws (nutdriver7mm) securingtheCRT blocksonthe
plate.
2Removeonbothsidesoftheframethe2screws(nutdriver8mm)
securing the fixed plate on the top of the main frame.
3Removetheplate.
Illustration metallic
coverremoval
1
22
Date: 06/02/98
R9000901
R9000908
GRAPHICS
Replacement of a picture tube 5
808S
Removing the Lens of the defective picture tube
Lens
How to remove the lens
Necessarytool Pot nut runner of 8 mm
Support the lens body by hand and remove the 4 screws, holding lens to frame.
The lens is fixed to the main frame by 4
screws, 2 on top and 2 on bottom of the
lens.
lensfixation
screws
holes with screw thread
for lens fixation
Date: 06/02/98
R9000901
R9000908
GRAPHICS
Replacement of a picture tube 6
808S
Removing the picture tube from its frame
How to remove the
picture tube out of its
frame
The picture tube unit is fixed to the main frame in two ways:
- Mechanical: two long bolts secure the position of the picture tube support in the
frame.
- Electrical: the Units on the picture tube are electrical connected to the main frame.
To remove the unit, first disconnect the picture tube units electrical from the main
frame and then remove the bolts holding the picture tube support to the main frame.
Necessarytool Screwdriver5mm
Thefollowingunitshavetobedisconnectedfromthemainframe:
-deflectionunitconnection
-focusunitconnection
-groundconnection
-videodriverunit
- EHT lead
How to disconnect the
picturetubeunits
electrical from the main
frame
How to disconnect the
video driver unit Disconnecttheunitsasdescribedbelow:
Step Action
1Pull out the connector on top of the unit.
2Pull out on main frame the wire connector.
3Disconnectthetwogroundconnectors
4Loosenthe2screwsholdingdrivermoduletosupportbrace.
5Carefullypull off the Video DriverUnit from the picture tube socket.
6Lay down the unit, still connected to the frame with the focus wire, out of
theareaofthepicturetubetoberemoved.
1
23
4
Video Driver
Unit
to be continued on next page
Date: 06/02/98
R9000901
R9000908
GRAPHICS
Replacement of a picture tube 7
808S
How to disconnect the
Units on the neck of the
picturetube
Disconnecttheunitsasdescribedbelow:
Step Action
1Pull out focus connector on top of unit.
2Pullout on main framethe deflection connector.
1
2
Removing the picture tube from its frame
How to disconnect the
EHT lead of the CRT DisconnecttheEHTleadasdescribedbelow:
Step Action
1Pull out on the EHT splitter the respective EHT lead, e.g. Red CRT.
2Pushthe EHT leadthrough theprovided hole inthe twocover supports to
maketheEHT leadfree forremovalwith thetube.
EHT connection/disconnection
to remove
to secure
1
2
EHT lead of the
Red picture tube
to be continued on next page
Date: 06/02/98
R9000901
R9000908
GRAPHICS
Replacement of a picture tube 8
808S
How to remove the
picture tube unit me-
chanical out of the
main frame
Toremovethepicturetubeunit out ofmainframe,proceedasfollows:
Step Action
1Removethetworodswithscrewedthreadattheend.
2Take the picture tube unit out of the main frame
Removing the picture tube from its frame
1
2
Date: 06/02/98
R9000901
R9000908
GRAPHICS
Replacement of a picture tube 9
808S
Disassembling the Picture Tube unit
Purpose ThemountedunitsonthepicturetubehavetoberemovedbecausetheCRTspare
consist of a naked picture tube with the EHT cable installed.
Removing the Picture Tube Unit from its support
Necessarytool Pot nut runner of 8 mm
How to remove the
picturetubefromits
support The CRT Unit is mounted on its support by means of four bolts. To separate the CRT
unitfromitssupport,proceedasfollows(seephoto):
Step Action
1Put the CRT Unit on its face.
2Removethefourscrewsholding
picturetube tosupport.
3RemovethePicturetubefrom
its support.
CRTspare=Picture tube+EHTcable
Date: 06/02/98
R9000901
R9000908
GRAPHICS
Replacement of a picture tube 10
808S
Removingthe
Picturetubeunits
fromtheneck The Units on the picture tube are clamped on the neck of the picture tube by means
ofa gear clamp. Follow the next steps to remove:
Gear clamp
Video Drive
support
Gear clamp
Focus Unit
Gear clamp
Deflection Unit
Gear clamp
Magnetic
unit
Clasp ring
Focus Unit
Step Action
1Loosen the gear clamp of theMagnetic unit
2Slidethe unit off of the end of the CRT
3Loosen the gear clamp of theVideoDrivesupport
4Slidethe unit off of the end of the CRT
5Loosen the gear clamp of theFocus and Deflection unitand the clasp
ring ofthe Focusunit.
6Slidethe two units (joined by the ground wire) together offof the end of the
CRT
Date: 06/02/98
R9000901
R9000908
GRAPHICS
Replacement of a picture tube 11
808S
Reassembling the Picture Tube unit
Mounting the Picture Tube on its support
Necessarytool Pot nut runner of 8 mm
How to mount the
picture tube on its
support
CRTsupportblock
Necessarytool Philips screwdriver to pull tight the gear clamps
Order of installation
123
The CRT Unit is mounted on its support by means of four bolts. To mount the CRT
unitonitssupport, proceed asfollows(seephoto):
Step Action
1Put the CRT support block on its face.
2. Place the picture tube face in the support in such a way that the
expansion unit of the CRTfits therecessin the CRT support block.
3Insertandtighten thefourfixation
screws
Date: 06/02/98
R9000901
R9000908
GRAPHICS
Replacement of a picture tube 12
808S
Mountingtheunits
on the neck of the
picturetube
The Units on the picture tube are clamped on the neck by means of a gear clamp.
Follow the next steps to install:
Gear clamp
Video Drive
support
Gear clamp
Focus Unit
Gear clamp
Deflection Unit
Gear clamp
Video Drive
support
Clasp ring
Focus Unit
Step Action
1Slide the two unitsFocus and Deflection unit,
(joinedby the groundwire) together onthe neck
of the CRT , the Deflection block fully against
the CRT bulb and the Focus unit ±8 mm from de
Deflectionunit(seephoto).
2Tighten slightly the gear clamp of theFocus
and Deflection unit and the clasp ring of the
Focus unit(rotationmustbepossiblefor
correct adjustment of the units).
3Slide the Video Drive support on the end of
theCRT.
4Tighten not too fast the gear clamp of theVideo
Drive support(positiondeterminedwhenthe
VideoDrivermoduleispluggedontheCRT).
5Slide the Magnetic unit on the end of the CRT
(min 2 cm from the end of the CRT neck).
6Tighten not too fast the gear clamp of the
Magnetic unit(positioncanchangewhen
adjusting the Magnetic unit).
Date: 06/02/98
R9000901
R9000908
GRAPHICS
Replacement of a picture tube 13
808S
Picture tube alignment
Before starting the alignment of the new picture tube, the projector must warm up for at least 15
minutesat amediumbrightness andcontrast.
1 or 2 picture
tubes replaced
projected picture of the
non-defective tube can be
used as reference
rotate the deflection yoke
untiltheHorizontalmidline
is levelled - tighten the
gear clamp
apply an external crosshatch
pattern at 15 kHz or use the internal
crosshatch
Picture tube alignment
proceed to a quick
optical and
electrical focus
all picture tubes
replaced
apply an external crosshatch
pattern at 15 kHz or use the internal
crosshatch
rotate the deflection yoke
untiltheHorizontalmidline
is levelled - tighten the
gear clamp
centre the picture on the
CRT faceplate (refer to
installationmanual)
note: alignment of the
stigmators will change
again its position, if so,
realign raster centring
ç
proceed to the following
adjustments for each picture
tube separately
<
Set the midpoint focusing
on 57 (see owner's manual)
and the Contrast on 80
move the focus unit slowly
for- or backwards for max
focusing in the middle of the
screen - tighten the gear
clamp and the centring
clamp
Date: 06/02/98
R9000901
R9000908
GRAPHICS
Replacement of a picture tube 14
808S
a b
d
c
a<b
c<d
a' b'
d'
c'
a'=b'
c'=d'
realign the electrical
and optical focus
due tu mutual influence between the
stigmators, focus and centring, it is
advised to repeat above a couple of
times
reposition the raster as
described earlier
adjust the 4-pole rings until the
defocused dots are circular.
decrease the Contrast and
Increase the Brightness to
reveal the background raster
see service sheet 'Deflection
switching/Hor Amplitude' in this
manual for the alignment of the
image width coils
Note: when only one tube has
beenreplaced,theimagewidth
of one of the other tubes as a
reference, and obviously limit
theadjustmenttothecoreofthe
corresponding replaced tube
<
<
scan width
adjustment
Set the midpoint focusing
on 100
select a source that
generate a field of small
dots and crosshairs
realign the electrical and
optical focus
adjust the 2-pole magnets rings by
rotating one or both up to a point
where 'shading' of both sides of
the vertical and horizontal lines is
equal.
lower the Brightness and
put the Contrast on its max
with the RCU
Set the midpoint focusing
on 0
2-pole
4-pole
neutral
position

Other manuals for R9000901

2

This manual suits for next models

1

Other Barco Projector manuals

Barco PFWX-51B User manual

Barco

Barco PFWX-51B User manual

Barco R9002250 User manual

Barco

Barco R9002250 User manual

Barco UDM 4K15 User manual

Barco

Barco UDM 4K15 User manual

Barco F35 User manual

Barco

Barco F35 User manual

Barco DP-1500 User manual

Barco

Barco DP-1500 User manual

Barco Wodan User manual

Barco

Barco Wodan User manual

Barco Balder Series User manual

Barco

Barco Balder Series User manual

Barco GRAPHICS 9300 User manual

Barco

Barco GRAPHICS 9300 User manual

Barco RLM G5i Performer R9010320 User manual

Barco

Barco RLM G5i Performer R9010320 User manual

Barco Galaxy NH-12 User manual

Barco

Barco Galaxy NH-12 User manual

Barco iQ Reality 500 User manual

Barco

Barco iQ Reality 500 User manual

Barco RETROGRAPHICS 808s User manual

Barco

Barco RETROGRAPHICS 808s User manual

Barco SLM R8 Performer User manual

Barco

Barco SLM R8 Performer User manual

Barco RLM-W14 User manual

Barco

Barco RLM-W14 User manual
Barco HDF W series User guide

Barco

Barco HDF W series User guide

Barco iCon H600 User manual

Barco

Barco iCon H600 User manual

Barco R9002120 User manual

Barco

Barco R9002120 User manual

Barco ClickShare CSE-200 User manual

Barco

Barco ClickShare CSE-200 User manual

Barco iQ G350 User manual

Barco

Barco iQ G350 User manual

Barco Galaxy NW­12 Installation instructions

Barco

Barco Galaxy NW­12 Installation instructions

Barco DP2K-19B User manual

Barco

Barco DP2K-19B User manual

Barco iQ Pro R500 R9010221 User manual

Barco

Barco iQ Pro R500 R9010221 User manual

Barco XLM H25 Manual

Barco

Barco XLM H25 Manual

Barco CTHD-61B User manual

Barco

Barco CTHD-61B User manual

Popular Projector manuals by other brands

PLUS Vision RS-232 release note

PLUS Vision

PLUS Vision RS-232 release note

Canon WUX450 Specifications

Canon

Canon WUX450 Specifications

Sony VPL-FHZ700L Quick reference manual

Sony

Sony VPL-FHZ700L Quick reference manual

Epson EB-1400 series quick start guide

Epson

Epson EB-1400 series quick start guide

Epson ELPMB67 installation guide

Epson

Epson ELPMB67 installation guide

Optoma EX531p Specifications

Optoma

Optoma EX531p Specifications

NEC NP64 Series Quick setup guide

NEC

NEC NP64 Series Quick setup guide

Sony VPL-ES1 operating instructions

Sony

Sony VPL-ES1 operating instructions

Panasonic PT-VW330U operating instructions

Panasonic

Panasonic PT-VW330U operating instructions

BenQ MX768 quick start guide

BenQ

BenQ MX768 quick start guide

Dukane ImagePro 8918 user manual

Dukane

Dukane ImagePro 8918 user manual

Eiki LC-XB42N owner's manual

Eiki

Eiki LC-XB42N owner's manual

Bell and Howell RC55 operating instructions

Bell and Howell

Bell and Howell RC55 operating instructions

Sharp PGF310X - Notevision XGA DLP Projector Service manual

Sharp

Sharp PGF310X - Notevision XGA DLP Projector Service manual

Eiki LC-XG300 Features & specifications

Eiki

Eiki LC-XG300 Features & specifications

LG BX327 Specifications

LG

LG BX327 Specifications

Christie IMB user manual

Christie

Christie IMB user manual

Optoma TS721 Specifications

Optoma

Optoma TS721 Specifications

manuals.online logo
manuals.online logoBrands
  • About & Mission
  • Contact us
  • Privacy Policy
  • Terms and Conditions

Copyright 2025 Manuals.Online. All Rights Reserved.