manuals.online logo
Brands
  1. Home
  2. •
  3. Brands
  4. •
  5. Barefoot
  6. •
  7. Modem
  8. •
  9. Barefoot nbn Instruction Manual

Barefoot nbn Instruction Manual

31Page
www.barefoottelecom.com.au 1300 017 622 support@barefoottelecom.com.au
FTTC guide
nbn™ Connection Guide - Fibre to the Curb (FTTC)
STEP 1 - Locate the wall socket in your home
Find the telephone wall socket in your home. They’re
most commonly found in the main living room space or
bedrooms, but can sometimes be in the kitchen area.
It should look something like the photo below. Make
a note of all the sockets in your home, even ones that
may be in non-ideal locations such as bedrooms.
If your home has an older style wall socket shown
below (typically the plug is a yellow square with 3
prongs), you’ll need to purchase a Jackson adapter
that allows you to plug in a modern RJ11 telephone
cable. These adapters can be purchased at all most
electronics and computer stores.
IMPORTANT: If you are porting your existing landline
telephone number to an nbn™ VoIP service and
you need to keep using your landline phone at the
premises until the port is completed (porting can take
up to six (6) weeks), you will need to purchase and
connect a VDSL in-line filter/splitter to connect your
phone and nbn™ Connection Device (NCD). A VDSL
splitter can be purchased at most major electronics
stores.
STEP 2 - Plug in your nbn™ Connection Device (NCD)
Disconnect all devices in your home such as
telephones, modems, fax machines or anything else
that is plugged into a telephone wall socket. It is very
important that you have no other devices plugged into
sockets in your home. You will need to plug in your
nbn™ Connection Device (NCD) first. Plug the included
black power cable (A) from plug A (POWER) on the
back of the NCD. Plug the other end of the power
cable (A) into a power wall outlet in your home and
switch the power point on.
Plug the included grey telephone cable (B) into plug
B (WALL SOCKET) on the back of the NCD. Plug the
other end of the telephone cable (B) into your wall
socket. You will now need to wait for the connection
light and the DSL light on the top of the NCD to turn
solid blue - this may take up to 15 minutes. DO NOT
UNPLUG THE DEVICE DURING THIS TIME.
If the connection light and DSL light on the top of the
NCD do not turn solid blue after 15 minutes and you
have more than one socket in the home, please plug
the NCD into other sockets in your home, and turn
32Page
FTTC guide
www.barefoottelecom.com.au 1300 017 622 support@barefoottelecom.com.au
OPTION 1: I chose the Barefoot supplied modem/
router
Your Barefoot Communicate modem comes pre-
configured and does not require any setup. Simply
ensure the supplied yellow Ethernet cable is plugged
from plug C (GATEWAY) on your nbn™ Connection
Device (NCD), into the blue WAN port on the back of
your modem. Ensure the power cable is plugged into a
power outlet and switched on.
Your Barefoot modem/router will begin broadcasting
Wi-Fi as soon as it is plugged into power, turned on
and has finished booting up. You can then connect
your devices such as computers, phones and tablets
via Wi-Fi.
The modem’s Wi-Fi name and password is printed on
a separate card included with the modem. The Wi-
Fi name and password is also shown on the bottom
of the modem as “WiFi Network Name” and “WiFi
Password” for both the 2.4GHz and 5GHz networks.
the power on and o once plugged in. Leave the NCD
plugged into each socket for up to 15 minutes until the
lights turn blue.
If the connection light and DSL light on the top of the
NCD do not turn solid blue after 15 minutes and you
have tried to connect this on ALL phone wall sockets
in your home, please contact our support team for
further troubleshooting.
STEP 3 - Plug in your modem/router
Take your modem/router’s power supply cable and use
it to connect your modem/router’s power port to an
electrical outlet. Switch the power point on.
Take your Ethernet cable (this is typically blue,
yellow, grey or white) and plug one end into plug
C (GATEWAY) on the back of the nbn™ Connection
Device (NCD). Plug the other end into the WAN port
on your modem/router. This may also be labelled as
INTERNET or WAN/LAN. The Ethernet cable is larger
than a telephone cable. DO NOT use the telephone
cable to plug in your modem/router to the nbn™
Connection Device (NCD).
The setup should look like the below image once
completed.
Connecting your modem/router - nbn™ Fibre to the Curb (FTTC)
33Page
FTTC guide
www.barefoottelecom.com.au 1300 017 622 support@barefoottelecom.com.au
If you have a computer nearby that you would like
to connect via Ethernet, take another Ethernet cable
and plug one end into any one of the modem’s yellow
Ethernet ports (labelled LAN).
If you have issues connecting your Barefoot supplied
modem/router, please contact our support team at
support@barefoottelecom.com.au or 1300 017 622 for
further troubleshooting.
OPTION 2: I chose BYO modem/router
Your BYO modem/router will need to be configured
with your new Barefoot Communicate nbn™ details to
work.
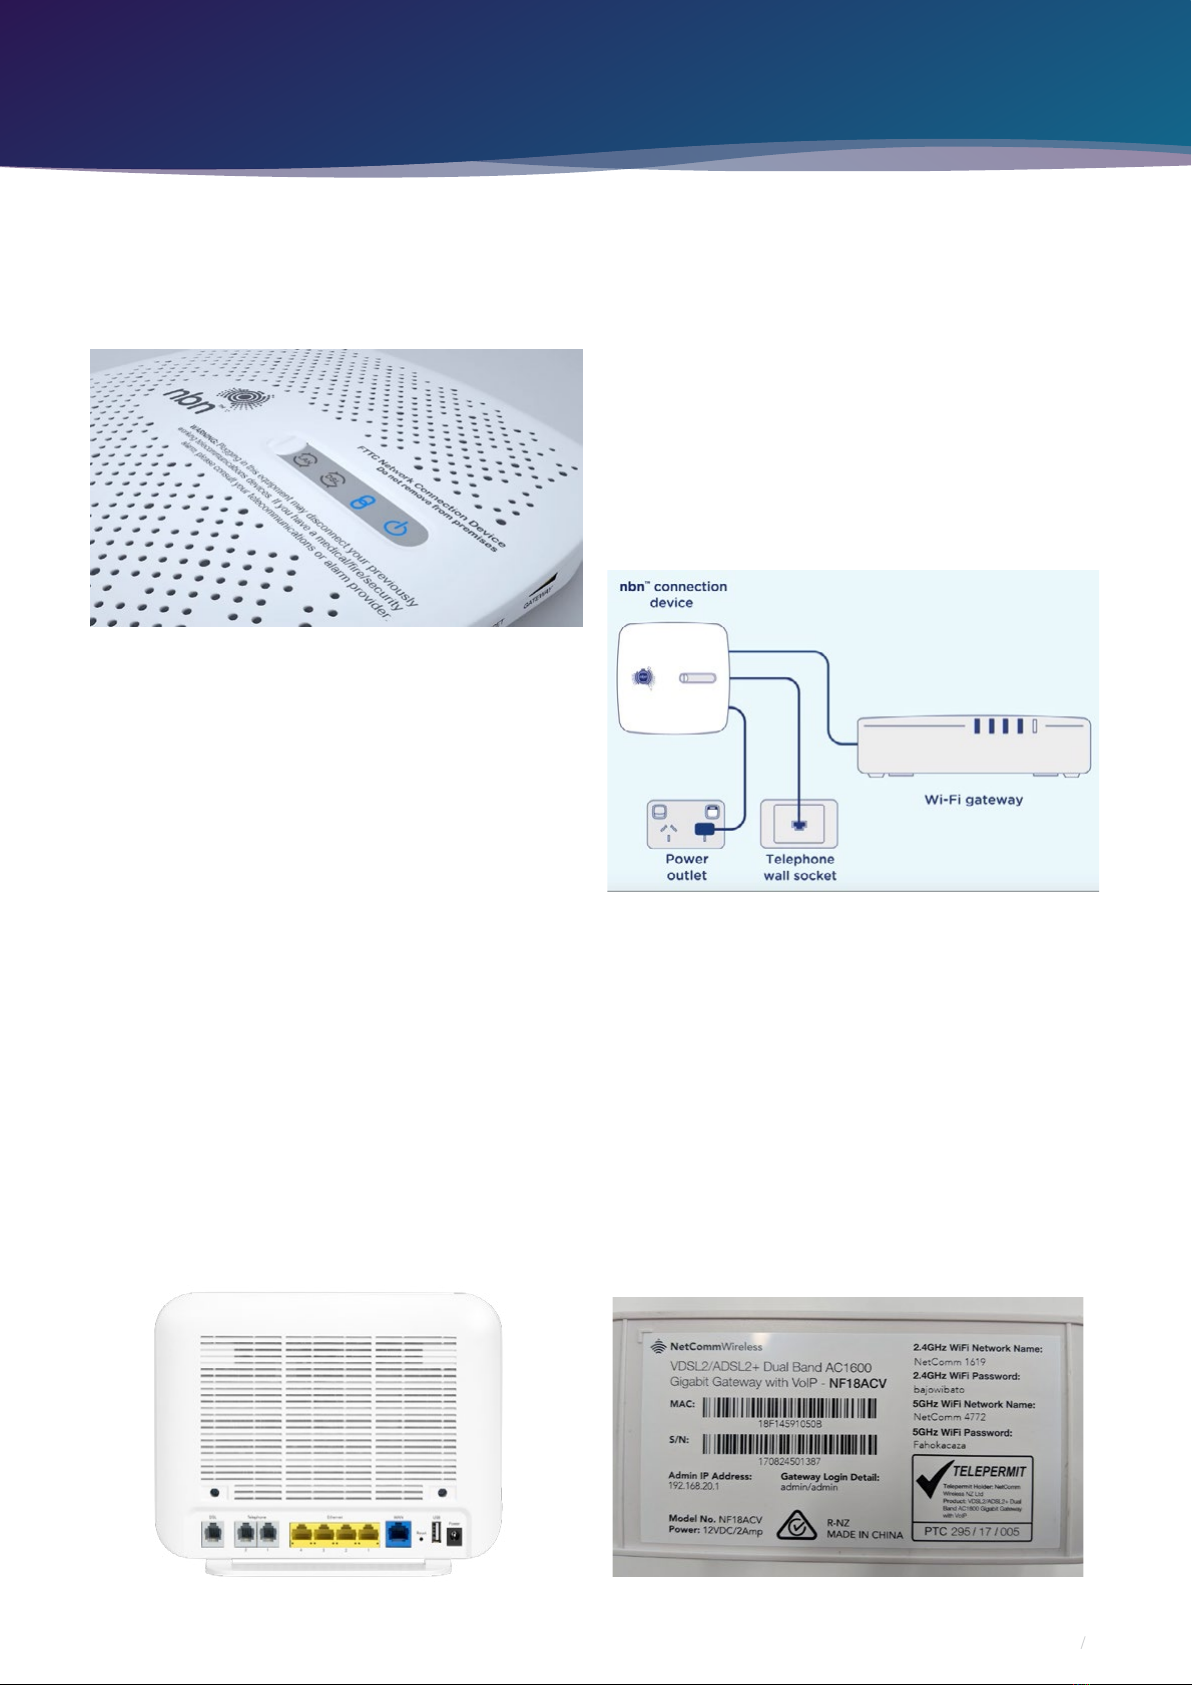
1. First, ensure the supplied yellow Ethernet cable
with your modem/router (this is usually yellow, blue,
grey or white) is plugged from plug C (GATEWAY)
on your nbn™ Connection Device (NCD), into the
WAN port on your modem. This WAN port may also
be labelled as INTERNET or LAN/WAN depending
on the make and model of your modem.
2. You will now need to connect your BYO modem/
router to your device. You’ll need a computer,
laptop, tablet or smartphone that is connected to
your BYO modem/router via Ethernet or Wi-Fi.
3. Once you have connected your device to your
BYO modem/router, open the web browser on your
connected device and type in your modem/router’s
default gateway/admin IP address in the address
bar. This will be printed on the bottom or back of
your modem depending on the make and model.
Some of the most common addresses are 192.168.1.1,
192.168.20.1, 10.1.1.1 and 10.0.0.138.
4. Once you have accessed the gateway of your
BYO modem/router, you may see a login page. If
there’s a username field, the default username will
almost always be admin (it may even already be
filled in). The default password is typically admin
or password. If you can’t log in with these settings,
please check the manufacturer’s website for your
BYO modem/router’s default login settings. If your
BYO modem router is secondhand or you have used
it previously, it may have custom login details set.
If you need to, you can factory reset the modem
router to return it to the default settings.
5. From here, it gets a little tricky to oer general
advice for all BYO modem/routers. The layout of
modem/router settings pages can vary greatly
for each dierent modem. If you get stuck or it is
not clear where you should change your Internet
settings, you need to check the manufacturer’s
website for support information. Ideally, your
modem will have a Setup Wizard or Quick Setup
that will run automatically the first time you log in to
the settings, or there’ll be a fairly obvious button to
launch it.
6. The Setup Wizard should run you through
entering the required broadband settings, step by
step. The most important settings are the following:
• Encapsulation or Connection Type
• Must be set to PPPoE
• Connection Mode/Access Type/Service Type
• Must be set to ETHERNET WAN/RESIDENTIAL
GATEWAY/WIRELESS ROUTER MODE
This will then allow you to enter your username
(sometimes called Login) and password which are
supplied in your Barefoot Welcome Letter email.
7. After completing the Setup Wizard and saving
your settings, give the modem some time. Some
modem routers reboot automatically after every
new configuration, while others simply need a
few minutes to apply the settings. Take a look
at the lights on your modem router. Most should
now be green, blue, purple or another “positive”
colour. Many modem routers have lights that flash
to indicate connection activity, so you shouldn’t
be concerned if any lights are flashing unless the
manufacturer’s support information specifically
advises that flashing lights indicate a problem.
8. Hop on one of your computers or Wi-Fi devices
and try to visit a website. If it works, your nbn™
Internet is up and running! If you have issues
connecting, please contact our support team at
support@barefoottelecom.com.au or 1300 017 622
for further troubleshooting.

Popular Modem manuals by other brands

MaxStream XTend-PKG-U quick start guide

MaxStream

MaxStream XTend-PKG-U quick start guide

Paradyne COMSPHERE 3920PLUS Series Installation and operation manual

Paradyne

Paradyne COMSPHERE 3920PLUS Series Installation and operation manual

Zoom 5510 installation guide

Zoom

Zoom 5510 installation guide

Nokia CS-15 Technical bulletin

Nokia

Nokia CS-15 Technical bulletin

Milltronics VT-Modem-1 WW instruction manual

Milltronics

Milltronics VT-Modem-1 WW instruction manual

Wood and Douglas ORION RADIO MODEM WITH I/O operating instructions

Wood and Douglas

Wood and Douglas ORION RADIO MODEM WITH I/O operating instructions

SILENT KNIGHT 5530 installation manual

SILENT KNIGHT

SILENT KNIGHT 5530 installation manual

Sierra Wireless AirCard 310U Quick start installation guide

Sierra Wireless

Sierra Wireless AirCard 310U Quick start installation guide

TC Communications TC1630R user manual

TC Communications

TC Communications TC1630R user manual

Archos G9 3G stick user guide

Archos

Archos G9 3G stick user guide

Belkin F5D8633-4 Quick installation guide

Belkin

Belkin F5D8633-4 Quick installation guide

HomeMatic HMIP-RFUSB operating manual

HomeMatic

HomeMatic HMIP-RFUSB operating manual

WirelessHART SWA70 operating instructions

WirelessHART

WirelessHART SWA70 operating instructions

Abocom IFM560 Quick installation guide

Abocom

Abocom IFM560 Quick installation guide

Asus AAM6000EV user manual

Asus

Asus AAM6000EV user manual

Zoom 5370 quick start

Zoom

Zoom 5370 quick start

ViaSat SurfBeam user guide

ViaSat

ViaSat SurfBeam user guide

Wavecom WMOD2B user manual

Wavecom

Wavecom WMOD2B user manual

manuals.online logo
manuals.online logoBrands
  • About & Mission
  • Contact us
  • Privacy Policy
  • Terms and Conditions

Copyright 2025 Manuals.Online. All Rights Reserved.