Barnstead EASYpure LF User manual

1
BARNSTEAD|THERMOLYNE CORPORATION
EASYpure™ LF
OPERATION MANUAL
AND PARTS LIST
Series 1052
LT1052X2 • 9/8/97

2
IMPORTANT INFORMATION
This manual contains important operating and safety information. You must carefully
read and understand the contents of this manual prior to the use of this equipment.
Water purification technology employs one or more of the following: chemicals, electrical devices, mercury
vapor lamps, steam and heated vessels. Care should be taken when installing, operating or servicing
Barnstead products. The specific safety notes pertinent to this Barnstead product are listed on the following
page.
Table of Contents
Safety Information ................................................................................................................................3
Alert Boxes ............................................................................................................................................3
Warnings ................................................................................................................................................4
Introduction ............................................................................................................................................5
Specifications ........................................................................................................................................6
Dimensions and Clearance Requirements. ......................................................................................6
Feedwater Requirements ..................................................................................................................6
Product Water....................................................................................................................................6
Electrical Requirements ....................................................................................................................6
Environmental Conditions..................................................................................................................6
Declaration of Conformity ......................................................................................................................7
Unpackaging and Installation ................................................................................................................8
Tubing Adapter Installation ....................................................................................................................9
Wall Mounting ......................................................................................................................................10
Initial Operation....................................................................................................................................13
Cartridge Installation and Rinse Up ................................................................................................13
Normal Operation ................................................................................................................................14
Water Draw Off ................................................................................................................................14
Run and Standby Modes ................................................................................................................14
Installing Float or Pressure Switch ......................................................................................................15
Maintenance and Servicing..................................................................................................................16
Cartridge Replacement....................................................................................................................16
Cartridge Removal ..................................................................................................................16
0.2 Micron Filter Replacement ........................................................................................................17
General Cleaning Instructions..........................................................................................................17
System Sanitization ........................................................................................................................17
Fuse Replacement ..........................................................................................................................18
Printed Circuit Board Replacement ................................................................................................19
Cleaning the Resistivity Cell............................................................................................................21
Shutdown ........................................................................................................................................22
Troubleshooting ..............................................................................................................................23
Parts and Supplies ..............................................................................................................................25
Ordering Procedures............................................................................................................................27
Flow Diagram ......................................................................................................................................28
Wiring Diagram ....................................................................................................................................29
Warranty ..............................................................................................................................................35

3
Safety Information
Your Barnstead EASYpure LF has been designed with
function, reliability, and safety in mind. It is your respon-
sibility to install it in conformance with local electrical
codes. For safe operation, please pay attention to the
alert boxes throughout the manual.
Alert Boxes
WARNING
Warnings alert you to a possibility of personal inju-
ry.
CAUTION
Cautions alert you to a possibility of damage to
the equipment.
NOTE
Notes alert you to pertinent facts and conditions.
Safety Information

4
Warnings WARNING
To avoid electrical shock, always:
1. Use a properly grounded electrical outlet of correct voltage and current handling capacity.
2. Do not locate the EASYpure LF directly over equipment that requires electrical service. Routine main-
tenance of this unit may involve water spillage and subsequent electrical shock hazard if improperly
located.
3. Replace fuses with those of the same type and rating.
4. Do not disassemble water lines or remove cartridges where spilled water could contact equipment
that requires electrical service. Disassembly of water lines and removal of cartridges will result in
water spillage. Electrical shock hazard could result.
5. Disconnect from the power supply prior to maintenance and servicing.
To avoid personal injury:
1. Do not use in the presence of flammable or combustible materials; fire or explosion may result. This
device contains components which may ignite such materials.
2. This device is to be used with water feeds only. Sanitizing/cleaning agents must be used in compli-
ance with instructions in this manual. Failure to comply with the above could result in explosion and
personal injury.
3. Avoid splashing disinfecting solutions on clothing or skin.
4. Ensure all piping connections are tight to avoid chemical leakage.
5. Ensure adequate ventilation.
6. Carefully follow manufacturer’s safety instructions on labels of chemical containers and material safe-
ty data sheets.
7. Depressurize system prior to opening cartridge access door.
8. Refer servicing to qualified personnel.
Warnings

5
Introduction
The Barnstead EASYpure LF is a line-fed water purifica-
tion system designed to provide Type I reagent-grade
water with extremely low organic content. It uses a
three-stage deionization process combined with a 0.2
micron filter to polish pretreated water (distilled, deion-
ized, or reverse osmosis) to produce water with a resis-
tivity of up to 18.3 megohms-cm and with a total organic
carbon content of less than 15 ppb. Water resistivity is
continuously sensed by a resistivity cell and displayed
on a digital display.
Introduction
Figure 1 EASYpure LF Front Figure 2 EASYpure LF Back

6
Specifications
Dimensions and Clearance Requirements.
EASYpure LF dimensions - 12 7/8" W X 19" D X 17 1/8" H (32.7 cm X 48.3 cm X 43.5 cm).
Clearances:
Sides - 4" (10.2 cm) minimum to allow air flow.
Above - 12" (30.5 cm) minimum for removal of the top cover.
Cartridge replacement requires that you be able to access the back of the unit and open the cartridge
access door (total depth, unit + open door, = 34") (86.4 cm).
Feedwater Requirements
The EASYpure LF requires water pretreated by either distillation, deionization or reverse osmosis meeting the
following criteria.
TOC - Less than 1.0 ppm.
Turbidity - 1.0 N.T.U. maximum
Temperature - 40°F - 120°F (4.4°C - 48.8°C)
Pressure: Gravity - 100 PSIG
Resistivity (Minimum):
Distilled - 300,000 Ohms-cm
Deionized - 1.0 Megohms-cm
Reverse osmosis - 100,000 Ohms-cm
Product Water
Quality Resistivity: ASTM Type I
TOC: Less than 15.0 ppb
Flow Rate: 1.5 LPM at 30 PSIG inlet, feedwater pressure at 60Hz and with a new final filter.
Electrical Requirements
The EASYpure LF is equipped with a power cord to be plugged into an electrical outlet of the appropriate volt-
age.
Model D7383 - 100 VAC +5%, -10%, 47-63 Hz.
Model D7381 - 120 VAX +5%, -10%, 47-63 Hz.
Model D7382-33 - 230 VAC +10%, -10%, 47-63 Hz.
Model D7382 - 240 VAC +10%, -10%, 47-63 Hz.
WARNING
Use a properly grounded electrical outlet of correct voltage and current handling capacity.
Environmental Conditions
Operating: 4°C - 49°C; 20% to 80% relative humidity, non-condensing. Installation Category II
(over-voltage) in accordance with IEC 664. Pollution Degree 2 in accordance with IEC 664.
Altitude limit: 5,000 meters.
Storage: -25°C to 65°C; 20% to 80% relative humidity.
Specifications

7
Declaration of Conformity
Barnstead|Thermolyne hereby declares under its sole re-
sponsibility that this product conforms with the technical
requirements of the following standards:
EMC: EN 50081-1 Generic Emission Standard;
EN 50082-1 Generic Immunity Standard;
Safety: IEC 1010-1-92 Safety requirements for
electrical equipment for measurement, control, and
laboratory use; Part I: General Requirements
per the provisions of the Electromagnetic Compatability
Directive 89/336/EEC, as amended by 92/31/EEC and
93/68/EEC, and per the provisions of the Low Voltage
Directive 73/23/EEC, as amended by 93/68/EEC.
The authorized representative located within the Europe-
an Community is:
European Manager
Barnstead|Thermolyne
Saarbrückener Str. 248
D-38116 Braunschweig
Germany
Copies of the Declaration of Conformity are available
upon request.

8
Unpackaging and Installation
1. Remove the unit from its shipping container. Ensure
that the tubing, adapter and power cord are removed
from the packaging materials before discarding.
Description Catalog Number
EASYpure High Purity/Low TOC Cartridge D50229
Pretreatment Cartridge DI Feed D50230
Pretreatment Cartridge R/O - Distilled Feed D50231
Ultrapure Mixed Bed Cartridge D50233
Filter, 0.2 Micron FL703X2
2. Place the EASYpure LF on a bench top convenient to
your work area, noting the Clearance Requirements.
3. Tape the 1/4" OD x 1/4" NPT tubing adapter using 1
1/2 to 2 turns of Teflon®tape, and install it on your in-
coming water line or your storage reservoir.
4. Install one end of the tubing to this adapter, but do not
install the other end on the EASYpure LF until car-
tridges have been installed. You will connect the
water supply to the quick disconnect body in the Initial
Operation section. Refer to the Tubing Adapter In-
stallation section of this manual.
NOTE
Cartridges and the 0.2 micron final filter are not
provided with the EASYpure LF and must be or-
dered separately.
WARNING
Do not locate the EASYpure LF directly over
equipment that requires electrical service.
Routine maintenance of this unit may involve
water spillage and subsequent electrical shock
hazard if improperly located.
Do not use in the presence of flammable or
combustible materials; fire or explosion may
result. This device contains components which
may ignite such materials.
This device is to be used with water feeds only.
Sanitizing/cleaning agents must be used in
compliance with instructions in this manual.
Failure to comply with the above could result in
explosion and personal injury.
NOTE
If you purchased a wall mount bracket for the
EASYpure LF, refer to the Wall Mounting sec-
tion of this manual.
NOTE
The outlet of your storage reservoir must be
level with the inlet of the EASYpure LF.
NOTE
To disrupt the flow of water to the EASYpure LF,
press the stainless steel thumb pad on the
quick disconnect fitting. The insert with the
valve is easily removed. To resupply the
EASYpure LF with water, push the insert into
the coupling body and listen for the click that
indicates full closure.
Unpackaging and Installation

9
Tubing Adapter Installation
1. Completely disassemble the fitting. Refer to Figure
3 to familiarize yourself with the names of the com-
ponent parts.
2. Make sure the tubing is cut off reasonably square
and that no plastic burrs or ridges are present.
3. Place the grab ring and back-up ring in the hex nut
in the order and orientation shown in Figure 3.
Thread the nut onto the adapter. DO NOT use the
o-ring at this time.
4. Push the tubing through the nut until it bottoms out
in the adapter.
5. Remove the adapter nut and tubing. Place the o-
ring over the tubing. Be careful not to push the
back-up ring or grab ring further back on the tubing
when installing the o-ring.
6. Install the hex nut on the adapter and hand tighten.
Figure 3 Typical Polypropylene Tubing Adapter Installation
®Teflon is a registered trademark of Dupont.
CAUTION
Do not tighten tube fitting hex nut with a wrench.
Tight connections can be easily made by hand.
Tubing Adapter Installation

10
Wall Mounting
Install the wall bracket on the wall in a location that is ac-
cessible to water and convenient to use. A minimum of 4
fasteners must be used.
1. Remove the pump interlock plug from the rear of the
unit.
2. Open cartridge access door in the rear of the unit.
3. Remove the cover of the EASYpure LF by removing
the screws that secure it to the unit and lifting it
straight up.
4. Remove tubing attached to quick disconnect body.
5. Remove the inlet quick disconnect body from the rear
of the EASYpure LF cabinet.
6. On both sides of the wall bracket there are plugs. Re-
move the plug from the side that is most accessible to
your feedwater source. Install the inlet quick discon-
nect body fitting into the hole by placing the inlet quick
disconnect into the hole and secure in place with the
locknut inside. Replace the plug in the hole generated
in the EASYpure LF (where the disconnect body was
installed).
7. Remove the four feet from the EASYpure LF and
retain the screws.
8. Place the EASYpure LF on the wall bracket swivel
base so the screw holes where the feet were attached
line up with the holes in the wall bracket. There are
guides on the wall bracket that will mate with the
EASYpure LF.
WARNING
Do not locate the EASYpure LF directly over
equipment that requires electrical service. Rou-
tine maintenance of this unit may involve water
spillage and subsequent electrical shock hazard
if improperly located.
CAUTION
Wall composition, condition and construction, as
well as fastener type, must be considered when
mounting this unit. The mounting surface and
fasteners selected must be capable of support-
ing a minimum of 150 lbs. Inadequate support
and/or fasteners may result in damage to
mounting surface and/or equipment. If you are
unsure of mounting surface composition, condi-
tion and construction or correct fasteners, con-
sult your building maintenance group or con-
tractor.
Wall Mounting

11
9. Install the four screws removed in step 7 through
the bottom of the wall bracket and into the
EASYpure LF.
10. Snake the tubing removed in step 4 through the
hole in the EASYpure LF floor and the wall bracket
and attach it to the quick disconnect body installed
on the side of the bracket.
11. Installing feed tubing from the water source to the
quick disconnect body on the outside of the bracket
cannot be done until cartridges have been installed.
You will connect the water supply to the quick dis-
connect body in the Initial Operation section of this
manual.
12. Replace the EASYpure LF cover.
13. Reinstall the pump interlock plug.
Figure 4 Orientation of Swivel Base
NOTE
Ensure there are no kinks in the tubing that could
restrict water flow.
NOTE
Outlet of feedwater storage tank must be above or
at the same level as the inlet valve on the
EASYpure LF.
WALL MOUNTING

12
Figure 5 Cartridge Installation
WALL MOUNTING
O-rings
Upper end cap
Flanges
O-rings
Lower end cap

13
Initial Operation
Cartridge Installation and Rinse Up
1. Open cartridge access door in the rear of the unit
by pushing the door latch down.
2. Remove a new Pretreatment cartridge (Catalog No.
D50230 or D50231) from its plastic bag.
3. Wet the o-rings on both end caps.
4. Press the upper end cap into the upper right posi-
tion until it bottoms out.
5. Lower the cartridge and insert the lower end cap
into the lower socket until it is firmly seated.
6. Repeat steps 2 - 5 with the EASYpure ULTRApure
and High Purity/Low TOC cartridges, placing them
in the center and left-hand positions.
Do not install
0.2 micron filter and bell assembly at this time.
7. Close cartridge access door.
8. Open draw-off valve.
9. Connect water supply to quick disconnect body.
10. Plug power cord into the unit’s power entry module
and plug into a live outlet. Turn on power entry
module switch.
11. Press “START”.
12. Rinse 5-10 liters of water through the cartridges to
drain.
13. Remove a new 0.2 micron filter and bell assembly
from its bag and insert it into the Luer fitting. Gently
turn it clockwise until it is fully seated in the Luer fit-
ting.
14. Remove the protective cap from the filter bell.
15. Flush 5-10 liters of water through the filter to waste.
NOTE
If the EASYpure LF is wall mounted, rotate the
EASYpure LF until the cartridge access door faces
forward and the EASYpure LF locks into place.
NOTE
The EASYpure LF’s cartridges must be installed
in the proper order.
NOTE
The upper end cap is the one with the right-angle
turn and the two flanges. The lower end cap ex-
tends straight out from the cartridge.
NOTE
The two flanges on the end cap should be able to
slide down on each side of the keyway wall.
WARNING
Use a properly grounded electrical outlet of correct
voltage and current handling capacity.
CAUTION
Do not allow EASYpure LF to operate unless
water is available to unit.
NOTE
For more demanding applications where low TOC
water is required, a rinse of 15-20 liters through
the cartridges and filter may be necessary.
Initial Operation

14
Normal Operation
1. Press the “START” button on the front of the
EASYpure LF.
The EASYpure LF’s pump will begin to run and the Purity
meter will display the resistivity of the water in megohm-
cm.
2. Allow the water’s resistivity to rise to the desired purity
before drawing off water.
Water Draw Off
1. Remove the protective cap from the filter bell.
2. Depress the draw-off lever.
3. When draw off is complete, lift the draw-off lever and
replace the protective cap on the filter bell.
Run and Standby Modes
Since not all qualities of permissible feedwater will reach
maximum resistivity after one pass through the unit’s car-
tridges (especially as the cartridges near exhaustion), the
EASYpure LF has two operational modes.
In the run mode, the pump continuously recirculates water
through the cartridges. This is the mode that the unit enters
upon startup. If water will be drawn from the EASYpure LF
on a continuous basis throughout the day, it is recommend-
ed that the EASYpure LF be left in the run mode. In the run
mode, the purity meter display indicates the resistivity of
the water available for draw off.
In standby mode, the pump runs for ten minutes out of ev-
ery hour (i.e. ten minutes on, fifty minutes off). If water will
be drawn from the unit only infrequently, it is recommended
that the unit be put into standby mode. To put the unit into
standby mode, press the “STANDBY” button on the front of
the unit. The purity meter’s digital display will display “Sby”
to indicate that the unit is in standby mode.
NOTE
On initial startup, the purity meter may display
“ERR.” This is caused by air in the cell and
should be replaced by a resistivity reading al-
most immediately. If “ERR” does not go out
after the pump has run for a minute or if it
appears any time while the EASYpure LF is in
operation, refer to the Troubleshooting section
of this manual.
NOTE
For low organic applications, draw off 50 to 100
ml of water from system and discard prior to
drawing water for use.
Normal Operation

15
Installing Float or Pressure
Switch
Accessories D0606 (float switch) and D2706 (pressure
switch) are designed to protect the EASYpure LF pump
by alerting the EASYpure LF of an inadequate feedwater
condition so that the pump can be shut down. Use the
following instructions for installation.
1. Disconnect electrical power.
2. If using D0606 float switch, follow the installation in-
structions included with the float switch for installa-
tion to tank.
3. If using D2706 low pressure switch, install the PVC
tee (supplied with D2706) in incoming water line.
Screw the switch into the top of the tee, then con-
nect the inlet tubing to the EASYpure LF with the
remaining opening.
4. Route cable from float or low pressure switch to the
rear of the EASYpure LF.
5. Remove jumper plug and save for future use.
6. Plug cable into jumper plug outlet.
7. Reconnect electrical cord.
Installing Float or Pressure
Switch
Figure 6 Float and Pressure Switch Installation

16
Maintenance and Servicing
Cartridge Replacement
The frequency with which you will need to replace cartridg-
es is dependent on your feedwater’s characteristics, your
purity requirements and your usage. Replace the cartridges
when the product water purity drops below acceptable lev-
els of resistivity or when organic levels become too high.
Cartridge Removal
1. Turn unit off.
2. Disconnect the unit from the power supply.
3. Disconnect incoming water line at quick disconnect.
Depressurize system by opening outlet valve.
4. Open the cartridge access door in the rear of the unit
by sliding the latch down and pulling the door toward
you. The door will swing down.
5. Grasp one of the cartridges at the bottom and pull it
straight up to disconnect the lower end cap from the
lower socket.
6. Move cartridge upward until upper socket is in keyhole
of keyway.
7. Pull cartridge straight out from unit to disconnect
upper end cap from upper socket.
8. Repeat steps for the other cartridges.
9. Discard the used cartridges. (See note below.)
10. Install new cartridges and rinse according to the in-
structions for Cartridge Installation in the Initial Op-
eration section.
WARNING
Disconnect from the power supply prior to
maintenance and servicing.
Refer servicing to qualified personnel.
Do not disassemble water lines or remove car-
tridges where spilled water could contact equip-
ment that requires electrical service. Disassem-
bly of water lines and removal of cartridges will
result in water spillage. Electrical shock hazard
could result.
NOTE
The cartridges will still contain water when re-
moved. Therefore, you will want to have a sink,
bucket or other waterproof container available
to place them in after removal.
WARNING
Depressurize system prior to opening cartridge
access door.
NOTE
If the EASYpure LF is wall mounted, remove
the power cord and rotate the EASYpure LF
until the cartridge access door faces forward
and the EASYpure LF locks into place.
NOTE
A small amount of water will drain from the car-
tridge when it is disconnected from the lower
socket. Plug the cartridge’s lower opening with
your finger to minimize water spillage while you
finish removing the cartridge.
Maintenance and Servicing

17
0.2 Micron Filter Replacement
Replace the 0.2 micron filter whenever any of the follow-
ing conditions occur: every 30 days, the
product water flow rate is reduced or bacteria break
through. The 0.2 micron filter is shipped assembled with
a bell. To replace the 0.2 micron filter assembly:
1. Remove the old 0.2 micron filter assembly by turn-
ing it counter-clockwise until it is free from the Luer
fitting.
2. Remove the new 0.2 micron filter assembly from its
bag and insert it into the Luer fitting. Gently turn it
clockwise until it is fully seated in the Luer fitting.
3. Rinse at least 10 liters of water through the filter to
drain prior to using the product water.
General Cleaning Instructions
Wipe exterior surfaces with lightly dampened cloth con-
taining mild soap solution.
System Sanitization
The frequency with which you will need to clean your
unit and replace your cartridges is dependent on your
feedwater’s characteristics, your purity requirements and
your usage. Sanitize your EASYpure LF and replace the
cartridges when the product water purity drops below ac-
ceptable levels of resistivity, when organic levels
become too high, or if a new 0.2 micron filter clogs
rapidly after installation even though the cartridges were
thoroughly rinsed before the 0.2 micron filter was
installed. To sanitize the EASYpure LF, the purification
cartridges must be replaced with a sanitization cartridge
and the two empty cartridges. The simple-to-use saniti-
zation cartridge (Catalog Number D50245) and two
empty cartridges (D7034) are available from
Barnstead|Thermolyne or your local representative.
1. Turn the unit off.
2. Disconnect the unit from the power supply. Discon-
nect the unit from the water supply.
NOTE
Used cartridges may be recycled. See P.U.R.E. in-
formation packed with new cartridges.
CAUTION
Do not overtighten the 0.2 micron filter assembly
onto the Luer fitting or use excessive force in seat-
ing it. The filter and/or Luer fitting can be damaged
by overtightening or excessive force.
NOTE
If a newly installed 0.2 micron filter clogs rapidly
after installation, the EASYpure LF may need to
be sanitized to remove bacterial contaminants.
See System Sanitization.
WARNING
Disconnect from the power supply prior to main-
tenance and servicing. Refer servicing to quali-
fied personnel.
Avoid splashing disinfecting solutions on clothing
or skin.
Ensure all piping connections are tight to avoid
chemical leakage.
Ensure adequate ventilation.
Carefully follow manufacturer’s safety instructions
on labels of chemical containers and material
safety data sheets.
NOTE
The cartridges will still contain water when re-
moved. Therefore, you will want to have a sink,
bucket or other waterproof container available to
place them in after removal.
MAINTENANCE AND SERVICING

18
3. Depressurize system by opening the draw-off
valve.
4. Open the cartridge access door in the rear of the unit
by sliding the latch down and pulling the door toward
you. The door will swing down.
5. Remove exhausted cartridge in the right-hand position
by pulling it first up and then out.
6. Remove a D50245 sanitization cartridge from its pack-
aging. Press the upper end cap of the D50245 saniti-
zation cartridge into the upper right position until it bot-
toms out.
7. Lower the cartridge and insert the lower end cap into
the lower socket until it is firmly seated.
8. Repeat steps 2 - 6 with the two empty cartridges sup-
plied with your EASYpure LF, placing them in the cen-
ter and left-hand positions.
9. Close the cartridge access door. Remove the 0.2 mi-
cron filter and bell assembly.
10. Sanitize, install new cartridges and rinse according to
the instructions for Cartridge Installation and Rinse Up
in the Initial Operation section.
Fuse Replacement
1. Turn the system off.
2. Disconnect incoming water line at quick disconnect.
Depressurize system by opening outlet valve.
3. Disconnect the EASYpure LF from the power supply.
4. Remove the power cord from the power entry module,
and remove the pump interlock plug from the rear of
the unit.
5. Remove the screws securing the EASYpure LF cover.
6. Remove the cover by lifting it straight up.
7. Pull out the fuse drawer located in the power entry
module.
WARNING
Depressurize system prior to opening cartridge
access door.
NOTE
If the EASYpure LF is wall mounted, remove
the power cord and rotate the EASYpure LF
until the cartridge access door faces forward
and the EASYpure LF locks into place.
NOTE
The two flanges on the end cap should be able
to slide down on each side of the keyway wall.
WARNING
Depressurize system prior to opening cartridge
access door.
MAINTENANCE AND SERVICING

19
8. Replace fuse drawer.
9. Replace cover, power cord, and pump interlock
plug.
10. Reconnect unit to power supply, and connect in-
coming water line at quick disconnect.
Printed Circuit Board Replacement
1. Turn system off.
2. Disconnect incoming water line at quick disconnect.
Depressurize system by opening outlet valve.
3. Disconnect the EASYpure LF from the power sup-
ply.
4. Remove the power cord from the power entry mod-
ule, and remove the pump interlock plug from the
rear of the unit.
5. Remove the screws securing the EASYpure LF cov-
er.
6. Remove the cover by lifting it straight up.
7. Remove the filter and the Luer fitting.
8. Remove the screws securing the front cover. Re-
move the front cover.
9. Disconnect the membrane switch lead from the
printed circuit board.
10. Disconnect the resistivity cell lead from the printed
circuit board.
11. Disconnect the printed circuit board relay plug by
squeezing the retaining clip while pulling the plug
straight out from the frame.
12. Remove the nuts holding the printed circuit board in
place.
13. Remove the printed circuit board. Disconnect power
WARNING
Replace fuses with those of the same type and
rating. (See Parts Listing)
WARNING
Depressurize system prior to opening cartridge ac-
cess door.
MAINTENANCE AND SERVICING

20
supply (3 wires) from printed circuit board.
14. Reconnect power supply to new printed circuit board
and install the new printed circuit board. Refer to elec-
trical diagrams.
15. Reconnect the resistivity cell lead and printed circuit
board relay plug.
16. Reconnect the membrane switch lead.
17. Reinstall the front cover.
18. Retape the Luer fitting with new Teflon tape and rein-
stall fitting.
19. Reinstall the EASYpure LF’s cover.
20. Reconnect the power cord and the pump interlock
plug to the unit, and reconnect the unit to the power
supply. Connect the incoming water line at quick dis-
connect.
MAINTENANCE AND SERVICING
Figure 7 Printed Circuit Board
This manual suits for next models
1
Table of contents
Other Barnstead Water Filtration System manuals
Popular Water Filtration System manuals by other brands
Victron energy
Victron energy VDI-16 installation manual

Philips
Philips WP3970/01 user manual
Blanco
Blanco EVOL Mono Hot & Filter HD manual
Monacor
Monacor DNH-185 quick start guide
Aquadistri
Aquadistri SuperFish Aqua-Flow 50 user manual
HYDAC FILTER SYSTEMS
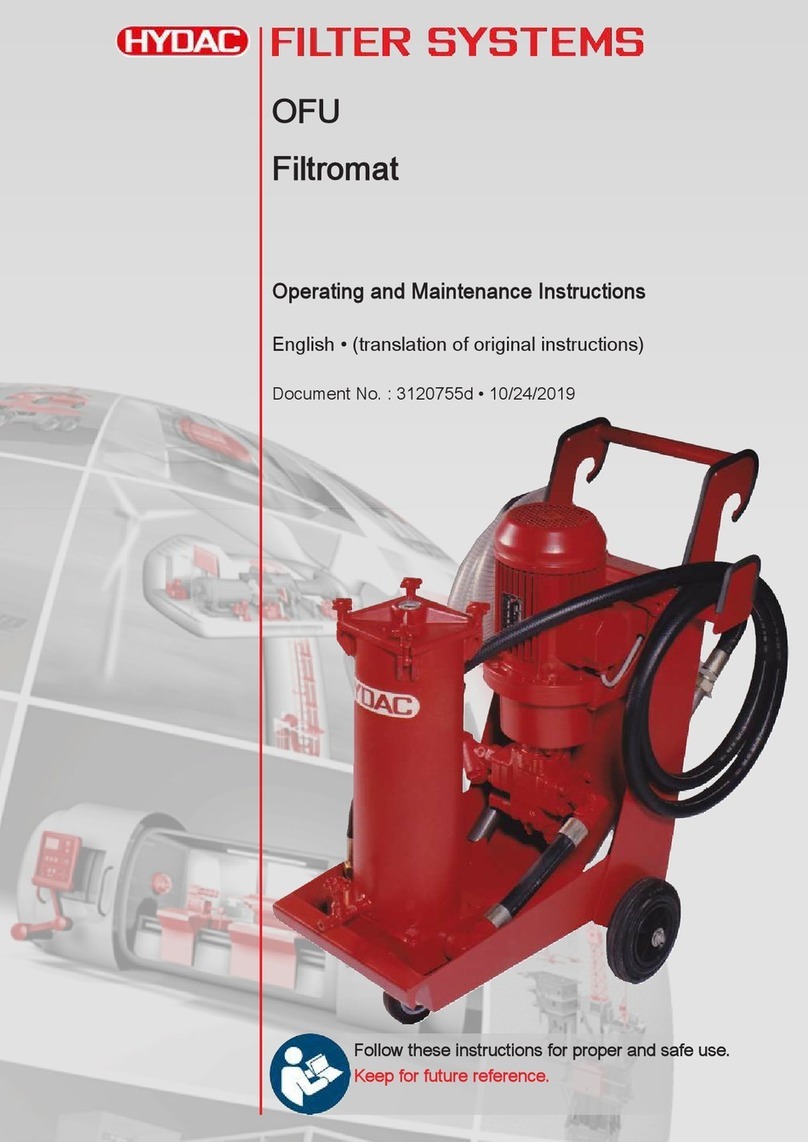
HYDAC FILTER SYSTEMS OFU Filtromat Operating and maintenance instructions
