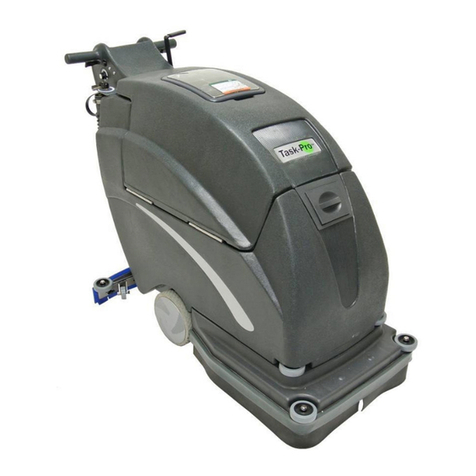
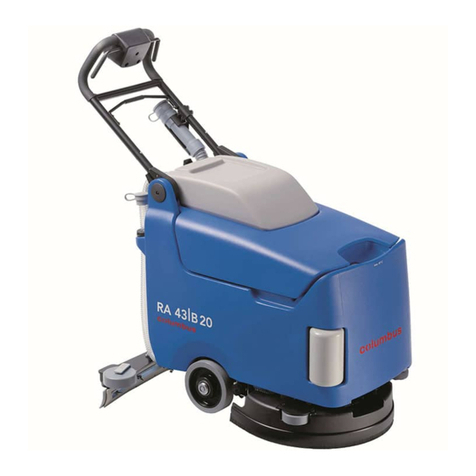
BART BAR100-20BD User manual

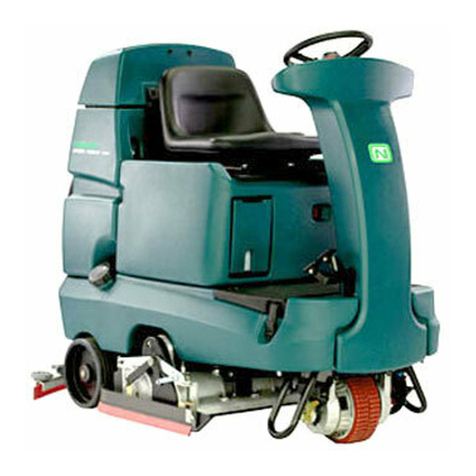
20” Self-Propelled
Automatic Floor Scrubber
BAR100-20BD
Bart Cleaning Equipment Ltd. | Hamilton, ON. | www.bartclean.com
Owners Guide & Manual
Version 2021-08

BAR100-20BD | OWNER’S GUIDE
Contents
Precautions........................................................................................................................................ 2-3
Instructions on Machine Operation................................................................................................ 6
Reception of Machine....................................................................................................................... 4
Machine Unpackaging...................................................................................................................... 4
Battery Installation ........................................................................................................................... 4
Machine Cleaning Method............................................................................................................... 5
Information on Brush and Scouring Pad ....................................................................................... 5
Machine Installation ......................................................................................................................... 5
Installation and Connection of Squeegee Component ................................................................ 5
Installation of Brush/Scouring Pad................................................................................................. 5
Machine Operation........................................................................................................................... 6
Pre-operational Examination .......................................................................................................... 6
Machine Operation........................................................................................................................... 6
Machine Operation Duration .......................................................................................................... 6
Battery Coulombmeter .................................................................................................................... 7
Drainage of Water Tank ................................................................................................................... 7
Drainage of Waste Water Tank ....................................................................................................... 7
Battery Charging ............................................................................................................................... 8
Machine Maintenance...................................................................................................................... 8
Daily Maintenance ............................................................................................................................ 9
Monthly Maintenance ...................................................................................................................... 9
Quarterly Maintenance .................................................................................................................... 9-10
Machine Transport ........................................................................................................................... 10
Machine Storage ............................................................................................................................... 10
Troubleshooting................................................................................................................................ 11
Machine Parameters ........................................................................................................................ 12
Structure ............................................................................................................................................ 13
Recovery Tanker Assembly.............................................................................................................. 14
Water Tank Assembly....................................................................................................................... 15
Frame System.................................................................................................................................... 16
Squeegee Assembly.......................................................................................................................... 17
Brush Assembly ................................................................................................................................ 18-19
Pushing Handle Assembly ............................................................................................................... 20-21

1
WWW.BARTCLEAN.COM
This Guide provides necessary instructions on machine operation and maintenance.
Before operation or use of this machine, please carefully read and understand this
Guide.
When ordering the replacement parts, please refer to the spare and accessory parts
manual attached to the machine. Before matching parts or accessories, please rstly
determine your machine model and serial number. You can order parts and accesso-
ries from any authorized service centre or dealer by telephone or mail.
Protect the environment
Please abandon the old machine components such as packaging material, battery, etc.
and toxic liquid such as anti-freezing agent and oil according to your local regulations
on waste disposal and on the premise of maintaining the environmental safety.
Please ensure to carry out the recycling well.
Machine Information
Please ll in when installing for future reference.
Model number-
Machine number-
Machine option-
Sales representative-
Tel. of sales representative-
Customer ID
Installation date

2
BAR100-20BD | OWNER’S GUIDE
Precautions
This machine is suitable for industrial and commercial use and specially used for clean-
ing indoor hard oors. Please use the suggested scouring pad and brush as well as the
commercially available oor cleaner suitable for this machine.
Warning: re or explosion hazard: -Do not use ammable liquid; do not operate the
machine close to or in the place where there is ammable liquid, air or dust.
This machine is not equipped with explosion-proof motor. If this machine is used in
the place where there is ammable air, liquid or dust, electric motor may generate
spark during the start and operation, which may cause ash re or explosion.
• Please do not pick up ammable materials or reactive metals.
Warning: Electric shock hazard. Please rstly disconnect the battery wring before
maintaining the machine.
Warning: Operation of rotary brush. Do not get close with hands. Please turn o the
power before maintaining the machine.
The following information explains the conditions causing potential dangers to the oper-
ators or equipment:
For safety:
1. Please do not operate the machine:
• when contacting ammable liquid or getting close to ammable air, otherwise it
may cause explosion or ash re.
• unless being trained and authorized to operate the machine. -unless having read
and understood the operation manual.
2. Before starting the machine:
• Please ensure that all safety equipment have been in place and operated correctly.
3. When using the machine:
• Please walk slowly when encountering a slope.
• Please wear anti-skid shoes.
• Please slow down when turning.
• Report immediately when the machine is broken or the operation fails.
• Do not let the children play on or around the machine.
• Observe the mixing ratio and processing instructions on the chemical vessel.
4. Before leaving or maintaining the machine:
• Stop and place the machine on the ground.
• Shut down the machine.

3
WWW.BARTCLEAN.COM
5. When repairing the machine:
• Avoid moving parts. Please do not wear loose clothing.
• Please do not spray this machine with high pressure washer
• Use the replacement parts provided by the manufacturer.
• All maintenance must be carried out by qualied maintenance personnel.
• Please do not revise the original design of the machine.
6. When transporting the machine:
• Please do not transport the machine with the power on.
• Please transport the machine with the aid of the others.
• Lower the brush head to the lower position.
Reception of Machine
Machine Unpackaging
1. Please carefully check whether there is damage on the packing box of the machine.
If there is, please immediately refer to the carrier.
2. Check the freight list, if there is any omission, please contact the distributor.
Freight content:
• Two 12V batteries - standard conguration
• One 24V battery charger - standard conguration
• One scrubbing brush - standard conguration
• Other accessories - additionally purchased

4
BAR100-20BD | OWNER’S GUIDE
3. Before unpackaging the machine, please dismantle the cargo xed parts and ropes
xing the machine on the warehouse. Carefully unload the machine from the ware-
house with the aid of the others.
Note: If no handling apron is used, please do not push the machine directly so as to
avoid machine damage.
Note: To avoid machine damage, please install the battery after unloading the ma-
chine from the warehouse.
Battery Installation
Warning: re or explosion hazard. The battery releases hydrogen. Please be away
from spark or open re. The battery cover must be kept open when charging.
For safety: Please wear protective gloves and eye protectors when treating the bat-
tery and battery wiring when repairing the machine. Avoid contacting the battery liquid
acid.
1. Stop and place the machine on the level ground and take out the key.
2. Lift up the waste water tank to expose the touchable battery compartment.
3. Carefully install the battery in the battery cabin and connect the battery cable ac-
cording to the following gure:
Note: Please do not throw the battery into the battery cabin so as to avoid the damage
to the battery and the machine.
4. Before connecting the battery, please rstly ensure whether the electrodes and elec-
tric terminals are clean. Use electrode cleaning uid and wire brush as required.
Explanation: Paint a thin layer of metal-free lubricating oil or protective spray on the
connected wiring to avoid battery corrosion.
5. After the battery is installed, please check the scale of the battery coulombmeter.
Charge the battery as required.
Machine Cleaning Method
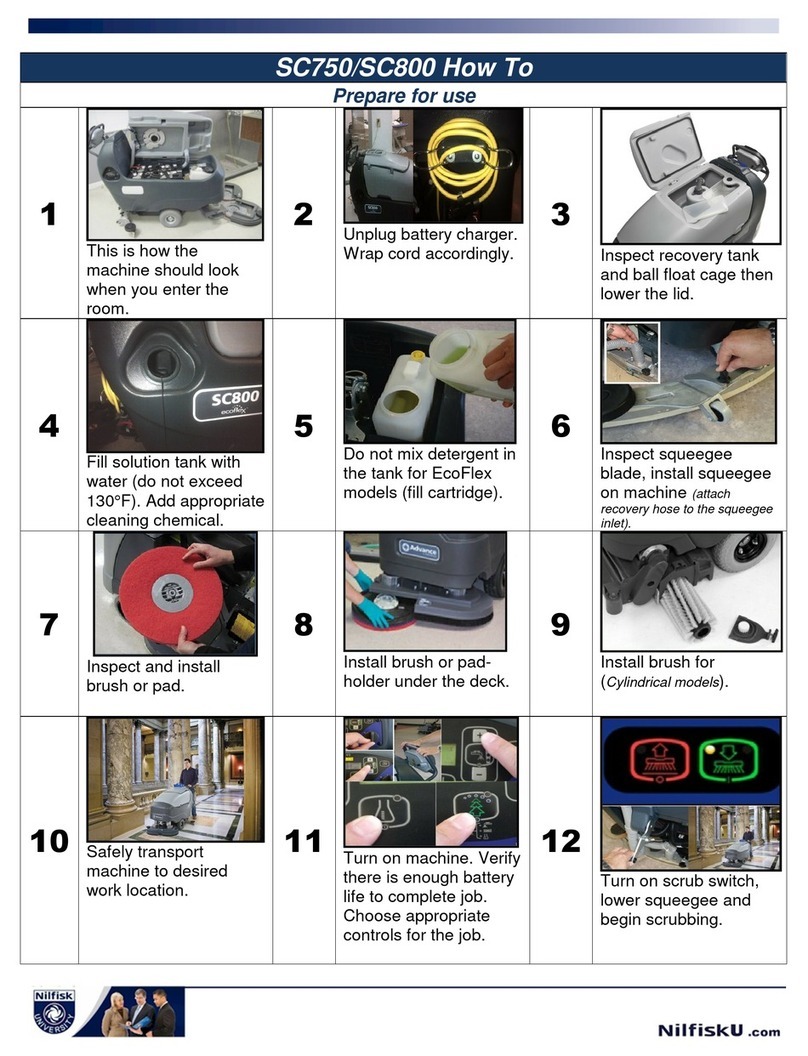
Cleaning method: Manually control the water valve to adjust the volume of the
cleaning liquid (water and detergent) owing to the ground. The brush cleans the oor
with the solution mixing detergent and water. While the machine advances, absorb the
waste water on the oor with squeegee into the waste water tank.
Information on Brush and Scouring Pad
To ensure the optimum eciency, please use the correct type of brush for cleaning.
The brush and scouring pad suggested for use are as follows:

5
WWW.BARTCLEAN.COM
Soft nylon brush (white) - It is suggested to clean the coated oor without damaging
the oor. Clean without scratches.
Polishing pad (white) - It is used for maintaining highly smooth or polished oor.
Red - It is used for scrubbing slight dirt without damaging the oor.
Black - It is used for powerfully removing the heavy coating or base or super-powerful
scrubbing.
Machine Installation
Installation and Connection of Squeegee Component
1. Stop and place the machine on the level ground and take out the key.
2. Lower the lifting rod of the squeegee to the lower position.
3. Install the squeegee to the squee-
gee installation bracket as shown in
the gure. Ensure to fully place the
fastening knob into the jack and then
tighten the knob.
4. Connect the vacuum suction pipe
to the squeegee component.
5. Examine the squeegee adhesive
tape and reasonably adjust.
Installation of Brush/Scouring Pad
Explanation: As for the brush and scouring pad suggested for use, please refer to the
section of [Information on Brush and Scouring Pad] in this Guide or consult your local
authorized dealer.
1. Stop and place the machine on the level ground and take out the key.
2. Step on the brush head lifting pedal to lift up the brush head from the ground.
3. Place the scouring pad on the holder and then install the drive disc. Fasten the cen-
tral lock to x the scouring pad.
4. Align the holder/brush installation stud at the motor drive disc buckle and press the
motor switch of the brush.
5. If the holder and brush are to be dismantled, step on the brush head lifting pedal to
lift up the brush head from the ground, press the motor switch of the brush.

6
BAR100-20BD | OWNER’S GUIDE
Machine Operation
For safety: Please do not operate this machine before reading and understanding the
operation manual. Warning: re or explosion hazard. Do not operate the machine
close to or in the place where there is ammable liquid, air or dust.
Pre-operational Examination
• Clean the dust on the ground.
• Check the scale of the battery meter.
• Check the abrasion conditions of the scouring pad/brush.
• Check the abrasion conditions of the squeegee adhesive tape and reasonably adjust
the angle.
• Conrm that the waste water tank is empty and has been equipped with clean
oating lter screen.
• Check the abrasion conditions of the skirt section of the brush head.
1. Switch the key of the main power supply to the position of (I).
2. Pull down the squeegee lifting rod to lower the squeegee component to the ground.
3. Step on the brush head lifting pedal to lower the brush head to the ground.
4. Switch on the clean water control knob.
5. Press the motor switch of the brush and press the switch of water suction motor.
6. Motor drive model: adjust the speed control knob to the cleaning speed required by
you.
Explanation: It is suggested to use the cleaning speed of 45-60 meters/min.
Machine Operation Duration
Warning: re or explosion hazard. Please do not pick up ammable materials or
reactive metals.
1. Each cleaning path overlaps by 5cm.
2. Let the machine advance constantly to avoid ground damage.
3. If there is drag mark on the ground after the squeegee absorbs water, remove the
waste with duster cloth. Clean in advance to prevent drag mark.
4. Do not operate the machine on the slope with a slope over 5% (3°).
5. If there is too much foam, it is suggested to pour defoamer solution into the waste
water tank.

7
WWW.BARTCLEAN.COM
Note: Do not let the foam enter the lter screen so as to avoid damage to vacuum
motor.
6. Use double cleaning method to clean the extremely dirty area. Lift up the squeegee
rstly for cleaning, sink with solution for 3-5 min, lower the squeegee for re-cleaning.
7. Replace or rotate the scouring pad as required.
8. Observe the power consumption of the battery meter (refer to the battery meter).
9. Observe the residual liquid amount through the solution tank hose. In traditional
scrubbing method, the consumption for each 10 min is about 10l.
10. When the solution in the clean water tank is used up, empty the waste water tank
rstly, then re-pour the solution.
11. When the sta leaves the machine, stop and place the machine on the level ground
and take out the key.
12. After cleaning, carry out daily maintenance procedure.
Battery Meter
The battery meter will display the power quantity of the battery. When the battery is
full of power, all indicator lights will be on. Along with the consumption of the power
quantity, the indicator lights will go out from the right to the left. To prolong the life
of the battery, do not let the indicator lights go out to below the following power con-
sumption.
Explanation: To prolong the life of the battery, please ensure to charge the battery
after the total use time of the machine exceeds 30min.
Drainage of Water Tank
After each use, the waste water tank shall be drained and cleaned. The clean water
tank shall be periodically cleaned to remove any corroded parts. Carry the machine
to the drainage place, switch o the key of the power supply, and drain the water
according to the following drainage instructions: for safety: please stop and place the
machine on the level ground and shut down the machine and take out the key before
leaving or maintaining the machine.
Drainage of Waste Water Tank
1. Unscrew the drain pipe cover of the waste water tank counter clockwise and take it
down.
2. Open the cover of the waste water tank and ush the water tank.
3. Dismantle and ush the oating lter screen in the waste water tank.

8
BAR100-20BD | OWNER’S GUIDE
Battery Charging
Note: To prolong the life of the battery and ensure the optimum eciency of the
machine, the battery must be charged after the use time of the machine exceeds
30min. Please do not let the battery exist in the uncharged state for long. The follow-
ing charging instructions are suitable for the charger attached to this machine. Please
ensure to use the charger of the following specication to avoid battery damage. The
specication of the battery charger:
• Charger type: - charger for aluminic acid battery.
• Output voltage -24 V
• Output current - 25A
• APO circuit
• Suitable for deep cycle battery charging
1. Move the machine to the place with good ventilation for charging.
Warning: re or explosion hazard. The battery releases hydrogen. Please be away
from spark or open re. The battery cabin must be kept open when charging.
2. Stop and place the machine on the level ground and turn the key to the close posi-
tion.
3. For Wet Acid Batteries: Before charging, check the electrolyte level in each battery
unit.
For safety: Please wear protective gloves and eye protectors when treating the bat-
tery and battery wiring when repairing the machine. Avoid contacting the battery liquid
acid.
4. When charging, please open the side of the waste water tank to facilitate ventilation.
5. Plug the AC (alternating current) power cord of the charger to the power socket with
sound grounding.
6. Plug the DC (direct current) power cord of the charger to the battery charging socket
behind the waste water tank.
7. The charger will automatically start charging and will automatically swtich o when
it is full.
Explanation: The machine will not work when being connected to the
charger. Note: during the charging of the charger, please do not pull the DC cord of the
charger out of the socket of the machine to avoid generation of arc strike. If the charg-
ing must be suspended during the charging, please pull out the AC power cord rstly.
Warning: re or explosion hazard. The battery releases hydrogen. Please be away
from spark or open re. The battery cabin must be kept open when charging.
8. After the charging is completed, recheck the electrolyte level.

9
WWW.BARTCLEAN.COM
Machine Maintenance
Only by indeed following daily, weekly and monthly maintenance procedure can the
machine be kept in the optimum working state.
Warning: Electric shock hazard. Please rstly disconnect the battery wring before
maintaining the machine.
Daily Maintenance (after each use)
1. Drain and clean the waste water tank
2. Dismantle and ush the oating lter screen in the waste water tank
3. Drain the clean water tank and ush the water tank with hot water of no higher than
60°C as required
4. Dismantle the scouring pad/brush for cleaning. If there is any abrasion, overturn or
replace the scouring pad
5. Wipe the squeegee blades. Place the squeegee component in the rising position to
avoid damage to squeegee blades.
6. Check the abrasion conditions of the scraper edge of the squeegee blades. If there is
any wear and tear, exchange two sides of the adhesive tape.
7. Use multi-purpose detergent and wet cloth to wipe the machine.
For safety: please do not spray this machine with high pressure or ush this machine
with water pipe when cleaning the machine to avoid failure of electronic component.
8. Check the abrasion conditions of the skirt side of the brush head and replace it if
there is any wear and tear or damage.
9. Charge the battery. To prolong the life of the battery and ensure the optimum e-
ciency of the machine, the battery must be charged after the use time of the machine
exceeds 30min.
Monthly Maintenance (every 80 hours)
1. Dismantle the lter of the clean water tank from the bottom of the machine and
clean the lter screen. Ensure the clean water tank is emptied before dismantling the
lter.
2. Clean the top of the battery to prevent electrode corrosion (refer to [Battery Mainte-
nance]).

10
BAR100-20BD | OWNER’S GUIDE
3. Check whether the battery wiring is loose.
4. Check and clean the cover seal of the waste water tank and replace it if there is any
damage.
5. Spray the silica gel dry lubricant on all pivots and wheels, and cover a layer of wa-
ter-proof lubricating oil to ensure smooth operation of wheels and pivots.
6. Check whether the nuts and bolts on the machine are loose.
7. Check whether the machine leaks.
Quarterly Maintenance
Examine the abrasion conditions of the carbon brush of drive motor (drive model), vac-
uum motor and brush motor every 250 hours. When the abrasion length of the carbon
brush is within 10mm, the carbon brush needs to be replaced. If it is required to deliv-
er the machine for maintenance, please contact with the authorized service centre.
Warning: Electric shock hazard. Please rstly disconnect the battery wring before
maintaining the machine.
Machine Transport
When transporting the machine with truck or trailer, please ensure to following the
following binding procedure:
1. Lift up the brush head to the transport position
2. Use the suggested handling apron to load and unload the machine.
3. Lean the front of the machine closely against the front part of the truck or trailer.
When the machine is placed properly, lower down the brush head and turn the key to
the close position.
4. Place blocks behind each driving wheel to prevent the machine from sliding.
5. Use the rope to x the top of the machine to prevent titling. You must install bracket
on the sweeping board of the truck or trailer. For safety: when transporting the ma-
chine, please use the suggested handling apron when handling the machine from the
truck or trailer and use the rope to x the machine on the sweeping board.
Machine Storage
1. Please charge the battery before storage. Do not store the battery with the power

11
WWW.BARTCLEAN.COM
PROBLEM REASON SOLUTION
The machine can not be operated The battery has no power Charge the battery
The battery fails Replace the battery
The battery wiring is loose Fasten the battery wiring
The main fuse blows out Replace the fuse
The brush motor does not work The brush head rises up from the ground Lower down the brush head
The battery coulombmeter is locked Charge the battery
and not started
The breaker of the brush motor Reset the button of the breaker
circuit triggers blackout of the brush circuit
The brush (upper/lower) switch fails Contact with the service centre
The carbon brush of the motor wears Contact with the service centre
The vacuum motor does not work The squeegee rises up from the ground Lower down the squeegee
The fuse of the vacuum motor blows out Replace the fuse
The vacuum motor or wiring fails Contact with the service centre
The carbon brush of the motor is worn Contact with the service centre
A little or no water ows out The lter or solution pipe of the clean Clean the lter of the clean
water tank is blocked tank
The speed of the ow control knob Adjust the water control knob
is set too low
The screw of the control knob is Lubricate the knob and then
loosened fasten the screw
The waste water recovery rate The waste water tank is full Drain the waste water tank
is low The water-absorbing adhesive tape is Replace the water-absorbing
worn adhesive tape
The water suction pipe is blocked Remove the blocked scraps
The sealing strip of the waste water Replace the sealing stripe
tank is damaged
The vacuum motor fails Contact with the service centre
The running time shortens The battery has aws Replace the battery
The battery charging fails Repair or replace the charger
running out.
2. Drain and ush thoroughly the bottom of teh water tank.
3. Store the machine in a dry palce and the brush head shall be kept in the rising
position.
4. Open the cover of the waste water tank. Note: Don not let the machine subject to
the rain and store it indoor.
5. If the machine is stored in a cold environment, please indeed drain all liquid in the
machine.
Troubleshooting

12
BAR100-20BD | OWNER’S GUIDE
Technical Parameters
Parameters of AR-S5/S5D Ride behind Scrubber
Technical parameter Unit AR-S5/S5D
Productivity m2/h 2800
Squeegee width mm 790
Cleaning width mm 530
Clean water tank capacity L 60
Waste water tank capacity L 60
Working votage v 24V/100AH
Brush motor w 500
Vacuum motor w 370
Brush pressure Kpa 18-31
Noise level dB(A) 60
Brush speed Rpm 220
Machine weight kg 129
Dimension mm 1270*550*1090
Working hours h 4-5

13
WWW.BARTCLEAN.COM
ITEM PART No PART NAME QTY
1 ZBA230600 Recovery tank assembly 1
2 ZBA230700 Water tank assembly 1
3 ZBA230200 Frame system 1
4 ZBA230300 Brush assembly 1
5 ZBA230800 Squeegee assembly 1
6 ZBA231400 Push handle assembly 1
Structure

14
BAR100-20BD | OWNER’S GUIDE
ITEM PART No PART NAME QTY
1 ZBA230601 Recovery tank cover 1
2 ZBA230602 Overow net 1
3 ZBA230603 Recovery tank 1
4 ZBA230604 Hinge 2
5 ZBA230605 Screw 3
6 ZBA230606 Vacuum motor OEM 1
7 ZBA230607 Motor cover 1
8 ZBA230608 Drain hose 1
9 ZBA230609 Suction hose 1
10 ZBA230610 Water inlet 1
Recovery Tanker Assembly

15
WWW.BARTCLEAN.COM
ITEM PART No PART NAME QTY
1 ZBA230701 Water inlet cover 1
2 ZBA230702 Inlet lter net 1
3 ZBA230703 Front cover 1
4 ZBA230704 Bracket 1
5 ZBA230705 Water pipe 1
6 ZBA230706 Water lter net seat 1
7 ZBA230707 Copper pipe 1
8 ZBA230708 Water lter 1
9 ZBA230709 Water valve 1
10 ZBA230710 Copper pipe 1
11 ZBA230711 Squeegee lift assembly 1
12 ZBA230712 Pressure lifting bracket 1
13 ZBA230713 Pressure plate 2
14 ZBA230714 Joint 1
15 ZBA230715 Small water inlet 1
Water Tank Assembly

16
BAR100-20BD | OWNER’S GUIDE
ITEM PART No PART NAME QTY
1 ZBA230251 Frame 1
2 ZBA230252 Drive motor bracket 2
3 ZBA230253 Motor xed screw 2
4 ZBA230254 Drive wheel 2
5 ZBA230255 Traction motor and axle 1
6 ZBA230256 Caster 2
7 ZBA230257 Water lter bracket 1
8 ZBA230258 Spring 1
9 ZBA230260 Squeegee adjustable bracket 1
10 ZBA230261 Buckle 1
11 ZBA230262 Lift lever assembly 1
Frame System

17
WWW.BARTCLEAN.COM
ITEM PART No PART NAME QTY
1 ZBA230801 Fender wheel 2
2 ZBA230802 Squeegee body 1
3 ZBA230803 Squeegee wheel support bracket 2
4 ZBA230804 Upper squeegee plate 1
5 ZBA230805 Squeegee kit 1
6 ZBA230806 Rear squeegee strap (metal) 1
7 ZBA230807 Rear rubber 1
8 ZBA230808 Bottom squeegee plate 1
9 ZBA230809 Bolt 4
10 ZBA230810 Cross Nut 4
Squeegee Assembly

18
BAR100-20BD | OWNER’S GUIDE
Brush Assembly
Table of contents
