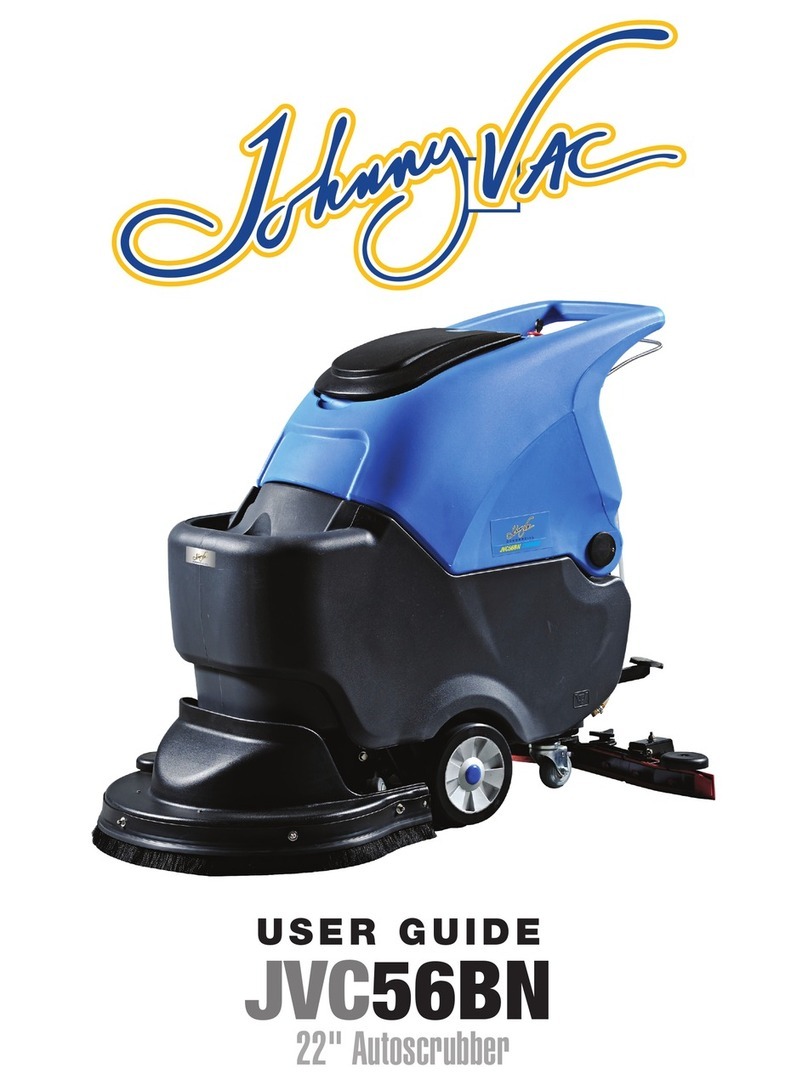
Johnny Vac JVC50BC User manual

Floor Scrubber
JVC50BC /
JVC56BT
Operator Manual
Please read this manual before operating the machine.


INDEX
1.!IDENTIFYING+THE+MACHINE......................................................................................................5!
2.!GENERAL+INFORMATION.............................................................................................................8!
3.!TECHNICAL+INFORMATION ........................................................................................................8!
3.1.!General+description.............................................................................................................................. 8!
3.2.!Danger+zones .......................................................................................................................................... 8!
a)!Tank!assembly:!when!using!detergent,!user!should!be!careful!not!to!spray!some!over!is!skin!
or!eyes;!be!aware!of!danger!of!germs!or!chemical!substance!from!the!dirt;!danger!of!being!
crushed!in!between!two!tanks!when!the!dirty!water!tank!is!replaced!on!the!solution!tank. ........... 8!
b)!Control!panel:!danger!of!short-circuits. .......................................................................................................... 8!
c)!Bottom!of!washing!head:!danger!due!to!rotating!brush........................................................................... 8!
d)!Rear!wheels:!danger!of!being!crushed!in!between!the!wheel!and!chassis. ..................................... 8!
e)!Battery!compartment:!danger!of!short-circuits!between!the!battery!poles!and!presence!of!
hydrogen!during!charging. ............................................................................................................................................. 8!
4.!SAFETY+INFORMATION ................................................................................................................9!
5.!HANDLING+AND+INSTALLATION ............................................................................................ 10!
5.1.!Lifting+and+transportation ...............................................................................................................10!
5.2.!Check+on+delivery................................................................................................................................10!
5.3.!Unpacking..............................................................................................................................................10!
5.4.!Electrical+connections+and+ground................................................................................................10!
5.5.!Battery+Installation+(battery) .........................................................................................................11!
6.!OPERATION................................................................................................................................... 12!
6.1.!Controls+description...........................................................................................................................12!
6.2.!Squeegee+mounting+and+adjustment ............................................................................................12!
6.3.!Moving+the+machine+without+operating+it ..................................................................................12!
6.4.!Brush+mounting+and+adjustment...................................................................................................12!
6.5.!Preparation+before+operation.........................................................................................................13!
6.6.!Working..................................................................................................................................................13!
6.7.!Useful+cleaning+tips ............................................................................................................................14!
7.!PERIODS+OF+INACTIVITY.......................................................................................................... 14!
8.!BATTERIES+MAINTENANCE+AND+CHARGING ..................................................................... 14!
8.1.!Recharging+procedure.......................................................................................................................14!
9.!MAINTENANCE+INSTRUCTIONS.............................................................................................. 15!
9.1.!Maintenance+-+General+rules ...........................................................................................................15!
9.2.!Routine+maintenance.........................................................................................................................15!
10.!TROUBLESHOOTING ............................................................................................................... 16!
11.!TECHNICAL+SPECIFICATIONS ............................................................................................... 19!

- 5 -
1. IDENTIFYING+THE+MACHINE+
1. Recovery tank cover
2. Power switch
3. Brush motor switch
4. Vacuum motor switch
5. Battery meter
Fig. 1
6. Recovery tank
7. Uncovered handle
8. Solution tank
9. Brush guard cover
Fig. 2
10. ??
11. ??
12. ??

- 6 -
13. Water inlet filter net
Fig. 3
14. Wheel
Fig. 4
15. Squeegee blades
Fig. 5

- 7 -
16. Vacuum motor
17. Suction canal
18. Exhaust outlet
19. Power control board
20. Battery
Fig. 6
21. Driven lever
22. Tap lever
23. Drain hose
24. Squeegee lever
25. Recharger connector plug
26. Lowering and raising pedal
27. Squeegee bracket
28. Suction hose
29. Solution tank outlet cap
30. Water filter
Fig. 7

- 8 -
2. GENERAL+INFORMATION+
This manual has been written by the manufacturer. It contains all the details required by operators.
Respect these instructions; not only it will help to guarantee the operator’s safety and machine’s good function but it
will also prolong its lifetime and get better performance.
Parts of the text illustrated and described by bold words, preceded by symbols, should be given high attention:
DANGER
Warn of hazards or unsafe practices that could result in sever personal injury or death.
IMPORTANT
Pay attention to the user instructions in order to avoid damaging the machine, the floor or loss on economy.
3. TECHNICAL+INFORMATION+
3.1. General+description+
This machine is an automatic floor scrubber dryer for sweeping, washing and drying flat, horizontal, smooth floor. It
can be available in both battery and cable versions to meet running time and using environment requirements.
The scrubber dryer can spread solution water and detergent in the correct direction on the floor and then scrub and
remove the dirt. With correct detergent and brushes, this machine can be adapted to a wide range of floors and dirts.
The squeegee collects the dirty water into the recovery tank. By means of the negative pressure, a suction system
installed inside the recovery tank dries the floor after washing.
3.2. Danger+zones+
a) Tank assembly: when using detergent, user should be careful not to spray some over is skin or eyes; be
aware of danger of germs or chemical substance from the dirt; danger of being crushed in between two
tanks when the dirty water tank is replaced on the solution tank.
b) Control panel: danger of short-circuits.
c) Bottom of washing head: danger due to rotating brush.
d) Rear wheels: danger of being crushed in between the wheel and chassis.
e) Battery compartment: danger of short-circuits between the battery poles and presence of hydrogen during
charging.

- 9 -
4. SAFETY+INFORMATION+
The manufacturer declines all liability for damage to people or property resulting from failure to observe the
instructions.
IMPORTANT
•This machine must be exclusively operated by trained and authorized people.
•This machine must not be operated by minors.
•This machine must not be used for other purposes than those expressly designed.
•Scrupulously respect all safety standards and conditions when this machine is operated in some special
circumstance e.g. hospitals, chemicals, etc.
•Do not use this machine in some places where lightning is inadequate or explosive atmosphere or in presence of
dirt hazard to health environment.
•This machine is designed to work in a humidity of 30 % to 95 %.
•Never use to clean flammable liquids, explosive gases, dry ducts, acids and solvents.
•Never use this machine on slopes or ramps of more than 2 %.
•In the case of slight slopes, do not use the machine transversally or reverse it. When it is transported on steeper
ramps or slopes, ….
•Make sure to raise up the brush head and squeegee when moving the machine on ramps.
•Never park the machine on a slope.
•The machine must not be left unattended with motor or engine on. Before leaving it, turn off the motor or engine
and make sure it cannot move.
•Never obstruct ventilation or heat dispersion slits.
•Based on numerous unpleasant experiences, user should remove jewellery, watches and ties before operation to
prevent the cause of some serious accidents.
•Keep your hands away from moving part.
•Never use detergents other than the ones specified”
•Make sure the power socket used for this machine recharge is correct.
•Make sure the characteristics of the machine, such as working voltage, current, frequency, meet its rated ones.
•It is indispensable to respect the battery manufacturer’s instructions and current legislation. The batteries should
always be kept clean and dry to avoid surface leakage current. Keep the batteries away from metal dust. Never
leave any tools on batteries as this may cause short circuit and explosion. Hen using acid batteries, user should
comply with relevant safety instructions scrupulously.
•In the presence of particularly strong magnetic fields, the machine’s electronic control system may be affected.
•Never wash the machine with high-pressure water jets.
•The collection of sewage or detergent should be disposed off in accordance with current legislation.
•In case of malfunction and faulty operation, turn the machine off and report immediately.
•All maintenance operations must be performed in an adequate place. Make sure to shut off the machine before
proceeding. Only authorized personnel must perform maintenance or repair operations.
•Only original accessories and spare parts supplied by the manufacturer may be used in order to guarantee safety
on operation of the machine. Never use the parts removed from other machines.
•The machine must be disconnected from the power supply, emptied of liquids and cleaned completely.
•Special waste cannot be disposed of with ordinary waste.
•Alternatively, the machine must be returned to manufacturer for a complete overhaul.
•If you decide to stop using the machine, you are recommended to remove the batteries and dispose of them at an
authorized collection center.

- 10 -
5. HANDLING+AND+INSTALLATION+
5.1. Lifting+and+transportation+
IMPORTANT
During all lifting operations, make sure the packaged machine is firmly fastened to avoid being accidentally tipped of
dropped. The machine should be loaded by lorries in the circumstance of sufficient light.
The machine, packaged on a wooden pallet by the manufacturer, must be loaded onto the transporting vehicle. At
destination, it must be unloaded using similar means.
A forklift truck must always be used to lift the package body of the machine. Handle with care to avoid knocking or
overturning the machine.
5.2. Check+on+delivery+
Please check and make sure the package and machine are both good enough during transportation. If the machine is
damaged, you are to request compensation for the damage from the forwarder.
5.3. Unpacking+
IMPORTANT
When unpacking the machine, the operator must be provided with the necessary protection devices to limit the risk
of accident.
Unpack the machine as follow:
a) Remove the cardboard.
b) Remove the metal brackets.
c) Cut the plastic straps and check that all is in good condition.
d) Find and read the operator manual.
e) Unpack battery connector wire with terminal (model with battery);
f) Unpack the power cord cable (cable model).
g) Push the machine backwards off the pallet by using a sloping ramp.
h) Clean the outside of the machine in respect of safety regulations.
i) After unpacking the machine, please install the machine accordingly to specifications.
The package carton may be kept, as it can be used to protect the machine if it is moved to another site or to a repair
workshop. It must be disposed off in compliance with current legislation.
DANGER
Failure to observe theses instructions could cause serious damage to people or things and invalidate the guarantee.
5.4. Electrical+connections+and+ground+
The machine working voltage and rated frequency are given on the label. Make sure the voltage and frequency
correspond to the rated ones.
IMPORTANT
Check and make sure the power cord is correctly connected to power socket to avoid getting an electric shock.

- 11 -
5.5. Battery+Installation+(battery)+
Two different types of battery may be installed:
Leak proof battery: the electrolyte level must be checked regularly. When necessary, please fill up with distilled water
until the plates are covered.
Gel battery: this type of battery is maintenance free. The type of battery used must correspond to machine’s technical
specifications. The use of heavier batteries could seriously jeopardise machine’s manoeuvrability and lead to motor
brush overheating. While the use of batteries with lower capacity and weight requires more frequent charge.
CAUTION
To protect and extend batteries life, the machine cannot be used continuously when the power is used up.
5.5.1. Batteries+-+Preparation+
DANGER
The operator must be provided with the necessary protection devices to limit the risk of accident when installing the
batteries or doing maintenance. Keep away from naked flames, sparks, smokes and avoid short-circuit.
The batteries are normally filled with acid and ready for use. If the batteries are dry, it should be proceeded before
mounting. Remove the cap and fill every element with specific sulphuric acid solution until the plates are entirely
covered.
Leave for 4 or 5 hours to allow the plates to absorb the electrolyte. Make sure the level of electrolyte is still above the
plates or fill up with sulphuric acid solution. Close the caps. Mount the batteries on the machine
Before using the machine for the first time, please charge the batteries, following instructions.
5.5.2. Batteries+-+Installation+and+connection+
DANGER
Check that all switches on the control panel are in the “O” (off) position.
a) Make sure to connect the terminal “+” with positive pole of the battery.
b) Follow the instructions given below or it may cause an explosion.
c) Make sure the two tanks are empty.
d) Lift the recovery tank and tilt it backwards by about 90oto uncover the batteries compartment.
e) Place the batteries into the compartment correctly.
IMPORTANT
Mount the batteries suitable for their weight and pay attention to the differences between positive and negative
poles.
a) Connect the battery cable based on the wiring diagram and tighten the terminals on the poles.
b) Place the water tank in to its working position and fasten it to the detergent tank.

- 12 -
6. OPERATION+
6.1. Controls+description+
The machine is equipped with the following controls and indicator lights:
a) Three LED lights indicate the battery charge level. They may be:
•GREEN LED light on: batteries are 100% charged
•GREEN & RED LED lights are flashing: batteries are almost flat
•RED LED light on: batteries are completely flat
b) Brush button (Fig. 1 – Ref. 3): enable brush operation.
c) Tap lever (Fig. 7 –Ref. 22): provides continuous control of the flow of water or detergent to the brushes. Pull up
to increase the liquid outflow.
d) Drive lever (Fig. 7 –Ref. 21): moves the machine forwards and rotates the brushes.
e) Squeegee lever (Fig. 7 –Ref. 24): raises (when lifted) or lowers (when pushed down) the squeegee.
f) Brush pressure adjustment: turn the knob to adjust brush pressure on the surface being cleaned.
g) Head lowering/rising pedal (Fig. 7 –Ref. 26): press it to lower or raise the brush head.
h) Vacuum motor switch (Fig. 1 – Ref. 4)
6.2. Squeegee+mounting+and+adjustment+
The squeegee (Fig. 7 - Ref. 27) is responsible for drying. The mounting of the squeegee can be proceeded as follow:
a) Lift the squeegee mount (Fig. 7 –Ref. 24)
b) Insert the suction hose sleeve (Fig. 7 –Ref. 28) fully into the squeegee.
c) Insert the two threaded pins into the slots on the support and fix the squeegee by tightening the two knobs (Fig. 7
– Ref” 27).
The squeegee blades can scrape the water and detergent from the floor and prepare the way for perfect drying. As
time goes by, the constant rubbing makes the edge of blade in contact with the floor rounded and cracked, reducing
its dry efficiency.
As a result, the state of the squeegee should be checked frequently. For perfect drying, the squeegee must be
adjusted in such a way that the edge of rear blade bends during operation by about 45owith respect to the floor at
every point. Adjust blade’s angle during operation by regulating the height of the two wheels positioned behind
squeegee.
6.3. Moving+the+machine+without+operating+it+
To move the machine without operation:
a) Lift the squeegee.
b) Push the head pedal down toward the right to lift the head.
c) Push or pull the machine with mechanical drive.
6.4. Brush+mounting+and+adjustment+
Never work without brushes, rollers or drive disks perfectly installed.
Fitting the brush: rest the brush on the floor in front of the machine and center it with the guard. Lower the head and
repeatedly action the brush control lever until the brush automatically engages on the flange hub. If this manoeuvre is
not successful, press on the handle again and repeat the centring and repeated action of the brush lever.
Remove the brush: raise the machine head by pushing the head lift pedal down and then to the right and repeatedly
action the brush lever. After a few pulses, the brush is released and falls to the ground.

- 13 -
6.5. Preparation+before+operation+
Perform the following steps before operating the machine:
Battery model:
a) Check the battery charge (recharge it if necessary).
b) Lower the head using the pedal.
c) Make sure the recovery tank is empty. If necessary please empty it.
d) Confirm the solution tank is filled with clear water or detergent.
e) Mount the most suitable brush, drive disk.
f) Make sure the squeegee is firmly attached and connected to the suction hose and check the blade for wear and
damage.
If you are using the machine for the first time, we recommend trying it on a large obstacle-free surface first to acquire
some familiarity.
Always empty the recovery tank before filling again with detergent.
For effective cleaning and to extend the machine’s working life, the operator should follow these rules:
a) Prepare the work area by removing all possible obstacles.
b) Begin to work from the furthermost point to avoid walking on the area you have just cleaned.
c) Chose straight possible working routes during operation.
d) Divide the floor into several rectangular sections to clean.
6.6. Working+
After setting up the machine, drive the machine as follow:
a) Turn the key switch on.
b) Move the tap lever (Fig. 7 –Ref. 21) to the minimum detergent flow position.
c) Press the brush switch and suction switch.
d) Lower down the squeegee; suction motor starts by auto.
e) Once the drive lever is pulled, the brush motor starts and the machine begins to move forward. If the drive lever is
released, the brush stops rotating.
f) If there is not enough water in the solution tank, the brush motor automatically stops.
g) The machine can only be used if there is water in the solution tank and recovery tank is empty.
h) You can improve the cleaning effect by increasing or reducing the water flow.
IMPORTANT
The suction motor shuts off when recovery tank is full. At this time, stop working and empty the tank. To restart the
suction motor, please turn the suction switch off and then on again. Do not remain on the same spot to avoid floor
abrasion.
At the end of work:
a) Place the tap lever in the “CLOSED” position.
b) Release the brush lever located under the handgrip and let the brush motor stop.
c) Turn off brush switch.
d) Lift the lever to raise the squeegee from the floor to prevent the continuous pressure from warping the blades.
e) Remove the brushes to prevent them from warping permanently.
f) Cut off the power supply.
g) Empty and clean up the recovery tank.

- 14 -
6.7. Useful+cleaning+tips+
In the event of particularly stubborn dirt on the floor, washing and drying can be performed in two separate operations.
6.7.1. Prewashing+by+brushes+or+pads+
a) Adjust the water flow switch
b) Place the brush switch in position “l”.
c) Lower the head.
d) Operate the drive lever to rotate the brush.
e) Raise the squeegee.
f) Begin washing.
g) When washing some particularly dirty zones, give time to detergent to take effect and perform an effective
mechanical action.
6.7.2. Drying+
a) Lower the squeegee, drive the suction motor and pass over the same area washed previously.
b) To wash and dry at the same time, operate brush, water, squeegee, and suction motor simultaneously.
6.7.3. Drain+dirty+water+
IMPORTANT
The dirty water drain hose is at the back left side of the machine.
To empty the dirty water tank:
a) Move the machine near to a drain.
b) Detach the drain hose and open its cap.
c) When the dirty water is drained out, tighten closely the cap and replace the drain hose.
7. +PERIODS+OF+INACTIVITY+
If the machine is not used for some time, squeegee and brush should be removed, washed and put them in a dry
place away from the dust. Furthermore, the machine’s recovery and solution tanks have to be completely emptied and
perfectly cleaned.
Battery model: completely recharge the batteries before storing them.
During long periods of inactivity, you should charge the batteries regularly (at least once every two months) to keep
them constantly at maximum charge.
IMPORTANT
The dirty water drain hose is at the back left side of the machine.
8. BATTERIES+MAINTENANCE+AND+CHARGING+
During the installation and maintenance of the batteries, the operator must wear protection devices such as glove,
goggle, etc. Batteries emit hydrogen gas. Explosion or fire can result. Keep sparks and open flame away. Always
perform installation and maintenance in a ventilated room.
8.1. Recharging+procedure+
a) Connect the battery charger with wiring socket.
b) Disconnect the battery charger with wiring socket after full charging.

- 15 -
9. MAINTENANCE+INSTRUCTIONS+
Before any maintenance performance, power supply should be cut off.
Specialised personnel only, in compliance with current safety legislation and user manual, must perform maintenance
on the electrical circuit and all other operations.
9.1. Maintenance+-+General+rules+
Performing regular maintenance according to the manufacturer instructions improves performance and extends the
machine working life.
Avoid the use of high-pressure washers. Water could penetrate the electrical compartment or motors and lead to
damage or risk of short circuit.
9.2. Routine+maintenance+
9.2.1. Filter+net+and+float+switch+sensor:+cleaning+
a) Make sure the dirty water has been emptied.
b) Clean the float switch at the back of the recovery tank.
c) Do not clean the float switch directly.
d) Fetch out filter net and clean it.
e) Dry the filter thoroughly before replacing it in the support.
f) Make sure the filter is correctly located in its housing.
g) Screw the cap back on the recovery tank.
9.2.2. Filter+net+-+Cleaning+
a) Fetch the filter out from the solution tank.
b) Clean the filter net with running water.
c) Replace the filter net back in its housing and make sure it is correctly positioned.
9.2.3. Squeegee+blades+-+Renewing+
The squeegee blades collect the film of water and detergent from the floor and prepare the way for perfect drying. As
time goes by, the constant rubbing leaves the edge of the blade, in contact with the floor, rounded and cracked, which
reduces its drying efficiency. Check the squeegee blades for damage and wear daily. Rotate or replace them after a
certain period of time.
Replacing the blades
a) Lower the squeegee (Fig. 7 –Ref. 24)
b) Remove the squeegee (Fig.7 – Ref. 27) from its mount by completely unscrewing the two knobs (Fig. 7 –
Ref. 29).
c) Remove the suction hose sleeve from the squeegee (Fig. 7 –Ref. 28).
d) Release the catch.
e) Remove the blade.
f) Reuse the same blade by reversing the edge in contact with the floor until all four edges are worn out. Then
replace with a new blade.
g) Fix the screws on the squeegee body.
h) Refasten the catch.

- 16 -
9.2.4. Fuse+changing+
The fuse, protecting the brush and the suction motors, is located in the fuse holder attached to the recovery tank,
above the machine battery compartment.
To replace the fuse:
a) Make sure the dirty water is emptied.
b) Raise the recovery tank.
c) Open the fuse holder cover and remove the fuse by unscrewing the fixing screws.
d) Fit a new fuse and close the fuse holder cover.
e) Lower the recovery tank.
10. TROUBLESHOOTING+
B – Battery Model / C – Cable Machine
Problem
Cause
Solution
B – Battery connector disconnected
B – Connect the battery to the
machine
B – Batteries are flat
B – Recharge the batteries
C – The machine is not plugged into
power supply socket
C – Plug into socket
The brush switch is in the position “O“
Press the brush switch in the “l”
position
You have not pressed the brush lever
Press the brush lever
B – The motor thermal cut-out has
tripped and the motor is overheated
B – Release the brush lever, turn the
brush switch to the “O” position;
leave the machine cool down at least
45 minutes
C – The power motor supply connector
is disconnected
C – Reconnect the motor power
supply connector
B – The brush motor fuse has blown
B – Check and eliminate the causes
responsible for the blown fuse, then
replace it
The solution tank is empty
Fill the solution tank
The reduction unit is faulty
Have the reduction unit replaced
The machine doesn’t work
The motor is faulty
Have the motor replaced

- 17 -
Problem
Cause
Solution
You are working with a dry brush on a
very rough floor
Open the detergent tap
You are working with power cable
extensions with an inadequate section,
or the voltage is considerably lower
than the rated value for the scrubber as
shown on the rating plate
Avoid the use of inappropriate
extensions. Increase the section of
the electric wires and locate sockets
with a higher voltage.
The brush motor has trouble in
starting
The motor is faulty
Have the motor replaced
The machine doesn’t clean evenly
The brush or disks are worn
Replace the brush or disks
The tap lever is in the “CLOSED”
position
Move the lever to the “OPEN”
position
The solution tank is empty
Fill up the solution tank
The hose delivering the detergent to
the brush is blocked
Unblock and open the circuit.
No water or detergent is delivered
The tap is dirty or faulty
Clean or replace the tap by
unscrewing the screw
The water or detergent flow does
not stop
The tap stays open because it is
damaged or very dirty
Have the tap cleaned or replaced
The suction power switch is in the “O”
position
Turn the suction switch on
There is no power to the suction motor
or the motor is faulty
Check that the motor power
connector is correctly connected to
the main wiring. Or have the motor
replaced
B – The fuse has blown
B – Replace the fuse
The suction motor does not start
The recovery tank is full
Empty the recovery tank
The edge of the rubber blades in
contact with the floor is worn
Replace the rubber blades
The squeegee or hose is blocked or
damaged
Unblock and repair the damage
The float switch has tripped (inside
recovery tank) or is clogged by dirt or
broken
Empty the recovery tank or reset the
front switch
The suction hose is blocked
Unblock the hose
The suction hose is not connected to
the squeegee or damaged
Connect or repair the hose
The squeegee does not clean or
suction is not effective
The suction motor has no power or the
Check that the motor power
connector is correctly connected to

- 18 -
Problem
Cause
Solution
motor is faulty
the main wiring and that the fuse is
not blown. Or have the motor
replaced.
The machine tends to pull to one
side
The direction adjustment knob must be
adjusted appropriately for the floor
Regulate the direction of movement
by adjusting the direction adjustment
konb
The battery poles and charging
terminals are dirty and oxidised.
Clean and grease the poles and
terminals, recharge the batteries
The electrolyte level is low
Top up all the elements with distilled
water as described in the instructions
The battery charger does not work or is
unsuitable
See battery charger instructions
The batteries do not provide the
normal work time
There are considerable differences in
density between the various elements
of the battery
Replace the damaged battery
The battery is new and does not deliver
100% of its expected capacity
The battery must be “run-in” by
performing 20-30 charges and
discharges to obtain maximum
performances
The battery discharges too fast
during use, even though it has
been charged correctly and when
tested with a hydrometer at the
end of recharging, it turned out to
be uniformly charged
The machine is being used at
maximum capacity for continuous
periods and the working time is not
sufficient.
If possible, use batteries with a
higher capacity or replace the
batteries with other charged
previously
The power cord is not connected
correctly with recharger
Check the power cord and make
sure it is connected with charger
The battery fails to be recharged
The batteries are not connected
correctly with recharger
Check the batteries and make sure
they are connected with recharger.

- 19 -
11. TECHNICAL+SPECIFICATIONS+
ITEM
Power:
24 V DC
Traction :
With brush rotation
Dimensions :
49’’ x 21’’ x 39’’
123 x 53 x 98 cm
Weight with batteries:
386 lbs.
175 kg
Tank construction:
Polyethylene
Solution tank:
13 gal
50 L
Recovery tank:
13 gal
50 L
Cleaning path:
20’’
500 mm
Squeegee width:
32’’
815 mm
Brush size:
20’’
500 mm
Vacuum motor:
AMETEK 0,6 HP
Brush motor:
0,75 HP
Battery system:
24 V DC, 105AH CHILWEE x 2
200 minutes’ non-stop work
Productivity:
20 990 pi2/h
1 950 m2/h
Standard accessories
1 x 20’’ (500 mm) Manish Brush
1 x 20’’ (500 mm) Manish Pad holder
2 x 10⁵AH CHILWEE Maintenance-free batteries
1 x Charger

This manual suits for next models
1
Table of contents
Other Johnny Vac Scrubber manuals

Johnny Vac
Johnny Vac JVC70RIDER User manual

Johnny Vac
Johnny Vac JVC50BCN User manual

Johnny Vac
Johnny Vac JVC50BCN User manual

Johnny Vac
Johnny Vac JVC110RIDER User manual

Johnny Vac
Johnny Vac JVC85BCT User manual

Johnny Vac
Johnny Vac JVC65RBTN User manual

Johnny Vac
Johnny Vac JVC110RIDERN User manual

Johnny Vac
Johnny Vac JVC56RIDERN User manual

Johnny Vac
Johnny Vac JVC70RIDERN User manual

Johnny Vac
Johnny Vac JVC56BN User manual