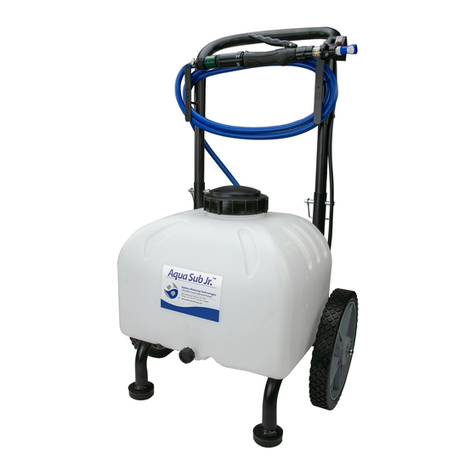
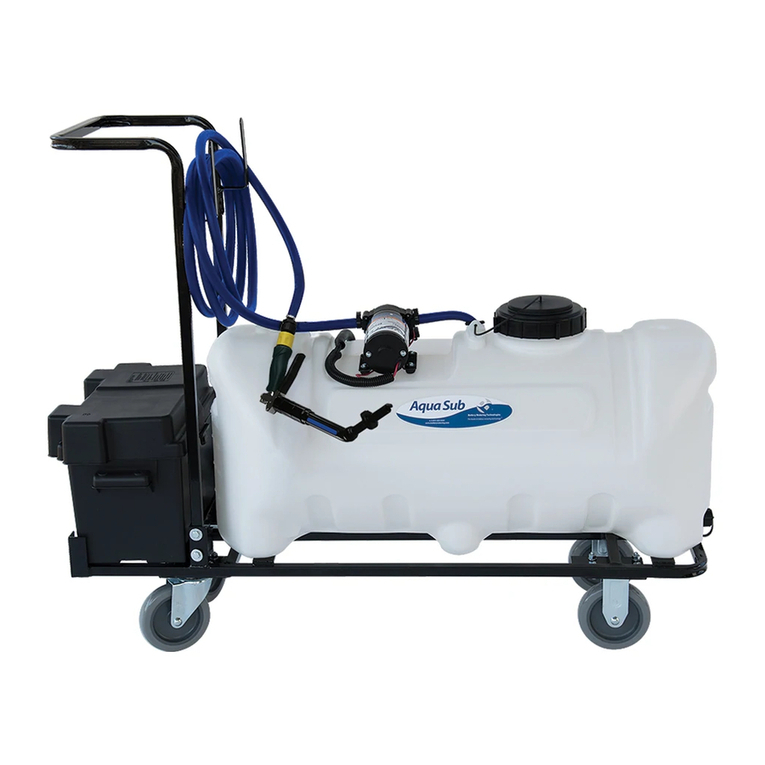
Battery Watering Technologies Aqua Sub Jr. NC5090PN User manual

Instruction Manual for Part # NC5090PN,
NC5090P & NC5090PNMAN
Aqua SubJr.™Cart
• Always wear personal protective equipment (goggles, gloves, etc.) to
protect yourself from sulfuric acid.
• Only water after charging.
• Do not use pump in an explosive environment.
• Do not use tank to pump ammable liquids (gasoline, fuel, oil, etc.)
• Read instructions in entirety before beginning the installation.
Assembly Instructions:
1. Remove handle from box and assemble. Use lock pins to secure handle.
2. Connect the two black connectors (located at the bottom of the back panel) to attach the
pump to the battery.
3. Charge battery – See charging instructions on next page.
Operation with Direct Fill Link Instructions:
1. Fill the tank with clean or deionized water through the lid on top of the tank. Turn the
power switch on the back of the cart under the handle to“ON”.
2. Remove dust cap on watering system and insert the male connector on the watering
system into the female connector on the direct ll link.
3. Squeeze the handle on the direct ll link to begin watering. You will see the ow indicator
start spinning.
4. When the ow indicator stops spinning and all indicator eyes on top of the valves rise to
the top, release the handle and uncouple the connectors.
5. Replace the dust cap on watering system. Never leave the tank connected after watering.
6. Turn o when all batteries have been watered.
Operation with Manual Gun Instructions:
1. Fill the tank with clean or deionized water through the lid on top of the tank.
2. Remove battery caps.
3. Turn the power switch on the back of the cart under the handle to “ON”. Squeeze the handle
on the manual gun to clear any air in the hose, dispensing water back into tank until there
is uninterrupted ow.
4. Insert the nozzle into the battery cell to be lled. Squeeze the trigger until the shut-o
takes place. Release the trigger and gently tap the nozzle to prevent any drips.
5. Remove the gun from the battery. Repeat until all cells are lled.
6. When watering is complete, turn o the tank and replace battery caps.
T: 336-714-0448
F: 336-714-0449
G: 877-522-5431
www.batterywatering.com
AquaSubJr_INSEF_0616
ATTENTION: Si le produit est entreposé
à des températures sous le point de
congélation, videz complètement l’eau
pour prévenir les bris.
Instructions pour la Charge:
Chargez la batterie avant la première utilisation ou si le chariot a été entreposé depuis plus
de 6 mois an d’assurer un bon rendement.
1. Éteignez le système en mettant le bouton sous la poignée à la position“OFF”.
2. Insérez la fiche (qui est moulée au bout du cordon d’alimentation) dans la prise qui est située
à l’arrière du chariot.
3. Branchez le chargeur sur une alimentation de 100 à 240 Vac 50/60Hz. (Il est possible qu’un
adapteur soit requis à l’extérieur des É-U.)
4. Lors de la charge, le témoin lumineux sera rouge et changera au vert lorsque la charge est
complétée. Débranchez la fiche de la prise et le chargeur de l’alimentation AC.
Dépannage:
La pompe ne démarre PAS:
1. Assurez-vous que l’interrupteur est à la position“ON”(il est situé à l’arrière du chariot).
2. Assurez-vous que la batterie 12V est pleine charge.
3. Vériez le fusible en série sur les ls de la pompe (situé derrière le couvert arrière). Remplacez-
le s’il est ouvert (5A mini à lamelle).
4. Vériez qu’il y ait une bonne connexion aux terminaux de la batterie (situé derrière le couvert
arrière).
La pompe démarre mais n’amorce pas:
1. Assurez-vous que le niveau de l’eau est au-dessus de l’entrée de la pompe.
2. Assurez-vous que le boyau ne soit pas bloqué ou entortillé.
Entretien:
Svp utiliser la passoire pour éviter que des débris atteignent la pompe.
Garantie:
Ce produit est garanti contre les défauts de manufacture et de matériaux pour une période
d’une année après l’expédition.

P: 336-714-0448
F: 336-714-0449
T: 877-522-5431
www.batterywatering.com
AquaSubJr_INSEF_0616
CAUTION: If storing this product in
freezing conditions, drain all of the
water to prevent damage.
Charging Instructions:
Charge the battery before using the tank for the rst time or if it has been stored more than 6
months to ensure the unit is fully charged.
1. Turn the power switch on the back of the system under the handle to the“OFF”position.
2. Insert the plug (which is molded onto the end of the charger wire) into the jack, which is
located on the rear of the tank.
3. Plug the charger into 100-240 VAC 50/60 Hz volt power supply. (You may need plug
adapter if outside the U.S)
4. While charging, the light will appear red. Light will change to green when fully charged.
Disconnect the plug from the jack and the charger from the electrical outlet.
Troubleshooting:
Pump will NOT run:
1. Make sure the on/o switch is in the“ON” position (power switch is located on the back
of the unit).
2. Make sure your 12 volt battery is fully charged.
3. Check in-line fuse on the wires on the pump (located behind back cover). If blown, replace
with new fuse (5 Amp mini-blade fuse).
4. Ensure a tight connection at the battery clips (located behind back cover).
Pump runs, but does not prime:
1. Inspect to make sure water is above inlet hole.
2. Inspect hose to be sure of no kinks or blockages.
Maintenance:
Please utilize strainer to prevent debris from getting into the pump.
Warranty
This product is warranted against defects in workmanship and materials for a period of one year
from date of shipment.
Manuel d’Instructions pour l’Aqua Sub Jr. ™
Modèle # NC5090PN, NC5090P et NC5090PNMAN
Chariot Aqua Sub Jr.™
• Toujours porter de l’équipement de protection (lunettes, gants, etc.) pour
vous protéger de l’acide sulfurique.
• Remplir d’eau seulement après la charge
• Ne pas utiliser la pompe dans un environnement explosif.
• Ne pas utiliser le réservoir pour des liquides inammables (solvants,
essence, huile, etc.)
• Lisez les instructions entièrement avant de débuter l’installation.
Instructions d’Assemblage:
1. Retirez la poignée de la boite et assemblez-la. Utilisez les goupilles de verrouillage pour la
sécuriser.
2. Branchez ensemble les deux connecteurs noirs (situés près de l’ouverture au bas du panneau)
pour attacher la pompe à la batterie.
3. Chargez la batterie - Référez-vous aux instructions à la page suivante.
Instructions d’Opération avec le Fusil de Remplissage Direct:
1. Remplir le réservoir par l’ouverture du dessus avec de l’eau propre ou déionisée. Mettre le
bouton sous la poignée à la position“ON”pour alimenter le chariot.
2. Retirez le capuchon anti-poussière du système d’eau et branchez le connecteur mâle au con-
necteur femelle du fusil de remplissage direct.
3. Pressez la poignée sur le fusil pour débuter le remplissage. Vous verrez alors l’indicateur de
débit commencer à tourner.
4. Lorsque l’indicateur de débit arrête de tourner et tous les indicateurs visuels sur les valves
sont remontés, relâchez la poignée et débranchez les connecteurs.
5. Replacez le bouchon anti-poussière sur le système. Ne laissez jamais le réservoir branché
après le remplissage.
6. Éteignez l’alimentation lorsque toutes les batteries sont remplies.
Instruction d’Opération avec Fusil de Remplissage Manuel:
1. Remplir le réservoir par l’ouverture du dessus avec de l’eau propre ou déionisée.
2. Retirez les bouchons de cellules.
3. Mettre le bouton sous la poignée à l’arrière du chariot à la position“ON”. Pressez la poignée
sur le fusil pour libérer toute bulle d’air dans le boyau, en renvoyant le contenu dans le
réservoir jusqu’à ce qu’il y ait un débit constant sortant du fusil.
4. Insérez l’embout dans l’ouverture de la cellule à être remplie. Serrez la gâchette jusqu’à ce
que l’arrêt automatique s’active. Relâchez la gâchette et tapez doucement l’embout contre
l’ouverture pour éviter des égouttements.
5. Retirez le fusil de la batterie. Répétez jusqu’à ce que toutes les cellules soient remplies.
6. Lorsque le remplissage est terminé, éteignez le chariot et replacez le bouchon anti-poussière.
This manual suits for next models
2
Other Battery Watering Technologies Outdoor Cart manuals
Popular Outdoor Cart manuals by other brands

Carts Vermont
Carts Vermont 20 manual

Westward
Westward 2CZY4 Operating instructions and parts manual

Numatic
Numatic EcoMatic EM-5 Assembly

Bosch
Bosch XL-Cart Operating/safety instructions

Tennsco
Tennsco Modular Cart Top Component Assembly Assembly Instructions/Parts Manual

Clam
Clam POLAR TRAILER HD MAX manual


