A
BC
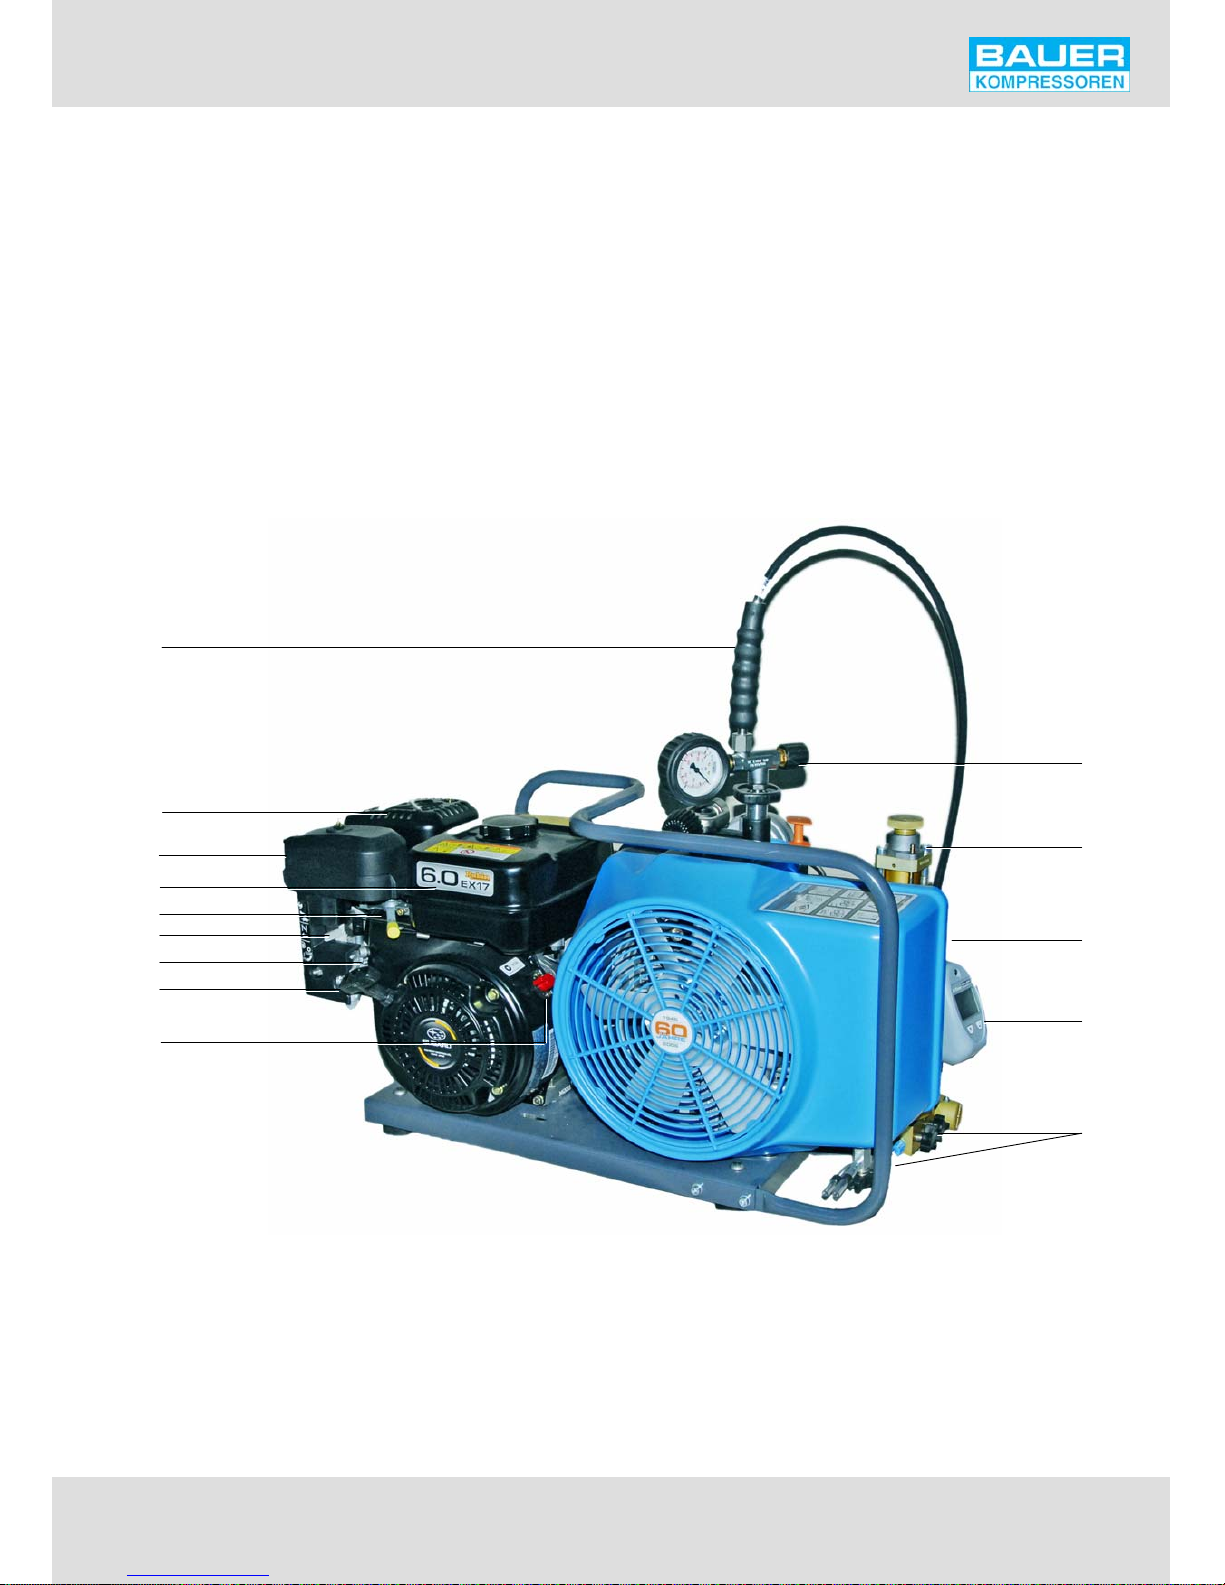
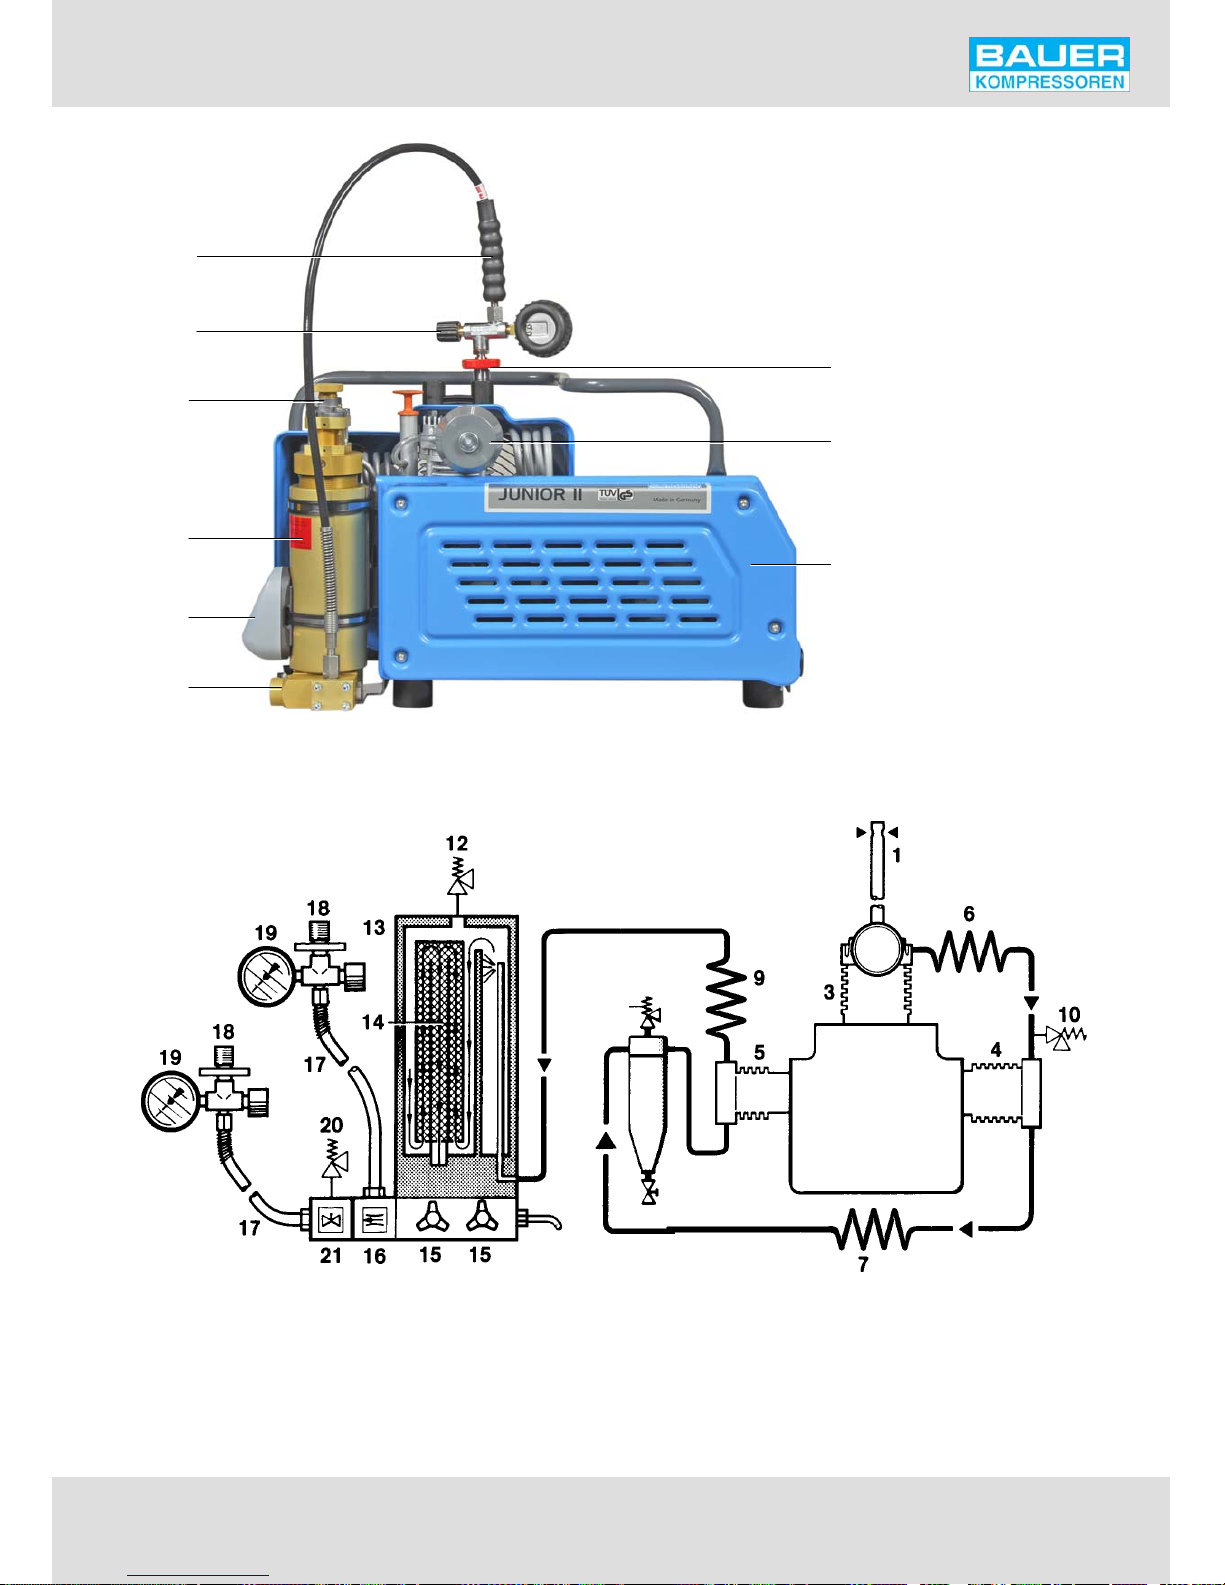
Instruction Manual Junior II
ii
Dear customer
We are happy to give you advice on any questions regarding
your BAUER compressor and help as soon as possible with
any arising problems.
You can contact us Mondays to Thursdays from 0800 till 1630,
Fridays from 0800 till 1400 on phone no. (089) 78049-0.
If you call the following extensions directly, it will save you
time and continuous dialling.
Do you want to order spare parts?
Customer service
Phone no: (089) 78049-129 or -149
Fax no: (089) 78049-101
Do you have problems with maintenance or repair work?
Technical customer service
Phone no: (089) 78049-246 or -176
Fax no: (089) 78049-101
Do you need further information regarding your unit, ac
cessories, prices etc.?
Sales department
Phone no: (089) 78049-138, -185, -154, -205 or -202
Fax no: (089) 78049-103
Are you interested in any training courses?
Training manager
Phone no: (089) 78049-175
Fax no: (089) 78049-103
Explanation of the short operating instructions on the unit
Read instruction manual before op
erating unit
chapter 3.
Check oil level on compressor and
petrol engine before operating unit
chapter 4.4.1.
Drain condensate at least every 15
minutes (3 locations)
chapter 4.4.3. and 4.4.4.
Position units with petrol engine
with exhaust in wind direction to
prevent exhaust fumes being sucked
in by the compressor
chapter 3.
Petrol driven units must not be oper
ated indoors.
chapter 3.
Position unit level: max. inclination
5°
chapter 3.
Operate unit only at ambient tem
peratures between +5 and +45 °C
chapter 3.
Keep away from hot surfaces on
motor and compressor
chapter 2.
Wear ear protectors when unit is
running
chapter 2.