Baum 105808H04 User manual

Visio Light
User Guide
Item number: 105808H04
User guide version: 1.5
English 06/2017


About BAUM 3
About BAUM
BAUM Retec AG has been a leading provider of products and services
for blind and visually impaired people for more than 35 years. The high
quality and innovative braille products, desktop magnifiers, reading
machines, and software solutions are developed and manufactured in
Germany, and are ideal for educational, professional and private use.
Our Mission
“We believe in independence for every person who is blind or visually
impaired. We passionately apply our skills and experiences toward
developing solutions that reinforce success at school and work, and
improve quality of life.
We always question the way things have been done in the past. We
explore new and innovative ways to solve problems. Our approach
includes ergonomics, thoughtful design, and materials that meet the
highest quality standards. We care deeply about our customers, and help
and support them as much as we can. We care about our employees
too, and support them to reach their highest potential, ensuring a secure
and lasting working environment.
We develop innovative technology solutions that provide independence
for people who are blind or visually impaired. Our high-quality solutions
allow visually impaired people to magnify their world, and blind people to
access electronic and print content with speech or braille output.”
Wolfgang Baum, Chief Executive

Contents 4
Contents
1ABOUT THIS USER GUIDE .............................................................................................5
2ABOUT VISIO LIGHT .......................................................................................................6
3BEFORE YOU START......................................................................................................7
WHAT’S IN THE BOX:..................................................................................................73.1
4HOW TO POSITION VISIO LIGHT ON YOUR DESK ......................................................8
5CONNECTING TO MONITOR AND MAINS .....................................................................9
6VERY FIRST TIME POWER ON AFTER INSTALLATION ............................................10
SHORT DESCRIPTION OF BUTTONS...........................................................................126.1
7GETTING FAMILIAR WITH YOUR NEW VISIO LIGHT .................................................13
8COMMON PROBLEMS AND SOLUTIONS ...................................................................16
9DEFECTS AND REPAIR ................................................................................................17
10 SERVICE BOX................................................................................................................18
11 COMPLIANCES..............................................................................................................19
CE CONFORMITY ....................................................................................................1911.1
ENVIRONMENTALLY FRIENDLY DISPOSAL ACCORDING TO EU-DIRECTIVE 2012/19/EU1911.2
12 WARRANTY ...................................................................................................................21
13 FOR YOUR SAFETY ......................................................................................................22
14 TECHNICAL DATA.........................................................................................................26

About this user guide 5
1 About this user guide
This manual addresses to end users of Visio Light. The device was
assembled by your dealer or shipped to you as a completely assembled
and tested device. In this manual you will find all information required to
use your Visio Light.
The manual is a part of your device. Please read this manual with care
and attention as it contains important instructions and tips with regard to
operating the device and its safety. Please keep the manual always
within reach of your device and do pass it on to a next owner.
Notice for End Users in Germany/Europe
This user guide is a part of the VisioBook HD product, and should be
kept with the product at all times. In the event your VisioBook HD is ever
sold to a new end user, this user guide must be provided to them.
Copyright © 2017 BAUM Retec AG, Industriestr. 15, 74909
Meckesheim, Germany. All rights reserved. No part of this publication
may be reproduced or distributed in any form or by any means, or stored
in a database or retrieval system, without prior written permission from
BAUM Retec AG.
All efforts have been made to ensure that information contained in this
document is correct at the time of issue. Neither BAUM Retec AG nor its
representatives assume any responsibility for errors or omissions. Nor is
any liability assumed for damages resulting from the use of information
contained herein.
Licenses and trademarks
All licenses and trademarks are the property of their respective owners.

About Visio Light 6
2 About Visio Light
Handy design, simple to use, excellent picture quality – that is what the
name Visio stands for.
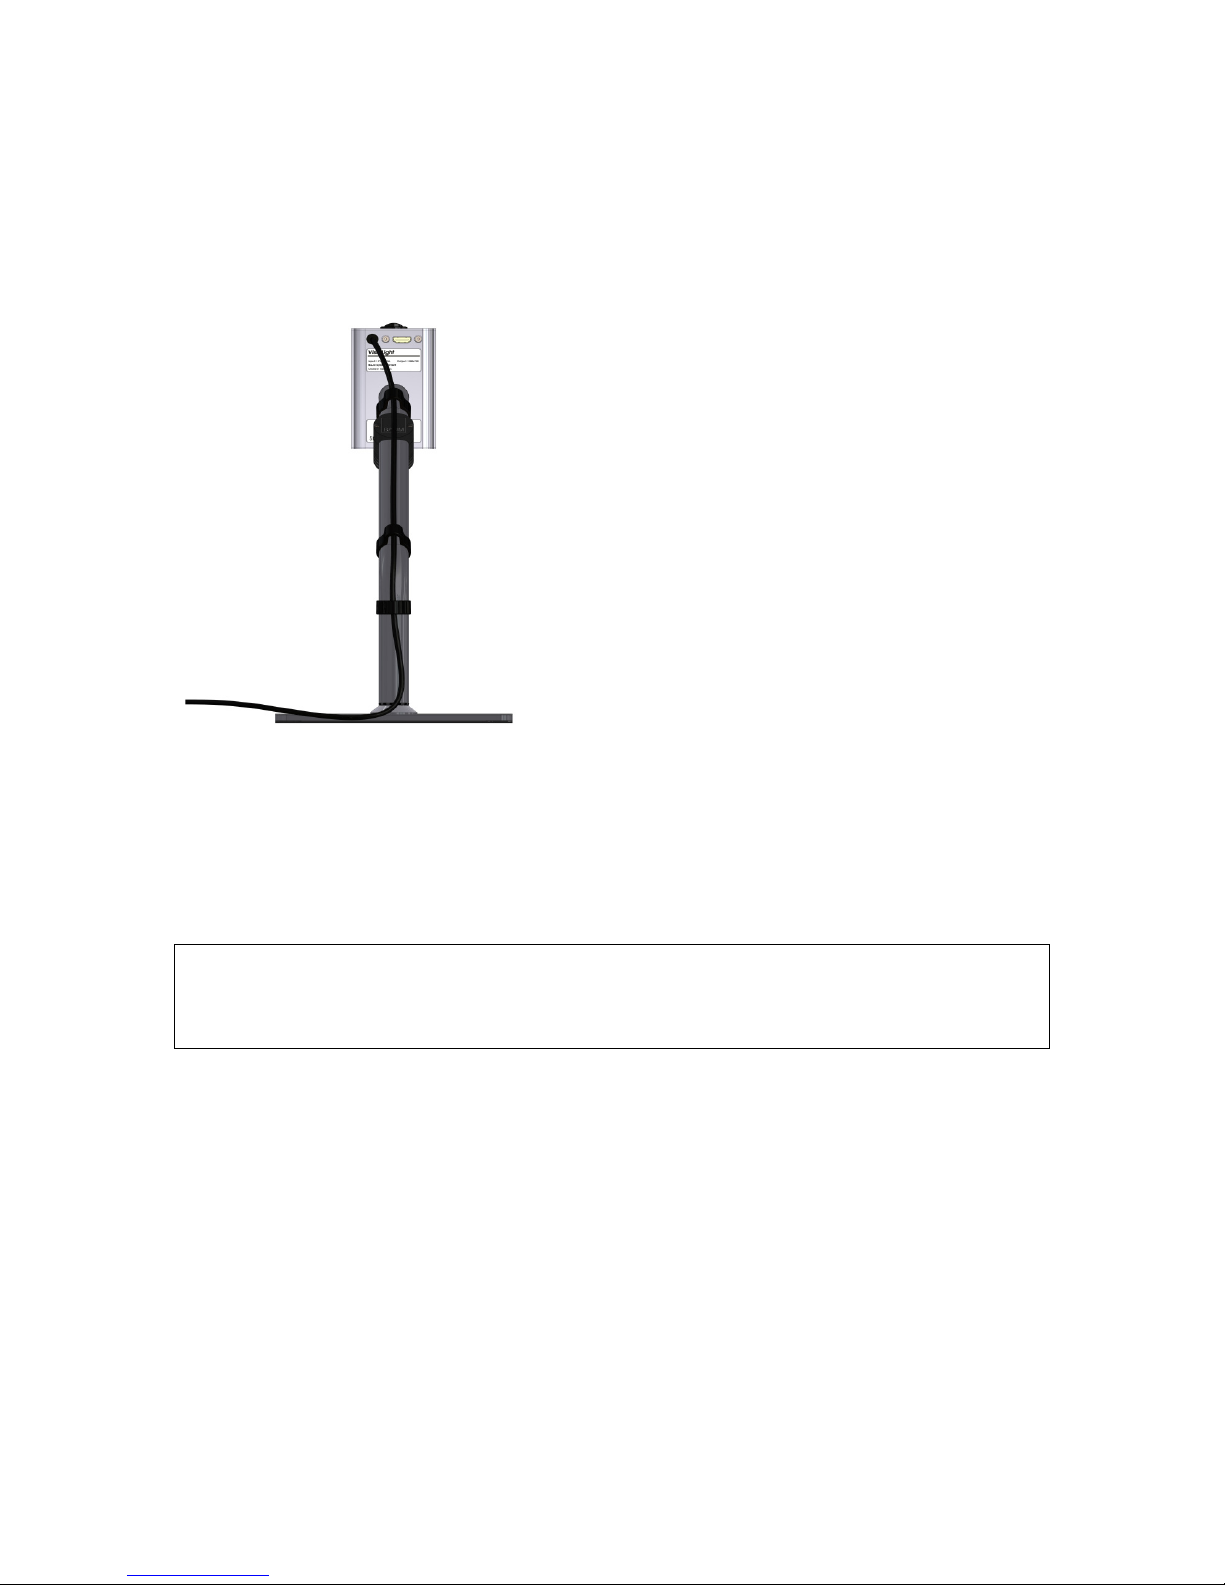
Visio Light is the basic model of the VISIO product family. With only three
buttons, ease of use is guaranteed. Though being one of the smallest
and lightweight devices, Visio Light provides all the functionality you
expect from an excellent CCTV reader.
Visio Light has a high-resolution camera. Thanks to this high-resolution
camera Visio Light provides a bright and crisp image even in the smallest
magnification. The standard configuration provides 22” widescreen
display in 16 by 9 format with high contrast and power saving LED
backlight.
Visio Light can also be purchased without monitor. The monitor can be
attached to an optional swivel arm. It also connects to HDMI or DVI
inputs of most flat screen TVs.
Visio Light features full colour auto focus and three false colour modes
with contrast enhancement in black on white, white on black and yellow
on blue. Thanks to its image optimizer feature Visio Light will always
provide an optimum image quality.
Visio Light can even display documents of very poor quality magnified
and in higher contrast, like faint print or crumpled or dirty paper. However
despite all technical efforts made, there may exist a few documents
which cannot be displayed properly. In those rare cases, the full colour
setting may be the best setting but in seldom cases it may happen that a
document cannot be made better readable.

Before you start 7
3 Before you start
Please read the safety instructions at the end and check the contents of
the packaging.
What’s in the box:3.1
1 Visio Light CCTV Reader device
1 Power supply with cable to mains
1 Users manual
1 HDMI-DVI cable
1 flat screen display with power supply and power supply cable
(standard configuration only)

How to position Visio Light on your desk 8
4 How to position Visio Light on your desk
Place Visio Light on your desk and set it at least so far back that an A4
page can be moved in all four directions without leaving the surface.
Being right handed, you should place the display to the left of the
camera. Always use a stable table with a smooth and even surface.
Slide the plastic profile over the front edge of Visio Lights stand. This
profile provides a smooth transition from the table to the stand, so the
paper will glide smoothly across.

Connecting to monitor and mains 9
5 Connecting to monitor and mains
Normally, you may skip this and the next chapter because the following
steps should be performed when delivering the device to you. If not so,
please follow the instructions below.
At the rear of the camera head, there is a
round socket which connects to the power
supply that comes with Visio Light. First,
plug in the power supplies round plug into
this socket, then connect the power supply
to the mains cable and plug it into the wall
outlet.
Also at the rear of the camera head, there
is the HDMI socket which connects to the
monitor. Connect the HDMI-DVI cable to
this socket and connect the DVI plug at the
other end to the monitor.
Now connect the monitor to the mains.
Fix both cables to the camera arm using the cable clips.
Note: For connecting a different monitor or a flat screen TV, you may
use a normal HDMI cable or an adapter which both can be obtained from
your local electronics store.

Very first time power on after installation 10
6 Very first time power on after installation
Power on Visio Light by pushing the
power button on top of the camera
head to the “1” position. Document
illumination will be lit immediately. The
monitor will also power on immediately
(Power switch and indicator light in lower
right corner of monitor will turn blue).
Display power button is directly left to
light. You can move your finger from the
right bottom edge of Display frame slowly
to the left, until you feel the raised power
button. After pressing this button, the blue
light will be lit. From now, Visio Light will
switch on the Monitor automatically.
The above steps only have to be performed once directly after assembly.
In your daily use from then on, you only have to press the Power button
on the Visio Light.

Very first time power on after installation 11
The image below shows the monitor control panel at the lower right of
the display. The power button is the rightmost button. Use the menu
button to access settings like brightness and contrast. In the monitors
user guide you find a more detailed description of these settings.

Very first time power on after installation 12
Visio Light control panel
Short description of buttons6.1
Power switch
Set to „1“ to power on. (Light will be lit immediately).
Set to „0“ to power off.
Zoom + / Enlarge
Press this button to increase magnification.
Zoom - / Decrease
Press this button to reduce magnification.
Colour
Press to cycle through colours.
The following colours are available:
Full colour: for viewing photographs or documents in real
colour. Also recommended to read low quality documents
and for handwriting.
Black on white, enhanced contrast,
White on black, enhanced contrast,
Yellow on blue, enhanced contrast
Use one of those three text modes for reading. Contrast
will be increased for ease of reading.

Getting familiar with your new Visio Light 13
7 Getting familiar with your new Visio Light
You have already learned how to position Visio Light on your desk and
you have connected it to power supply and display.
You can slightly tilt the display so that you can comfortably view the
screen. Do not tilt too much; do not try to exceed the stopper position.
Now, switch on Visio Light and use it for the first time.
Power on Visio Light by pushing the power button on top of the
camera head to the “1” position. The document illumination will be lit
immediately. The monitor will also power on immediately (Power switch
and indicator light in lower right corner of monitor will turn blue).
The Display may show a message like “Invalid video mode”for a few
seconds, then the magnified image will be displayed.
In case the display should not power up automatically, find its power
button directly left to the light. If you cannot see it, move your finger from
the display frame bottom right edge slowly to the left, until you feel the
raised power button. After pressing this button, the blue light will be lit.
From now, Visio Light will switch on and off the monitor automatically.
To power off Visio Light, set the the power switch to the “0” position.
Switch your Visio Light on and off for several times, just to get familiar
with the power up procedure of Visio Light, document illumination and
display. For the next steps, leave it on.
Place a document on your desk right below the camera. Please use
something coloured, like a brochure or magazine with text and images.
Let us try the buttons on the control panel now. We have already
learned, the power on button is on top of the device.
The three button control panel is located to the front of the camera
head.

Getting familiar with your new Visio Light 14
The upper button is zoom + which enlarges the image. Press and hold
this button until you reach the desired magnification level.
The lower button is the zoom - which decreases magnification level.
Press and hold this button until you reach the desired magnification level.
Now, press the zoom – button until you reach minimum magnification
level.
The minimum zoom level is not intended for reading; however it gives
you a better overview of the document structure. Thus you can easily
find the position you want to view at higher magnifications.
Now, press the colour button in the middle. Press to cycle throught the
four colour schemes starting at full colour mode, white on black, black on
white, yellow on blue. After that it will start over again at full colour.
The real or full colour mode is ideal for viewing images and it also serves
for reading low quality print and for writing or filling in forms. It provides
all natural colours in all shades.
So move the document until you find one of the images on your
document. If the image is too small, increase magnification with zoom+
button. If you got lost and do not know where you are on the document,
decrease magnification with zoom-, move document and increase again.
You already know a lot about Visio Light now, however let us read some
text.
Move the document to a position where you see some text on the
display. Now press the colour button in the middle. The image will be
displayed in high contrast in two false colours only (black on white). If
you press the colour button once more, foreground colour and
background colour will be reversed (white on black). Press this button
again to view in yellow on blue. With the next press it will start over with
full colours. Press the colour button a few times to see the differences in
presentation. In text mode, letters are much clearer and brighter with

Getting familiar with your new Visio Light 15
higher contrast whereas in picture mode you see all colours and shades
of grey.
Now press the colour button until you find the option you prefer. Take
your time to find out which is best for you. Most users prefer white
characters on black background.
Note: You will often find the previous setting was the best one, so the
trick to get one step back is by pressing the button three more times.
Note: Visio Light always starts in full colour at power up.
Now that you found your preferred colour settings for reading text, let us
try to read some more problematic documents with low contrast or faint
print. In most cases, Visio Lights automatic image control will present a
good quality magnified image of your document. This is easy with black
characters on bright white paper. However sometimes documents are of
low quality like coloured text on coloured background or bad copies with
faint print on grey paper. In those cases we make use of the full colour
mode. Simply press the colour button until you find the best setting. Also,
increasing magnification often helps improving quality and last but not
least, try to change the environmental lighting.
Note: In rooms lighted by neon lights, the image may flicker. Try to
switch off the light or change the location of Visio Light to improve image.
Visio Light has a permanent auto focus. That means, no matter how thick
a book or how curved a page, Visio Light will always focus on the part
displayed and thus always present a sharp image on the display.
Now you have already learnt about all options on Visio Light. We hope
you will enjoy your new CCTV.

Common problems and solutions 16
8 Common problems and solutions
So now it happened. Visio Light does not work as expected and you are
clueless if it is broken. Very often, a small reason can cause a big
problem, which can be resolved easily. So please read the following
checklist and try to find out what is wrong. If this does not help, please
switch off Visio Light, unplug power cable from mains and contact our
service department.
Display and lights remain dark
Please try to switch Visio Light on again. If this does not help, make sure
power supply is connected to both the Visio Light and wall outlet and that
wall outlet is live. You may want to connect another device to the wall
outlet to check. Also check if mains cable is firmly seated in power
supply!
Only display remains dark, lights are on
Is the light in the bottom right of the display on? Is it blue?
If not, switch display on. The display power button is directly left of the
light and you can feel that raised button. Best you touch the edge and
move your finger leftwards until you feel first the light and then the
button. Now the light should be on and blue.
If not, please check if power cable in back of display is seated properly.
Also check if cable from Visio Light to monitor is seated properly on both
ends.
Image is blurred
Check if protective plastic foil is still covering camera lens (remove this
foil) or whether this lens is dirty. If so, clean with a dry, soft cloth.
Press zoom+ button to increase magnification.
Document cannot be read
Press zoom+ button to increase magnification.
Try a different document.
Letters are fluttering
Increase zoom.
Try different settings of colour button.

Defects and Repair 17
9 Defects and Repair
If Visio Light is broken – what to do?
Did you check all settings and connections according to the manual?
Did you remove the protective plastic film from the camera lens?
Are you sure the mains outlet is live?
Do not use a broken device! Unplug broken device from mains! Please
do not hesitate to contact your local distributor or BAUM Retec AG.
You can reach BAUM Retec AG at telephone number +49 (0) 6223
4909-0 in Germany. We will help you check your Visio Light and in case
it is broken we can mail a service box for shipping Visio Light to our
repairs department.
Contact:
BAUM Retec AG
Industriestr. 15
74909 Meckesheim
Germany
Phone: +49 6223 4909-0
Web: www.baum.de
Email: [email protected]
Email Service: service@baum.de

Service box 18
10 Service box
For shipping Visio Light in the service box, proceed as follows:
Switch off Visio Light
Unplug from mains
Unplug all cables to and from power supply and display.
Put display in its own box
Put Visio Light in its own box
Do not forget to include all cables and power supplies.
Close box.

Compliances 19
11 Compliances
CE Conformity11.1
This product conforms to the guidelines of the European
Union and takes the CE- and ROHS Marking.
Environmentally friendly disposal according11.2
to EU-Directive 2012/19/EU
The symbol (crossed garbage can), which is also attached to
the device, states that this device and its accessories, once
come to the end of its lifetime, should not be regarded as
household waste. An environmentally friendly way of final
disposal is compulsory.
This device contains electronic components. In order to avoid risks or
dangers for the environment through non-professional waste disposal,
the disposal of this device and its accessories must correspond to the
valid EC-Directives or other local regulations. Please check your local
regulations for proper disposing of this device or consult your local
distributor.
For data privacy protection reasons, please remove all personal data
from the device prior to disposal.

Table of contents
Other Baum Magnifier manuals