Baume And Mercier Clifton Series User manual

www.baume-et-mercier.com
Depliant_COR2.indd 1-4 06.01.15 09:06

MOVEMENT GUIDE
A
1
A
C
2
A
3
A
C
4 5 6
A
E
7
A
C
D
E
8
A
C
9
C
10 11 12
13 14 15
E
O
16 17
C4
P1
P2
AB
F
G
H
18
E
C5
P1
P2
AB
F
C
G
19
E
P1
P2
AB
F
G
C
20 21
P1
P2
E
G
H
22
P1
P2
E
G
H
P1
P2
A
B
C
E
F
G
H
24
25
P1
P2
G
AB
C
26
FH
27
H
P1
P2
F
G
AB
C
C1
P1
P2
A
B
C
E
F
G
H
23
P1
P2
A
B
F
JG
C
Clifton
ref. n°
65717 6
65718 17
65719 4
65720 5
65730 8
65731 24
65743 14
65745 6
65747 4
65749 4
67761 3
65770 4
65776 10
Linea
ref. n°
65690 4
65691 4
65692 4
65701 27
65702 27
65703 27
65704 4
65709 4
65710 4
65711 4
65712 1
65713 1
65723 4
65724 4
65727 4
65728 4
65736 1
65739 4
65740 4
65744 2
Capeland
ref. n°
65687 25
65688 20
65689 20
65716 26
65726 25
65733 15
65734 15
Hampton
ref. n°
65564 1
65640 3
65646 27
65647 2
65648 16
65649 10
65650 4
65651 4
65652 3
65665 4
65693 3
65694 3
65695 3
65696 3
65697 6
65698 19
65699 18
65700 5
65721 3
65722 1
65725 3
65732 3
65750 3
65751 4
Classima
ref. n°
65320 4
65492 4
65493 3
65494 8
65533 23
65534 4
65554 4
65558 2
65560 21
65591 21
65593 4
65615 4
65620 1
65627 4
65636 4
65666 1
65675 22
65679 4
65681 9
65684 10
65685 13
65686 11
65705 16
65707 4
65708 13
Classima
ref. n°
65714 4
65715 4
65735 3
65772 4
65773 4
65774 7
65775 12
65779 4
65781 7
65782 4
65786 3
65787 3
Promesse
ref. n°
65752 1
65753 1
65754 1
65756 2
65757 2
65759 1
65760 1
65762 1
65763 2
65764 2
65765 2
65766 1
To nd the diagram corresponding to your watch, please locate its technical reference
(5 digits engraved on the case back) in the list above and note the corresponding diagram number.
Depliant_COR2.indd 5-8 06.01.15 09:06

FrançaisDeutschItalianoEspañolPortuguês English
INSTRUCTION MANUAL
ENGLISH 1
FRANÇAIS 25
DEUTSCH 49
ITALIANO 71
ESPAÑOL 93
PORTUGUÊS 115
137
159
181
201
001-224_COR2.indd 1 06.01.15 10:46

001-224_COR2.indd 2 06.01.15 10:46

English
CONTENT
I. PRINCIPAL WATCH FUNCTIONS AND COMPLICATIONS 3
II. MECHANICAL WATCHES 5
A. GENERAL INFORMATION 5
B. USER GUIDE 5
III. QUARTZ WATCHES 12
A. GENERAL INFORMATION 12
B. USER GUIDE 12
IV. RECOMMENDATIONS AND CARE 16
V. INTERNATIONAL GUARANTEE 19
VI. CONTACT 23
001-224_COR2.indd 3 06.01.15 10:46

2|
Thank you for choosing a Baume&Mercier watch. You have
acquired a timepiece which combines aesthetic design with
technical performance.
Baume &Mercier: two names which evoke an exceptionally
long-lived watchmaking heritage and an expertise fostered
within the most perfect tradition of the greatest Swiss
Maisons d’Horlogerie.
Since 1830, from generation to generation, from family
ties to friendship ties, from sophisticated complications to
visionary innovations, the family dream continues to be
fulfilled and Baume&Mercier watches continue to embody
the ideal of perfection sought after by the company’s
founders.
The House’s motto is one of no compromise: “Accept
only perfection, only manufacture watches of the highest
quality.”
This quest for technical and aesthetic excellence is
represented by the Greek letter Phi, Antiquity’s symbol
for the Golden Ratio and Baume & Mercier’s designated
emblem.
Phi is the sign of recognition among connoisseurs of
Baume & Mercier, united by the same generous and
relaxed vision of life. By selecting a timelessly beautiful
Baume & Mercier watch, you have also selected a memory-
keeper, a souvenir of a cherished moment.
Authenticity, emotion and closeness are the foundations of
Baume &Mercier’s international renown.
001-224_COR2.indd 2 06.01.15 10:46

|3
English
I. PRINCIPAL WATCH FUNCTIONS AND COMPLICATIONS
POWER RESERVE
A hand indicates how much of the watch’s power supply
remains (for both self-winding and hand-wound watches).
DUAL TIME
A watch equipped with a dual time complication is able to
indicate a “2nd time zone”. This second time can be read on
a central hand or a hand located in a dial graduated from
1 to 24.
In practice, the main hour hand is typically set to the local
time of where one is during one’s travels, and the time of
the second time zone can specify the time where one lives,
for example.
CHRONOGRAPH
A chronograph is a watch which can measure a period of
elapsed time. A chronograph model generally also contains
a central seconds hand for counting seconds, a counter for
totaling minutes and another for totaling hours.
FLYBACK
The flyback function means exactly what it says, to
“fly backward”: it allows the wearer to move from one
chronograph reading to another in a single button push
instead of three.
TACHYMETER
Scale used to measure average speed in km/h based on the
time needed to traverse 1000 m.
For example, to measure your average speed while driving,
start the chronograph at a roadside mile marker, then stop
it exactly 1 km farther on (next mile marker). The seconds
hand uses the tachymeter scale to indicate your average speed
in km/h for the kilometer you just traveled.
TELEMETER
Scale used to measure the distance separating an observer
from a phenomenon which is first visible and then audible.
Its graduation is based on the speed of sound (343 m/s).
For example, to determine a storm’s distance from the
wearer, start the chronograph at the first appearance of
lightning ; then stop it when the thunder can be heard.
Look at the dial of your watch, the seconds hand uses the
“telemetric scale” to indicate the distance separating you
from the place where the lightning occurred.
MOON PHASE
Watches with a moon-phase complication display the cycles
of the moon on their dial (first quarter, full moon…). Moon
phases are generally displayed using a moving disk which
makes one rotation every lunar month (29 and one half day).
001-224_COR4.indd 3 08.01.15 07:59

4|
ANNUAL CALENDAR
Annual calendar is a movement function which handles the
difference between 30 and 31-day months automatically,
without a manual date adjustment. Only one adjustment
per year is needed, at the end of February.
COMPLETE CALENDAR
The full calendar is the term used to describe a watch that
indicates:
§The date (manual date adjustment for each month of
less than 31 days)
§The day of the week
§The month of the year
WORLDTIMER
Worldtimer watches, also called “world time” or “universal
time”, indicate, in addition to local time, the time of the 24
time zones around the world via a 24-hour disc to index to
the 24 cities indicated on the dial. This makes it possible to
identify the 24 zones in which cities are found.
At any time, you can find out the time in 24 major cities
(representing each time zone) while viewing the time of the
city where you live or are traveling.
RETROGRADE DISPLAY
A display is considered retrograde when one of the hands
(the retrograde hand) moves backward after having reached
its final mark.
001-224_COR2.indd 4 06.01.15 10:46

|5
English
II. MECHANICAL WATCHES
A.GENERAL INFORMATION
WATCH PRECISION
A mechanical movement, whether manual or automatic (self-
winding), is a complex assembly of gears, gear trains and other
components often not much bigger than a single strand of hair.
A watch’s precision is determined by the spiral balance wheel,
the heart of the watch, which regulates the rate of time through
its oscillations. Oscillation frequency varies depending on the
model and can be anywhere between 3 and 4 hz, it is therefore
important to bear in mind that, despite the great care taken in
assembling your watch and its movement, it is nevertheless not
as precise as a quartz watch, with an oscillation of 32,000 hz.
Further, rate variations may still occur, caused by a variety
of factors, including impact, the aging of the oils, significant
temperature fluctuations, magnetic fields and wearer activity.
In general and depending on the model, your watch time may
vary by 1 to 2 minutes per week.
B. USER GUIDE
This guide explains all the functions available for different
Baume &Mercier watch models.
To adjust your watch, please identify its icon XX , and refer to the
diagram located on the inside cover of this guide, then follow the
directions corresponding to your model.
Note on screw-down crowns: Your Baume&Mercier watch may
come with a screw-down crown. If so, you must first unlock
the screw-down crown by turning it counter-clockwise before
adjusting the date or the time or winding the watch.
Once you have finished adjusting your watch, press lightly
on the crown while turning gently clockwise, tightening it
down again until you feel some resistance. If the crown is
not correctly screwed-down, your watch may no longer be
completely water-resistant.
WINDING
Hand-wound mechanical watch
Warning: Do not turn beyond its pre-determined blocking
point, otherwise you may damage the movement.
001-224_COR2.indd 5 06.01.15 10:46

6|
Crown in Position 1: turn crown clockwise. The watch is
fully wound when the crown can no longer be turned.
The power reserve of a mechanical watch varies, depending
on the model, between approximately 40 and 90 hours 5.
We recommend you wind it once a day if it has a power
reserve less than 48 hours.
Self-winding mechanical watch
A watch equipped with an automatic winding mechanism
automatically winds itself throughout the day as you move
your wrist.
Because of this, the watchband must be correctly fitted to
the wearer’s wrist. If the watchband is too loose, the watch
may not wind itself correctly. For optimal winding, wear your
watch daily.
If you have not worn your watch for more than 40 hours,
you must wind it manually by turning the crown in Position
1, clockwise, between 20 and 30 turns.
After wearing your watch for several hours, depending on
your activity level, the watch will be perfectly wound.
Once completely wound, your watch has a power reserve of:
§Approx. 40 hours 2468910 11 13 14 15 16 17
20 26
§Approx. 48 hours 19 21 22 23 24 25
§Approx. 65 hours 18
POWER RESERVE 910 13 14
For models with a power reserve indicator, the hand (L)
indicates, on a scale which may vary per model, the amount
of time remaining until the watch must be wound again.
When the watch is entirely wound, the indicator sits at its
maximum position.
SETTING THE TIME WITHOUT A CALENDAR
FUNCTION 2 5 9
1. Set the crown in Position 2.
2. Turn it either clockwise or counter-clockwise until the
watch hands (A, B) are positioned at the desired time.
3. Reset the crown Position 1.
SETTING THE TIME WITH A CALENDAR
FUNCTION 4 6 8 10 11 13 18 19 20 21 22 23 24
25 26
1. Pull the crown to the maximum position (Position 2 or
3 depending on the model). If your watch comes with a
seconds hand (C) it will stop moving.
2. Turn the crown either clockwise or counter-clockwise,
depending on the model, until the hands are positioned
at the desired time.
Note: When the hands pass the numeral 12, if the date
changes, it means it is midnight and if the date does not
change it means it is noon.
3. When the start of the set time is announced (reference
clock, radio, etc.), Reset the crown to Position 1.
001-224_COR2.indd 6 06.01.15 10:46

|7
English
RAPID DATE CHANGE
Warning: In order to prevent damage to the movement, it
is extremely important that you do not use the rapid date
change function between 8 p.m. and 2 a.m.; this is when
the movement pinions are working to automatically change
the date.
Date change using the crown
4 6 8 10 11 13 18 19 20 21 22 23 24 26
1. Set the crown in Position 2.
2. Turn the crown either clockwise or counterclockwise,
depending on the model, until the desired date (E)
appears.
3. Reset the crown Position 1.
For months with less than 31 days, the date must be changed
manually at the end of the month.
Rapid date change with corrector 25
If your watch comes equipped with a corrector (C1) for
setting the date, press the corrector button (C1) several times
in succession, so as to advance the date (E) to the desired date.
To do this, use the small tool provided in the watch packaging.
For months with less than 31 days, the date must be changed
manually at the end of the month.
RAPID DAY CHANGE 24
Warning: In order to prevent damage to the movement, it
is extremely important that you do not use the rapid day
change function between 8 pm and 2 am; this is when the
movement pinions are working to automatically change
the day.
1. Pull the crown to Position 2.
2. Turn the crown clockwise until the desired day (K)
appears.
3. Reset the crown Position 1.
DUAL TIME
Warning: Do not adjust immediately after re-setting the
time on your watch in a counter-clockwise direction. This
may damage the movement. In this specific situation, wait
approximately 30 minutes before setting the second time zone.
Adjustment by crown 8 22
Set the crown in Position 2, and then turn it clockwise to set
the second time zone hand (D) at the desired time.
Adjustment by corrector 13
If your watch has a corrector, press the corrector button (C1)
several times to move the second time zone hand (D) forward
and position it to the time of the desired zone. To do this, use
the small tool provided in the watch packaging.
RETROGRADE DATE 14
To set your watch, please perform these steps in the
following order:
Setting the day of the week
1. Pull the crown to Position 3
2. Turn the crown in either direction until the day hand
(K) indicates the day immediately preceding the desired
day.
3. Position the hands (A, B) at 2 a.m.
001-224_COR2.indd 7 06.01.15 10:46

8|
Setting the date
4. Reset the crown to Position 2.
5. Turn the crown so as to move the date (E)
chronologically forward to one day before the desired
date.
Setting the time
6. Pull the crown to Position 3.
7. Turn the crown clockwise to advance the hands (A, B)
8. Continue turning the crown until the desired day (K),
date (E) and time (A, B) are displayed.
For months with less than 31 days, the date must be changed
manually at the end of the month.
WORLDTIMER 15
To set your watch, please perform these steps in the
following order:
Setting the 24 time-zone disc, local time and date
1. Pull the crown to Position 3, the seconds hand (C) will
stop moving.
2. Turn the crown either in one direction or the other so as
to rotate the hands (A, B), and the 24 time-zone disc (O).
Index the time indicated on this disc to the local reference
city (example: if it is 2 p.m. in London, put the 2 p.m. by
London).
3. Position the minutes hand (B) on the desired minute.
4. When the start of the set time is announced (reference
clock, radio, etc.), reset the crown Position 1: the
seconds hand starts again.
5. Pull the crown to Position 2.
6. Turn the crown in order to advance or reverse the hour
hand (A) by jumping an hour until the required date is
indicated (E).
Note: When the hour hand (A) passes 12, if the date changes,
it is midnight, and if the date does not change, it is noon.
7. Position the hour hand (A) to the current time in the
city where you are (local time).
8. Push the crown in again Position 1.
Changing the date
For months with fewer than 31 days, it is necessary to
change the date manually at the end of the month.
1. Pull the crown to Position 2.
2. Turn the crown in either one direction or the other to
advance or reverse the hour hand (A) by jumping an
hour until the required date is indicated (E).
Note: When the hour hand (A) passes 12, if the date changes,
it is midnight, and if the date does not change, it is noon.
3. Position the hour hand (A) to the local time.
4. Press the crown Position 1.
001-224_COR2.indd 8 06.01.15 10:46

|9
English
Setting the time depending on where one is
(local time)
If traveling to a different time zone, the hour hand must
be set.
1. Pull the crown to Position 2.
2. Turn the crown to advance or reverse the hour hand (A)
by jumping an hour and position to the desired time.
3. Press the crown Position 1.
ANNUAL CALENDAR 16
Warning: To prevent damage to the movement, it is
extremely important that you do not adjust your rapid date
setting between 8 p.m. and 2 a.m.; this is when the movement
pinions are working to automatically change the date.
To adjust your watch, please respect the following steps in
this specific order:
Setting the time
1. Set the crown to Position 3, which will stop the seconds
hand (C).
2. Turn the crown clockwise to advance the hands (A, B)
until they are positioned at the desired time.
Note: When the hands pass the numeral 12, if the date
changes, it means it is midnight, and if the date does not
change, it means it is noon.
3. When the start of the set time is announced (reference
clock, radio, etc.), reset the crown to Position 1.
Rapid date and month correction
1. Set the crown in Position 2.
2. Turn it to advance the date (E) and month (M)
chronologically, until the desired month is displayed,
then the desired date.
3. Reset the crown Position 1.
Note: The annual calendar on your watch is able to keep
track of 30 day months; the month of February is treated as
a 30-day month. At the end of February, you must adjust the
date setting manually using the rapid date change function.
COMPLETE CALENDAR WITH MOON PHASE 17
Warning: To avoid the risk of jamming the corrector buttons
or damaging the movement, it is essential you not make any
adjustment (day, date, month and moon phase) between 3
p.m. and 1 a.m.
To manipulate the corrector buttons, use the small tool
provided in the watch packaging.
To set your watch, please perform these steps in the
following order:
Adjusting the time
1. Pull the crown to Position 2, the seconds hand (C) will
stop moving.
2. Turn the crown to advance the hands (A, B) clockwise
until the date (E) and day (K) change (when the watch
indicates midnight).
3. Continue to turn the crown to set the hands to 3 a.m.
001-224_COR2.indd 9 06.01.15 10:46

10|
Setting the moon
4. Press the corrector button (C4), until the full moon
appears in the center of the moon phase aperture (I).
5. Then press the corrector button (C4) as many times as
there are days passed since the last full moon (consult a
calendar).
To know the dates of the full moon and set your watch, please
visit our website www.baume-et-mercier.com and consult the
page corresponding to your model.
Adjusting the date
6. Press the corrector button (C3), until the date hand (E)
is positioned on the 1.
Setting the month
7. Press the corrector button (C2) to advance the month
(M) until the desired month.
Setting the date
8. Press the corrector button (C3) to advance the date (E)
to the desired date.
Setting the day of the week
9. Press the corrector button (C1), to advance the day (K)
to the desired day.
Setting the time
10.Turn the crown to advance the hands (A, B) clockwise
and position them at the desired time.
11.When the start of the set time is announced (reference
clock, radio, etc.), reset the crown to Position 1.
For months with fewer than 31 days, it is necessary to
change the date manually at the end of the month.
SIMPLE CHRONOGRAPH
18 19 20 21 23 24 25 26
P1: Start/stop push-button. Press once to start the
chronograph (F=seconds, G =minutes, H=hours).
Press a second time to stop and a third time to start
the chronograph again.
P2: Reset push-button. Once the chronograph has been
stopped by pressing the P1 push-button, press the P2
to reset all counters to zero.
To measure several successive times, without counting
intervals, press the P1 push-button several times
consecutively, as follows:
1. Start.
2. Stop and read.
3. Start.
4. Stop and read.
This operation may be repeated as often as desired to
measure successive times.
5. Press the P2 push-button to reset the chronograph to zero.
001-224_COR2.indd 10 06.01.15 10:46

|11
English
FLYBACK CHRONOGRAPH 20
1. Start the chronograph by pressing the push-button P1.
2. To move directly to the next sequence, press the P2
push-button which will reset the chronograph and start
it immediately for a new measurement.
Note: It is also possible to use the standard Chronograph
function. To do this, refer to the preceding paragraph Simple
Chronograph.
DUAL TIME WITH CHRONOGRAPH 22
To use the Chronograph function, refer to the preceding
paragraph Simple Chronograph.
Setting the second time zone
1. Set the crown in Position 2.
2. Turn the crown clockwise to advance the second time
zone hand (D) and set it at the desired time.
001-224_COR2.indd 11 06.01.15 10:46

12|
III. QUARTZ WATCHES
A.GENERAL INFORMATION
A quartz watch is powered by a battery which generally lasts
between 2 to 6 years depending on the model.
The majority of our quartz watches, having a central seconds
hand, come equipped with a system to indicate a low battery
(EOL – End of Life). Approximately two weeks before the
battery will stop, the central seconds hand will begin to jump
every four seconds as a signal to the wearer that the battery
must be changed.
Batteries must be changed by an authorized Baume&Mercier
retailer or After-Sales Service Center to insure that the
battery and any other maintenance meet Baume& Mercier’s
standards. Respecting this requirement is imperative in
connection with the International Guarantee.
COLLECTION AND TREATMENT OF END OF
LIFE QUARTZ WATCHES*
Quartz watches contain a battery as well as
other electronic components. When your watch
is serviced, your authorized Baume & Mercier
retailer or After-Sales Service Center will
take care of storing and disposing of these
components in compliance with current laws.
This symbol indicates that this product should
not be disposed with household waste. It has
to be returned to a local authorized collection
system. By following this procedure you will contribute
to the protection of the environment and human health.
The recycling of the materials will help to conserve
natural resources.
*Valid in EU member states and in any countries with
corresponding legislation.
Note: Since 2011, all batteries used in Baume & Mercier
watches are mercury-free.
PRECISION OF A QUARTZ WATCH
Quartz watches are extremely precise. This is due to the
high frequency of their vibrations (32 kHz). Their precision
(fast or slow) deviates by approximately 1 minute per year.
001-224_COR4.indd 12 08.01.15 08:01

|13
English
B. USER GUIDE
This guide explains all the functions available for different
Baume &Mercier watch models.
To adjust your watch, please identify its icon XX , and refer
to the diagram located on the inside cover of this guide, then
follow the directions corresponding to your model.
SETTING THE TIME WITHOUT A CALENDAR
1 2
1. Pull the crown to Position 2. If your watch has
a seconds hand (C), it will stop moving.
2. Turn the crown either clockwise or counter-clockwise
until the watch hands (A, B) are positioned at the
desired time.
3. Reset the crown Position 1.
SETTING THE TIME WITH A CALENDAR
3 4 7 12 27
1. Pull the crown to Position 3. If your watch has a
seconds hand (C), it will stop moving.
2. Turn the crown either clockwise or counterclockwise,
depending on the model, until the hands (A, B) are
positioned at the desired time.
Note: When the hands (A) pass the 12, if the date changes,
it means it is midnight, and if the date does not change, it
means it is noon.
3. When the start of the set time is announced (reference
clock, radio, etc.), reset the crown Position 1.
RAPID DATE CHANGE 34 7 12
Warning: To avoid damaging the movement, it is vital not
make any rapid date changes during the following time
window, since this is when the movement pinions are gearing
up for the automatic date change.
§Between 11 p.m. and midnight 34
§Between 9.30 p.m. and midnight 7
1. Set the crown in Position 2.
2. Turn the crown to advance the date (E) chronologically,
until the desired date appears.
3. Reset the crown Position 1.
For months with less than 31 days, the date must be changed
manually at the end of the month.
SETTING THE DATE USING RAPID HOUR
CORRECTION 27
1. Set the crown in Position 2.
2. Turn it either clockwise or counter-clockwise to move
the hour hand (A) forward or backward, until the
desired date is displayed (E).
3. Reset the crown Position 1.
For months with less than 31 days, the date must be changed
manually at the end of the month.
Note: When the hands (A) pass the 12, if the date changes,
001-224_COR2.indd 13 06.01.15 10:46

14|
it means it is midnight, and if the date does not change, it
means it is noon.
DUAL-TIME FUNCTION ADJUSTMENT USING
THE CORRECTOR 12
When operating the corrector buttons, kindly use the
dedicated small tool provided in the watch packaging.
1. Activate the dual-time adjustment mode by pressing the
corrector button (C5) for at least two seconds until the
minutes hand of the second time zone (D) moves one minute
forwards.
2. Set the hours and minutes hands of the second time
zone (D) to the required time by proceeding as follows:
- a brief (less than one-second) press on the corrector
(C5) moves the time forwards in one-minute
increments.
- a medium (from one to two-second) press on the corrector
(C5) move the time forwards in one-hour increments.
- a prolonged (more than two-second) press on
the corrector (C5) moves the time zone forwards
continuously until the corrector is released.
Note: The adjustment mode is deactivated if the corrector is
not touched for a full 10 seconds.
SETTING THE MOON PHASE 7
The setting of the moon phases on this watch does not have
rapid correction, and thus is accomplished using the time-
setting.
1. Pull the crown to Position 3.
2. Turn the crown to advance the hands (A, B) clockwise.
This also has the effect of rotating the moon-phase disc
(I) by jumps (one jump per day).
3. Continue to turn the crown to rotate the moon-phase
disc of (I) by jumps until the full moon appears in the
center of the aperture.
4. Continue turning the crown in order to bring about as
many jumps as there are days passed since the last full
moon (consult a calendar).
5. Reset the crown Position 1.
To know the dates of the full moon and set your watch,
please visit our website www.baume-et-mercier.com and
consult the page corresponding to your model.
CHRONOGRAPH: SIMPLE FUNCTION 27
P1: Start/stop push-button. Press once to start the
chronograph (F=seconds, G=minutes, J=1/10 second).
Press a second time to stop.
P2: Reset push-button.
To measure several successive times, without counting
intervals, press the P1 push-button several times
consecutively, as follows:
1. Start.
2. Stop and read.
3. Start.
4. Stop and read.
001-224_COR2.indd 14 06.01.15 10:46

|15
English
This operation may be repeated as often as desired to
measure successive times.
5. Press the P2 push-button to reset the chronograph to
zero.
CHRONOGRAPH: ADDITIONAL FUNCTION
“SPLIT-SECONDS” 27
To measure intermediate time periods with a split-seconds
hand.
1. Press the P1 push-button to start the chronograph.
2. Press the P2 push-button to read the intermediate time.
3. Press the P2 push-button to reset and read the time
elapsed.
Operations 2 and 3 may be repeated as often as desired to
measure any number of intermediate times.
4. Press the P1 push-button to stop the chronograph and
read the final time.
5. Press the P2 push-button to reset the chronograph
to zero.
CHRONOGRAPH: INITIALIZING
THE COUNTERS 27
If the counters are not correctly reset to zero, kindly proceed
in the following order:
1. Pull the crown out to Position 2.
2. Press push-button P2 to reset the minutes counter (G)
to zero.
3. Pull the crown out to Position 3.
4. Press push-button P1 to reset the
chronograph seconds counter (F) to zero.
5. Press push-button P2 to reset the tenth of a second
counter (J) to zero.
6. Press the crown back into Position 1.
001-224_COR2.indd 15 06.01.15 10:46

16|
IV. RECOMMENDATIONS AND CARE
Your Baume & Mercier watch was both designed and
manufactured with great care. It contains a great number
of very delicate components, which is why we encourage
you to be careful, avoid any impact to the watch, avoid
any erroneous adjustments, and protect it from impact and
extreme temperature variations.
Furthermore, a watch is something rare in that it works
continuously, 24 hours a day. For optimal reliability and
for the longevity of your watch, we recommend having your
watch serviced every 3 to 5 years.
BAUME& MERCIER AUTHORIZED AFTER-
SALES SERVICE CENTERS
Baume& Mercier watches are maintained by an international
network of After-Sales Service Centers which meet the
highest quality requirements of Swiss watchmaking.
Approved through a demanding selection process, only a
Baume &Mercier authorized retailer or After-Sales Service
Center is authorized to perform service on your watch.
These centers undergo regular training provided by the
brand, thus guaranteeing an irreproachable service quality
by using specially-designed tools meant for repairing
Baume &Mercier watches and by replacing worn parts with
original components. Furthermore, tests are conducted using
up-to-date and reliable quality controls.
Any repair work not carried out by a Baume &Mercier
authorized retailer or After-Sales Service Center will not be
covered by the Baume & Mercier warranty. Also excluded
from warranty coverage are watches not containing original
Baume &Mercier parts.
Furthermore, to safeguard your watch, please read the
following recommendations for use and care:
MECHANICAL WATCH MAINTENANCE
In the event that your watch will not be worn for several
months, we recommend you wind your mechanical watch
regularly so that the oils do not seize, thus disrupting proper
functioning of the movement.
WATER-RESISTANCE
Baume &Mercier watches are water-resistant up to at least
30 meters. If a model’s water-resistance goes beyond 30
meters, the depth is indicated on the back of the case.
When a watch is water-resistant its movement is protected
from dust, humidity and any risk of damage caused by
immersion.
The water-resistance of a watch comes from its joints.
Because these joints are exposed to different types of
external stress (cosmetics, perspiration, temperature
changes), your watch may become less water-resistant with
time. As a consequence, we recommend you have your watch
checked every 12 to 24 months to guarantee it remains fully
water-resistant.
001-224_COR2.indd 16 06.01.15 10:46
This manual suits for next models
118
Table of contents
Languages:
Other Baume And Mercier Watch manuals
Baume And Mercier
Baume And Mercier Clifton Club 10367 User manual

Baume And Mercier
Baume And Mercier Clifton 10060 User manual

Baume And Mercier
Baume And Mercier Baume 10590 User instructions
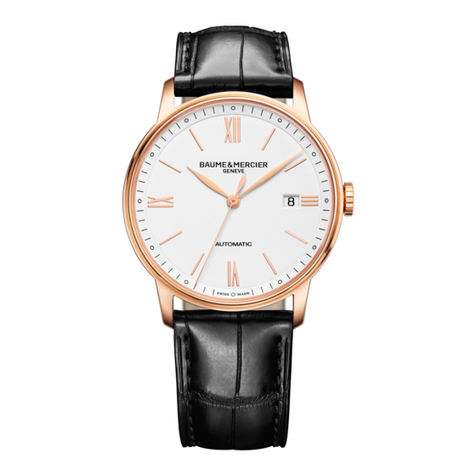
Baume And Mercier
Baume And Mercier Watch User manual

Baume And Mercier
Baume And Mercier Clifton 10449 User manual

Baume And Mercier
Baume And Mercier Baume 10603 User instructions
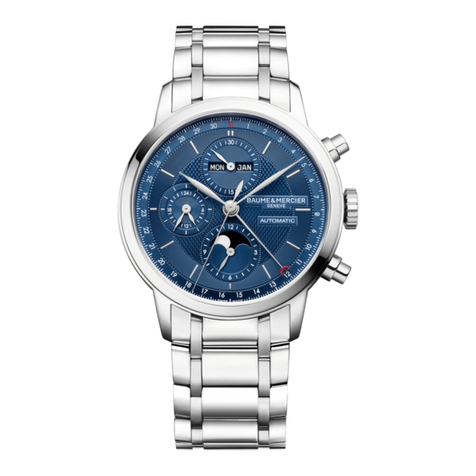
Baume And Mercier
Baume And Mercier 10485 User instructions

Baume And Mercier
Baume And Mercier 8380 User manual

Baume And Mercier
Baume And Mercier 8050 User manual

Baume And Mercier
Baume And Mercier Clifton 65717 User manual


