Baby bottle and food warmer
EN
10
b. In-car use
!
Attention:
Do not use the bottle warmer in acar while driving, the water inside could reach ahigh temperature and cause
burns. To prevent discharging the car battery, we recommend that the engine is running during the warming
process.
■Never use the bottle warmer without water in the heating tank!
■Stand the bottle warmer on ahorizontal and stable surface.
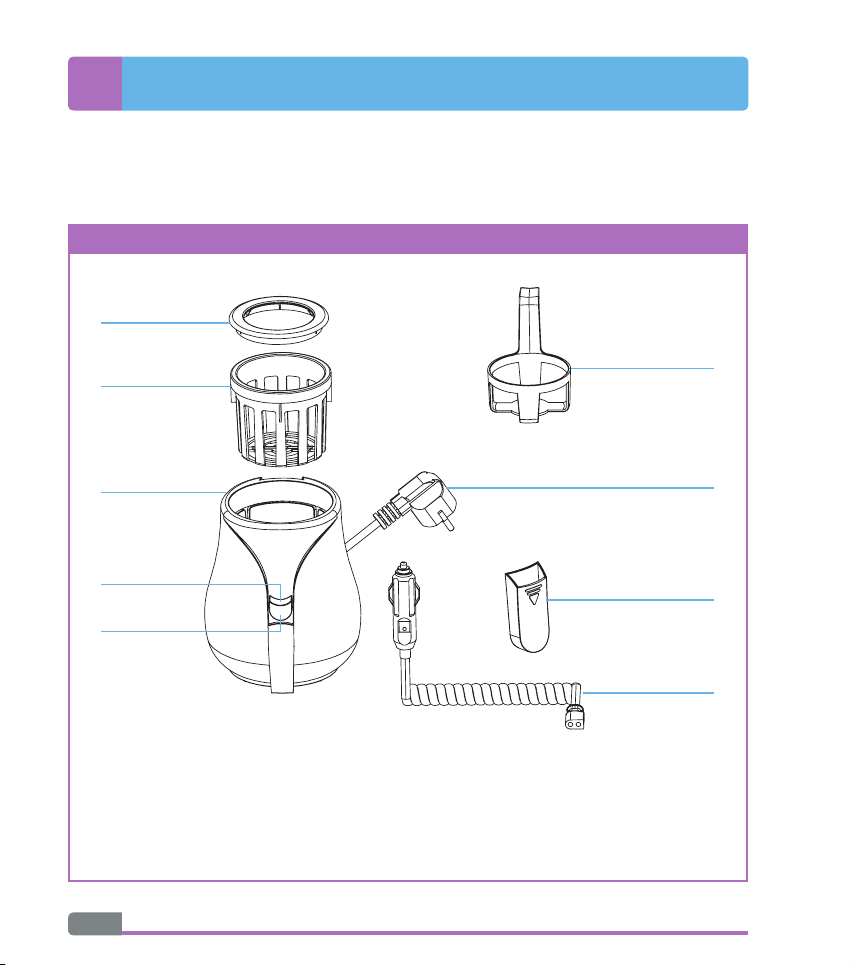
■Place the baby bottle into the bottle tray A2and put it into the heating tank A3.
■For small bottles, use the baby bottle adapter ring A1, that is fitted on to the baby bottle and place it inside
the baby bottle warmer adapter A2and put it into the heating tank A3.
■To pour the correct amount of water into the heating tank, use the removable measuring cup A8or ababy
bottle with an appropriate measuring scale.
■Adhere to the precise amount of water depending on the size of the baby bottle based on the information in
the Reference baby bottle warming table above and use it to find the time necessary for warming up the milk.
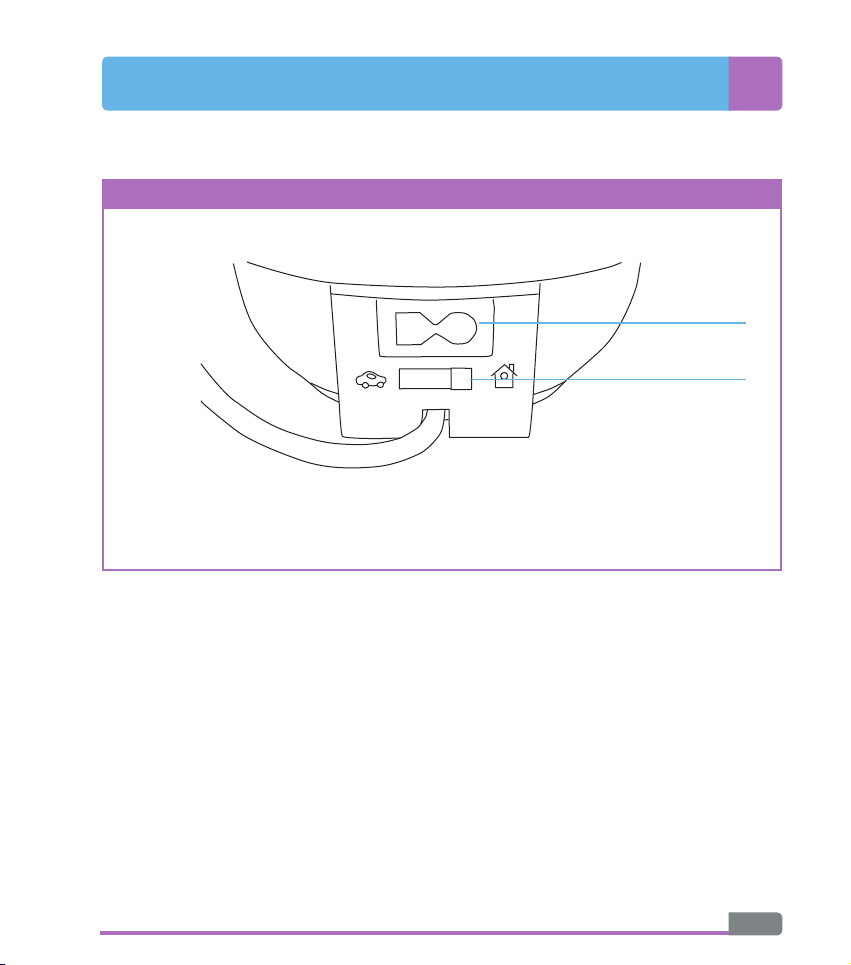
■Check that the switch is in the middle OFF position (turned off), insert the cigarette lighter adapter A9into
the 12 V cigarette lighter adapter socket B1and the other end into the your car'scigarette lighter socket.
■Select the warming method by setting switch B2to in-car warming (picture of acar).
■Press the ON switch A4.
■The indicator light A5signalises that the bottle warmer is running.
■The ON switch A4cannot be used for turning off the appliance. The bottle warmer will automatically turn off
at the end of the warming cycle.
!
Attention:
The steam that is released during the warming process is hot. Keep your hands away during the warming
process.
■At the end of the warming cycle, immediately take the bottle out of the bottle warmer and set the switch B2
at the rear of the bottle warmer to the OFF position (turned off). Then, please unplug the 12V car cigarette
lighter adapter A9from the 12V cigarette lighter socket in your car.
■If you wish to turn the bottle warmer off at any time, set the switch B2to the middle OFF position (turned off)
and unplug the 12 V car cigarette lighter adapter A9from the 12 V car cigarette lighter socket.
■Shake the baby food or milk after taking it out of the bottle warmer. Check the temperature of the food or milk
by dripping alittle on your wrist. Carefully dry the bottle before serving the food to achild.