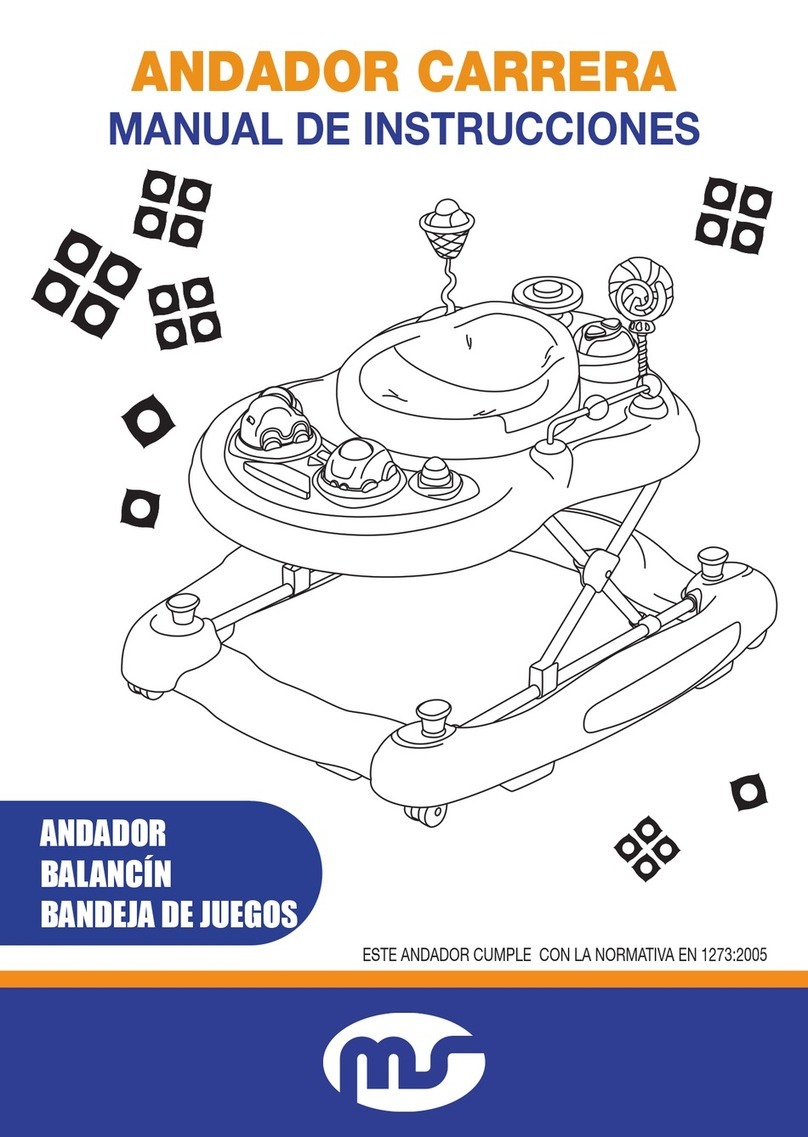
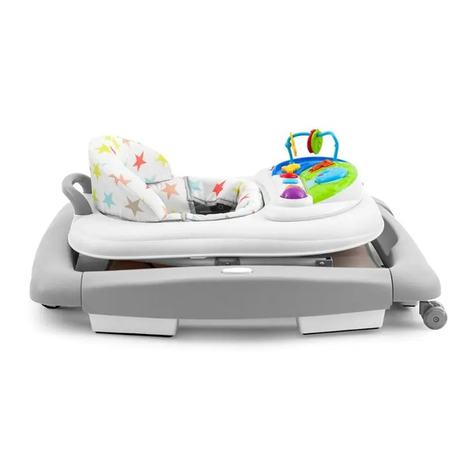
Innovaciones M.S. 435 User manual

Infant Walker and Electronic Play Tray
Owner’s Manual
Read all instrucons before assembly and use of the walker.
Keep instrucons for future use.
The child may be hurt if you do not follow these instrucons.
IMPORTANT! KEEP FOR FUTURE REFERENCE.
WARNING! TO BE ASSEMBLED BY AN ADULT!
Lea las instrucciones antes de montar y utilizar el andador .
Guarde las instrucciones para futuras consultas.
El niño puede sufrir alguna herida si no sigue las instrucciones.
¡IMPORTANTE! GUARDE LAS INSTRUCCIONES
PARA FUTURAS CONSULTAS.
¡ PRECAUCIÓN! ¡EL ANDADOR LO DEBE MONTAR UN ADULTO!
MANUAL DE INSTRUCCIONES
ANDADOR
PARA NIÑOS
CON BANDEJA ELETRÓNICA
REF.: 435 - 436 - 437
Estándard europeo aprobado
EN1273:2005
EN71-1-2-3

step 3
step 2
step 1
ASSEMBLY
1. Turn the baby walker frame upside down. Fix the wheels in the appropriate housings. Ensure that
the wheels are firmly pushed all the way into the housing on the down base of the walker.
2. Fix the rear fix wheels in the appropriate housings. Ensure that the wheels are firmly pushed all the
way into the housing on the down base of the walker.
3. Fix the safe rubbers in the appropriate housings. Ensure that the safe rubbers are firmly pushed all
the way into the housing on the down base of the walker.
Assembling Procedures
2
Assembling Procedures
D. Large spoiler
Check that you have all the parts for this model BEFORE assembling your product.
No tools required.
Parts List
F. Padded seatE. Baby walker frame G. Electronic play tray
1
Before using, check that the product and all of its components have not been
damaged during transportaon. Check regularly that the product is not broken or
damaged. If the product is broken or damaged, keep out of reach of children.
The product must only be assembled by an adult. For the correct assembly of the
product, please refer to the following instrucons.
STAIR HAZARD: Avoid serious injury or death. Block stairs/
step securely before using walker even when using
parking brake.
The child will be able to reach further and move rapidly when in the w alking frame.
Prevent access to stairs, steps and uneven surfaces, slopes or unstable floors,
swimming pools or other sources of water. Only use the baby walker frame on
flat and stable surfaces.
Never leave child unaended. Always keep child in view
while in walker.
Guard all fires, heang and cooking appliances.
Remove hot liquids, electrical flexes and other potenal hazards from reach.
Prevent collisions with glass in doors, windows and furniture.
Do not use the baby walking frame if any components are broken or missing.
This baby walking frame should be used only for short periods of me(e.g.20 min).
This baby walking frame is intended to be used by children who can sit unaided,
approximately from 6 months. It is not intended for children weighing more than 12kg.
Do not use replacement parts other than those approved by the manufacturer
or distributor.
Before using, remove and dispose of any plasc bags and any other packaging(e. g
fasteners, fixing es, etc. ) and keep them out of reach of children.
•
•
•
•
•
•
•
•
•
•
•
Read the instrucons carefully before use and keep them for future reference.
The child may be hurt if you do not follow these instrucons.
B. rear fix wheels C. safe rubbers
A. wheels
Partes del andador
Compruebe que tiene todas las partes del andador ANTES de montar el pro-
ducto. No necesita ninguna herramienta para montar este andador.
A. Ruedas B. Ruedas jas traseras
E. Chasis del andador F. Asiento acolchado G. Bandeja de juegos electrónica
C. Frenos D. Guarda barros
ADVERTENCIAS
!
ADVERTENCIAS
!
ADVERTENCIAS
!
Lea las instrucciones atentamente antes de utilizar el producto y guárdelas para futuras consultas. El
niño puede hacerse daño si no sigue las instrucciones.
Antes de utilizarlo, saque y tire todas las bolsas de plástico o cualquier otro embalaje (como por ejemplo
, tiras, cuerdas, etc) y manténgalas fuera del alcance de los niños.
• Antes de utilizarlo, compruebe que el producto y todos sus componentes no están rotos por el trans-
porte. Compruebe regularmente que el producto no esté roto o dañado de alguna forma. Si el producto
está roto o dañado, tiene que mantenerlo fuera del alcance de los niños.
• Este producto sólo puede montarlo un adulto. Para el montaje correcto del producto, por favor lea las
siguientes instrucciones.
PELIGRO CON LAS ESCALERAS: Impedir el acceso a escaleras, esca-
lones y superfcies irregulares.
•
ADVERTENCIA: Cuando esté en el andador, el niño podrá alcan-
zar más objetos y desplazarse rápidamente.
• Evite el acceso a escaleras, escalones o supercies con desnivel, pendientes o suelos inestables, pisci-
nas o cualquier otra fuente de agua. Sólo puede utilizar el andador es supercies estables y sin desniveles.
ADVERTENCIA: No dejar nunca al niño desatendido.
Debe estar vigilado siempre que esté en el andador.
• Proteja los fuegos, calefacciones o aparatos de cocina.
• Quite los líquidos calientes, cables eléctricos u otro peligro potencial al alcance de los niños.
• Evite que el niño pueda tropezar con el cristal de las puertas, de las ventanas o de los muebles.
• No utilice el andador si hay alguna parte rota o que falta.
•
Este andador debe utilizarse durante cortos periodos de tiempo ( por ejemplo unos 20 minutos seguidos)
• Este andador es para niños que puedan quedarse sentados sin ayuda , des de los 6 meses aproximada-
mente. Este andador no se puede utilizar con niños que pesen más de 12 kg.
· No utilice piezas de repuesto que no hayan sido autorizadas por el fabricante o distribuidor.
· Instrucciones de mantenimiento y de limpieza o lavado.

step 3
step 2
step 1
ASSEMBLY
1. Turn the baby walker frame upside down. Fix the wheels in the appropriate housings. Ensure that
the wheels are firmly pushed all the way into the housing on the down base of the walker.
2. Fix the rear fix wheels in the appropriate housings. Ensure that the wheels are firmly pushed all the
way into the housing on the down base of the walker.
3. Fix the safe rubbers in the appropriate housings. Ensure that the safe rubbers are firmly pushed all
the way into the housing on the down base of the walker.
Assembling Procedures
2
Assembling Procedures
Proceso de Montaje
Paso 1
Paso 2
Paso 3
1. Ponga el chasis del andador boca abajo. Coloque las ruedas en su hueco correspondiente. Asegúrese de que
las ruedas están bien colocadas en su lugar correspondiente en la parte inferior de la base del andador.
2. Coloque las ruedas traseras en su lugar correspondiente. Asegúrese de que las ruedas están bien colocadas
en su sitio en la parte inferior de la base del andador.
3. Coloque los frenos de goma en su lugar correspondiente. Asegúrese de que los frenos de goma estén bien
colocados por toda la base del andador, en el lugar donde les corresponde.
D. Large spoiler
Check that you have all the parts for this model BEFORE assembling your product.
No tools required.
Parts List
F. Padded seatE. Baby walker frame G. Electronic play tray
1
Before using, check that the product and all of its components have not been
damaged during transportaon. Check regularly that the product is not broken or
damaged. If the product is broken or damaged, keep out of reach of children.
The product must only be assembled by an adult. For the correct assembly of the
product, please refer to the following instrucons.
STAIR HAZARD: Avoid serious injury or death. Block stairs/
step securely before using walker even when using
parking brake.
The child will be able to reach further and move rapidly when in the w alking frame.
Prevent access to stairs, steps and uneven surfaces, slopes or unstable floors,
swimming pools or other sources of water. Only use the baby walker frame on
flat and stable surfaces.
Never leave child unaended. Always keep child in view
while in walker.
Guard all fires, heang and cooking appliances.
Remove hot liquids, electrical flexes and other potenal hazards from reach.
Prevent collisions with glass in doors, windows and furniture.
Do not use the baby walking frame if any components are broken or missing.
This baby walking frame should be used only for short periods of me(e.g.20 min).
This baby walking frame is intended to be used by children who can sit unaided,
approximately from 6 months. It is not intended for children weighing more than 12kg.
Do not use replacement parts other than those approved by the manufacturer
or distributor.
Before using, remove and dispose of any plasc bags and any other packaging(e. g
fasteners, fixing es, etc. ) and keep them out of reach of children.
•
•
•
•
•
•
•
•
•
•
•
Read the instrucons carefully before use and keep them for future reference.
The child may be hurt if you do not follow these instrucons.
B. rear fix wheels C. safe rubbers
A. wheels

5. Insert the plasc rings of the padded seat in the slots located along the upper edge of the walker
frame. Pass the rings through the slots and tug them unl they clear the passage, then release them,
ensuring that they are correctly locked in the posion and cannot recede into the slot.
6. Fit the large spoiler on the rear walker frame; simply place it on the housings, located at the rear of
the backrest, and push it firmly in a downward direcon, ensuring that it has been fied in the
correct posion. Please do not li up baby walker with large spoiler. It is dangerous do in this way.
3
4. Open the baby walker frame in the in-use posion, ensuring that all wheels touch the floor. Slowly
raise the tray by polling it in an upward direcon, unl a click indicates that the frame has been
locked correctly in one of the three posions.
step 4
step 5
step 6
Paso 4
Paso 5
Paso 6
4. Abra el chasis del andador como si fuera a utilizarlo, asegúrese de que todas las ruedas tocan el suelo. Con
cuidado, levante la bandeja tirando hacia arriba, hasta que un “clic” indica que el chasis está bien colocado en una
de las 3 posiciones.
5. Introduzca las anillas de plástico en el asiento acolchado en las ranuras que están colocadas por el borde su-
perior del chasis del andador. Pase las anillas por las ranuras y tire de ellas hasta que pasen al otro lado, libérelas
asegurándose de que están bien colocadas y no pueden salirse de la ranura.
6. Coloque el asa grande en la parte trasera del chasis , sólo tiene que colocarla en sus ranuras correspondientes
que están en la parte trasera del respaldo, y apriete rmemente hacia abajo, asegurándose de que lo ha colocado
en su lugar correspondiente . No levante el andador por el asa. Es peligroso hacerlo de este modo.

8. Completely assembled.
4
7. Insert all small toy parts into corresponding holes, then press and hold the front of the toy tray safe
buons, while the toy tray to put on the dinner plate, release the buon, then the toy tray is locked.
step 7
step 8
Paso 8
Paso 7
7. Introduzca los juguetes pequeños en sus agujeros correspondientes, luego apriete y mantenga los botones
delanteros de la bandeja apretados , mientras coloca la bandeja en la parte correspondiente del chasis, luego
suelte los botones y la bandeja ya se queda colocada en su sitio.
8. Andador completamente montado

How to Fold the Walker
5
How to Adjust the Height of Baby Walker Frame
10. To close the walker frame, pull the buon located under the small tray-table, and rotate it to 90
degrees. While pressing the safe buon lower the seat, ll the walker frame is completely folded.
9. To adjust the seat’s height, remove the child from the baby walking frame, pull up the safe buon
located under the small tray table and rotate it to 90 degrees. keep the safe buon pressed, then
raise or lower the small table unl the desired posion is reached, then pull up the safe buon and
rotate it to 90 degrees again to lock the small table.(If it is a automac secondary lock, please make
sure the lock rotated to go degrees.)
When opening, closing or adjusng the walker, ensure that your child is at a safe
distance. Before placing the child in the walker ensure that the secondary lock
buon is correctly locked again.
step 10
step 9
Paso 9
Paso 10
9. Para ajustar la altura del asiento , saque al niño del andador , suba el botón de seguridad que está colocado
debajo de la bandeja pequeña y gírelo 90 grados, mantenga el botón de seguridad presionado, luego suba o
baje la mesita hasta la posición que desee, entonces tire hacia arriba del botón de seguridad ,y vuélvalo a girar 90
grados otra vez para jar la bandeja en una posición ( si es el doble cierre automático, asegúrese de que ha girado
los grados necesarios para que se quede jo).
10. Para cerrar el chasis del andador, tire del botón que está debajo de la bandeja pequeña, y gírelo 90 grados.
Mientras presiona el botón de seguridad , vaya bajando el asiento, hasta que el andador esté completamente
plegado.
Como ajustar la altura del chasis del andador
Cómo dobla el andador
¡PRECAUCIONES!
Al abrir, cerrar a ajustar el andador, asegúrese de que el niño esté a una distan-
cia segura. Antes de colocar al niño en el andador , asegúrese de que el segundo
cierre de seguridad esté bien colocado.

How to Install the Strip
11. Put the so bumpers on the corresponding posion of the baby walker frame, lock screw and ghten.
step 12
step 11
The walker includes one electronic play tray that aaches to the walker frame as
shown in step 7. The funcon and use of the play tray are shown here.
Using Electronic Play Toy Tray
3D colorful scker shows beauful view
Rotang toy
Lights twinkle with music when the lovely
Press the piano keys to listen to
Move ddler back and forth
Switch
splendid music
Octopus is pressed
Paso 11
Paso 12
11. Coloque las gomas de freno en su lugar correspondiente en el chasis del andador, en la base. Coloque los
tornillos y enrósquelos.
Como instalar las gomas de freno
Para utilizar la bandeja de juegos electrónica
¡PRECAUCIONES!
El andador incluye una bandeja de juegos electrónica que se engancha al chasis
como se muestra en el paso 7. La función y el uso de la bandeja se muestran aquí.
Piezas de juguete giratoria.
Juguete en forma de or giratoria con un molino
que gira 360 grados para la diversión de los más
pequeños.
Botones musicales
A
B
C
A
BCB

7
• Check regularly the walker frame for signs of damage or wear.
• Clean the plasc parts, including the stoppers, with a damp cloth.
• Clean the seat with brush or family soap and neutral scour
• Dry the metal parts to prevent the formaon of rust.
• Prolonged exposure to direct sunlight may cause the fabric to fade.
Product Care and Maintenance
Fing and / or Replacing Baeries
The toy of the walker frame requires 2X"AA" 1.5Volt alkaline
type baeries(not included).
• Baeries must only be fied by an adult.
• To fit and/ or replace baeries: loosen the screw on the baery
compartment cover with a suitable screwdriver, press the tab and
remove the baery compartment cover. Then remove the spent
baeries and fit new ones, ensuring that they have been fied in
the correct polarity, as shown inside the baery compartment.
Replace the baery cover and ghten the screw.
• Always keep baeries and tools out of reach of children.
• Always remove spent baeries from the toy to avoid the danger of
possible leakage from the baery damaging the product.
•
Always remove the baeries if the toy will not be used for a
long period.
• Only use alkaline baeries of the same type of equivalent to the
type recommended for the correct funcon of this product.
• Never mix new and old baeries, or different types of baeries.
• Do not burn or dispose of spent baeries into the environment.
Dispose of spent baeries at an appropriate differenated
collecon point.
• Do not short-circuit the baery terminals.
• Do not aempt to recharge non-rechargeable baeries: they
might explode.
• The use of rechargeable baeries is not recommended and cannot
be used.
Para colocar / o cambiar las pilas
Cuidado y mantenimiento del producto
¡PRECAUCIONES!
La bandeja del andador necesita 2x AA ´´ 1.5 Vol pilas alcalinas ( ESTAS
PILAS NO VAN INCLUIDAS EN EL PRODUCTO )
· Las pilas debe colocarlas un adulto.
· Para colocar / o quitar las pilas : suelte los tornillos que están en la tapa
del compartimiento de las pilas con el destornillador correspondiente,
apriete el enganche para quitar la tapa del compartimiento de las pilas.
Luego quite las pilas gastadas y coloque las nuevas, asegúrese de que las
ha puesto con la polaridad correcta , como se muestra dentro del comparti-
miento de las pilas. Vuelva a colocar la tapa del compartimiento de las pilas
y enrosque el tornillo .
· Tiene que mantener las pilas y cualquier herramienta fuera del alcance de
los niños.
· Tiene que quitar las pilas gastadas de la bandeja para evitar que se salga
cualquier uido de la pila dañando el producto.
· Si no va a utilizar la bandeja durante un largo periodo de tiempo, tiene
que quitar las pilas.
· Solo puede utilizar pilas alcalinas del mismo tipo o equivalentes al tipo
recomendado para el correcto funcionamiento de este producto.
· Nuca mezcle pilas nuevas y gastadas , o tipos diferentes de pilas.
· No queme o tire las pilas gastadas a la basura, debe reciclarlas.
· Tiene que evitar que las baterías sufran cualquier corto circuito.
· No intente recargar las pilas que no sean recargables: podrían explotar.
· De todas formas no se recomienda el uso de pilas recargables. No debe
utilizarlas.
• Compruebe periódicamente que el chasis no está dañado ni tiene ninguna rotura.
• Limpie las partes de plástico , incluyendo los frenos con un trapo húmedo.
• Limpie el asiento con un cepillo y jabón o detergente para ropa delicada neutro.
• Seque las partes de metal para evitar cualquier corrosión.
• Si lo deja al sol durante mucho tiempo, la tela puede perder el color.


GARANTÍA FORMAL
Los contenidos de este documento como se muestra a continua-
ción tendrán efecto desde el momento que se compra el producto.
Innovaciones M.S. S.L. el distribuidor oficial situado en Pol. Ind.
La Cava. Avda. Generalitat Valenciana s/n. Sector Industrial 5. 46892
MONTAVERNER. Valencia.(Spain) garantiza al consumidor que este
es un producto nuevo y no tiene ningún fallo en cuanto a los materia-
les, diseño y fabricación y que tiene las características que ha decla-
rado el fabricante.
Esta garantía formal, es válida para todos los países miembros de
la Comunidad Europea sin quedar en ninguno excluido el derecho del
consumidor según medidas legales que obligan a la tienda que vende
el producto a ofrecer esta garantía.
Para beneficiarse de esta garantía formal, el Consumidor debe de-
volver el producto defectuoso a la tienda donde lo adquirió presen-
tando al comerciante la prueba de compra del producto que debe
mostrar detalladamente la dirección de la tienda, la fecha de compra
del producto con el sello de la tienda y una firma indicando de que
producto se trata, o , en su defecto, el recibo que no debe ser altera-
do y que claramente debe mostrar la misma información que hemos
dicho antes.
La garantía formal es válida durante veinticuatro (24) meses des de
que se compra el producto.
Durante este periodo INNOVACIONES M.S. S.L. arreglará o cam-
biará cualquier producto defectuoso bajo su criterio.
La garantía formal es para el comprador final del producto (Con-
sumidor) y no excluye ni limita los derechos del Consumidor según
marca la ley y/o los derechos que el Consumidor tiene respecto a la
tienda que vende el producto.
LA GARANTÍA NO SERÁ VÁLIDA EN LOS SIGUIENTES CASOS.
La garantía formal queda excluida en el caso de daño causado al
producto por las siguientes razones: si el producto se utiliza de una
forma que no cumple con la información de las instrucciones para su
uso y montaje, si le han dado un golpe al producto o se ha caído, si
el producto está expuesto a la humedad, o al calor extremo o a con-

diciones ambientales adversas, o a cambios repentinos de tiempo,
cuando el producto se corroe , se oxida o se repara o se altera el
producto sin autorización previa, si lo repara utilizando piezas de re-
puesto no autorizadas , si el uso o mantenimiento del producto no es
el correcto, o no hace ningún tipo de mantenimiento sin hacer lo que
se dice en el manual de instrucciones, se monta mal, tiene algún ac-
cidente , se estropea a causa de la comida o la bebida, por cualquier
producto químico o causas de fuerza mayor.
En cualquier caso, INNOVACIONES M.S. S.L. ,rechaza toda res-
ponsabilidad por daños causada a las personas o a la propiedad ,
otra que no sea el producto ,si el daño lo causa por no seguir las
instrucciones, consejos o precauciones que hay en el manual de ins-
trucciones por parte del propietario o persona que esté utilizando el
producto. (Sólo como ejemplo, no deje nunca al niño solo o el niño
debe de tener siempre el arnés puesto…)
Es más, INNOVACIONES M.S. S.L. , rechaza toda responsabilidad
de daño a personas y a la propiedad cuando la rotura del producto se
debe a un deterioro de los componentes del producto normal por el
uso que se hace de éste. Todos los componentes de este producto
hechos de plástico, se desgastan con el uso.
Importado por INNOVACIONES M.S. S.L.
Pol. Ind. La Cava
C/. Beniganim, 9
46892 MONTAVERNER (Valencia) Spain
Tel. 96 229 76 70 - Fax 96 229 76 76
Sello del establecimiento vendedor para garantía


IMPORTADO POR
INNOVACIONESMS.COM
IMPORTADO POR
INNOVACIONES M.S., S.L.
Pol. Ind. La Cava.
C/ Benigànim, 9
46892 MONTAVERNER
(Valencia) Spain
Tel. 96 229 76 70
Fax 96 229 76 76

Read all instructions before assembly and use of the walker.
Keep instructions for future use.
The child may be hurt if you do not follow these instructions.
IMPORTANT! KEEP FOR FUTURE REFERENCE.
WARNING! ¡TO BE ASSEMBLED BY AN ADULT!
OWNER’S MANUAL
INFANT
WALKER
AND ELECTRONIC PLAY TRAY
Infant Walker and Electronic Play Tray
Owner’s Manual
Read all instrucons before assembly and use of the walker.
Keep instrucons for future use.
The child may be hurt if you do not follow these instrucons.
IMPORTANT! KEEP FOR FUTURE REFERENCE.
WARNING! TO BE ASSEMBLED BY AN ADULT!
REF.: 435 - 436 - 437
Estándard europeo aprobado
EN1273:2005
EN71-1-2-3

step 3
step 2
step 1
ASSEMBLY
1. Turn the baby walker frame upside down. Fix the wheels in the appropriate housings. Ensure that
the wheels are firmly pushed all the way into the housing on the down base of the walker.
2. Fix the rear fix wheels in the appropriate housings. Ensure that the wheels are firmly pushed all the
way into the housing on the down base of the walker.
3. Fix the safe rubbers in the appropriate housings. Ensure that the safe rubbers are firmly pushed all
the way into the housing on the down base of the walker.
Assembling Procedures
2
Assembling Procedures
D. Large spoiler
Check that you have all the parts for this model BEFORE assembling your product.
No tools required.
Parts List
F. Padded seatE. Baby walker frame G. Electronic play tray
1
Before using, check that the product and all of its components have not been
damaged during transportaon. Check regularly that the product is not broken or
damaged. If the product is broken or damaged, keep out of reach of children.
The product must only be assembled by an adult. For the correct assembly of the
product, please refer to the following instrucons.
STAIR HAZARD: Avoid serious injury or death. Block stairs/
step securely before using walker even when using
parking brake.
The child will be able to reach further and move rapidly when in the w alking frame.
Prevent access to stairs, steps and uneven surfaces, slopes or unstable floors,
swimming pools or other sources of water. Only use the baby walker frame on
flat and stable surfaces.
Never leave child unaended. Always keep child in view
while in walker.
Guard all fires, heang and cooking appliances.
Remove hot liquids, electrical flexes and other potenal hazards from reach.
Prevent collisions with glass in doors, windows and furniture.
Do not use the baby walking frame if any components are broken or missing.
This baby walking frame should be used only for short periods of me(e.g.20 min).
This baby walking frame is intended to be used by children who can sit unaided,
approximately from 6 months. It is not intended for children weighing more than 12kg.
Do not use replacement parts other than those approved by the manufacturer
or distributor.
Before using, remove and dispose of any plasc bags and any other packaging(e. g
fasteners, fixing es, etc. ) and keep them out of reach of children.
•
•
•
•
•
•
•
•
•
•
•
Read the instrucons carefully before use and keep them for future reference.
The child may be hurt if you do not follow these instrucons.
B. rear fix wheels C. safe rubbers
A. wheels
Read the instructions carefully before use and keep them for future reference. The child may be hurt if
you do not follow these instructions.
Before using, remove and dispose of any plastic bags and any other packaging (e.g fasteners, xing ties,
etc.) and keep them out of reach of children.
· Before using, check that the product and all of its components have not been damged during
transportation. Check regularly that the product is not broken or damaged. If the product is broken or
damaged, keep out of reach of children.
· The product must only be assembled by an adult. For the correct assembly of the product, please refer
to the following instructions.
STAIR HAZARD: Avoid serious injury or death. Block stairs/step secu-
rely before using walker even when usng parking brke.
• WARNING: When in the baby walking frame, the child can
reach more objects and move quickly.
• Prevent acces to stairs, steps and uneven surfaces, slopes or unstable oors, swimming pools or other
sources of water. Only use the baby walker frame on at and stable surfaces.
• WARNING: Never leave the child unattended.
Always keep child in view while in walker.
• Guard all res, heating and cooking appliances.
• Remove hot liquids, electrical exes and other potential hazards from reach.
• Prevent collisions with glass in doors, windows and furniture.
• Do not use the baby walking frame if any components are broken or missing.
•
This baby walking frame should be used only for short periods of time (e.g. 20 min.)
• This baby walking frame is intended to be used by children who can sit unaided, approximately from 6
months. It is not intended for children weighing more tan 12kg.
· Do not use replacement parts other than those approved by the manufacturer or distributor.
· Maintenance and cleaning or washing instructions.

step 3
step 2
step 1
ASSEMBLY
1. Turn the baby walker frame upside down. Fix the wheels in the appropriate housings. Ensure that
the wheels are firmly pushed all the way into the housing on the down base of the walker.
2. Fix the rear fix wheels in the appropriate housings. Ensure that the wheels are firmly pushed all the
way into the housing on the down base of the walker.
3. Fix the safe rubbers in the appropriate housings. Ensure that the safe rubbers are firmly pushed all
the way into the housing on the down base of the walker.
Assembling Procedures
2
Assembling Procedures
D. Large spoiler
Check that you have all the parts for this model BEFORE assembling your product.
No tools required.
Parts List
F. Padded seatE. Baby walker frame G. Electronic play tray
1
Before using, check that the product and all of its components have not been
damaged during transportaon. Check regularly that the product is not broken or
damaged. If the product is broken or damaged, keep out of reach of children.
The product must only be assembled by an adult. For the correct assembly of the
product, please refer to the following instrucons.
STAIR HAZARD: Avoid serious injury or death. Block stairs/
step securely before using walker even when using
parking brake.
The child will be able to reach further and move rapidly when in the w alking frame.
Prevent access to stairs, steps and uneven surfaces, slopes or unstable floors,
swimming pools or other sources of water. Only use the baby walker frame on
flat and stable surfaces.
Never leave child unaended. Always keep child in view
while in walker.
Guard all fires, heang and cooking appliances.
Remove hot liquids, electrical flexes and other potenal hazards from reach.
Prevent collisions with glass in doors, windows and furniture.
Do not use the baby walking frame if any components are broken or missing.
This baby walking frame should be used only for short periods of me(e.g.20 min).
This baby walking frame is intended to be used by children who can sit unaided,
approximately from 6 months. It is not intended for children weighing more than 12kg.
Do not use replacement parts other than those approved by the manufacturer
or distributor.
Before using, remove and dispose of any plasc bags and any other packaging(e. g
fasteners, fixing es, etc. ) and keep them out of reach of children.
•
•
•
•
•
•
•
•
•
•
•
Read the instrucons carefully before use and keep them for future reference.
The child may be hurt if you do not follow these instrucons.
B. rear fix wheels C. safe rubbers
A. wheels

5. Insert the plasc rings of the padded seat in the slots located along the upper edge of the walker
frame. Pass the rings through the slots and tug them unl they clear the passage, then release them,
ensuring that they are correctly locked in the posion and cannot recede into the slot.
6. Fit the large spoiler on the rear walker frame; simply place it on the housings, located at the rear of
the backrest, and push it firmly in a downward direcon, ensuring that it has been fied in the
correct posion. Please do not li up baby walker with large spoiler. It is dangerous do in this way.
3
4. Open the baby walker frame in the in-use posion, ensuring that all wheels touch the floor. Slowly
raise the tray by polling it in an upward direcon, unl a click indicates that the frame has been
locked correctly in one of the three posions.
step 4
step 5
step 6
This manual suits for next models
2
Table of contents
Other Innovaciones M.S. Baby Accessories manuals
Popular Baby Accessories manuals by other brands
dreambaby
dreambaby F820AL instructions
Philips
Philips SCH530/86 user manual

Bright Starts
Bright Starts Disney Baby WINNIE THE POOH Once Upon a Tummy... quick start guide
Baby Brezza
Baby Brezza One Step Advanced instructions

JANE
JANE 050206C01 quick start guide
VTech Baby
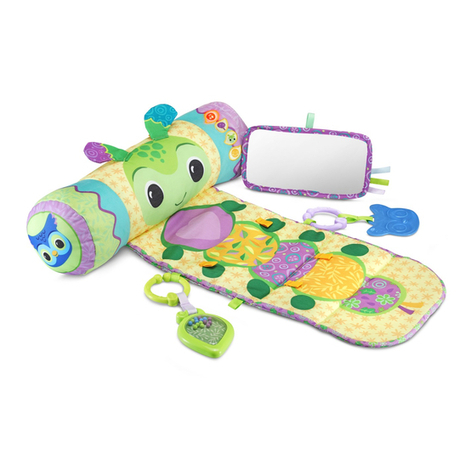
VTech Baby Tummy Time Play Pillow Parents' guide
