BBQ Guru UltraQ User manual

EN
powered by Monolith Grill GmbH
OPERATING INSTRUCTIONS
BBQ GURU
UltraQ

CONTENTS
01 BBQGURU LIMITED WARRANTY AND
RETURN/REPAIR
02 ULTRAQFUNCTIONS
03 PREMIUM SENSORS
04 VARIABLE AIR FLOW RATE
05 5-IN-1 MAGNETIC CONTROLLER MOUNT
06 REAL TIME VISUAL COOKING STATUS
07 MANUAL OPERATION
08 CONNECT WITH BLUETOOTH
09 __________ USING THE MOBILE APP
10 WI-FI REMOTECONTROL SETUP
11 STARTTING YOUR FIRE
12 TROUBLESHOOTING
13 CONTACT BBQ GURU
EN
READY FOR YOUR
BBQ GURU?
Get inspired and
follow us at:
#bbqguru
BBQ Guru Europa
BBQ Guru USA
App Download

CAUTION!
Opening the control unit or any modication / conversion can lead to a unit failure. This will
invalidate the warranty.
SAFETY REGULATIONS
ATTENTION!
Read and understand this user manual completely before installing or
using this product.
FIRE HAZARD, BURN HAZARD!
Keep the barbecue at a safe distance from combustible objects such as buildings, walls, solvents,
cars, combustibles, wood piles and furniture and use caution when opening the barbecue. Embers
that have fallen or are ejected from the barbecue can catch re in a garage, forest or meadow.
Keep a re extinguisher or re blanket near the barbecue.
FIRE HAZARD!
Do not place the barbecue on combustible surfaces.
DANGER OF EXPLOSION!
Barbecue res can occur if liquids are spilled or fat catches re! Never extinguish a grease re
with water. Close the grill and the air supply!
ELECTRICITY / HIGH VOLTAGE!
The power supply unit requires 2400V AC mains. This voltage can cause injury or death. Keep the
power supply away from water. Never touch the power supply when it is wet. Do not use the power
supply if it is visibly damaged.
FOR
YOUR
SAFETY

EN | UltraQ | Operating instructions EN | UltraQ | Operating instructions
02 ULTRA Q FUNCTIONS
• Connects to your Bluetooth-enabled device for direct
access to temperature control via the BBQ Guru app
• The patent-pending LED Q-light ring shows the status
of the grill and fan in real time at a glance.
• Smart Cook‘s full-time adaptive control algorithm
learns the grill for even better stability and accuracy.
• The cooking chamber sensor controls your grill and
regulates the air ow until the preset food sensor
temperature is reached.
• Detects an open lid to minimise temperature
uctuations
• The „RampMODE“ lowers the grill temperature to
prevent „overcooking“.
• Toepassingsbereik van 0 tot 180 graden Celsius.
• Application range 0 degrees Celsius to 180 degrees
Celsius
• 5-in-1 Magnetic Mount
• Allows viewing from any angle
• Operation with 110-240V AC for worldwide use or
12V DC for automotive use
• Wi-Fi function. Connect your UltraQ to your home
network to control or monitor your barbecue from
anywhere with an internet connection.
All returns or exchanges must be accompanied by
the original receipt or invoice, accessories and origi-
nal manufacturer‘s packaging. Any of these that are
missing may delay your refund or exchange.
Items must be in a condition to be resold. BBQ Guru
will not accept the following items for return: (i) Items
that have been personalised or customised; (ii) Spe-
cial orders unless they are part of BBQ Guru‘s retail
offering; (iii) Items that have been used, altered
or worn and damaged; (iv) Gift cards; (v) Services.
UltraQ controls and fans (2 year limited warranty)
BBQ Guru warrants this product to be free from
defects in workmanship and materials for a period of
2 years from the date of purchase.
If a product fails within the warranty period, obtain
an RMA form according to the instructions above. If
it is defective, it will be repaired or replaced free of
charge (at BBQ Guru‘s discretion).
This warranty is void if the appliance shows signs of
tampering or is exposed to moisture, excessive heat,
corrosion or other abuse, including use with appli-
ances not manufactured by BBQ Guru. Components
with excessive wear or damage due to misuse are not
covered by the warranty.
BBQ Guru shall not be liable for any damage or loss
which may arise from the installation or use of this
product.
01 BBQ GURU LIMITED WARRANTY AND
RETURN/REPAIR

EN | UltraQ | Operating instructions EN | UltraQ | Operating instructions
The probes supplied with the UltraQ are precision
stainless steel thermocouple material.
The thermocouple wiring has an armoured braid with
moisture and smoke resistant teon insulation rated
for stationary temperatures up to 180 degrees. Avoid
kinking the wires and do not allow them to come into
contact with direct ame (heat spot). They should be
washed by hand. The probes can be replaced by the
user. Keep a spare set ready for unforeseen emergen-
cy situations.
03 PREMIUM SENSORS
PLEASE NOTE
1. Insert the sensors completely into the control unit.
Push the plugs into the sockets so that they phy-
sically and audibly snap into place. If the sensors
are not connected securely, incorrect temperature
readings may occur and the DynaQ will not regula-
te the temperature accurately. This can cause the
grill to go out
2. There is an LED indicator light above each sensor
socket. If a probe is rmly inserted into the socket
when the DynaQ is switched on, but the LED
does not light up, this indicates that the probe is
damaged or defective and does not indicate the
temperature correctly.
3. The cooking chamber temperature sensor must
be placed inside the grill near the cooking area for
proper temperature control. If this sensor is not in
the grill, there will be no control. This can lead to
the fan running constantly and the grill becoming
excessively hot.
4. Some ceramic grills can cause early probe failure
by using wires between the gaskets. If you use a
deector, we recommend routing the probe cables
through the exhaust cap. The heat that rises through
the gap between the outer wall and the deector is
intense and concentrated. If the cable is exposed
to this heat source, it can quickly become dama-
ged. For ceramic grills, it is recommended to use
the Gurus for Low & Slow jobs only. With proper
care, a probe has a functional expectancy of 2 to
3 years.
The fan system uses a variable flow rate to finely
modify the amount of oxygen supplied to the fire
and raises or lowers the air flow to maintain the
specified set temperature. All fans are equipped
with an adjustable „damper“ and an aluminium
nozzle. The „damper“ (sliding flap) can be closed
completely to extinguish the embers. This function
can be used to make fine adjustments for any wind
draughts, which could affect the grill temperature
during the fan‘s switch-off cycle. Open the “damper“
fully for a quick start. Close half to two thirds of the
„damper“ for smaller grills or low and slow
cooking.
04 VARIABLE
AIR FLOW RATE

EN | UltraQ | Operating instructions EN | UltraQ | Operating instructions
The UltraQ should be placed in a stable position in the
holder. The controller can be rotated in any direction
andby tightening the twist nut. The control unit must
be protected from the weather!
05 5-IN-1 CONTROLLER MOUNT
STEP 1 Mounting the Holder
1. Secure the lower stand platform to the upper
control bracket using the hexagonal bolt and twist
nut provided.
2. From the bottom of the lower stand platform, press
the rubber feet into the holes to prevent the stand
from slipping.
3. Engage the controller in the upper control bracket.
4. Turn the upper control bracket to the desired angle
and tighten the twist nut to hold the bracket in the
selected position.
NOTE: The additional bracket required to attach the
control to the side table is only included with the
Monolith grill in the rack.
This assembly requires a Phillips screw, hex nut and
the upper control bracket from the 5-in-1 magnetic
bracket, hex screw and twist nut supplied with the
control.
1. Attach the sheet metal holder to the left-hand side
shelf by inserting the Phillips screw through the
existing hole in the lower side table rail and tighten
the nut provided.
2. Attach the upper control bracket to the sheet metal
bracket with the hexagon screw and twist nut from
the 5-in-1 magnetic bracket.
3. Engage the controller with the Q-tail diagonally to
the right on the upper control bracket.
4. Tilt the upper control bracket to the desired angle
and tighten the twist nut on the hexagon screw to
hold the bracket in the selected position.
STEP 2 Mounting on a MONOLITH GRILL
*Attachment only included in the BBQ Guru Edition.

EN | UltraQ | Operating instructions EN | UltraQ | Operating instructions
When the cooking chamber temperature is within its
strategy range and the fan is on, the top and bottom
of the outer Q-ring remain solid red, while the left and
right sides pulse red.
TIP: If the grill has been running for several hours
and the sides start to pulse more frequently or
constantly, additional charcoal may be needed. If
the temperature uctuates and the sides do not
pulse or pulse infrequently, close the ,”damper“
(sliding ap) slightly.
If the cooking chamber temperature is above the set
temperature, the outer light ring pulses continuously
in red. The temperature deviation range is approx.3
degrees Celsius. For more information or to change
the deviation range, see section 09 USING THE
MOBILE APP under step 4 „Alarm“.
06 REAL TIME VISUAL COOKING STATUS
The outer ring of the control lights up in different ways
to indicate the current grill status at a glance.
When you bring your grill up to temperature for the rst
time, the Q-shaped light ring glows solid blue. When
the grill temperature rises into the Smart Cook strategy
range, the outer ring changes from blue to red.
The temperature range is 0 degrees Celsius and your
set temperature. For more information, see the section:
09 USING THE MOBILE APP under step 5 „Adaptive
control strategy for Smart Cook“.
When using the UltraQ for the rst time, connect
the cooking chamber sensor rst. Then connect the
food probe and the fan before supplying power to the
controller. The corresponding LEDs light up above the
probe sockets to indicate that a probe is connected.
If you connect a probe and the corresponding
indicator LED does not light up, push the plug all the
way into the socket so that it locks into place. If the
indicator light still does not light up, this may indicate
that you have a faulty probe sensor.
If the UltraQis connected to the power supply but no
pit probe sensor is connected, the outer ring ashes
quickly. This is a safety feature so that the fan only
runs when a cavity sensor is plugged in.
Press the SELECT button shown to clear one of these
visual warnings.
NOTE: If there is a short or prolonged power interrup-
tion at any time, the UltraQ will automatically restart
and continue to control the temperature under the
same settings that were set before the interruption.
NOTE: To reset the controller to the factory
settings, press and hold the button on the left
side of the controller for 2 seconds.

EN | UltraQ | Operating instructions EN | UltraQ | Operating instructions
1. The control displays one temperature at a time. To
toggle scanning of all temperatures, press and hold
the DOWN button for 2 seconds.
2. The control cycles through all four temperatures
at 2- second intervals. The respective colour for
each probe lights up on the bulge just as it does
at the set temperature. The outer ring of the Q
always indicates the current cooking status. The
bulge changes accordingly to indicate which food
temperature is reached.
1. The outer ring of the control unit lights up in vari-
ous ways to indicate the current cooking chamber
status at a glance.
2. When the cooking chamber temperature is below
the target range, the outer ring lights up solid blue.
The bulge of the Q remains solid red.
STEP 3 Enter scan mode STEP 4 Visual real-time cooking status
07 MANUAL OPERATION
The UltraQ can also be used without connecting to another device via Bluetooth or Wi-Fi.
STEP 1 Setting the cooking chamber temp. STEP 2 Setting the core temperature
1. As soon as the control is started, the cooking
chamber temperature is displayed. The default
value is 120°C (250°F).
2. There are three buttons on the left side of the
control. To set the target temperature, press and
hold the SELECT button for 2 seconds. The digital
display ashes.
3. If you press the UP or DOWN buttons while the
display is ashing, the target temperature is adjusted
by 1 degree. Pressing and holding the UP or DOWN
buttons changes the target temperature by 1° for
4 seconds and then increases or decreases in 5°
steps.
4. When the temperature is at the desired set point,
press the SELECT button to save the temperature.
The food probe temperatures are set to a standard
value of 85°C (185°F). Each probe slot has a corre-
sponding indicator light.
Food 1 – Yellow
Food 2 – Green
Food 3 – Blue
1. Press the SELECT button to jump from the preset
cooking chamber temperature to the “Food probe
1“ temperature. Press and hold the SELECT button
for 2 seconds. Use the UP or DOWN buttons to
set the desired food temperature by following the
same instructions for setting the cooking chamber
temperature.
Repeat the above steps to set additional food
probe sensor temperatures.
NOTE: The control element is made in the shape of a
Q. The bulge of the Q lights up in the same colour as
the probe display so that it is easy to determine which
temperature is currently being displayed.
NOTE: If no probe is connected to a particular
probe socket, the display will show „---“.

EN | UltraQ | Operating instructions EN | UltraQ | Operating instructions
STEP 1 Connect with Bluetooth
1. When the cooking chamber temperature is above
the target range or when it has reached its
specied set point, an alarm sounds.
NOTE: When an alarm sounds press any key to clear
that alarm off. To turn off audible alarms please
read section 09. Using the Mobile App
2. If the UltraQis connected to the power supply but
no cooking chamber probe is connected the dis-
play shows “---“ and the outer ring ashes quickly.
The audible alarm doesn’t sound. This is a safety
feature so the fan won’t run unless a cooking
chamber probe is plugged in.
08 CONNECT WITH BLUETOOTH
1. When the UltraQ is not connected to another
device, the blue connection LED indicator ashes
slowly. Check the settings on your Bluetooth ena-
bled device to ensure that Bluetooth is enabled.
2. When your device is successfully paired with the
UltraQ, the Bluetooth LED indicator light will be
solid blue. If an error occurs during pairing, a noti-
cation is displayed in the app and a prompt
to try again appears.
3. If scan mode is entered while the cooking chamber
temperature is rising, or if the display is switched to
other readings by pressing the SELECT button, the
outer ring will remain solid blue, but the reading of
the Q will change according to the respective probe.
When the cooking chamber temperature is within
the target range, the outer ring remains solid red.
The standard deviation of the target range is approx.
1-2°C (25 degrees F).
4. When the cooking chamber temperature is within
the set point range and the fan is on, the top and
the LEDs of the outer ring remain constantly red
while the left and right sides pulse red.
5. When the cooking chamber temperature is above
the target range, the display shows „HI“. The outer
light ring pulses continuously red and the buzzer
sounds to visually indicate a warning.
NOTE: To change the target area, see section 09 Using
the mobile app, step 4. „Alarm“.
STEP 5 Alarm and warning

EN | UltraQ | Operating instructions EN | UltraQ | Operating instructions
09 USING THE MOBILE APP
Search for „BBQ Guru“ in the Google Play or Apple
Store and install the BBQ Guru app. Once the
installation is complete, open the app and follow
the instructions to set this up. You will be prompted
to give your controller a name of your choice to
distinguish it from other controllers.
1. On the main screen, touch the corresponding tem-
perature values to set the desired cooking chamber
and food temperatures. The default temperature
for the cooking chamber is 120 ° C , the default
temperature for food is 85 ° C . As long as the
controller is within Bluetooth range, the application
always displays the desired target temperature be-
low the actual temperature value. The temperature
can be switched between ° C and ° F in the menu
settings.
STEP 1 Monitoring and adjustment of
the temperature
1. This function allows the set temperature to be qui-
ckly recovered after the lid has been opened. The
„open lid“ detection is set to ON by default. When
the lid is opened, the temperature drops, which can
cause the fan to overheat the coals. The controller
detects when the lid or door is open. In this case, it
minimises the power of the fan.
NOTE: When the lid or the door of the grill are opened
and closed, there is always a certain overshooting of
the temperature.
To deactivate this function, switch off Open Lid in the
controller settings in the menu.
STEP 2 “OpenLid” Function
1. When the „RampMODE“ is activated, the aim is to
prevent overcooking of food. This function lowers
the cooking chamber temperature
TIP: For the „RampMODE“ to work properly, the set
point for the cooking chamber temperature must be
more than 1 ° C above the desired core temperature
of the food.
The factory setting is „RampOFF“, so this must be
activated to use it. By selecting the specic food
temperature probe from which the „RampMODE“
should work, the function can be selected.
NOTE: The „RampMODE“ can be based on one of
the 3 food temperature probes. If a probe is not
connected, the „RampMODE“ will not start.
1. If the temperature of the grill changes by a point
set to alert you of this, an alarm is displayed in
the application. The alarm deviation is adjustable.
Change the alarm deviation from the user settings
in the menu.
STEP 4 Alarm
UltraQ‘s adaptive cook control strategy is designed to
work with a variety of grills by continuously learning
how the grill operates. To adapt to many factors,
including ambient temperature, amount of charcoal,
damper settings and more. For the UltraQ to work
properly and determine how to adjust, the grill needs a
constant temperature. Lid or door must remain closed.
If the lid or door is opened frequently, especially at
start-up, the control will not be able to maintain the set
point.
If the lid remains closed for about 10 to 20 minutes,
the temperature should become stable after the cont-
roller has settled. If the lid remains closed for at least
20 to 30 minutes and the temperature still rises and
falls considerably (± 10 ° C or more), the fan damper
needs to be closed more.
NOTE: The grill may run up or down a few
degrees due to various conditions, the control
will bring it back to set point. Grill temperatures
of 1-2 ° C +- rarely affect the quality of food.
The Smart Cook function allows you to change
the adaptive algorithm to your specic grill with
3 preset options.
1. Smart Cook Setting 1: Standard setting. This
setting is ideal for small and medium grills (thin-
walled), traditional Weber water smokers and small
smokers. This version of the algorithm is the most
popular for typical grills and uses average values.
2. Smart Cook Setting 2: This setting is ideal for
insulated grills that are very ecient, such as
the Monolith Kamado, other ceramic grills or the
Weber Summit. Here, the fan operates at 100 %
for less time.
3. Smart Cook Setting 3: This setting is ideal for
noninsulated grills or grills with multiple cooking
chambers (large smokers) that are less tempera-
ture stable. Weber Smokey Mountain or ordinary
horizontal smokers. Setting 3 allows the fan to
operate at 100% for longer, To change the Smart
Cook function, select option 1, 2 or 3 from the user
settings in the menu.
4. Smart Cook Setting 4: This is a customisable
setting to adjust the algorithm for specic situa-
tions. When this option is selected, the app will
prompt you to enter a cycle time between 5 and 12
seconds and a range (proportional band) between
0°C and 10°C. The Smart Cook function can be
changed via the controller settings in the menu.
STEP 5 Adaptive Smart Cook
function
STEP 3 RampMODE –bbq guru

EN | UltraQ | Operating instructions EN | UltraQ | Operating instructions
The appl has a countdown timer and there are three
different options to choose from when the timer has
run out.
1. On the main screen of the app, touch the timer to
set hours, minutes and seconds. On the same page
in the app, also select the desired timeout action.
2. No action (default): When the timer has gone off,
nothing changes in how the control regulates your
grill.
3. Hold: When the timer has expired, the controller
will hold the temperature at a specic set point you
have set. The default value is 93°C. The control
maintains the hold temperature until you either
change it or stop cooking.
4. Alarm: When the timer has expired, the app sends
you an alert to notify you.
STEP 6 Countdown Timer Once congured with Wi-Fi, the UltraQ can be
monitored and changed from any device with an
internet connection.
This activates the following additional functions:
• Email and text alerts
• Live graphic of the grill in progress
• Share recipes & photos via social media
• Stored data from previous applications
• Integration with Amazon Alexa
10 WI-FI REMOTE CONTROLSETUP
1. CONNECTING THE ULTRAQ TO WI-FI
Log in with an existing Share My Cook account or
click on the option to create an account. If you create
a new account, the user must verify the account
before they can use it through the app.
Follow the instructions to select your desired Wi-Fi
network and enter your password. If the Wi-Fi
connection is successful, the LED indicator in the
lower right side of the control unit lights up purple.
NOTE: If the controller is connected to another device
via Bluetooth and Wi-Fi, the led indicator lights up
purple. If the controller is connected to Wi-Fi but not
Bluetooth, the indicator light ashes between red and
purple.
If an error occurs during the pairing process, the app
will prompt you to try again.
2. REMOTE CONTROL OPTIONS
Once the UltraQ is successfully connected to a Wi-Fi
network, it can be monitored and controlled from any
device that allows the use of apps from the Apple or
Google Play stores.
The UltraQ can be monitored, controlled and individu-
al „cooks“ can be recorded for review. Social sharing
functions enable easy „posting capabilities“ via plat-
forms such as Facebook and Twitter.
STEP 8 More options
There are many other settings that are customisable
or can be turned on or off in the controller settings in
the menu. The operating instructions are also in the
BBQ Guru app menu.
1. When the unit connects to Bluetooth for the rst
time, you will be asked to name your controller. The
name can be changed later in this section. From
here you can also turn off the LEDs, turn off the
audible alarms or enter scan mode.
STEP 7 More options
2. There are additional options to customise the au-
dible alarm on the control unit, which is especially
important if you are in a situation where several
controllers are being used at the same time, so that
they can be separated from each other.
3. There are two settings that differentiate your audi-
ble alarms from the default tone: the alarm signal
and the signal tone duration. The beep duration
is the number of tweets the control beeps in a
10-second window, which can be set from 0 to 9.
which can be set from 0 to 9. The default value is
5. Alarm beep duration is how long that each beep
lasts, which can be set from 0 to 3. The default
value is 1.
NOTE: If any of the values are set to 0, no audible
alarms will sound on the control unit..
There are advanced options for the UltraQ in the
app menu. The control can be disconnected,
restarted and updated. Follow the instructions in
the app to complete these tasks.

EN | UltraQ | Operating instructions EN | UltraQ | Operating instructions
THE MOBILE BBQ GURU APP WILL NOT OPEN
ON MY DEVICE.
Check the Google Play or Apple Store to see if there
is an update available for the app. Download the
update, install it and try again. If no update is avai-
lable, uninstall the app and download it again. If the
with the details of your problem and the model of
your device and the platform you are running it on.
MY DEVICE DOES NOT CONNECT TO THE
MOBILE APP.
Before trying to connect again, make sure that
Bluetooth is activated on your device and the Blue-
tooth LED indicator on the UltraQ is ashing. If it
is not ashing, contact BBQ Guru Customer Service
immediately. If it is ashing, open the app again and
try to connect again. You must be within the Blue-
tooth range of the device, which is within a direct
line of sight of approximately 15m.
THE TEMPERATURE VALUES AND/OR THE
SCREEN SEEM TO BE FROZEN.
As soon as you are outside the Bluetooth range of
the UltraQ, it can no longer be received in real time.
Verify that the Bluetooth LED on the UltraQ is solid
blue. If it ashes you no longer have a Bluetooth
connection.
THE COOKING CHAMBER TEMPERATURE RISES
ABOVE THE DESIRED SET POINT.
Check the grill to make sure that it is tightly closed
around the rebox/pit and that there are no places
where air can enter and get to the re.
Activate the Open Lid Detection function.This allows
the UltraQ to detect when the grill is open and if the
cooking chamber temperature drops by itself runs the
fan when the lid or door is open, causing the cooking
chamber temperature to rise. If the function is
switched off, the UltraQ detects that the pit
temperature is dropping by itself and runs the fan
when the lid or door is open, causing the pit
temperature to rise. If the fan runs continuously,
unplug from the power socket and plug it back in to
restart the controller. The fan should then run
normally. If this is not the case, contact
THE COOKING CHAMBER TEMPERATURE IS
NOT CORRECT.
It is normal for the temperature in the dome of a grill
to be hotter than on the grate. Thermometers sup-
plied with most grills are nowhere near as accurate
as the UltraQ probes. If the cooking probe is too close
to the food, a lower temperature may be read from
the cool vapours coming out of the food. Place the
cooking probe 8 to 10 cm away from the food. If the
problem persists the cooking chamber probe
may be damaged and be giving an incorrect reading.
Replace the cooking chamber probe with a food
probe of the appropriate size.
If the food probe reads the value correctly, the probe
is defective it may also be defective or there may be a
problem with the control unit itself. Contact
If the probe wire has small, reddish bumps on the out-
side of the stainless steel mesh, the silicone insula-
tion is beginning to melt because the probe has been
exposed to direct ame or excessive temperatures.
temperatures. Buy a new probe from bbqguru
12 TROUBLESHOOTING
Starting the barbecue correctly is crucial for good
control, as is the right choice of charcoal. Especially
at low barbecue temperatures. Do not overheat the
barbecue as this can cause the barbecue to get too
hot when you start it.
Normally, the UltraQ can adjust the airow of the fan
accordingly to ensure precise control, so no adjust-
ment of the damper is required.
NOTE: Bring the grill to the desired operating
temperature manually and only then connect the
UltraQ.
If you still have charcoal left in the grill after grilling,
close the grill airtight, then you can use it for the next
grilling session.
11 STARTING YOUR FIRE

EN | UltraQ | Operating instructions EN | UltraQ | Operating instructions
13 CONTACT BBQ GURU
THE FOOD TEMPERATURE IS NOT RIGHT.
It is normal for different brands of thermometers to
vary in temperature measurement, but they should
usually be within a few degrees. Place your thermo-
meter in boiling water to check it for accuracy. If the
food probe reads hotter than another food probe,
check that the probe is fully inserted into the food at
the thickest part. If too much of the probe is exposed,
the probe will read hot. If the food has a bone in it,
make sure the probe is not touching any part of
the bone.
If the display shows „---“, rst check that the probe is
pushed fully into the socket. If this is still the case,
the probe may be broken. If the probe wire shows
small, reddish bumps on the outside of the stain-
less steel mesh, the silicone insulation has melted
because the probe was exposed to direct ame or
excessive temperatures.
The BBQ Guru
powered by Monolith Grill GmbH
Frida-Schröer-Straße 56
49076 Osnabrück
0541 / 2019 640
bbq-guru.eu
ENVIRONMENTAL
CONDITIONS :
Temperature:
5°C to 40°C / 41°F to 104°F
Relative humidity:
80%,
Non condensing height:
2000 Metres / 1,24 Miles
Input assessment:
IP53
Accuracy:
at 1,2 °C (5°C to 40 °C environment), at 2,8 °C (40
°C to 180 °C / 104 °F to 473 °F environment)
Controller input supply:
12V DC, 3,5A, 42W
Conguration:
Wand-Plug-in
Wi-Fi Modul:
Includes transmitter module FCC ID:
2ADHKATWINC1500 and 2AA9B04 with radio
regulatory certication for USA (FCC), Canada (IC),
Europe (ETSI), Korea(KC) and Japan (ARIB) 2.4
GHz, IEEE Std 802.11b/ b, g, n™ and WiFi® certied
(WFA ID: WFA16869).
The Wi-Fi components in this product are certied
under Wi-Fi 802.11withWPA2™ and WPA™ System
Interoperability ASD Model Test Plan with Test Engine
for IEEE 802.11b, n and g devices). Other 2.4 GHz
devices, such as cordless phones and wireless
networked devices, may cause interference with the
UltraQ and prevent a reliable connection. It is the
customer‘s responsibility to diagnose the cause of
the interference and determine which devices need to
be turned off or removed from the installation.

powered by Monolith Grill GmbH
2020 © THE BBQ GURU
Frida-Schröer-Straße 56 | 49076 Osnabrück
Table of contents
Other BBQ Guru Temperature Controllers manuals
Popular Temperature Controllers manuals by other brands
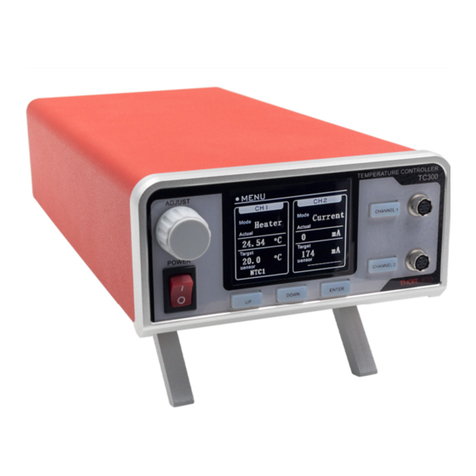
THORLABS
THORLABS TC300 user guide
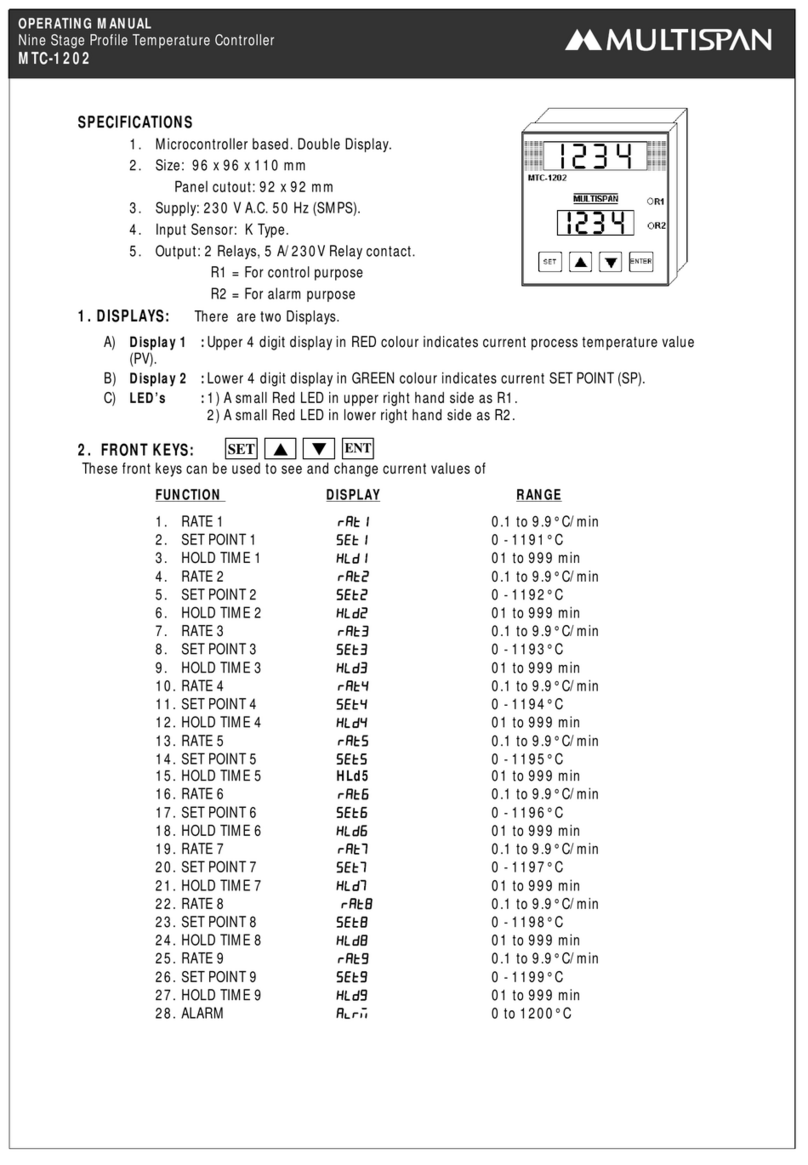
MULTISPAN
MULTISPAN MTC-1202 operating manual
oventrop
oventrop Unibox E BV operating instructions
S+S Regeltechnik
S+S Regeltechnik HYGRASGARD RFTF Series Operating Instructions, Mounting & Installation
RKC INSTRUMENT
RKC INSTRUMENT FZ110 Quick operation manual
dixell
dixell XR460C Installing and operating instructions
