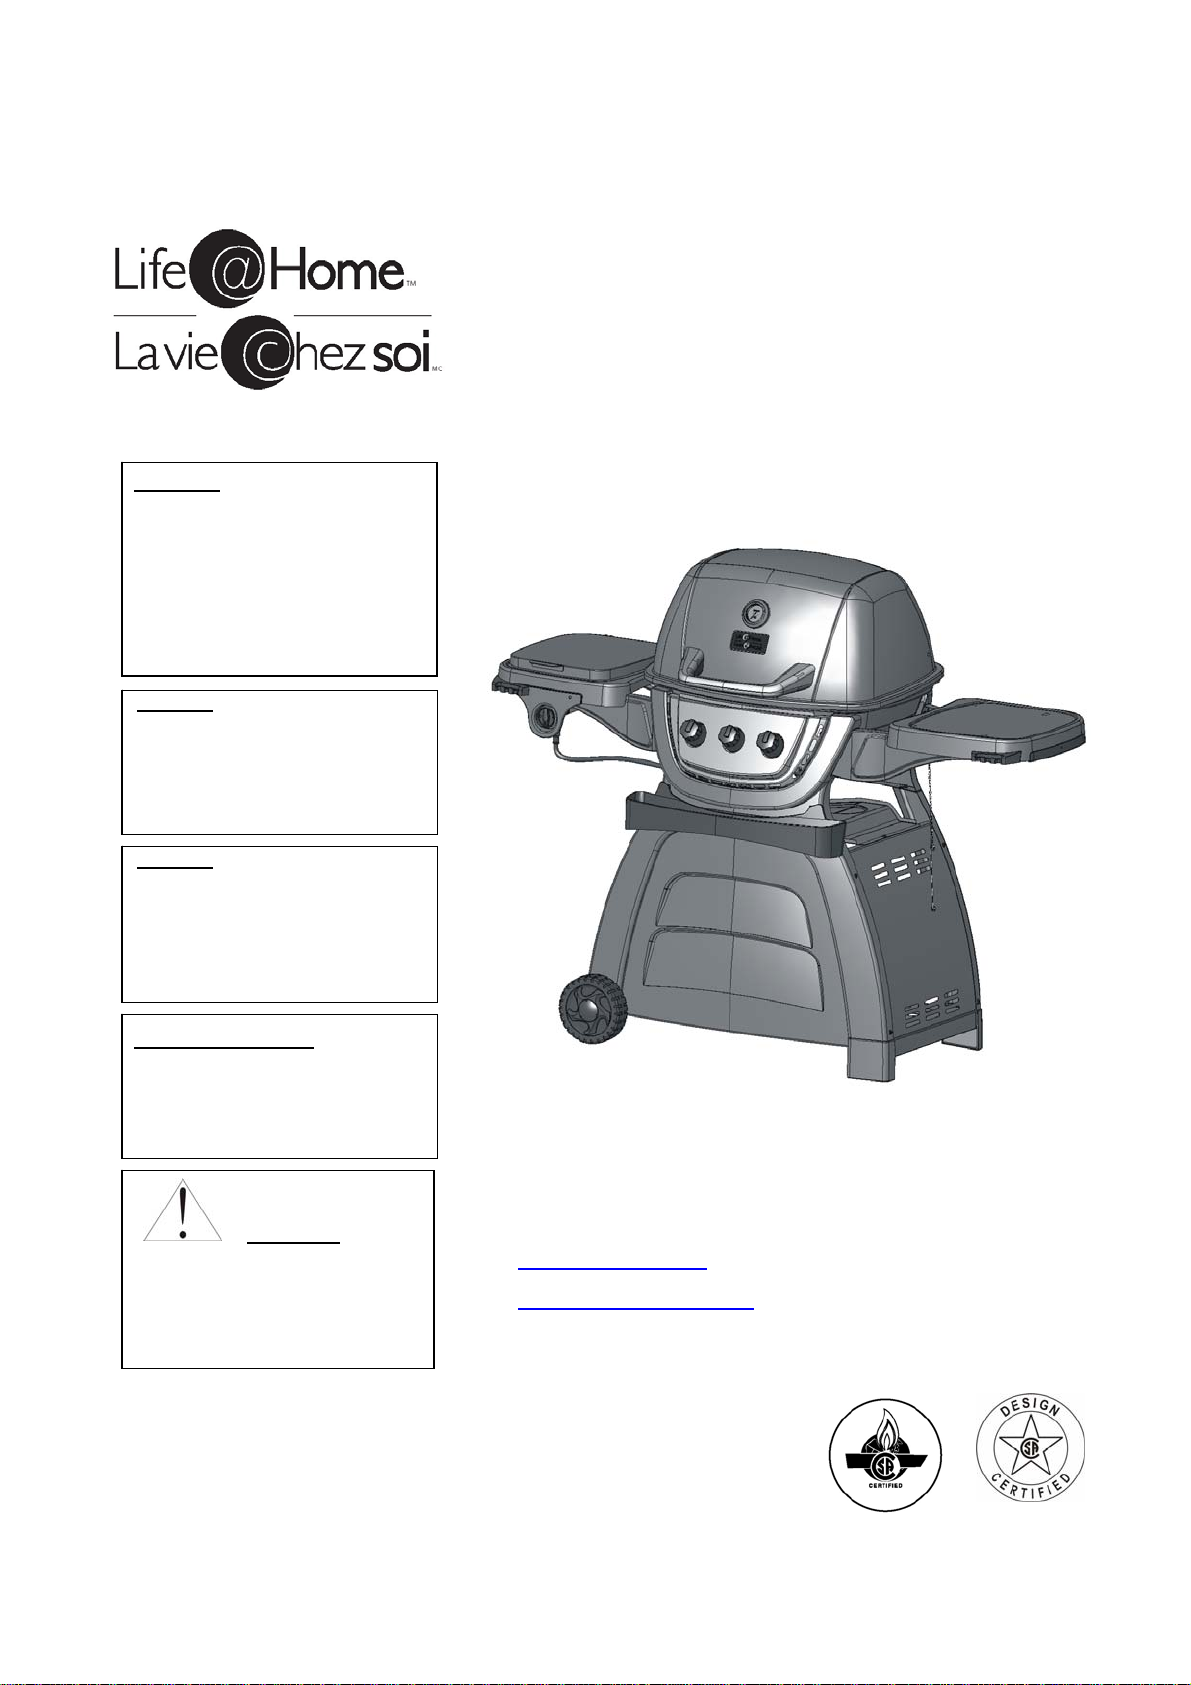
BBQ GPF2718JB User manual

GPF2718JB
Owner’s Manual
0
.
Deluxe LP
G
as
G
rill
WARNING
Improper installation,
adjustment, alteration, service or
maintenance can
cause injury or
property damage.
Read
the installation,
operation and maintenance
instructions thoroughly before
installing or servicing
this
equipment.
DANGER
Failure to follow these
instructions could result
in
fire
or explosion that
could
cause
property damage, personal
injury or death.
DANGER
DO
NOT use gas grill for
indoor
cooking or heating. TOXIC
fumes can
accumulate and
cause asphyxiation. DO NOT
use in
or on boats
or
recreational
vehicles.
PROP 65 WARNING
Chemicals known to the
state of
California to
cause cancer, birth
defects or other
reproductive
harm
are created by
the
combustion of propane gas
.
SAVE THESE INSTRUCTIONS
FOR FUTURE
REFERENCE. IF YOU ARE
ASSEMBLING THIS UNIT
FOR SOMEONE ELSE, GIVE
THIS MANUAL TO HIM
OR
HER TO SAVE
FOR FUTURE REFERENCE.
FOR CUSTOMER SERVICE OR
TECHNICAL HELP
,
PLEASE VISIT
WWW.BBQTEK.COM
SEND EMAIL TO
CALL 1-877-885-8227,
6
A.M. –
4:30
P.M.
(PST)
, MONDAY-FRIDAY.
Printed in China
WARNING
FOR YOUR SAFETY :
For Outdoor Use Only
(outside any enclosure)

GPF2718JB
Owner’s Manual
1
QUESTIONS, PROBLEMS, MISSING PARTS WITH THIS PRODUCT? DO NOT RETURN TO YOUR RETAILER.
PLEASE VISIT US AT WWW.BBQTEK.COM OR EMAIL US AT
SERVICE@BBQTEK.COM
YOU CAN ALSO CALL OUR CUSTOMER SERVICE DEPARTMENT 6:00 A.M. TO 4:30 P.M.
PACIFIC STANDARD TIME, MONDAY THROUGH FRIDAY, AT
1-877-885-8227.
Grill Operation 1-2-3
Before Grilling,
Step 1 Keep your grill a safe distance away from your property.
Step 2 Always Perform a Leak Test.
Step 3 Keep children away from the grill.
During Grilling,
(To avoid tripping safety valves, please follow these instructions carefully!)
Step 1 First open lid and turn gas tank on slowly.
Step 2 Turn only one knob on at a time when lighting up the grill.
Step 3 Use protective gloves when grill gets hot.
After Grilling,
Step 1 Burn grill for 10-15 minutes to burn off food residues.
Step 2 Wait until the grill is completely cooled before closing lid.
Step 3 Clean up grease build-up and cover your grill.
Please refer to the owner’s manual for details.
Always read and understand the
WARNINGS
and
INSTRUCTIONS
that are contained in this manual before
attempting to use this gas barbecue grill, to prevent possible bodily injury or property damage.
NOTE
: This grill must be used
with
propane gas
only (propane gas cylinder
not included).
Always keep this manual for convenient future reference.
WARNING
1.
Do
not
store or use gasoline or other
flammable
liquids or vapour in the vicinity
of this or any other appliance.
2.
An LP cylinder not connected for use shall
not be stored in the vi
cinity of this or any
other appliance.
DANGER
If you smell gas:
1. Shut off gas to the appliance.
2. Extinguish any open flame.
3. Open lid.
4. If odor continues, keep away from the
appliance
and immediately call your gas
supplier or your fire department.

GPF2718JB
Owner’s Manual
2
Table of Contents
For Your Safety.................................................................................................3
Illustrated Parts List .........................................................................................5
Hardware List.....................................................................................................6
Assembly Instructions.......................................................................................7
Operating Your Grill..........................................................................................14
Connecting Gas Cylinder...................................15
Checking for Leaks............................................15
Lighting Your Grill..............................................15
Excess Flow Safety Valve Reset Procedure....... 17
Care and Maintenance.......................................................................................18
Award-Winning Barbecue Recipes...................................................................19
Troubleshooting..................................................................................................20
Warranty Program..............................................................................................22

GPF2718JB
Owner’s Manual
3
For Your Safety
Dear Valued
Customer,
Congratulations
on your
new
barbecue grill
purchase! You’ve made the right choice. In
this manual, you
will
find
assembly instructions, suggestions for
grilling and
helpful hints, as
well as guidelines for
the safe operation, proper
care
and
use of
your grill. Our expert staff strives to provide
you
with an easy to assemble product. Should
you have
any
questions or problems with this product, please visit
WWW.BBQTEK.COM , send email to
or call
1-877-885-8227, 6:00
A.M. – 4:30 P.M. PST, MONDAY-FRIDAY.
NOTE:
If in the absence of local codes, a statement that the installation must conform with the National Fuel Gas
Code, ANSI Z223.1 / NFPA 54, Natural Gas and Propane Installation Code, B149.2.
IMPORTANT NOTICE:
READ ALL
INSTRUCTIONS PRIOR TO ASSEMBLY
AND
USE
Safety First!
Read and
understand all warnings
and precautions prior to
operating
your
grill.
WARNING
1.
This
grill is
for outside
use only. It should
not
be
used in a building,
garage
or any other
enclosed
area.
2.
The
use of alcohol, prescription or
non-prescription
drugs
may
impair an individual’s
ability to
properly
assemble or safely
operate this appliance.
3.
Always
open the grill lid carefully
and
slowly as heat
and steam trapped
within the grill
could cause severe burns.
4.
Always
place your grill on
a
hard and level
surface far
away from combustible materials and structures. An
asphalt or blacktop surface may not be acceptable for this purpose.
5.
Do not leave
a
lit grill
unattended.
6. Keep children and pets away from the grill at all times.
7.
This
is not a
tabletop
grill. Do not place
this
grill on any type of tabletop
surface.
8.
Do not use the
grill
in high winds.
9. This grill must be used
with
propane gas
only (propane gas cylinder
not included).
10. Do not attempt to
attach this
grill to the self-contained propane
system of a camper
,
trailer,
motor
home
or house.
11.
Do
not use charcoal or lighter
fluid.
12 Do
not use gasoline, kerosene
or alcohol
for lighting. The LP-gas supply
cylinder
must be constructed and
marked
in
accordance with the
specifications for
propane gas
cylinders of the U.S. Department of
Transportation (DOT) CFR
49, or the national standard of Canada,CAN/CSA-B339.
13. This outdoor
gas appliance is
not intended to be
installed in
or
on recreation
vehicles and
/
or boats.
14. Do
not attempt
to move the grill
while it is lit.
15. Do
not use the
grill unless it is
COMPLETELY
assembled
and
all parts are
securely fastened and tightened.
16. Keep combustible items and surfaces at least 24 inches away
from the grill at all times.
DO
NOT use
this gas
grill
or any
gas product under any overhead enclosure
or near any unprotected
combustible constructions.
17. Do not use in an
explosive
atmosphere. Keep grill area
clear and free from combustible materials,
gasoline and other flammable vapors and liquids.
18. Do not attempt to use or assembly with missing or damaged parts. Contact customer service for a replacement.
CAUTION-Prevention of Burns
1.
To avoid burns, do not touch metal
parts of the grill
until they have
completelycooledfor at
least
45 minutes
or
unless you
are
wearing protective gear
such as pot
holders, protective gloves or mittens.
2.
Do not alter the grill
in any manner.
3.
Clean and inspect the
hose before each
use. If there
is evidence of abrasion,
wear, cuts or
leaks,
the hose
must
be replaced prior to
operation. The replacement
hose assembly should be
in accordance
with
the
manufacturer’s specifications.
4.
Move gas hoses as
far away as possible from hot surfaces and dripping
hot grease.
5.
Never keep
a filled gas container in
a hot
car or
car trunk. Heat
will cause the
gas pressure to
increase,
which
could open
the relief valve and allow gas
to
escape.

GPF2718JB
Owner’s Manual
4
Safe Locations For Use Of This Outdoor Grill
DANGER
Never use this outdoor grill inside any building, garage, shed or breezeway, or inside any boat, trailer or recreational
vehicle, to prevent a possible fire and to prevent the possibility of carbon monoxide poisoning or asphyxiation.
WARNINGS
Do not use this appliance under overhead combustible surface or covered area (e.g., awnings, umbrellas, porches or
gazeboes).
Always confirm that this grill is not positioned under the overhang of a house, a garage or other structure before lighting it.
An overhang will serve to deflect flare-ups and radiated heat into the structure itself, which could result in a fire.
Always confirm that this grill is positioned more than 24 inches (61 cm) away
from any combustible materials or surface before lighting it, and that no gasoline
or other volatile substances are stored in the vicinity of this grill. (See diagram to right).
The temperature of a grease fire or of the radiated heat might otherwise be
sufficient to ignite nearby combustible or volatile substances.
Always locate this grill where there will be ample combustion and ventilation air, but
never position it in the direct path of a strong wind.
Never allow the grill to operate while unattended, to prevent uncontrolled
grease fires from erupting.
Never attempt to move this grill while it is in operation or while it is still hot, to prevent possible personal injury.
Never store or use gasoline or other flammable or volatile substances in the vicinity of this grill or in the vicinity of any other
heating-generating appliance, because of the danger of starting a fire.
If in the absence of local codes, a statement that the installation must conform with the National Fuel Gas Code, ANSI
Z223.1 / NFPA 54, Natural Gas and Propane Installation Code, B149.2.
DANGER – Gas Safety
Liquid
propane
(LP)
gas is flammable and hazardous if handled improperly. Become aware of its
characteristics
before using any propane product.
•
Propane Characteristics: Flammable,
explosive under pressure, heavier
than
air and settles
in pools in low
area.
• In its
natural state, propane has no odor. For
your safety, an
odorant has been
added.
• Contact
with propane could
cause freeze burns to the skin.
•
This grill is
shipped from the factory for propane gas
use only.
• Never use a propane cylinder
with
a damaged body, valve, collar
or footing.
• Dented or rusted propane cylinders
may
be
hazardous
and
should be
checked by your propane gas supplier.
CAUTION
It
is essential to keep the grill’s
valve
compartment,
burners
and circulating air passages clean.
Inspect the
grill before each use
.
Step 1. Inspect all hoses and connections and make certain they are secure.
Step 2. Check and clean the burner venturi tubes for insects and insect nests by removing the burner and inserting a
bottle brush cleaner into each tube to make sure the passage is clear.
A clogged tube can lead to a fire beneath the grill.
Step 3. Ensure that the valve nozzle is pointing straight and completely inserted into the venturi tube.
GENERAL
INFORMATION
1. A propane gas
cylinder
is
required for
operation.
2. This gas grill is NOT
intended
for commercial u
se
24 Inches
24 Inches

GPF2718JB
Owner’s Manual
5
Illustrated Parts List
1. Front Panel…………....1pc
2. Left Back Leg…..……..1pc
3. Right Back Leg….…….1pc
4. Bottom Panel………..1pc
5. Wheel & Hub Cap
………………..2pcs each
6. Wheel Axle……….…1pc
7. Cart Side Panel………2pcs
.
8. Grease Pan……….…..1pc
9. Smoke Box & Cover
………………….1pc each
91
-
92
-
10. Gas Tank Clip….……1pc
11. Side Shelf Support
L-F & R-B………….2pcs
12. Side Shelf Support
R-F & L-B……….…2pcs
13. Left Side Shelf…..…..1pc
14. Right Side Shelf… ….1pc
15. Grill Body Assembly…1pc
16. Warming Rack……...1pc
17. Cooking Grid………..2pcs
18. Heat Plate…….….…1pc
19. Side Burner Assembly
………………………1pc
20. Bottle Holder……..…1pc
21. Grease Cup Support..1pc
22. Grease Cup………....1pc
23. Side Valve Frame…..1pc

GPF2718JB
Owner’s Manual
6
Hardware List
A
24pcs I
4pcs
B
2pcs J
2pcs
C
1pc K
2pcs
D
5pcs L
1pc
E
4pcs M
1pc
F
4pcs N
1pcs
G
2pcs O
2pcs
H
2pcs
Parts & hardware shown above are not to scale.
M6 Bolt
M6 NutM6 Long Screw
Heat Insulation Washer
M6 Short Screw
Side Burner Knob
M6 Flat Washer
Screwdriver
M4 Flat Washer
Hexagon Wrench
M4 Long Screw
M4 Short Screw
M10 Flat Washer
M4 Nut
M10 Nut

GPF2718JB
Owner’s Manual
7
Assembly Instructions
Remove all
contents
from the carton packaging. Make sure all
parts are present before
attempting assembly.
Once
the grill is fully
assembled, go back check and make certain all the bolts are tight. Tighten again
with screwdriver provided if necessary.
Estimated Assembly
Time:
It will take less than
40
minutes to assemble the grill.
Ax4
()
1
2
3
4
52
-
51
-
6
Gx2
()
Hx2
()
Step 1
(Assemble the cart)
A
lign the holes on the bottom panel (4) with the
holes on the front panel (1) and the holes on the
left back leg (2) and the right back leg (3).
Screw one M6 bolt (A) into each pre-dilled hole.
Tighten by hand until secure.
Go back to tighten all the bolts using the hexagon
wrench provided.
Step 2
(Install the wheels)
Insert the wheel axle (6) into the hole on
the left back leg and the front panel.
Put one wheel (5-2) on each end of the
axle.
Put one M10 flat washer
(
G
)
on each end
of the axle.
Screw one M10 nut (H) on each end of the
axle toward the wheel and tighten all nuts
using the hexagon wrench provided.
Cover one hub cap (5-1) on each wheel.

GPF2718JB
Owner’s Manual
8
Ax8
()
7
7
8
Ax2(
)
Step 4 (Install the grease pan)
A
lign the holes on grease pan (8) with the
holes on two pieces of cart side panel.
Make certain the direction of the grease pan is
followed with the instructions on the sticker.
Screw one M6 bolt (A) into each pre-drilled
hole.
Go back to tighten all the bolts using the
hexagon wrench provided.
Step 3
(Assemble the cart side panels)
A
lign the holes on one piece of cart side panel (7)
with the holes on the front panel and the holes on
the right back leg.
Screw one M6 bolt (A) into each pre-dilled hole.
Repeat the procedure for another piece of cart
side panel, front panel and left back leg.
Go back to tighten all the bolts using the
hexagon wrench provided.
.

GPF2718JB
Owner’s Manual
9
15
Ax8
()
11 12
12
11
Step 6
(Install the side shelves supports)
A
lign the holes on the side shelf support L-F & R-B
(11) with the holes on the left front side and right
back side of the cart assembly.
Screw one M6 bolt (A) into each pre-drilled hole.
Repeat the procedure for the side shelf support R-F
& L-B (12) with the left back side and right front side
of the cart assembly.
Go back and tighten all the bolts using the
hexagon wrench provided.
Step 5
(Install the grill body)
Place the grill body assembly (15) upon the
cart assembly.
A
lign the holes on the bottom of grill body
assembly with the pre-assembled bolts on
the front panel, left back leg and right back
leg.
Tighten the pre-assembled bolts by hand.
Go back and tighten all bolts using the
hexagon wrench provided.

GPF2718JB
Owner’s Manual
10
13 14
.
Step 8 (Install the smoke box, heat plate, cooking
grid and warming rack)
A
lign the holes on the smoke box (9-2) with the holes
on back of inside of the cart.
Insert one M6 long screw (B), one M6 flat washer (D)
and one heat insulation washer (K) into each
pre-drilled hole then screw one M6 nut (J) from
outside of the grill.
T
ighten all nuts using the hexagon wrench provided.
Put the cover (9-1) upon the smoke box.
Install the heat plate (18) inside the grill body.
Put the cooking grid (17) upon the heating plate.
Put the warming rack (16) upon the cooking grid.
Step 7 (Install the side shelves)
Place the left side shelf (13) on the assembled side
shelf supports on left side pf cart assembly.
Insert the pre-assembled bolts on left side shelf with
the holes the left front support and the left back
support.
Tighten the bolts by hand.
Repeat the same procedure for the right side shelf
(14).
Go back and tighten all the bolts using the hexagon
wrench provided.

GPF2718JB
Owner’s Manual
11
Fx4()
Ex4()
Ix4()
19
Ox2()
L
23
D
C
Side burner grate
Step 10 (Fix the valve frame)
Move the side burner grate away.
A
lign the holes on the bottom of burner assembly
with the holes on the valve frame.
Insert one M6 flat washer (D) and one M6 short
screw (C) into the pre-drilled hole.
Tighten the M6 short screw using the screwdriver
provided.
Step 9 (Install the valve, side burner knob and
side burner assembly)
A
lign the holes on the valve frame (23) with the holes
on the valve and the side burner knob seat.
Insert one M4 screw (F) into each pre-drilled hole and
tighten with the screwdriver provided.
Insert the side burner knob (L) onto the shaft of the
valve.
A
lign the holes on the side burner assembly (19) on
the side burner shelf.
Insert one M4 screw (O) into each pre-drilled hole.
A
ttach with one flat washer M4 (E) and one nut M4 (I)
under the left side shelf.
Tighten all nuts using the screwdriver provided.

GPF2718JB
Owner’s Manual
12
20
21
22
Step 11 (Install the bottle holder)
Install the bottle holder (20) by inserting the
hinge on the bottle holder into the slot on
front of the grill body.
Step 12 (Install the grease cup support and
grease cup)
Install the grease cup support (21) by inserting
the hooks on the grease cup support into the
holes on the grease pan.
Place the grease cup (22) upon the grease cup
support.

GPF2718JB
Owner’s Manual
13
10
Step 14
Pull the gas tank clip towards the gas tank to lock
it in place and make certain the gas tank is
secure.
Connect the regulator with gas the gas tank.
Step 13
Install the gas tank clip (10) by insert the two
ends of the gas tank clip into the two holes on
bottom panel.
Place gas tank upon the tank seat on bottom
panel

GPF2718JB
Owner’s Manual
14
Operating Your Grill
CAUTION:
Use only the regulator provided. If a
replacement is necessary, call our customer service center. The
use of unauthorized
parts
can create an
unsafe condition and environment.
The propane gas supply cylinder used
must be
constructed
and
marked in accordance
with the
Specifications
for Propane Gas
Cylinders of the U.S. Department of Transportation (DOT). Only cylinders
with a listed overfill
prevention device (OPD) and marked
“propane”
may be
used. Cylinders with an
OPD
will have
valve handles with three
“lobes” (prongs).
The pressure regulator and hose assembly supplied with the outdoor cooking gas appliance must be used. Replacement pressure
regulators and hose assembly must be those specified by the outdoor cooking gas appliance manufacturer.
Only use
20 pound
cylinders equipped with a
cylinder
connection device compatible with the connection for outdoor
cooking appliances.
The
cylinder
must include
a
collar to
protect the
cylinder valve.
The
gas
cylinder should
not be
dropped
or handled
roughly. If the appliance is
not
in use, the gas cylinder
must be
disconnected.
Storage
of
the appliance indoors is permissible ONLY if the cylinder is disconnected
and removed from the appliance. Cylinders
must
be stored outdoors and out of the reach of children.
Cylinder must not be stored in a building, garage or other enclosed area.
Your cylinder
must never be stored
where temperatures can reach over 125
°F
.
Before connecting, make sure there is no
debris caught in
the head
of the
gas cylinder, regulator
valve
or in
the head of the burner
and burner ports. Connect regulator valve and hand tighten firmly. Disconnect the propane cylinder from the regulator valve when
the
grill is not in use. DO NOT obstruct the flow
of combustion air or ventilation air to the grill. The propane cylinder
must be
arranged for vapor
withdrawal and equipped
with a listed overfill prevention device (OPD).
Danger: A fire causing death or serious injury may occur if the following is not followed exactly:
Never store or use gasoline or other volatile substances in the vicinity of this grill
.
Never store a spare propane cylinder under or in the vicinity of this grill, or in the vicinity of another
potential heat source.
Never fill the propane cylinder beyond 80% full.
Warning: Don’t store spare gas cylinder in or near grill.
Left Side Right Side
Fully
A
ssembled View

GPF2718JB
Owner’s Manual
15
Connecting Gas Cylinder
LP (Propane) Gas Supply Connection
1.
Always place the propane cylinder on the tank brackets located on the right side of the cart.
2.
Always confirm that all burner control knobs are in the OFF position before activating the gas supply.
3.
Before connection, be sure that there is no debris caught in the head of the gas cylinder, head of the regulator valve, or in
the head of the burner and burner ports.
4.
Always connect the gas supply regulators as follows:
Insert the nipple of the valve coupling into the tank valve and tighten the connection
collar by turning it clockwise with one hand while holding the regulator with the other
hand (See diagram to right).
5.
Disconnect the propane cylinder from the regulator valve when the grill is not in use.
6.
Do not obstruct the flow of combustion air and ventilation air to the grill.
7.
Keep ventilation openings of the cylinder enclosure free and clear from debris.
8.
Place dust cap on cylinder valve outlet whenever the cylinder is not in use. Only install
the type of dust cap on cylinder valve outlet that is provided with the cylinder valve. Other
types of caps or plugs may result in leakage of propane.
DANGER
To prevent fire or explosion hazard when testing for a leak:
1. Always perform the “leak test“ on page 16 before lighting the grill and each time the cylinder is connected for use.
2. Do not smoke or allow other sources of ignition in the area while conducting a leak test.
3. Conduct the leak test outdoors in a well-ventilated area.
4. Do not use matches, lighters or a flame to check for leaks.
5. Do not use grill until all leaks have been stopped. If you are unable to stop a leak, disconnect the propane supply, call for gas
appliance service or your local propane gas supplier.
Checking
for
Leaks
1.
Make 2-3 oz. of leak solution by
mixing one part liquid dishwashing soap
with three
parts
water.
2.
Make sure control knobs are in the “OFF” position.
3.
Spray some solution on the tank valve up to the regulator connection. (
See diagram to right
).
4.
Inspect the solution at the
connections for bubbles. If no bubbles appear,
the connection is secure. .
5.
If bubbles appear,
you
have a leak. Go to step 6.
6.
Disconnect the regulator from
the
tank and reconnect.
Make sure the connection is secure.
7.
Retest
with solution.
8.
If
you continue to see bubbles, replace the cylinder.
Lighting Your Grill
Danger:
Failure to open lid while igniting the grill’s burners or not waiting 5 minutes to allow
gas to clear if the grill does not light, may result in an explosion, which could cause serious bodily injury or death.
WARNING
: Never stand with your head directly over the grill when preparing to light the main burners, to prevent possible
bodily injury.
Main Burner
1.
Open lid
while lighting burners.
WARNING
: Attempting to light the burner
with the lidclosed
maycause an explosion.Make
sure there are no obstructions
of airflow to the gas unit. Spiders and insects can nest and clog the burner/venturi tube at the
orifice. A clogged burner
tube can lead to
a fire beneath the appliance.
2.
All valves must be in the “OFF” position.
3.
Open cylinder valve.
4.
Ignite only the burners
you
wish to use, using the same method for each:
Push desired burner valve knob and rotate slowly about 1/4 counter-clockwise until a click is heard and wait for five seconds.
The burner should light. If the burner does not light, return the valve knob to the “OFF” position immediately. Wait five minutes
for the gas to clear and repeat the procedure. After burner is lit, repeat the procedure with any other burner desired

GPF2718JB
Owner’s Manual
16
5. Adjust valve knob(s) to desired cooking temperature
Using the Lighting Stick to Light the
Main Burners
1.
Insert a match into
the end of lighting stick. Light the match.
2.
Once lit, place the flame through
the hole on grill body to reach the
burner ports.
(
See diagram to right
).
3.
Press the valve knob and rotate it counter clockwise to the ‘’HIGH’’ position. The
burner should light immediately.
If more than
one burner is desired, use the
carry over channel to light each adjacent burner by pressing the valve knob and
rotate it counter –clockwise to the ‘’HIGH’’ position, repeat the same procedure
for
each adjacent burner and continue in sequence until all desired burners are lit
.
4. Adjust burners to the desired cooking temperature.
Precautions
1.
After lighting, observe the
burner flame.
Make sure all burner ports are lit.
2.
If the burner flame goes out during operation, immediately turn
the gas “OFF”.
Open
lid to let the gas clear for at least
5 minutes before re-lighting.
3.
Before
cooking on the grill for the first time, operate the
grill for approximately 15
minutes
with the lid closed and the gas
turned on “HIGH”.
This
will
“heat clean” the internal parts, dissipate odor from the manufacturing process and painted finish.
4.
Clean the grill after each use. DO NOT
use
abrasive or flammable cleaners. this may damage parts of the grill and cause a
fire.
Side Burner
1. Open lid
while lighting the burner. Lid must remain open
while burner is lit.
2. Valve
must be in the “OFF” position.
3. Open cylinder valve.
4
.
Push side burner knob fully and rotate it slowly about 1/4 turn counter-clockwise, until a click is heard. The burner should light.
If the burner does not light, turn the knob to the “OFF” position immediately. Wait five minutes for the gas to clear and repeat
the procedure.
5. Adjust valve knob to the desired cooking temperature.
Confirm that the burner is properly lit and that the flame pattern is as desired (see fig. A, B and C below for the proper flame patterns).
If the flame pattern is other than normal, consult the troubleshooting guide on page 20 for corrective action.
Observe flame
height
when lit:
Flame
should
be a blue/yellow
color between
1 to 2 inches
height.
2 in.
1 in.
0 in.
Using the Lighting Stick to Light the
Side
Burner
1.
Open the side top lid.
Lid must remain open
while burner is lit.
2.
Stick out the lighting stick then insert a match into
the end of lighting stick.
Light the match.
1. Once lit, place the flame through
the hole on grill body to reach the
burner ports.
(
See diagram to right
).
4. Press the control knob and rotate it counter clockwise to the ‘’HIGH’’ position. The
burner should light immediately.
5.
Adjust burner to the desired cooking temperature.

GPF2718JB
Owner’s Manual
17
FIG. A FIG. B FIG. C
“Flare-ups” sometimes occur when food drippings fall onto the hot heat distribution plate or burners and ignite. Some flaring is normal
and desirable, as it helps impart the unique flavors associated with grilled foods. Controlling the intensity of the flare-ups is necessary,
however, in order to avoid burned or unevenly cooked foods and to prevent the possibility of accidental fire.
WARNING: Always monitor the grill closely when cooking and turn the flame level down to LOW or OFF, if flare-ups
intensify.
Shutting Off Burners
1.
Always turn the valve knob(s) clockwise to the ‘’HIGH’’ position, then press and turn
it to ‘’OFF’’. Never force the knob
without
pressing it. This could damage the valve.
2.
Promptly turn
the gas supply to the “OFF” position at the propane cylinder.
3.
Close the lid of the grill.
Excess
flow
safety
valve
reset
procedure
●
The new regulators are equipped with a safety device that restricts the gas flow in the event of a gas leak. However, unsafe
practices of grill operation could activate the safety device without having a gas leak.
●
A sudden shut off of the gas flow typically occurs if you open the LP tank valve rapidly, or if one or more of the burner control
knobs is in an open position when opening the LP tank valve.
●
To ensure the procedure is safely and successfully performed, please carefully follow the instructions as:
1. Close the LP tank valve.
2. Turn all burner control knobs to the OFF position.
3. Disconnect the regulator from the LP tank.
4. Open the lid of the grill.
5. Turn burner control knobs to HIGH.
6. Wait at least 1 minute.
7. Turn burner control knobs OFF.
8. Wait for at least 5 minutes.
9. Re-connect the regulator to the LP tank.
10. Slowly turn the LP tank valve ¼ turn at a time and have the valve all the way open.
11. With the lid open: For grill with ignition button: ONLY turn on ONE front burner control knob to the HIGH position. Ignite the
grill by pushing the ignition button. For grill with an automatic ignition: Push down the control knob you want to light, turn
counter clock wise until you hear the ignition click.
12. After the first front burner is lit, turn on the other control knob(s) to the HIGH position. **If you have more than two burners,
ONLY turn them on ONE AT A TIME.
13. When all front burners are lit, close the grill lid.
14. Wait for 10-15 minutes, the temperature should reach 400°F – 450°F
WARNING: The cylinder valve always has to be above the horizontal position, for the cylinder to have vapor
withdrawl only.
CORRECT WRONG WRONG WRONG
Normal: Soft blue flames with yellow tips
between I inch - 2 inches high. Out of adjustment: Noisy hard blue
flames – too much air. Poor combustion: Wavy, yellow
flames- too little air.

GPF2718JB
Owner’s Manual
18
Care and Maintenance
IMPORTANT
Always allow to completely cool off before covering your grill to prevent corrosion from condensation.
Caution:
All cleaning and
maintenance should be done
when the grill is
cool, with the fuel supply
turned off at the control dial
and the propane cylinder disconnected. DO NOT clean any grill part in a self-cleaning
oven. The extreme
heat
will damage the
finish.
Cleaning
Burning off the grill after every use (approx. 15
minutes)
will keep excessive food residue from building up.
Recommended cleaning
materials
-
Mild dishwashing liquid detergent
Hot
water
Nylon
cleaning
pad
Wire
brush
Paper
clip
Putty
knife/scraper
Compressed air
DO NOT use cleaners that contain acid, mineral spirits or xylene.
Outside surfaces
Use a mild dishwashing detergent
and hot
water solution to clean. Rinse thoroughly
with
water.
Inside surface
If the inside surface of the grill lid
has the appearance of peeling paint, baked on grease has turned to carbon and is flaking off.
Clean thoroughly
with a strong solution of detergent
and hot
water.
Rinse
with
water and
allow it to completely dry.
Interior of grill bottom – Remove residue using brush, scraper and/or cleaning pad.
Wash with a dishwashing detergent and hot
water solution.
Rinse with
water and let dry.
Cooking Grates –
The porcelain grates have a glass-like
composition that should be
handled
with care. Use a
mild dishwashing
detergent or baking soda and hot
water solution. Non-abrasive scouring powder can be used
on stubborn stains. Rinse
with
water.
Heat Plates
–
Clean
residue with wire brush
and wash with
soapy water.
Rinse with water.
Grease Cup –
Periodically empty the grease cup
and clean
with
a
dishwashing detergent and hot
water solution.
Cleaning the Burner Assembly
1.
Turn gas off
at the control
knobs and propane tank.
2.
Remove cooking grates and heat
plate.
3.
Remove
grease
cup.
4.
Remove burner
by unscrewing nut from beneath
burner
“foot” using a screwdriver and pliers.
5.
Lift burner up and away
from the gas
valve orifice.
6.
Clean inlet (venturi tube) of burner
with small bottle brush or compressed air.
7.
Remove all food residue and dirt on outside of
burner surface.
8.
Clean any clogged ports
with a stiff
wire
(such as an opened paper clip).
9.
Inspect burner for damage
(cracks or holes). If damage is found, replace
with a new burner. Reinstall burner. Make certain the
gas valve orifices are correctly
positioned, pointing straight into burner inlet
(venturi tube).
Also, check position of spark
electrode.

GPF2718JB
Owner’s Manual
19
Award-Winning Barbecue Recipes
Never-fail Barbecue
Sauce
Ingredients:
¼ cup
Finely chopped onion
2 tablespoons
Butter or
margarine
¼ cup
Brown sugar, firmly
packed
1 tablespoon
Worcestershire sauce
¼ teaspoon
Hot sauce
1
Garlic clove, finely
chopped
1 cup
Catsup
¼ cup
Lemon juice
1 teaspoon
Prepared
mustard
Prepare:
Cook onion and
garlic in margarine until tender.
Add
remaining ingredients and bring to a boil. Simmer
uncovered 15 to 20 minutes. Refrigerate leftovers
after use.
Mamma’s Marinated
Chicken
Ingredients:
¼ cup
Dijon
mustard
2 tablespoons
Fresh lemon
juice
1 ½ teaspoons
Worcestershire sauce
½ teaspoon
Dried tarragon
¼ teaspoon
Freshly ground black peppe
r
4
Boneless, skinless chicken
breast halve
Prepare:
Combine ingredients,
mixing
well. Marinade chicken
for
several hours. Grill uncovered, over
medium heat,
for
10
to 15
minutes. Chicken is done when juices run
clear.
Barbecued Honey
Steak
Ingredients:
5 pounds
Beef sirloin steak
2 tablespoons
Red pepper -- crushed
1 teaspoon
Black pepper
2
Garlic cloves -- crushed
1 large
Onion
1 cup
Honey
Prepare:
Combine all ingredients and
marinate steak for 7-8
hours. Remove meat from
marinade and
grill over
very high heat to desired doneness. Heat leftover
marinade to a boil and pour over grilled steak to
serve.
Hardcore Grilled
Trout
Ingredients:
¼ cup
Lemon
or
lime juice
2 tablespoons Melted
butter
2 tablespoons Vegetable oil
2 tablespoons Chopped parsley
1 tablespoon
Hot sauce
½ teaspoon
Ground ginger
½ teaspoon
Salt
4 brook trout --
about 1 pound each
Prepare:
Combine lemon juice, margarine,
oil, parsley,
hot
sauce, ginger and salt. Mix well. Pierce skin of fish
in several places. Roll fish in juice mixture to coat
inside and out. Cover and refrigerate 30 minutes to
1 hour, turning occasionally.
Remove fish from
marinade.
Place fish on grill; brush fish
with
marinade
while grilling. Cook over high heat for 5
minutes.
Turn and brush
with marinade. Cook 5
minutes longer. Fish is done
when it flakes easily
with
fork.
Grilled Veggies
Ingredients:
¾ cup
Olive
oil
¼ cup
Red
wine vinegar
1 teaspoon
Fresh rosemary
1 teaspoon
Fresh thyme leaves
1 teaspoon
Fresh basil, chopped
1 teaspoon
Fresh oregano, chopped
1 tablespoon
Minced garlic
½ teaspoon
Salt
½ teaspoon
Ground black pepper
2 pounds assorted
vegetables, chopped or
whole
according to taste.
Prepare
Combine all ingredients in a small bowl.
Marinade
vegetables with sauce. Cover and refrigerate for 2
hrs.
Grill vegetables over medium heat until tender,
brushing them
with marinade
while they cook.
Cooking times
will vary according to the vegetables
chosen.
This manual suits for next models
2
Table of contents
Other BBQ Grill manuals

BBQ
BBQ 22.5in ROUND KETTLE GRILL User manual

BBQ
BBQ GSF2616AC User manual

BBQ
BBQ CBT916L User manual

BBQ
BBQ Grillware GSF2616 Instruction Manual

BBQ
BBQ 60078 User manual

BBQ
BBQ GrillWare 19272 User manual

BBQ
BBQ 60076 User manual

BBQ
BBQ BQGL-113 User manual

BBQ
BBQ GSF3016A User manual

BBQ
BBQ GPF2414C User manual
Popular Grill manuals by other brands

Ambiano
Ambiano Combo Chef 1300W instruction manual

Char-Broil
Char-Broil 466742111 Product guide

Outback
Outback Cuisine Assembly and operating instructions

Char-Broil
Char-Broil Patio Caddie 4654870 Assembling manual

Kenyon
Kenyon Frontier series Use & care guide - installation manual

George Foreman
George Foreman GGR201RCDSQ Use and care book