BE Ag & Industrial MFS350T Application guide

PURCHASE DATE MODEL NO. SERIAL NUMBER
DEALER
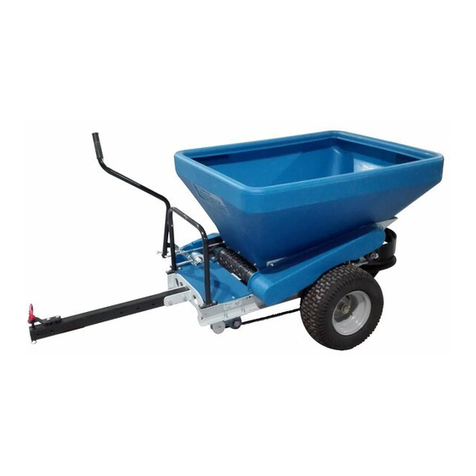
HD TOW-BEHIND
SPREADER
MFS350T
OPERATIONS & PARTS MANUAL
FOR MODELS:
• MFS350T

2 MFS350T USER MANUAL
TABLE OF CONTENTS
3SAFETY INFORMATION
3ASSEMBLY INSTRUCTIONS
16 GENERAL WARNING
17 SPREADING CHART FOR SEED
18 MAINTENANCE
19 EXPLODED DIAGRAM AND PARTS LIST

MFS350T USER MANUAL 3
SAFETY INFORMATION
READ THE DIRECTIONS BEFORE ASSEMBLY
• Read the towing vehicle owner’s manual and towing vehicle safety rules. Know how to operate your tractor
before using the tow-behind spreader.
• Read the chemical label instructions and cautions for handling and applying the chemicals purchased for
spreading.
• Wear eye hand protection when handling and when applying lawn or garden chemicals.
• Never operate tractor and spreader attachment without wearing substantial footwear and do not allow
anyone to ride or sit on spreader attachment frame.
• Never allow children to operate the tractor or spreader attachment and do not allow adults to operate
without proper instructions.
• Always begin with the transmission in first (low) gear, with the engine at low speed and gradually increase
speed as conditions permit.
• When towing spreader do not drive too close to a creek or ditch and be alert for holes and other hazards
which could cause you to lose control of the spreader and tractor.
• Before operating vehicle on any grade (hill) refer to the safety rules in the vehicle owner’s manual.
ASSEMBLY INSTRUCTIONS
Step 1:
1) Assemble the 4 panel by bolt and nuts according to drawing.
2) Assemble the hopper bottom plate by bolts and nuts.
3) Assemble the 4 Corner Cap by bolts and tighten all the bolts and nuts.
4) Adjust the direction of hopper for easy assembly.

4 MFS350T USER MANUAL
Step 2: The hopper needs to be downwards.
Step 3:

MFS350T USER MANUAL 5
Step 4:
Step 5:

6 MFS350T USER MANUAL
Step 6:
Step 7:

MFS350T USER MANUAL 7
Step 8:
Step 9:

8 MFS350T USER MANUAL
Step 10:

MFS350T USER MANUAL 9
Step 12:
Step 11:

10 MFS350T USER MANUAL
Step 13:

MFS350T USER MANUAL 11
Step 14:

12 MFS350T USER MANUAL
Step 15:

MFS350T USER MANUAL 13
Step 16:

14 MFS350T USER MANUAL
Step 17:

MFS350T USER MANUAL 15
Step 18:

16 MFS350T USER MANUAL
GENERAL WARNING
Operator must read and understand all safety and warning information, operating instructions, maintenance
and storage instructions before operating this equipment. Failure to properly operate and maintain the lawn
roller could result in serious injury to the operator or bystanders.
Operation Warnings:
• Do not at any time carry passengers sitting or standing on the lawn roller.
• Do not allow children to play on, stand upon or climb on the spreader.
• Do not exceed rated capacity of 350lbs.
• Replace or repair damaged or worn parts immediately.
• To avoid personal injury and/or equipment damage DO NOT EXCEED 5MPH.
• Only tow with recommended vehicles (Lawn/Garden Tractors and ATVs).
• Always inspect the spreader before using to assure it is in good working condition.
• Always keeps hands and feet clear from moving parts while operating the equipment.
• Never use if the spreader is damaged or worn as this may cause injury to the operator or bystanders.
• Always make sure the spreader is secure and locked to the hitch of the approved vehicle before operating.
• Never add material to the spreader unless it is attached to the tractor.
OPERATING INSTRUCTIONS
Read Instructions Carefully!
1. Right or Left hand is determined by standing at the rear of the spreader and facing in the direction of
travel of the vehicle.
2. Check the register of the control lever indicator with the seed gate (material gate).
With the seed gate closed, the control lever should be in its fully raised position. Control lever settings
listed on the spreader charts are set to the adjustable pointer/stop below the control lever.
3. DO NOT FILL HOPPER and transport over long distance, as it may result in packing, causing poor or
erratic discharge.
4. FOR BEST RESULTS use palletized fertilizer, as it has less tendency to lump and cause little or no dust.
5. Always break up lumps of granular fertilizer before filling hopper.
6. Never use on windy days, especially when spreading grass seed.
7. Always use caution when you are spreading herbicides, as there is the possibility of wind drift or
overthrow into areas where serious crop/shrub damage could occur. Always follow instructions on
chemical packaging.
8. Adjust the tension on the control handle so it moves with some resistance, but will remain where you set
it. Adjust the control handle stop so that the end of the field you can shut the seed gate and after your
turn, re-open to your exact setting.
9. If the agitator becomes jammed, open the feed gate all the way. Use small rod to push the material
through the feed gate.
10.After the agitator is cleared of the debris, reset the feed gate and proceed.
SPREADING INSTRUCTIONS
1. The opening in the hopper bottom is regulated by the control handle. The size of the opening is
determined by the calibrated scale. Place the control lever at the desired setting.
2. The spread chart in it this manual is an approximate guide based on various forward speeds.
For accurate spreading, calibrate your vehicle to operate at the desired speed.
3. Check rate chart for suggested setting for material type to be spread.
4. Make a trial run to assure accurate results. Close the feed gates and put in a pre-determined amount of
the material to be spread. Spread and check the results.
5. Make final adjustments to obtain desired results

MFS350T USER MANUAL 17
MATERIAL SPREAD
WIDTH IN
FEET
TRACTOR
SPEED
(MPH)
POUNDS PER ACER (APPROXIMATE) AT CONTROL LEVER
SETTING INDICATED
0.5 1 2 3 4 5 6 7 8
Alfalfa & Clover 24’
4
5
6
7.5
18
14
12
10
62
51
42
34
153
124
103
88
Barley 26’
4
5
6
7.5
94
76
63
50
117
94
78
62
139
112
92
74
196
157
130
105
Bluegrass &
Bermude Grass 17’
4
5
9
7.5
27
21.5
17.5
14
94
58.5
51
31
Brome Grass 9.5’
4
5
6
7.5
15.5
12
10
8
25
19.5
15
13
Frescue &
Ryegrass 17’
4
5
6
7.5
14
12
10
8
44
35
29
23
104
77
64
51
Lespedeza 30’
4
5
6
7.5
6.5
1.5
4
3
14
12
10
8
29
23
19.5
15.5
Oats 26’
4
5
6
7.5
59
47
39
31
92
74
62
49
170
137
113
91
Orchad Grass 11’
4
5
6
7.5
18
14
12
9
27
22
18
14
Rice 31’
4
5
6
7.5
113
91
75
61
182
146
121
98
329
264
220
176
Rye 31’
4
5
6
7.5
112
90
74
60
176
142
117
94
242
194
161
129
295
237
196
157
Sudan Grass 31’
4
5
6
7.5
48
39
33
26
75
61
51
40
120
96
79
64
Soybeans 38’
4
5
6
7.5
105
85
71
56
165
133
111
88
195
156
130
104
221
177
147
117
Timothy 15’
4
5
6
7.5
18
14
12
10
62
51
42
34
153
124
103
82
Wheat 31’
4
5
6
7.5
91
73
60
48
144
116
96
77
196
157
130
104
257
207
172
138
SPREADING CHART FOR SEED

18 MFS350T USER MANUAL
MAINTENANCE
• After each use clean material out of hopper.
• Rinse/dry inside and outside of the spreader after each use.
• Before operating make sure the tires have the RECOMMENDED TIRE PRESSURE.
• Periodically check all fasteners for tightness.
• Annually clean and lightly lubricate parts.
• Use a glossy enamel spray paint to touch up scratched or worn painted metal surfaces.
• Never exceed load capacity rating of 250lbs it will damage the spreader.
NOTE: The gearbox is filled and sealed at the factory. If operated and stored properly, the gearbox will
provide trouble-free service. If the gearbox is disassembled it is important it be re-filled with quality grease
and the box halves are resealed with silicone adhesive.
IMPORTANT:
If a part needs replacement, only use parts that meet the manufacturer’s specifications. Replacement parts
that do not meet specifications may result in a safety hazard or poor operations.
STORAGE
• Never allow material to remain in the hoper for extended periods of time.
• Before storing make sure the spreader is clean and dry for years of trouble-free service.
• Store indoors or protected area during severe weather and winter months.
WARNING
ALWAYS maintain the proper tire pressure.
DO NOT over or under inflate the tires as serious injury may result.
ALWAYS keep the tires at 300PSI.

MFS350T USER MANUAL 19
PARTS DIAGRAM

20 MFS350T USER MANUAL
PARTS LIST
REF DESCRIPTION QTY
1 Hex Bolt M10x75 1
2 Big Flat Washer Ø10 1
3 Spring 1
4 Adjustable Handle (Top) 1
5 Washer 1
6 Hex Lock Nut M10 3
7 Index 1
8 Wing Nut Assembly 1
9 Fixed Plate 1
10 Adjustable Handle (Low) 1
11 R Pin Ø2 1
12 Lock Washer Ø8 18
13 Cotter Pin Ø3x25 1
14 Flat Washer Ø8 20
15 Shaft Pin 1
16 Handle Fix Pin 1
17 Hex Bolt M8x20 5
18 Hex Nut M8 18
19 Flat Washer Ø10 7
20 Flat Washer Ø12 2
21 Hex Nut M10 3
22 Hitch Tongue 1
23 Lock Washer Ø12 4
24 Lock Nut M12 3
25 Coupler 1
26 Hex Bolt M12x75 3
27 Hex Bolt M8x70 1
28 Hex Bolt M12x20 2
29 Hopper Side Panel 2
30 Corner Cap (Front) 4
31 Big Rounded Head Bolt M6x12 44
32 Hopper Front Panel 1
33 Hex Flanged Nut M6 44
34 Hex Bolt M10x25 3
35 Hopper Rear Panel 1
36 Hex Bolt M8x25 4
37 Shield Brace 3
REF DESCRIPTION QTY
38 Lock Nut M8 3
39 Lock Washer Ø10 3
40 Hex Bolt M10x55 1
41 Shield Cap 1
42 Wheel 2
43 Initiative Axle Shaft Assembly 1
44 Safety Pin 1
45 Composite Bearing 2
46 Gearbox Assembly 1
47 Driven Axle Shaft Assembly 1
48 Hex Bolt M8x50 2
49 Lock Retaining Ring Cap Ø25 4
50 Dust Cover 1
51 Impeller Assembly 1
52 Spread Plate 4
53 Flat Washer Ø40 1
54 Adjustable Plate (Down) 1
55 Adjustable Plate (Down) 1
56 Hopper Bottom Plate 1
57 Axle Bush 1
58 Hex Bolt M10x50 1
59 Agitator 1
60 Oil Cup 2
61 Bearing 4
62 Frame Assembly 1
63 Cotter Pin Ø2x20 2
64 Hex Bolt M8x16 8
65 Connecting Shaft 1
66 Bid Round Head Bolt M6x16 3
67 Flat Washer Ø6 3
68 Lock Washer Ø6 3
69 Hex Nut M6 3
70 Lock Plate 1
71 Lock Retaining Ring Cap Ø40 1
72 Adjustable Plate 1
73 Handle Grip
Table of contents
Other BE Ag & Industrial Spreader manuals

