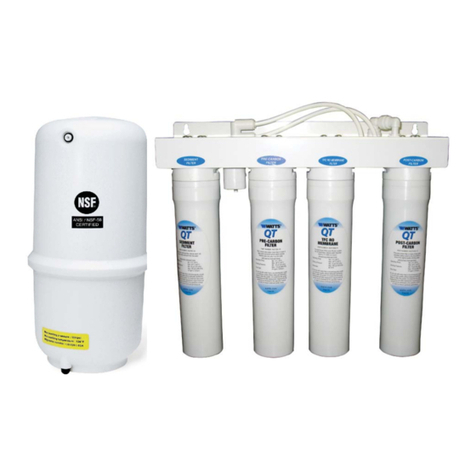
Beach House Reverse osmosis drinking water system User manual

Installation & Service Guide
Lo call (Ireland) 1890 20 30 20 International 00353 23 88 58 000

2
Beach House – Water Filter Systems, Ring, Clonakilty, Co. Cork, Ireland
Introduction
Please read this entire service guide
prior to beginning installation.
Our reverse osmosis drinking water system has been designed for quick and simple
installation and maintenance. By carefully reading this instruction manual and
following the operational guidelines you will insure a successful installation and
reliable operation. Routine maintenance is essential to the longevity and performance
of the system. Filters should be changed every six to twelve months depending on
the quality of the feed water supply. Please note the maintenance instructions at the
end of this manual.
CONDITIONS FOR OPERATION
TFC – Thin Film Composite
CAUTION
Do not use this system where the water is microbiologically unsafe or of
unknown quality. This system is for use on potable water only. Source water
exceeding chemical parameters requires pre-treatment.

3
Beach House – Water Filter Systems, Ring, Clonakilty, Co. Cork, Ireland
System & Faucet Diagrams
1
Sediment Filter 5mic white
(clear housing)
2Carbon Filter
3Sediment Filter 1mic white

4
Beach House – Water Filter Systems, Ring, Clonakilty, Co. Cork, Ireland
Starting Your Installation
Preparation
Chec
k the following list of components to ensure that all parts are packed
with your system.
1 – Storage Tank
1 – RO System
1 – Faucet
1 – Installation Kit
Determine the location for the installation of the RO system. Avoid locations
where the system might c
ome in contact with hot water pipes or other
hazards.
Determine the location for the faucet. Check to see that drilling the faucet
hole will not damage pipes or wires running underneath the sink.
Determine the location for the storage tank. A maximum dis
tance from tank
to faucet of 15 feet is possible. The system will produce a faster flow at the
faucet with the shortest tubing run from tank to faucet.
Fittings and Tubing
To install a tube, push it in the collet until it seats firmly. To remove a tube,
push in the collet and pull out the tube.

5
Beach House – Water Filter Systems, Ring, Clonakilty, Co. Cork, Ireland
Source & Drain Saddle Valve
Shut Off the Water
Locate the water shut-off valve for the cold water feed line you choose to use for the supply.
Accidentally hooking up the system to the hot supply line will permanently damage the
membrane (See conditions for operation). To assure you are using the cold water line, turn
on both the hot and cold faucet. After the water is warm to the touch, fell the pipes under the
sink. It will be easy to identify the hot and cold pipes.
Close the cold water valve. Turn on the cold water faucet only to assure that the line is
completely shut off and the line is drained. If no shut off valve is located under the sink, turn
off the main supply at the entry to the house.
Installing Supply Feed
½’’ Copper pipe installation with saddle valve
(self-piercing)
Please see attached sheet.
Note: If your piping is any other than described
here (acorn, alkathine etc.) then you must first
buy the appropriate connections at your local
Hardware store..
Installing the Drain Clamp
Select a location for the drain hole based on the
design of the plumbing. Position the drain outlet
saddle on the drain pipe. Allow adequate space
for drilling. Tighten the bolts evenly on both
sides. Avoid over tightening.
Using the opening in the drain outlet
saddle as a guide, drill a ¼’’ hole in the
drain pipe. Clean debris from the saddle
and threads.
Installation of the membrane
(Stage 4, blue filter, plastic wrapping)
Insert the new membrane directly from its bag into the housing. Avoid touching the
membrane. If necessary use sterile latex gloves.
The end with the two o-rings goes in first. If you'll twist it slightly as you push, it will
go in easily. You must feel it slip into the groove at the end of the housing. You'll feel
it "hit bottom."
It will insert easier into the housing if you wet it with tap water to provide
lubrication. Just hold it under a running tap for a moment.
When the membrane is securely in place, replace the cap.

6
Beach House – Water Filter Systems, Ring, Clonakilty, Co. Cork, Ireland
Faucet & Storage Tank
Installing the Faucet
The product water faucet may be installed on any flat surface at least 2’’ in diameter. Check the
underside of the location for interference.
Stainless Steel Sink
Make a small indent to mark the desired drilling
location using a centre punch. Drill a pilot hole
with a 1/8’’ metal drill bit. Enlarge the hole
using a 1/2’’ metal drill bit.
Faucet installation
Once the hole has been drilled in the sink, the
faucet may be located in the hole. Be sure the
faucet body, faucet base, and the rubber
faucet base washer are in place above the
sink.
Install the star lock washer and nut, then
tighten firmly while aligned faucet in the
desired direction.
Additional Point of Use Connection
To connect an additional point of use
(icemaker, extra faucet, etc.) place a T-
connector in the ¼’’ line between the faucet
and the RO system.
NOTE: Icemakers typically use ¼’’ tubing as
the water feed line. Use a reducing union fitting
to make this connection.
Mounting the Tank Ball Valve
NOTE: Do not tamper with the air valve on the storage tank. It has been preset and
screwed on with blue cap by the manufacturers.
Assemble Hardware as shown:
1.
Wrap the threads on the top of the water
storage tan
k 3 times with plumbers (teflon)
tape only. Make sure it is tight, but not over
tight.
2.
Connect the tank ball valve assembly to the
top of the water storage tank.
3.
Connect the tube from the RO module to
the water storage tank.

7
Beach House – Water Filter Systems, Ring, Clonakilty, Co. Cork, Ireland
Activation, Maintenance, Filter Change
Activating the System for the first time
Make sure all water supply/drain lines are
secure and free from leakage.
Open the water supply. If you are using the
self-piercing valve, slowly turn the saddle valve
counter clockwise until fully open. Check stem
seal for leakage. If necessary tighten stem nut
lightly.
Turn storage tank valve one quarter turn
counter clockwise to open the valve (the
handle should be in line with the tubing as
it enters the connection).
Open the product water faucet and let the
water flow until all the air has been
expelled from the system. This will take
about an hour.
Close the product water faucet. In 30
minutes, check the connections for leaks
and correct if necessary.
Maintenance
For the best quality water, it is essential to change the filters regularly. Changing the filters is
easy (see description below).
Filter Recommended exchange
Stage 1: 5 Micron Spun Sediment Filter 6 month to 1 year
Stage 2: Activated Carbon Filter 6 month to 1 year
Stage 3: 1 Micron Spun Sediment Filter 6 month to 1 year
Stage 4: Membrane 3-5 years (depending on TDS)
Stage 5: Post Carbon Filter +/- 1 year
Stage 6: Bacteria & Virus Filter +/- 2 years
When you go on holiday
If you go on holiday for longer than 3 weeks it is advisable to remove the membrane
for the duration of your absence. To do this, proceed as follows:
1. Switch off feed supply under the sink.
2. Empty tank and switch off tank.
3. Detach tube to membrane housing cap.
4. Screw off cap and remove membrane. Take care not to touch membrane with your
hands, latex gloves are recommended.
5. Place membrane in a Ziploc type freezer bag and place bag in the fridge.
6. DO NOT PLACE BAG IN THE FREEZER!
Do not use the first two Reservoirs of Water
Allow the reservoir to fill for 4
-
6 hours. Dispense this water to drain. This process
removes the factory installed sanitizing solution fr
om the entire system and sends it
to the drain. Repeat this process one more time. Allow the tank to fill for 4-
6 hours
and dispense this water to the drain.

8
Beach House – Water Filter Systems, Ring, Clonakilty, Co. Cork, Ireland
Troubleshooting
Troubleshooting
Problem Reason Solution
Water has an offensive odour /
taste Carbon post filter is depleted Drain storage tank & replace
post filter
Water has an offensive odour /
taste Filters are depleted Replace filters & sanitize system
Not enough product H
2
O
Pressure Storage tank air pressure is low Empty storage tank and set
pressure to 8 psi (55kPa)
Not enough water Low water pressure If line pressure is below 30 psi
install a booster pump
Not enough water Water supply is blocked Clear restriction, rotate valve on
feed water
Not enough water Storage tank is depleted Consider an increase in tank or
membrane capacity
Not enough water Clogged pre-filter cartridge Replace pre-filter, drain tank and
sanitize system
No drain water Clogged flow restrictor Replace flow restrictor, check
TDS level
No water Water supply is turned off Turn water on
High TDS level High TDS in product water Replace RO membrane, check
flow restrictor
Lo call: 1890 20 30 20
www.beachhouse-waterfilters.com
International customers phone: 00353 23 88 58 000
Table of contents
Popular Water Filtration System manuals by other brands
Pentair
Pentair THS Series Installation and user guide

TrojanUVMax
TrojanUVMax Pro10 owner's manual

Steinbach
Steinbach 040380 instruction manual

CALEFFI
CALEFFI 5495 SEP4 Installation, commissioning and servicing instructions

AMI
AMI AAA-RO-50 Instructions manual for installation, operation and maintenance

Aquatec
Aquatec DD 500 Technical manual