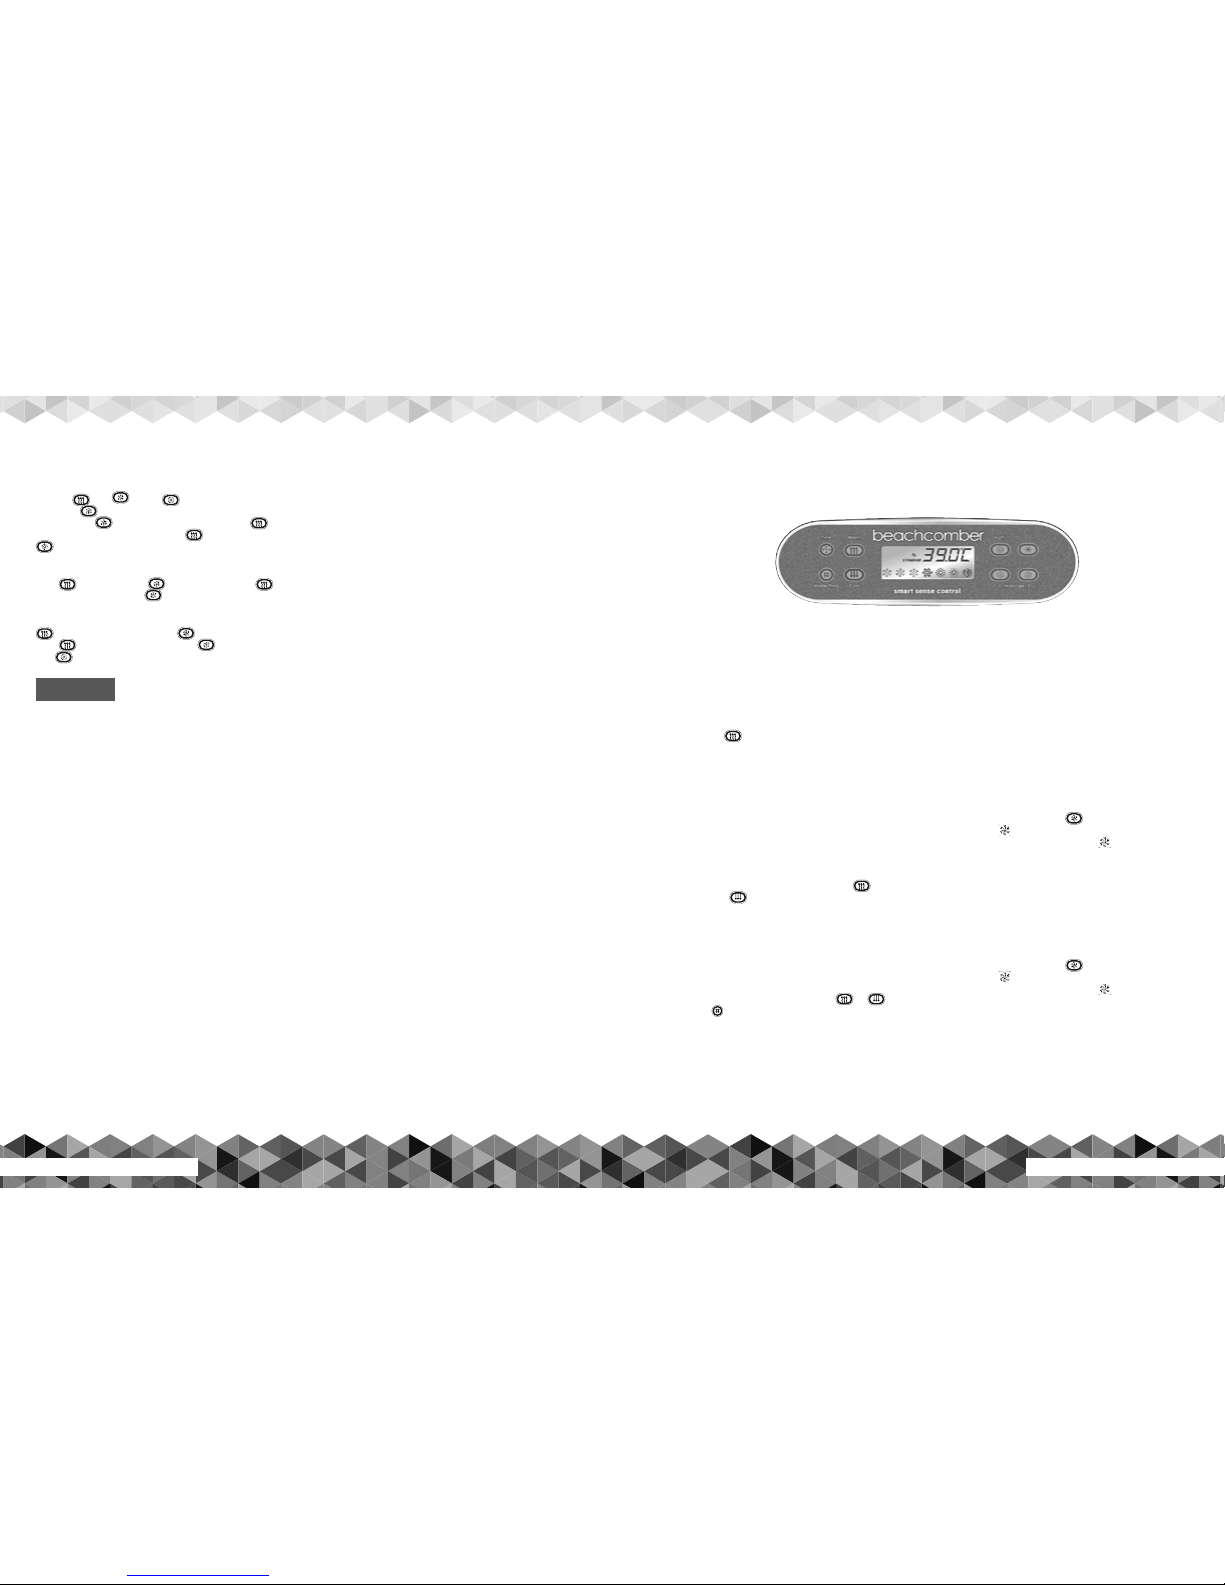
16 Beachcomber Hot Tub Owner’s Guide www.beachcomberhottubs.com 17
Turbo (optional)
To activate, press the button once to turn on and again to turn
off. The Turbo will turn off automatically after 15 minutes. The Turbo
will come on automatically for 30 seconds at the start of each filter
cycle to purge the Turbo plumbing. If the purge time is not at the time
of day you want change the filter times.
Light
To activate, press the button once to turn on and again to turn
off. The light will automatically turn off after 4 hours. If your tub has
an EverLite 6 or any additional lighting features see the instructions in
this Owner’s Guide.
Standby Mode
The Standby feature is used primarily to temporarily shut the
circulation pump off before removing the Microfilter for cleaning
or replacement. This prevents debris or objects from entering
the circulation pump while the skimmer basket and filter are out.
Standby can also be used if you want to have total quiet while using
the hot tub; however, during this time the hot tub will not heat. Use
the instructions below to put your hot tub into Standby. Please note:
Do not use Standby to drain and refill your hot tub. Always shut off
power at the main breaker before draining your hot tub to prevent
damage to the hot tub equipment.
Press then to put the tub into Standby; display will show
stby. Press any button to take the hot tub out of standby.
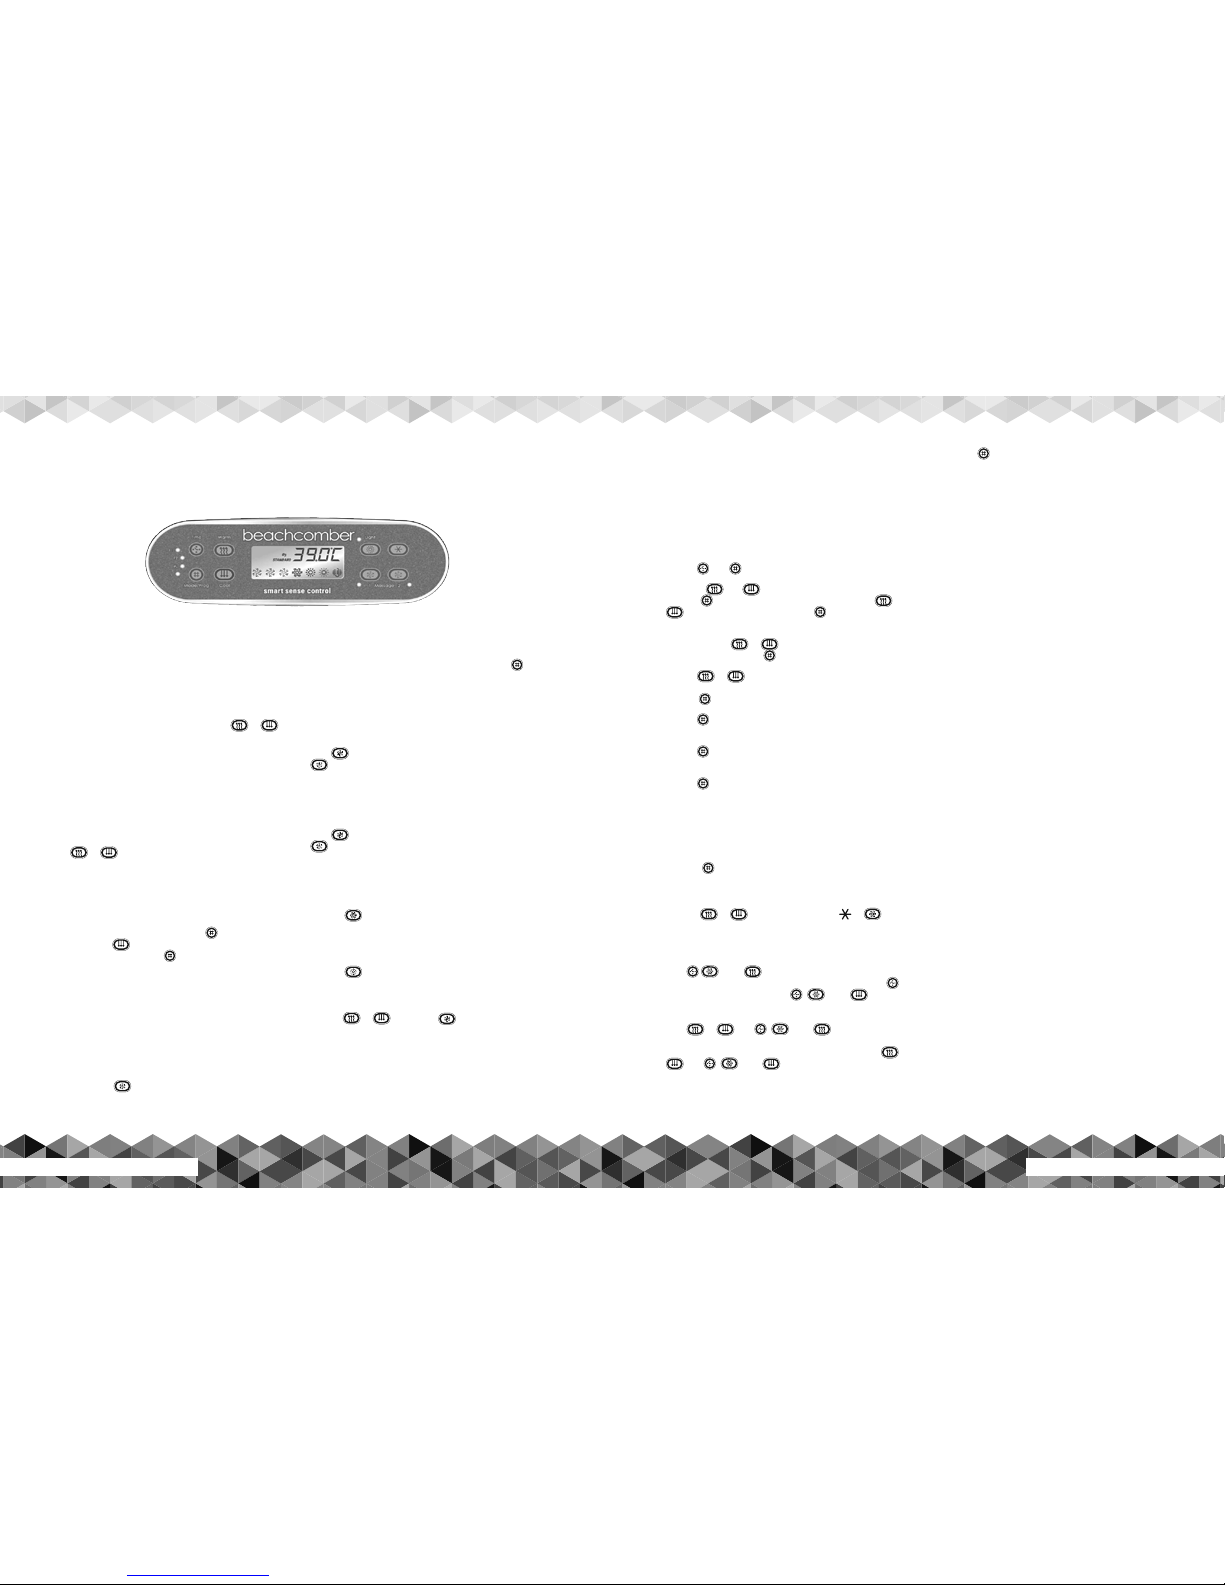
Setting the Time
To set time to your local time press , then the and Set Time
appears. Press to advance the time or the to back up the
time. The time will quickly advance, 5 seconds after pressing or
. Use the same button to stop the clock at the desired time.
Setting Filter Cycles
Filter cycles come preset from the factory. For hot tubs without the
Hush option, filter cycles are default to run two hours each time,
twice a day. For hot tubs with the Hush option, filter cycles are
default to 24 hours.
Filter cycle duration and frequency are adjustable and can be
changed by following the instructions below.
Once time of day is set press the button to set start time of Filter
cycle 1. If your hot tub is Hush Pump equipped, changing filter cycles
does not affect the time the pump runs. It tells the system when to
turn on the heater if you are using the Economy heat setting. If your
tub is non Hush Pump, changing the cycle time tells the two - speed
pump 1 when to operate for a filter cycle. Avoid programming a
long filter cycle that runs during the day time hours in hot summer
weather as it could cause the water to overheat. Use the or
buttons to advance or backup the Filter 1 start time. Press the
same button to stop the time once you reach the desired start time.
Press the button to advance to the Filter 1 stop time and use the
same procedure as above to adjust. Press the again to select
Filter 2 start time then use the same procedure as above to adjust,
then press to select Filter 2 stop time and once set, press to
exit the menu.
Make sure you do not program the cycles to overlap the start or stop time
of either cycle. Any changes to filter cycles and time are stored in the
system memory and will be retained in the event of a power outage.
Locking The Panel
This feature might be used if you do not want anyone to operate the tub
in your absence. To lock the panel press, , then then within
three seconds. A pad lock icon will appear on the LCD. To unlock press
then then 1, then within three seconds.
Locking the Set Temperature
This feature might be used to prevent other tub users such as children
from adjusting the tub set temperature. To lock the set temperature press,
then then 1 then within 3 seconds. To unlock press
then then 1 then within 3 seconds.
Diagnostic Display Messages
If nothing appears on the display screen, power to the Hot Tub is off.
-°F Current temperature not known
OHH Possible overheated heater: do not enter Hot Tub
OHS Possible overheated Hot Tub: do not enter Hot Tub
SnA Sensor problem
Snb Sensor problem
SnS Sensors out of balance
HFL Possible flow through heater problem
LF Confirmed flow through heater problem
dr Possible dry heater problem
drY Confirmed dry heater problem
ICE Freeze condition sensed
Stby Tub is in standby
PLEASE REFER TO TROUBLE SHOOTING GUIDE FOR A COMPLETE
EXPLANATION OF DIAGNOSTIC MESSAGES.
SHOCK HAZARD! NO USER SERVICEABLE PARTS.
DO NOT ATTEMPT SERVICE OF THIS CONTROL. CONTACT YOUR
RETAIL STORE OR SERVICE PROVIDER FOR ASSISTANCE. FOLLOW
ALL OWNER’S GUIDE POWER CONNECTION INSTRUCTIONS.
INSTALLATION MUST BE PERFORMED BY A LICENSED ELECTRICIAN AND
ALL GROUNDING CONNECTIONS MUST BE PROPERLY INSTALLED.
ALWAYS TEST WATER TEMPERATURE PRIOR TO ENTRY USING THE
TOPSIDE CONTROL PAD. ENSURE COMFORT BY ALSO CHECKING
WATER WITH AN ACCURATE THERMOMETER.
TAMPERING WITH OR MODIFYING THIS EQUIPMENT MAY VOID
YOUR GUARANTEE.
WARNING
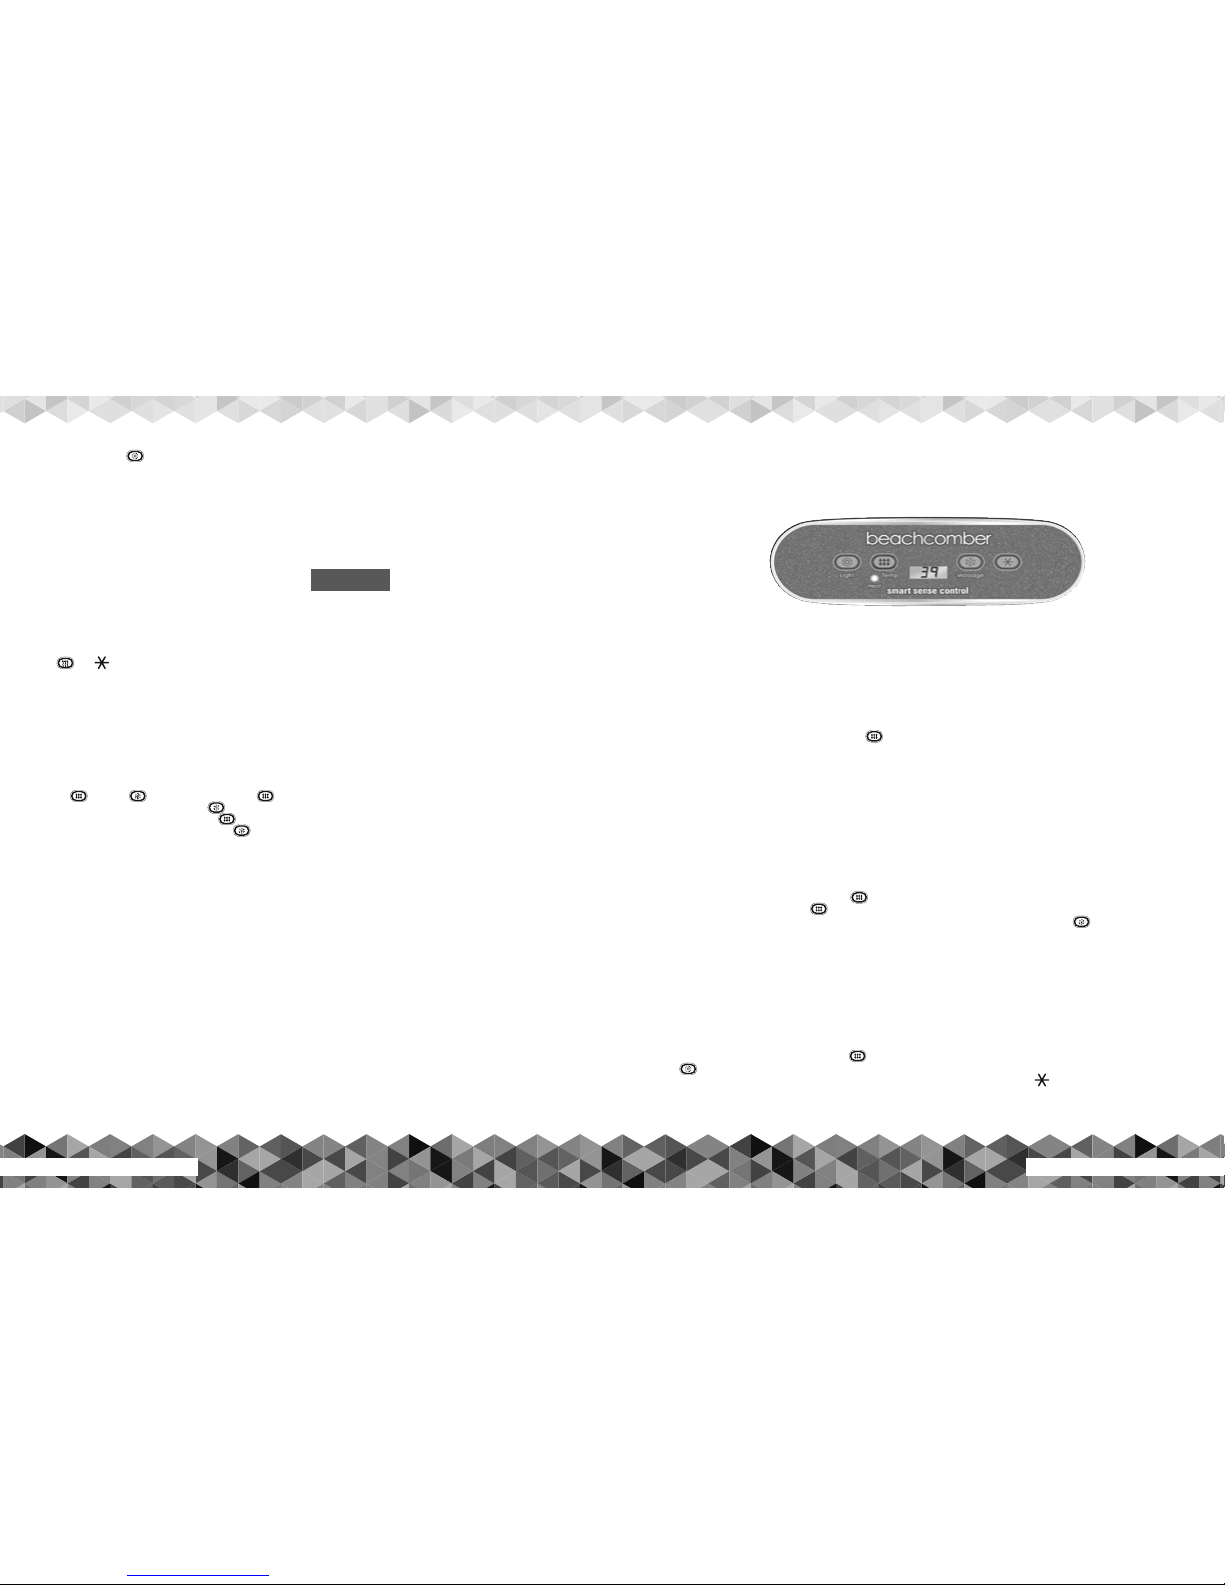
Start Up
Before turning on the power, make sure you have read the Start Up
instructions on page 9. When your hot tub power is first turned on
it will display a series of numbers identifying the software version
and the voltage input. It will then go into a 4 minute priming mode
indicated by a Pr on the LCD display. During priming mode the
Hush Pump will circulate the water through the filter and heating
system to allow the temperature to be read. If your hot tub is not
Hush Pump equipped, the jet pump will not turn on until the prime
mode times out or the button is pressed to time out early.
During prime mode the jet pump can be turned on to make sure
they are fully primed and moving water in the hot tub. Do not
allow an unprimed jet pump to run for more than 10 seconds. If
the fill water temperature is below 44°F / 7°C freeze protection
will activate all pumps immediately. While the circulation pump is
running the display will show a - - indicating current temperature is
not known. This will take two minutes. Once temperature is known
it will be displayed on the LCD.
Temperature Adjustment
The temperature range is 80°F - 104°F / 26.0°C – 40.0°C. The
default is 100°F/37.5°C. Any temp changes are saved in the
system memory if power is interrupted. Press the button to
increase or lower the set points. If the is pressed the set point
will flash. Each press will move the set point 1 degree. If the set
point is moving the wrong direction then stop pressing, let the
temperature display stop flashing, then press again to move the set
point in the other direction. After adjusting the set temp, the LCD
will revert back to the current water temperature.
Note: if set temp is lowered more than 3°F / 1.5°C below current
water temp, the Hush Pump will stop. The circulation will restart
every 30 minutes to check if water temp has come down to set
temp. It will also run continually during programmed times.
Heating Modes
To change to the desired heating mode, press the button then
the button.
There are 3 Heating Modes – Standard, Economy and Sleep
Modes.
St – Standard Mode: (Default mode) In Standard Mode the water
is always heated to the set temperature. The display will show
the temperature always with Hush Pump equipped systems. If non
Hush Pump, current water temperature will be shown when the
pump is running and when pump is not running. If your hot tub is
not equipped with a Hush Pump, the 2 speed pump will come on
every 30 minutes outside of filter cycles to poll for current water
temperature. If you do not want this to happen, use the Economy
mode below.
Ec – Economy Mode: In Economy Mode the water is heated only
during the filter cycle times. The factory default is F4 (4 hours), 2C
(twice a day) for Hybrid3 hot tubs and F2 (2 Hours), 2C (twice
a day) for LEEP hot tubs. If using the Economy mode, you may
need to alter these times to make sure the water is your desired
temperature during your usual hot tub usage times. The first filter
cycle starts 6 minutes after power is turned on. The display will
alternate between the current temperature and Ec.
SL – Sleep Mode: In Sleep Mode the water is only heated to within
20°F / 11°C of your set point and the heater only comes on during
the programmed filter cycle times. This mode is typically only used
for vacation time. The display will alternate between the current
temperature and SL.
Massage
To activate this jet pump, press the button once to activate
low speed, twice to activate high speed and three times to turn the
pump off. The low speed will turn off automatically after 4 hours
and the high speed will turn off after 15 minutes. If the hot tub is
Hush Pump equipped, the low speed of the jet pump will come on
automatically for 1 minute at the start of each filter cycle to purge
the plumbing lines.
Turbo (optional)
To activate this press the button once to turn on and twice to
turn off. The Turbo will turn off automatically after 15 minutes. The
Turbo will come on automatically for 30 seconds at the start of
each filter cycle to purge the Turbo plumbing.
Light
500 Series
ET-55 Topside Control Panel Operating Instructions


 owner's manual")