Becton Dickinson Clay Adams 0591 User manual
READACRIT
Centrifuge
[Model
Nos.
0591
and
0592]
AND
MP
READACRIT
Centrifuge
[Model
Nos.
0593
and
0594
OPERATORS
MANUAL
Clay
Adams
ς
Dra.
mon
ο
=
ER
id
BECTON
-
00050

READACRIT
Centrifuge
Model
No.
0591
[115
volts}
Model
No.0592
[220
volts]
MP
READACRIT
Centrifuge
Model
No.
0593
1115
voltsl
Model
No.0594
[220
volts]
OPERATORS
MANUAL
Read
this
manual
thoroughly
before
operating
equipment.
ADAMS,
PRE-CAL,
READACRIT,
MP
READACRIT,
REDI-LANCE
SEAL-EASE,
SEDI-CAL,
SEDI-STAIN,
VACUTAINER,
Ciay
Adams,
and
(A
are
trademarks
of
Becton
Dickinson
and
Company.
Copyright
©
1985
by
CLAY
ADAMS,
Division
of
Becton
Dickinson
and
Company.

Should
the
power
cord
and
plug
become
cracked,
frayed,
broken
or
otherwise
damaged,
they
should
be
replaced
immediately
by
a
qualilied
serviceman.
Unplug
the
power
cord
before
servicing.
The
operator
shouid
not
perform
any
servicing
oxcept
as
specifically
stated
in
this
manual,
Refer other
servicing
to
your
nearest
Clay
Adams
dealer
or
call
Clay
Adams
Technical
Servico
Depart-
ment:
(201)
887-4800,
C.
PRINCIPLES
OF
OPERATION
1.
Micro-Homatacnt
Mathod
Micro
methods
far
the
determination
of
hematocrits
have
been
widely
used
tn
clinical
laboratories
for
many
years.
The
results
of
micro-hematocrit
detor-
minations
are
recognized
as
heiog
fully
equivalent
to
the
results
of
macro
determinatlons.
The
macro
method
of
Wintrobe!"!
requires
at
least
1
mi
of
blood
and
up
to
30
minutes
of
centrifugation,
The
more
commonly
used
micro
methods
utilize
approximately
65
cu.
mm.
1,065
mi)
of
blood
and
require
only
about
5
minutes
of
centrifugation,
The
usual
micro
technique
for
determining
hematocrit
utilizes
a
small
glass
capillary
tube,
internally
coatod
with
an
anticoagulant
{heparin},
This
capillary
tube
ls
filled
with
blood
usually
obtained
from
a
finger-puncture.
One
end
of
the
cepillary tube
is
sealed
with
plastic
clay
(Figure
1),
and
the
tube
is
placed
in
a
spacial
micro-hematocrit
cantrifuge,
where
it
is
rotated
at
high
speed
for
about
5
minutes,
After
centrifugation,
the
blood
sample
is
separated
into
two
fractions
(Figure
21,
a
column
of
packed
red
cells
and
a
column
of
clear
plasma.
ke
Blood
Di
()————
<)
Sanlirg
Clay
Figure
1.
Cipillary
Tube
with
Whole
Blood,
Seated
for
Centrifugation.
Thea
hematocrit
is
defined
as
the
ratio
of
the
volume
of
packed
red
colls
to
the
volume
of
the
original
blood
sumple,
multiplied
by
100.
Since
the
capillary
tubo
is
of
uniform
bore,
the
hematacrit
may
be
easily
determined
by
measuring
the
two
lengths
as
shown
in
Figure
2.
The
hematecrit
value
may
then
be
redefined
as
follows:
HEMATOCRIT=
(lungth
of
column
61
packed
red
culla
avarali
bengih
sf
blood sample)
x
100
do
Mood
Sampla
—
>
ea
IT)
Sasling
Clay
——S
H—-
;
Plasma
ーー
Pe—
Packed
[tnd
Cots
—>|
Figure
2.
Capillary
Tube
Afrer
Contefugatton,
Usually
the
treo
lengths
are
measured
with
the
aid
of
special
mechanical
reading
2.

devices.
Such
devices
present
the
final
hematocrit
value
without
requiring
any
computation
by
the
operator.
2.
READACRIT
Centrifuge
Principte
The
READACRIT
Centrifuge
incorporates
a
built-in
hematocrit
scale
and
tube-holding
compartments
which,
when
used
vith
special
pre-calibrated
capillery
tubes,
permit
the
direct-reading
of
hematocrit
by
messuring
the
length
of
the
packed
red
cell
column.
It
is
not
necessary
to
measure
the
overall
length
of
blood
used,
since
this
length
remains
unchanged
from
one
sample
to
the
next.
The
READACRIT
Centrifuge
is
desiqned
to
be
used
with
haperinizad
PRE-CAL
Capillary
Tubes.”
A
PRE-CAL
Capillary
Tube
is
75
mm
long
and
bears
a
calibration
mark
60
mm
from
one
end.
The
length
of
the
built-in
scale
in
the
READACRIT
Centrifuge
is
exactly
the
same
as
tha
length
of
the
calibrated
portion
of
the
tube.
The
volume
of
blood
used
is
only
about
15
cu.
mm
(0.015
mi).
Figure
3
illustrates
the
READACRIT
Centrifuge
MHCT
principle,
in
this
case
yielding
a
hematocrit
value
of
30,
A
PRE-CAL
Tube
was
first
filled
with
blood
zo
the
calibration
mark
and
then
centrifuged.
As
shown
in
Figure
3,
the
length
of
the
packed
red
cell
column
when
measured
against
the
centrifuge
scale
equals
the
hematocrit.
READACRIT
Centrifuge
Scale
(simpiittodi
Seating
©
Clay
=
я
5
2
g
a я
2
я
=
o
[RA
sedia
lol
tina
brut
sul
dal
ida
dle]
sul
|
y
(dk
끄
D)
Pock
PLASMA
E
Red
Cells
Figure
3.
PRE-CAL
Capillary
Tube
(calibration
mark
not
own)
Containing
Blood
Swnple
After
Centrifugatian.
3.
SEDI-CAL
Tube
Principle
In
healthy
individuals,
urine
usually
contains
very
little
sediment.
There
may
ba
a
small
number
of
hyaline
casts,
epithelial
calls,
bacterial
mucus
threads,
crystals
and
some
amorphous
materials,
An
occasional
leucocyte
and
erythrocyte
may
aiso
be
seen,
!7)
In
renal
parenchyma!
disease,
the
uring
usually
contains
increased
numbers
of
cells
and
casts
from
an
organ
which
is
otherwise
accessible
only
by
biopsy
or
at
operation.)
Microscopic
examination
of
urinary
sediment
is
a
semi-quantitative procedure,
which,
while
not
intended
as
в
substitute
for
more
exact
enumeration
techniques
such
as
the
Addis
Count'*!,
is
a
valuable
method
for
determining
the
state
of
health
of
the
urinary
tract.
Elements,
which
are
too
few
in
number
to
be
observed
in
a
specimen
prepared
for
counting,
may
be
observed
in
the
concen-
trated
sediment
and
may
be
of
great
diagnostic
or
prognostic
importance
5
“PRE-CAL
Capillary
Tubos
contain
0.5
(minimum
US
P
units
of
ammonium
heparin
per
ruba
3.
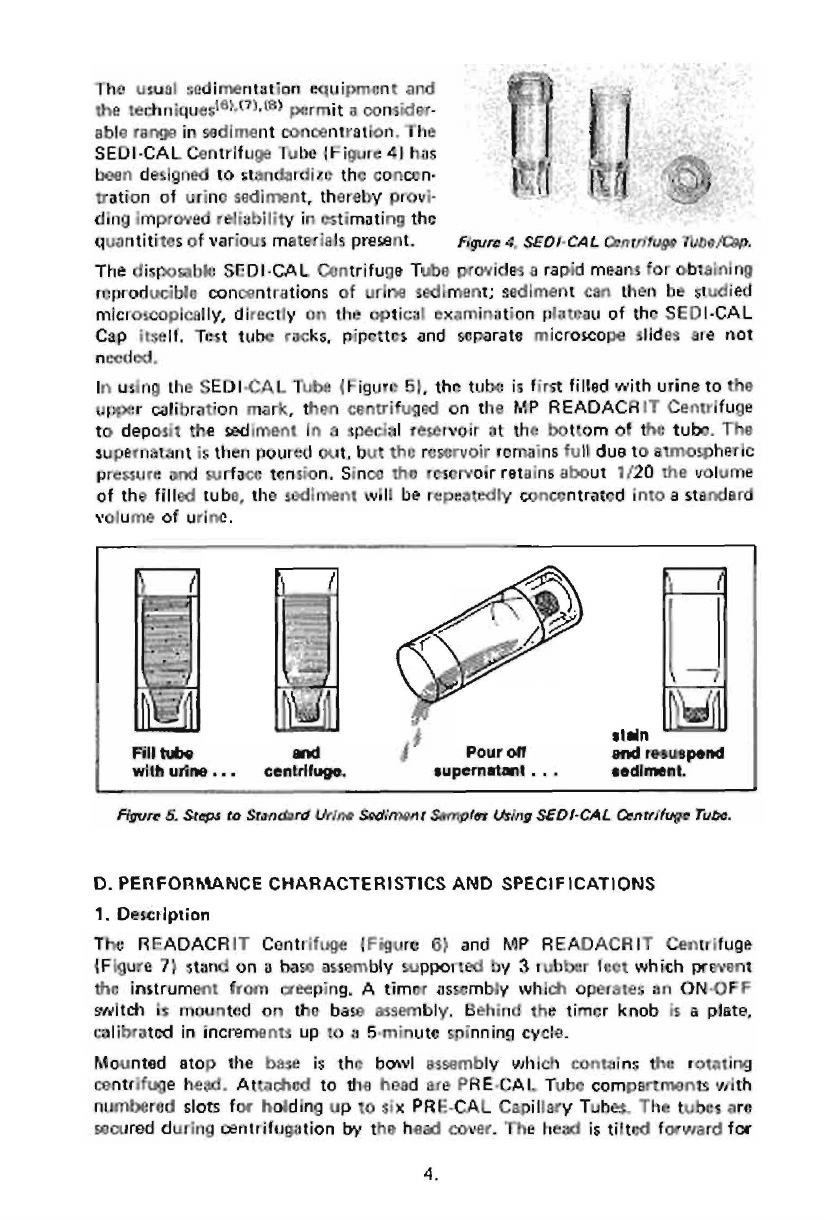
The
usual
sedimentation
equipment
and
the
techniques
DAS
permit
a
consider-
able
range
in
sadiment
concentration,
The
SEDI-CAL
Centrifuge
Tube
{Figure
4)
has
bean
designed
to
standardize
the
concen-
tration
of
urine
sediment,
thereby
provi-
ding
improved
reliability
in
estimating
the
quantitites
of
various
materials
present.
Figure
4,
SEDI-CAL
Centrifugo
Tube/Cap.
The
disposable
SEDI-CAL
Centrifuge
Tube
provides
a
rapid
means
for
obtaining
reproducible
concentrations
of
uring
sediment;
sediment
can
then
be
studied
microscopieally,
directly
on
the
optical
examination
plateau
of
the
SEDI-CAL
Cap
itself.
Test
tube
racks,
pipettes
and
separate
microscope
slides
are
not
needed,
In
using
the
SEDI-CAL
Tube
{Figure
5),
the
tube
is
first
filled
with
urine
to
the
upper
calibration
mark,
then
centrifuged
on
the
MP
READACAIT
Centrifuge
to
deposit
the
sediment
İn
a
special
reservoir
at
the
bottom
of
the
tubo.
The
supernatant
is
then
poured
out,
but
the
reservoir
remains
full
due
to
atmospheric
pressure
and
surface
tension,
Since
the
reservoir
retains
about
1/20
the
volume
of
the
filled
tube,
the
sediment
will
be
repsatedly
concentrated
into
a
standard
volume
of
urine.
=
k
i
№
El
”
$
stain
Fill
tube
and
j
Pour
off
ond
resuspend
with
urine...
centrifuge.
supernatant...
sediment.
Figure
5.
Steps
to
Standard
Urine
Sediment
Samples
Using
SEDI-CAL
Centrifuge
Tube.
D.
PERFORMANCE
CHARACTERISTICS
AND
SPECIFICATIONS
1.
Description
The
READACRIT
Contrifuge
{Figure
6)
and
MP
READACRIT
Centrifuge
{Figure
7}
stand
on
a
base
assembly
supported
by
3
rubber
feet
which
prevent
the
instrument
from
creeping.
A
timer
assembly
which
operates
an
ON-OFF
switch
is
mounted
on
the
base
assembly,
Behind
the
timer
knob
is
a
plate,
calibrated
in
incrementa
Up
to
a
5-minute
spinning
cycla.
Mounted
atop
the
base
is
the
bowl
assembly
which
contains
the
rotating
centrifuge
head.
Attached
to
tha
head
are
PRE-CAL
Tube
compertments
with
numberéd
slots
for
holding
up
to
six
PRE-CAL
Capillary
Tubes.
The
tubes
are
secured
during
centrifugation
by
the
head
cover.
The
head
is
tilted
forward
for
4.

Figure
G.
READACRIT
Cantrifuge
Figura
7,
MP
READACRIT
Contrifuge
far
for
Direct
Reading
of
Direct
Reading
of
Wiğro-Hematocviis
and
Micro-Hernotocrits.
for
Obtainina
Bluod
Separations,
Spain
fluid
Exudste
and
Transudate
Sediments,
and
Urine
Sedimenia
tions,
convenient
reading
of
the
capillary
tubes.
An
adjustable
magnifier
is
provided
ta
sid
in
reading
the
hematocrit
scale.
AL right
angles
to
the
PRE-CAL
Tube
compartment,
on
the
MP
READACRIT
Centrifuge
only,
are
holders
for
centrifuging
two
SEDI-CAL
Centrifuge
Tubes.
Hinged,
numbered
cavers
on
the
tube
holders
secure
the
SEDI-CAL
Tubes
during
œntrilugation.
A
clear
plastic
top
cover
is
hinged
to
the
rear
of
the
bow!
assernbly.
A
latch
is
mounted
on
the
front
of
the
top
cover,
The
latch
is
locked
by
pushing
it
down
into
the
latch
block
and
safety
switch
assembly
on
the
front
of
the
guard
bovd.
The
motor
will
not
operate
unless
the
cover
is
seourely
latched,
2.
Specifications
LI
Speed:
Model
Nos.
0591
and
0582
8000
rpm
+
10%
Мода!
Nos.
0593
and
0594
7000
rpm
(minimum),
with
filled
SEDI-CAL,
Tubes
installed.
[I
Nominal
Relative
Centrifugal
Force
(RCF):
Model
Nos.
0591
and
0592
53009
Model
Nos,
0593
and
0694 4750
g,
with
filled
SEDI-CAL
Tubas
installed.
C
Hematocrit
Time:
5
minutes
+
30
seconds.
[1
Motor:
Universal type
—
all
models.
5.
|!
Dimensions
and
Weights:
Height
7%"
Width
sur
Depth
9%"
{including
hinge
and
front
latch
block)
Net
Weight
7.5
Ibs.
Shipping
Weight
Model
Nos.
0591
and
0592—10.5
Ibs.
Mode!
Nos.
0593
and
0594—11.5
lbs,
O
Power
Cord—both
models:
Equipped
with
a
6-foot,
U.L.-listed
power
cord
with
strain-relief
and
three-
prong
plug.
_J
Power
Requirements:
Model
Nos.
9597
and
0593:
115
volts
AC,
50-60
Hz,
1.4
Amps
Modet
Nos.
0592
and
0594:
220
valts
AC,
50
Hz, 0.7
Amps
E.
OPERATING
INSTRUCTIONS
Connect
the
READACRIT
Centrifuge
to
a
3-wire
grounded
AC
receptacle
rated
for
the
particular
model.
b.
.
Centrifuging
PRE-CAL
Tubes
CAUTION.
Connect
only
to
a
3-wire
grounded
receptacle.
Where
only
a
2-vare
receptacle
is
available,
replace
with
a
properly
grounded
3-wira
racap-
tacle,
Do
not
remove
grounding
prong
from
povrer
plug
of
Centrifuge.
If
an
extension
cord
is
required,
usa
only
a
3-wire
(grounded)
extension
cord
rated
at
15
amps.
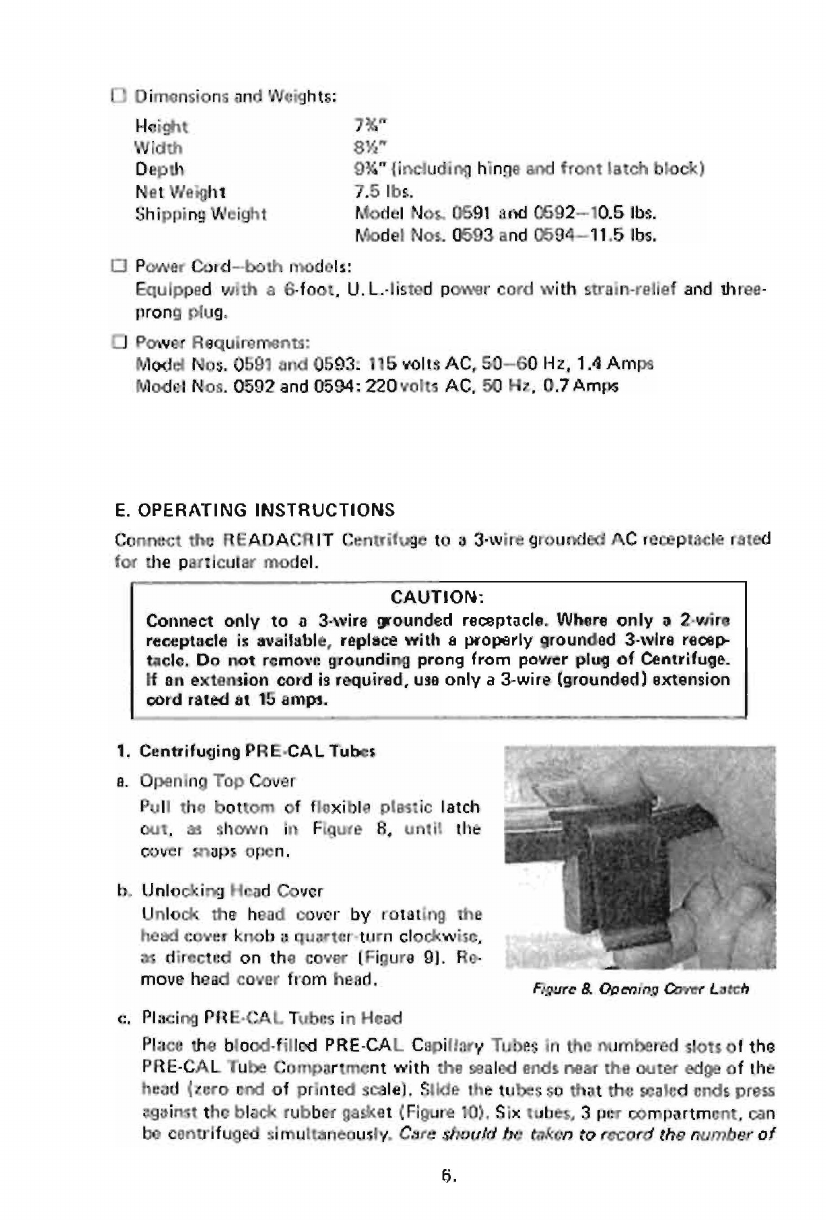
Opening
Top
Cover
Pull
the
battom
of
flexible
plastic
latch
cut,
as
shown
in
Figure
B,
until
the
cover
maps
open.
Unlocking
Mead
Cover
Unlock
the
head
cover
by
rotating
the
head
cover
Knob
s
quarter-turn
clockwise,
a:
directed
on
the
cover
[Figure
9].
Ro-
move
head
cover
from
head,
Figure
&
Opening
Cover
Latch
.
Placing
PRE-CAL
Tubes
in
Head
Place
the
blood-fillod
PRE-CAL
Capillary
Tubes
in
the
numbered
slots
of
the
PRE-CAL
Tube
Compartment
with
the
sealed
ends
near
the
outer
edge
of
the
head
(zero
end
of
printed
scale),
Slide
the
tubes
so
that
the
sealed
ends
press
against
the
black
rubber
gasket
(Figure
10),
Six
tubes,
3
per
compartment,
can
be
centrifuged
simultaneously.
Care
should
be
taken
to
record
the
number
of
6.

Ч.
Figure
9.
READACRIT
Centrifuge
With
Plead
Cover
Unlocked
eft)
and
Locked
(right).
the
stot
used
for
esch
patients
blood
specimen,
When
loading
more
than
1,
but
fess
than
S
tubes,
balance
the
head
by
loading
the
opposite
numbered
slots
(i.e.,
load
no,
1,
4, 2,
5
in
this
sequence),
Figure
10,
Placenent
of
Glood-Filled
PRE-CAL
Tubes
in
READACRIT
Centrifuge.
NOTE:
Failure
to
balance
the
head
in
this
manner
may
cause
a
slight
increase
in
noise
if
all
slots
on
one
side
of
the
centrifuge
arg
empty.
However,
this
imbalance
will
not
affect
operation
of
the
centrifuge
or
accuracy
of
the
determination,
Locking
Head
Cover
When
the
PRE-CAL
Tubes
are
in
position,
replace
the
head
cover,
Make
certain
that
the
cover
is
completely
within
the
compartment
recess.
Lock
the
head
cover
securaly
by
turning
the
head
cover
knob
e
quarter-turn
clockwise,
as
directed
on
the
cover
(sae
Figure
9}.
CAUTION;
DO
NOT
OPERATE
THE
CENTRIFUGE
UNLESS
THE
HEAD
COVER
HAS
BEEN
LOCKED
IN
PLACE,
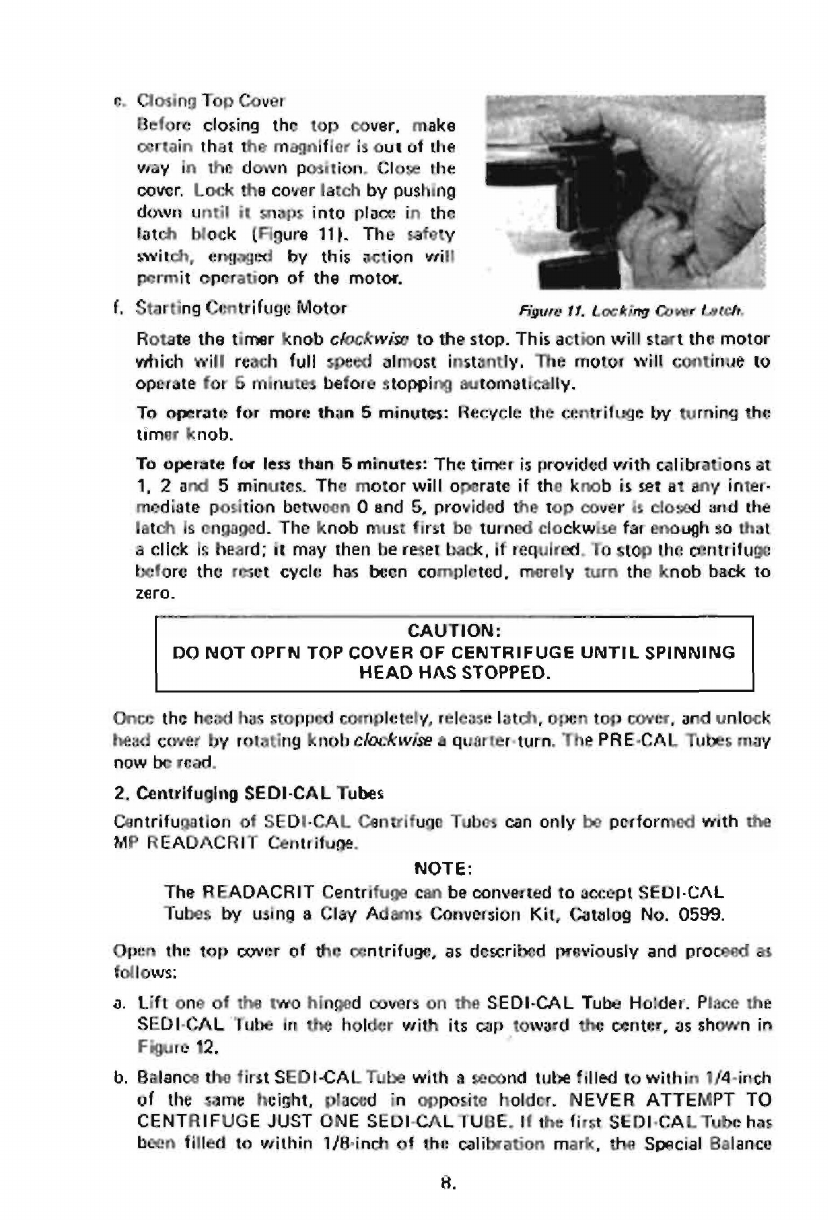
e.
Closing
Top
Cover
Before
closing
the
top
cover,
make
certain
that
the
magnifier
is
out
of
the
way
in
the
down
position.
Close
the
cover,
Lock
the
cover
latch
by
pushing
down
until
it
snaps
into
place
in
the
latch
block
(Figure
11).
The
safety
switch,
engaged
by
this
action
vrill
permit
operation
of
the
motor.
f.
Starting
Centrifuge
Motor
Figure
11.
Locking
Cover
Lstch,
Rotate
the
timer
knob
cfockwise
to
the
stop.
This
action
will
start
the
motor
which
‘will
reach
full
speed
almost
instantly,
The
motor
will
continue
to
operate
for
&
minutes
before
stopping
automatically.
To
operate
for
more
than
5
minutes:
Recycle
the
centrifuge
by
turning
the
timer
knob.
To
operate
for
less
than
5
minutes:
The
timer
is
provided
vith
calibrations
at
1,
2
and
5
minutes.
The
motor
will
operate
if
the
knob
is
set
at
any
inter-
mediate
position
betwoen
O
and
5,
provided
the
top
cover
è
closed
and
the
latch
is
engaged.
The
knob
must
first
be
turned
clockwise
far
enough
so
that
a
click
is
beard;
it
may
then
be reset
back,
if
required.
To
stop
the
centrifuge
before
the
reset
cycle
has
been
completed,
merely
turn
the
knob
back
to
zero.
CAUTION:
DO
NOT
ОРГМ
ТОР
COVER
OF
CENTRIFUGE
UNTIL
SPINNING
HEAD
HAS
STOPPED.
Once
the
head
has
stopped
completely,
release
latch,
open
top
cover,
and
unlock
head
cover
by
rotating
Knob
clockwise
a
quarter-turn,
The
PRE-CAL
Tubes
may
now
be
read.
2.
Centrifuging
SEDI-CAL
Tubes
Cantrifugation
of
SEDI-CAL
Centrifuge
Tubes
can
only
be
performed
with
the
MP
READACRIT
Centrifuge.
NOTE:
The
READACRIT
Centrifuge
can
be
converted
to
accept
SEDI-CAL
Tubes
by
using
a
Clay
Adams
Conversion
Kit,
Catalog
No.
0599.
Open
the
top
cover
of
the
centrifuge,
as
described
previously
and
proceed
as
follows:
a.
Lift
one
of
the
two
hinged
covers
on
the
SEDI-CAL
Tube
Holder.
Place
the
SEDI-CAL
Tube
in
the
holder
vrith
its
cap
toward
the
center,
as
shoven
in
Figure
12,
b.
Balance
the
first
SEDI-CAL
Tube
with
a
second
tube
filled
to
within
1/4-inch
of
the
same
height,
placed
in
opposite
holder.
NEVER
ATTEMPT
TO
CENTRIFUGE
JUST
ONE
SEDI-CAL
TUBE,
If
the
first
SEDI-CAL
Tube
has
been
tilled
to
within
1/8-inch
of
the
calibration
mark,
the
Special
Balance
8.

Tube
may
be
used
in
the
other
holder.
The balance
tube,
shown
in
Figure
12,
eliminates
the
need
for
filling
a
second
SEDI-CAL
Tube
when
only
one
sample
is
to
be
centrifuged,
NOTE:
EXCESSIVE
MACHINE
NOISE
OR
VIBRATION
USUALLY
MEANS
THAT
THE
TUBES
ARE
NOT
PROP-
ERLY
BALANCED.
c.
Be
sure
SEDI-CAL
Tubes
are
placed
with
caps
toward
center
locking
knob,
d.
Close
both
hinged
holder
covers
e.
Close
top
cover
of
MP
READACRIT
Centrifuge
in
accordance
with
previous
figure
12
MP
READACRIT
Centrifuge
Inserueti
with
Filiod
SEDI-CAL
Tube
(left)
HISTIUCTIONS,
and
Balance
Tube
(right).
3.
Use
of
MP
READACRIT
Centrifuge
for
Simultaneous
Determinations
The
PRE-CAL
Tube
compartment
and
the
SEDI-CAL
Tube
hoider
of
the
MP
READACRIT
Centrifuge
can
be
used
simultaneously.
Fallow
the
directions
given
for
each
procedure,
with
the
exception
that
centrifugation
time
is
additive.
For
example,
if
the
cantrifuge
is
loaded
with
urine-filled
SEDI-CAL
Tubes
and
PRE-CAL
Capillary
Tubes,
centrifuge
the
SEDI-CAL
Tubes
for
1
minute
and
remove;
centrifuge
capillary
tubes
an
additional
4
minutes,
for
a
total
of
5
minutes.
F.
CALIBRATION
PROCEDURES
READACRIT
Centrifuges
are
fixed-speed
devices.
The
speeds
may
be
measured
with
any
accurate
tachometer,
such
as
an
ADAMS
Photo
Electric
Tachometer,
Model
5205,
Mechanical
tachometers
that
contact
the
rotor
are
10
be
avoided,
It
the
machine
speed
is
found
to
be
outside
specified
limits
{see
Performance
and
Specifications,
above),
then
the
supply
voltage
should
be
checked
with
an
yocurate
monitor.
The
speeds
ere
specified
only
for
115
volts,
60
Hz
for
Model
Nos.
0591
and
0593,
and
220
volts,
50
Hz
for
Model
Nos.
0592
and
0594.
Devia-
tions
in
either
line
voltage
or
frequency
will
affect
operating
spead.
If
speeds
are
autside
specified
limits,
contact
your
nearest
franchised
Clay
Adams
equipment
dealer
for
service,
or
contact
Clay
Adems
Technical
Service
Department:
(201)
887-4800.
G.
OPERATING
PRECAUTIONS
1.
Basie
Precautions
In
order
to
obtain
properly
centrifuged
spacimens,
as
well
a5
to
prevent
damage
to
READACRIT
Centrifuges,
the
following
basic
operating
precautions
shauld
be
carefully
observed:
O
Electrical:
Operate
the
Centrifuge
only
from
an
AC
power
source
rated
for
the
particular
centrifuge.

Г]
Load
Balancing:
For
smooth
operation
and
long
service
life
of
the
READA-
CRIT
Centrifuges,
it
is
important
that
loads
be
balanced
as
equally
as
possible.
Equally
important
to
balancing
is
the
even distribution
of
material
to
be
centrifuged.
Follow
the
distribution
instructions
included
in
this
Manual.
[I
Installing
Head
Cover:
Always
install
the
head
cover
before
operating
the
centrifuge.
C1
Timing:
For
accurate
results,
follow
the
recommended
timing
routines
specified
in
this
Manual.
O
MHCT
Readings:
Accurate
microfhematoceit
determinations
depend
upon
proper
blood
collection
and
handling
techniques,
Carefully
observe
the
procedures
described
in
this
Manual.
Cl
Cleanliness:
Keep
centrifuge
clean
and
dust-free
in
accordance
with
Main-
tenance
and
Service
Instructions
supplied
in
this
Manual.
Avoid
spilling
liquids
into
the
centrifuga
bowl.
2.
Operator
Training
READACRIT
Centrifuges
are
electrical
instruments
designed
ta
produce
quan-
titative
micra-hematocrit
determinations
for
medical
purposes.
The
use
of
this
instrument
for
patient
medical
evaluation
places
a
responsibility
upon
admin-
istrative
personnel
for
adequate
training
Of
operators
in
the
sofe
and
eftective
use
of
the
equipment.
Administrative
personnel
should
make
certain
that
all
operators
and
technicians
receive
adequate
training
before
being
allowed
to
operate
the
centrifuges.
Such
training
should
include
a
thorough
working
Knowledge
of:
LI
Centrifuge
Set-up
and
Power
Requirements,
17
Handling
and
Preparation
at
Blood
Samples,
©
Reading
of
Micro-hematacrit
Values,
DO
Urine
Sedimentation
Techniques,
and
C
Equipment
Service
and
Maintenance.
H.
HAZARDS
Basle
safety
precautions
should
be
observed
when
operating
Centrifuges
in
order
to
avoid
the
hazards
of
electrical
shock
or
other
physical
injury.
READACRIT
Contrifuges
are
not
to
be
used
in
Class
1,
Division
1,
Group
C
hazardous
locations,
defined
by
the
National
Fire
Protection
Association,
Bulletin
No.
564
(Inhalation
Anesthatics),
as
extending
upssard
to
a
level
of
5
feet
above
the
floor
where
flammable
anesthetics
are
used,
To
Avold
Elactrical
Shock:
[7
Plug
the
power
cord
only
into
a
grounded
3-wire
receptacle.
다
Never
remove
the
grounding
prong
from
the
power
plus,
Always
unplug
the
power
cord
before
attempting
to
service
thé
centrifuge,
(
immediately
replace
worn
or
damaged
power
cord
or
plug.
10.
To
Avoid
Physical
Injury:
O)
Never,
under
any
condition,
open
the
lid
of
the
centrifuge
while
the
rotor
is
spinning,
I.
SERVICE
AND
MAINTENANCE
Care
has
been
taken
to
assure
that
every
component
of
the
READACRIT
Centrifuge
delivers
long,
trouble-free
service.
Instruments
are
fully
guaranteed
ageinst
defects
in
workmanship
and
materials
for
a
period
of
one
year,
provided
they
have
not
been
subjected
to
abusa
or
misuse.
Service
and
maintenance
that
can
be
performed
by
operating
personnel
are
described
below,
Refer
all
other
service
and
repairs
to
your
nearest
franchised
Clay
Adams
equipment
dealer,
or
contact
Clay
Adams
Technical
Service
Department:
(201)
897-4800.
1.
Lubrication
Both
models
of
the
READACRIT
Centrifuge
have
pre-lubricated
sleeve-type
bearings
which
require
no
lubrication
during
the
lifetime
of
the
machine,
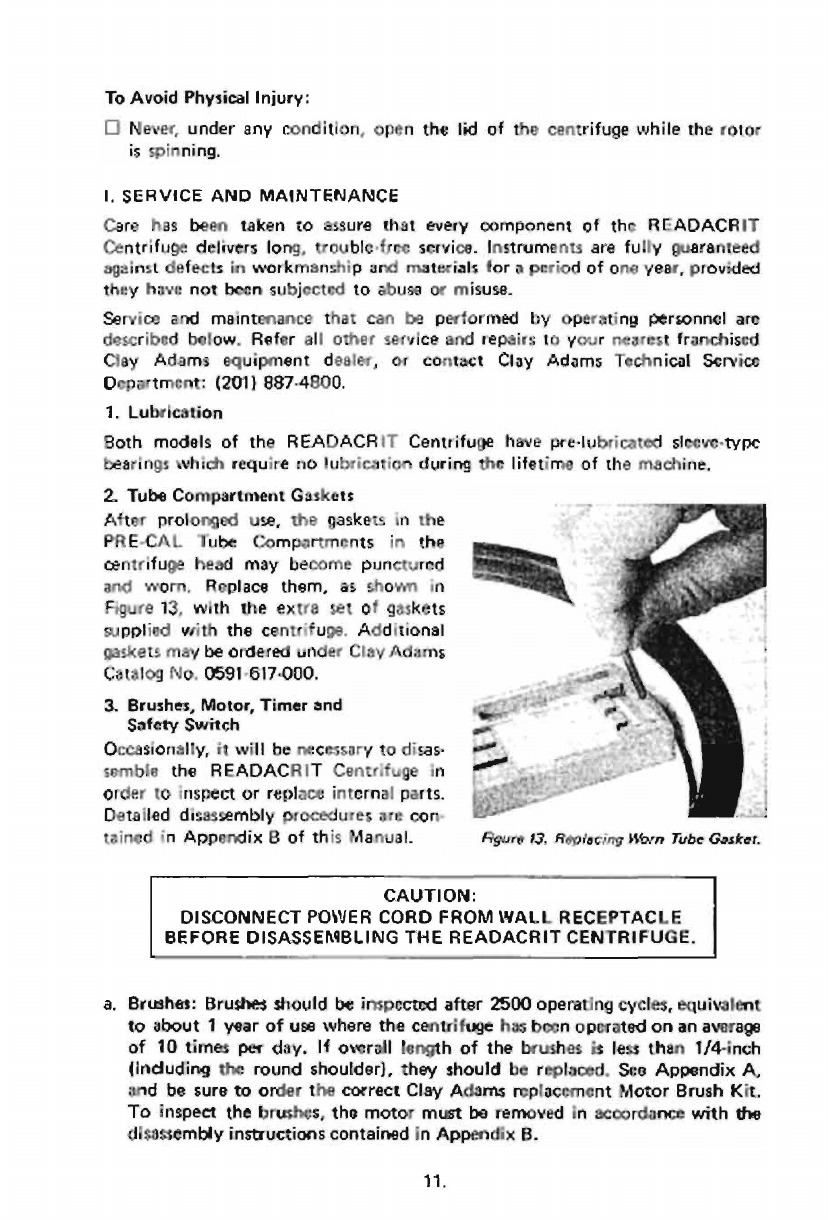
2.
Tube
Compartment
Gaskets
After
prolonged
use,
the
gaskets
in
the
PRE-CAL
Tube
Compartments
in
the
centrifuge
head
may
become
punctured
and
worn,
Replace
them,
as
shown
in
|
Figure
13,
with
the
extra
set
of
gaskets
supplied
with
the
centrifuge.
Additional
gaskets
may
be
ordered
under
Clay
Adams
Catalog
No.
0591-617-000,
3.
Brushes,
Motor,
Timer
and
Ce
Safety
Switch
>
Occasionally,
it
will
be
necessary
todisas
o»
semble
the
READACRIT
Centrifuge
in
=
PL
order
to
inspect
or
replace
internal
parts.
o
çö
©.
Detailed
disassembly
procedures
are
con
^
==
tained
in
Apperdix
B
of
this
Manual.
figure
13,
Reolacing
Morn
Tube
Gosker.
CAUTION:
DISCONNECT
POWER
CORD
FROM
WALL
RECEPTACLE
BEFORE
DISASSEMBLING
THE
READACRIT
CENTRIFUGE.
a.
Brushes:
Brushes
should
be
inspected
after
2500
operating
cycles,
equivalent
to
about
1
year
of
usa
where
tha
centrifuge
has
been
operated
on
an
average
of
10
times
per
day.
If
overall
length
of
the
brushes
is
less
than
1/4-inch
{induding
the
round
shoulder),
they
should
be
replaced.
See
Appendix
A,
and
be
sure
to
order
the
correct
Clay
Adams
replacement
Motor
Brush
Kit.
To
inspect
the
brushes,
the
motor
must
be
removed
in
accordance
with
the
disassembly
instructions
contained
in
Appendix
B.
11.

hb,
Motor,
Timer
and
Safety
Switch:
Should
any
of
these
assemblies
become
defective,
replace
them
with
the
following
Clay
Adame
parts:
Motor
(115
volts):
Catalog
No.
0591-600-000
Motor
(220
volts);
Catalog
No,
0597-600-000
Timer
with
knob:
Catalog
No.
0592-601-000
Safety
Switch:
Catalog
No.
0591-602-101
4.
Cleaning
lt
is
recommended
that
interior
and
exterior
surfaces
of
Ihe
centrituge
bowl,
head,
bead
cover
and
lid
be
wiped
occasionally
with
a
damp
cloth.
A
mild
detergant
may
be
used
to
remove
stains,
Keeping
these
parts
clean
will
prolong
the
life
of
the
cantrifuge.
The
transparent
cover
of
the
centrifuge
is
made
of
a
hatter-proof
polycarbonate
resin,
resistant
to
a
wide
range
of
laboratory
chemicals.
It
is
recommended,
however,
that
the
cover
be
kept
clean
and
that
spillage
be
wiped
off
as
soon
as
possible.
A
mild
detorgent
should
be
used.
Do
not
use
carbon
tetrachloride,
chloroform,
gasoline
or
acetone,
Other
chemicals,
such
as
aromatic
hydrocarbons,
(benzene,
toluene,
xylene)
and
strong
alkalies,
(sodium
and
ammoniurn
hydrox:
ide)
can
damage
the
cover.
5.
Transporting
Centrifuge
Though
the
READACRIT
Centrifuge
can
withstand
the
rigors
of
normal
labar-
atery
use,
it
can
be
damaged
by
dropping
or
by
excessive
abuse
in
handling.
If
the
centrifuge
must
be
shipped,
package
it
carefully
in
a
strong,
shock-proof
container
to
prevent
damage
fram
vibration
and
impact.
6,
Spare
Parts
and
Accessories
Spare
Parts
and
Accessories
for
the
READACRIT
Centrifuges
can
be
obtained
through
your
nearest
Clay
Adams
equipment
dealer,
Spare
part
numbers
are
listed
in
Appendix
A,
lil.
SPECIMEN
COLLECTION
AND
PREPARATION
A.
FOR
MICRO-HEMATOCRIT
DETERMINATIONS
Procedures
for filling
and
handling
PRE-CAL
Tubes
with
patient
blood
samples
taken
from
finger
punctures
or
from
venipunctures
are
described
below:
1.
Finger
Puncture
Blood
a.
Filling
PRE-CAL
Tube:
(1).
Puncture
the
fingertin
with
a
REDI-LANCE
Blood
Lancet
or
equivalent
disposable
lancet.
12).
Grasp
the
end
of
a
PRE-CAL
Tube
nearest
the
calibration
mark,
between
the
thumb
and
forefinger.
Bo
not
obscure
calibration
mark.
(3.
Insert
the
end
farthest
from
the
calibration
mark
into
the
center
of
the
drop
of
blood
on
the
finger.
NOTE:
THE
FINGERTIP
SHOULD
NEVER
BE
TIGHTLY
SQUEEZED
TO
INCREASE
BLOOD
FLOW.
Squeczing
the
finger
will
difute
the
blood
specimen
with
tissue
fluid
and
cause
a
falsely
low
hematocrit
reading.
Hold
the
tubs
level
(in
a
horizontal
position)
and
observe
the
blood
level
as
it
approaches
the
calibration
mark.
12.

(4).
FILL
THE
TUBE
EXACTLY
TO
THE
CALIBRATION
MARK,
The
rate
of
filling
may
be
accelerated
by
tilting
the
end
near
the
callbratlon
mark
be-
los
horizontal,
The
rate
may
be
retard.
ed,
stopped
or
reversed
by
tilting
the
same
end
above
horizontal.
(Figure
14),
151,
When
blood
reaches
the
calibration
mark,
remove
the
tube
from
the
finger,
holding
it
level
so
that
blood
cannot
flow
out
the
and.
NOTE:
In
the
event
the
tube
has
been
accidently
filled
beyond
the
calibra-
tion
mark,
remove
the
excess
blood
by
gently
dabbing
the
wet
tip
with
a
cotton
or
gauze
sponge.
(6).
Tilt
the
tube
until
blood
flows
about
1/8"
in
frorn
the
blood
collecting
tip
{Figure
151.
Then
return
tube
to
a
horizontal
position
so
that
no
blood
is
lost.
(71.
Wips
any
blood
from
the
outside
of
the
tube with
a
lint-free
tissue.
1,
Sealing
PRE-CAL
Tube:
Invert
the
tube
so
that
the
blood-free
end nearest
the
calibration
mark
is
directed
downward,
Immediately
insert
blood-free
end
into
the
SEAL-EASE
Tube
Holder
as
shown
in
Figure
16
Push
the
tube
fully
into
the
clay
be
fore
blood
flows
to
the
clean
end.
The
tube
is
now
ready
for
centrifugation.
NOTE:
If
blood
reaches
the
end
of
the
tube
before
SEAL-EASE
Tube
Sealer
is
forced
in,
some
blood-may
be
lost
and
the
clay
will
not
seal,
2.
Venipuncture
Blood
Figure
14.
Tir
PRE
CAL
Tube
ro
Regulate
Blood
Flow.
Figure
15.
Remove
Blood
from
Collecting
Tip.
Fiera
16.
Insoart
Bload.Fres
End
into
SEAL-EASE
Tube
Hofder,
Blood
from
venipunctures
can
be
collected
with
oither
a
standard
syringe
or
a
VACUTAINER
Brand
Blood
Collection
Tube.
To
prepare
věnous
blood
for
a
hamatocrit
determination,
proceed
as
follows:
a.
After
collecting
the
patient
specimen,
mix
the
blood
thoroughly
by
inverting
the
VACUTAINER
Blood
Collection
Tube
or
syringe
several
times.
Remove
the
VACUTAINER
Blood
Collection
Tube
needle
and
adapter.
If
using
a
syringe,
transfer
specimen
to
a
clean
test
tube.
Immediately
fill
PRE-CAL
Tube
as
described
below,
13.
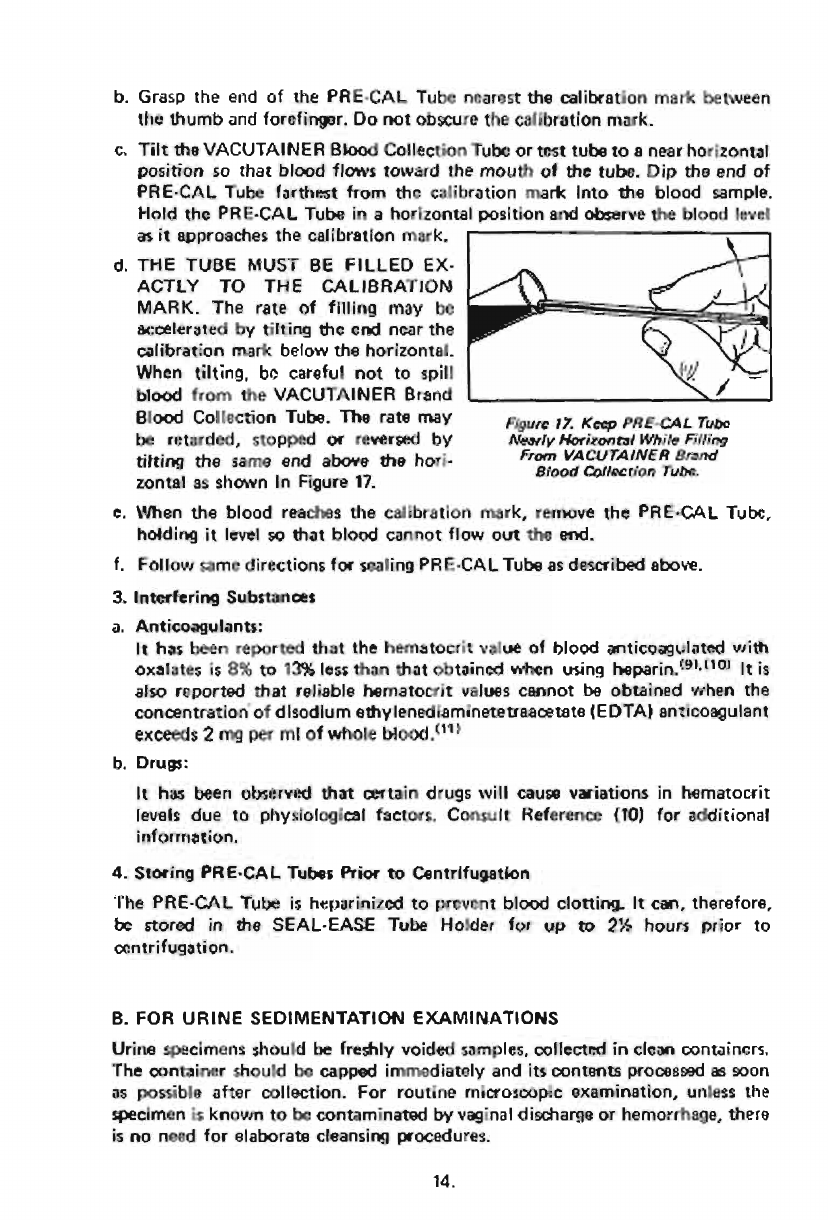
4.
.
THE
TUBE
MUST
BE
FILLEO
Ex-
.
Grasp
the
end
of
the
PRE-CAL
Tube
nearest
the
calibration
mark
between
the
thumb
and forefinger.
Do
not
obscure
the
calibration
mark.
Tilt
the
VACUTAINER
Blood
Collection
Tube
or
test
tube
to
a
near
horizontal
position
so
that
blood
flows
toward
the
mouth
of
the
tube.
Dip
the
end
of
PRE-CAL
Tube
farthest
from
the
calibration
mark
Into
the
blood
sample.
Hold
the
PRE-CAL
Tube
in
a
horizontal
position
and
observe
the
blood
level
as
it
approaches
the
calibration
mark.
ACTLY
TO
THE
CALIBRATION
MARK.
The
rate
of
filling
may
be
acoglerated
by
tilting
the
end
near
the
calibration
mark
below
the
horizontal.
When
tilting,
bo
careful
not
to
spill
blood
from
the
VACUTAINER
Brand
Blood
Collection
Tube.
The
rate
may
Figure
17.
Keep
PRE-CAL
Tubo
be
retarded,
stopped
or
reversed
by
Nesrly
Horizontal
While
Filling
tilting
the
same
end
above
the
hori-
TT
lade
Men
zontal
as
shown
In
Figure
17.
,
.
When
the
blood
reaches
the
calibration
mark,
remove
the
PRE-CAL
Tube,
holding
it
level
so
that
blood
cannot
flow
out
the
end.
Follow
same
directions
for
sealing
PRE-CAL
Tube
as
described
above.
Interfering
Substances
Anticoagulants:
It
has
been
reported
that
the
hematocrit
value
of
bloed
anticoagulated
with
oxalates
is
8%
to
13%
less
than
that
obtained
when
using
heparin.*9!.010)
Je
iş
also
reported
that
reliable
hematocrit
values
cannot
be
obtained
vrhen
the
concentration
of
disodium
ethylenediaminetetraacetate
(EDTA)
anticoagulant
exceeds
2
mg
per
mi
of
whole
blood,"
Drugs:
It
has
been
observed
that
certain
drugs
will
cause
variations
in
hematocrit
levels
due
to
physiological
factors,
Consult
Reference
(10)
for
additional
information,
Storing
PRE-CAL
Tubes
Prior
to
Centrifugation
The
PRE-CAL
Tube
is
hepurinized
to
prevent
blood
clotting.
It
can,
therefore,
be
stored
in
the
SEAL-EASE
Tube
Holder
for
up
to
2%
hours
prior
to
centrifugation.
B.
FOR
URINE
SEDIMENTATION
EXAMINATIONS
Urine
spacimaens
should
be
freshly
voided
samples,
collected
in
clean
containers,
The
container
should
be
capped
immediately
and
its
contents
processed
as
soon
as
possible
after
collection.
For
routine
microscopie
examination,
unless
the
specimen
is
known
to
be
contaminated
by
vaginal
discharge
or
hemorrhage,
there
is
no
need
for
elaborate
cleansing
procedures.
14.

Specimens
vehich
cannet
be
examined
immediately
should
be
refrigerated,
but
must
not
be
frozen.
If
examination
is
to
be
delayed
beyond
4
hours,
it
is
recommended
that
ane
(1)
drop
of
40%
formalin
par
SO
ml
of
urine
be
added
to
prevent
growth
of
micro-organisms
and
to
presarve
urinary
sediments,'?2!
Chloroform
should
net
be
used
as
a
preservative,
once
it
settles
to
the
bottom
of
the
container
and
may
interfere
with
the
microscopic
examination.
Caution
should
be
exercised
in
selecting
preservatives
which
will
not
interfere
with
other
tests
to
which
the
specimen
may
be
subjected.
IV.
TEST
PROCEDURES
A.
MICRO-HEMATOCRIT
DETERMINATIONS—
With
READACRIT
and
MP
READACRIT
Centrifuges
1.
Timing
and
Centrifuging
Place
the
properly
filled
PRE-CAL
Tubes
in
the
centrifuge
compartments
in
accordance
with
previous
instructions.
Set
the
timer
for
five
(S}
minutes
and
centrifuge
capillary
tubes.
2.
Reading
the
Hematocrit
a.
Positioning
Head
and
Magnifier:
Move
the
magnifier
to
its
active
po-
sition,
Rotate
the
head
so
that
the
PRE-CAL
Tube
to
be
read
is
directly
under
the
magnifier
[Figure
Th),
b,
Setting
to
the
Zero
Mark:
Shift
the
PRE-CAL
Tube
in
its
slot
so
that
the
Interface
between
SEAL-EASE
Clay
and
packed
red
cell
column
is
exactly
allgnad
with
the
“0”
mark
on
Е
É
Figure
18
Head
and
Mognifier
Praperty
the
centrifuge
hematocrit
scale.
Positioned
for
Viewing
tre
PRE-CAL
Tube,
c,
Reading
a
Hemataçrit:
Head
the
mark
on
the
printed
scalo
adjacent
to
the
interface
between
the
plasma
and
the
packed
red
cells.
This
value
is
the
hematocrit.
Discard
PRE-CAL
Tubes
after
reading.
B.
URINE
SEDIMENTATION
EXAMINATIONS.
With
MP
READACRIT
Centrifuge
In
order
to
prepare
urine
specimens
for
microscopic
examination,
startewith:
1
Patient
sample:
freshly
voided
urine
©)
Microscope
LI
SEDI-CAL
Centrifuge
Tubes
and
Caps
Ol
Cover
slips,
3/4-inch
square
LI
Clay
Adams
MP
READACRIT
DO
SEDI-STAIN
Concentrated
Stain
Centrifuge
{Model
Nos.
0693
or
(Catalog
No,
1570)
or
equivalent
0594")
O
Lens
Tissue
"NOTE:
The
READACKIT
Centrifuge
con
be
converted
to
an
MP
RFADACRIT
Centrifin
for
urine
tadimentation
iy
the
ure
of
a
Cotalag
No.
0599
Conversion
Kit.

Upper
Galibration
Murk
с.
d.
Figura
20,
FiNiny
SEDI-
CAL
Figure
12
SEDECAL
Tube
and
Cop.
Tube
to
Upper
Calibration
Mark
.
Filling
the
SEDI-CAL
Tubs
(Figure
19)
.
Thoroughly
mix
the
fresh
urine
specimen
and
pour
into
the
SEDI.CAL
Tube
to
the
upper
calibration
mark
as
shovrn
in
Figure
20.
If
the
SEDI-CAL
Tube
is
filled
exactly
to
this
calibration
mark;
it
will
contain
4
ml
of
urine
and
the
concentration
of
the
sediment
sample
for
examination
will
be
approximately
20X.
If
less
spaciman
is
used,
the
concentration
will
also
be
less.
.
Mark
patient
identification
on
the
cap using
&
marking
crayon
ar
a
felt
tip
pen
with
permanent
ink,
The
circumference
of
the
cap
has
a
Frosted
Writing
Surface
for
this
purpose.
Wipe
lint
off
the
optical
surface
of
the
cap
with
lens
tissue.
Placa
the
can
on
the
tube.
2.
Centrifuging
SEDI-CAL
Tubes
Place
SEDI-CAL
Tubes
in
MP
READACRIT
Centrifuæ
in
accordance
with
previous
operating
instructions
NOTE:
Be
sure
tubes
ere
placed
with
caps
toward
center
of
locking
knob,
.
Balance
the
first
SEDI-CAL
Tuba
with
@
second
tube
filled
to
within
1/4-inch
of
the
upper
calibration
mark.
Never
attempt
to
centrifuge
just
one
SEDI-CAL
Tube
without
first
balancing
the
centrifuge.
If
a
SEDI-CAL
Tube
has
been
filled
to
within
1/8-inch
of
the
upper
calibration
mark,
the
special
Balance
Tubs
may
be
used
in
the
other
holder
of
the
centrifuga.
A
Balance
Tube
eliminates
the
need
for
filling
a
second
SEDI-CAL
Tube
when
only
one
urine
specimen
13
to
be
centrifuged
(see
Figure
12).
Set
centrifuge
timer
for
oné
(1)
minute
and
osntrifuge
according
to
previous
operating
instructions.
.
After
centrifugation,
remove
the
SED!CAL
Tube
by
grasping
the
cap
and
lifting
the
tube
out
of
the
holder.
Grasp
the
body
of
the
tube
as
soon
as
it is
clear.
NOTE:
Do
not
carry
the
SEDI-CAL
Tube
by
its
cap.
16.
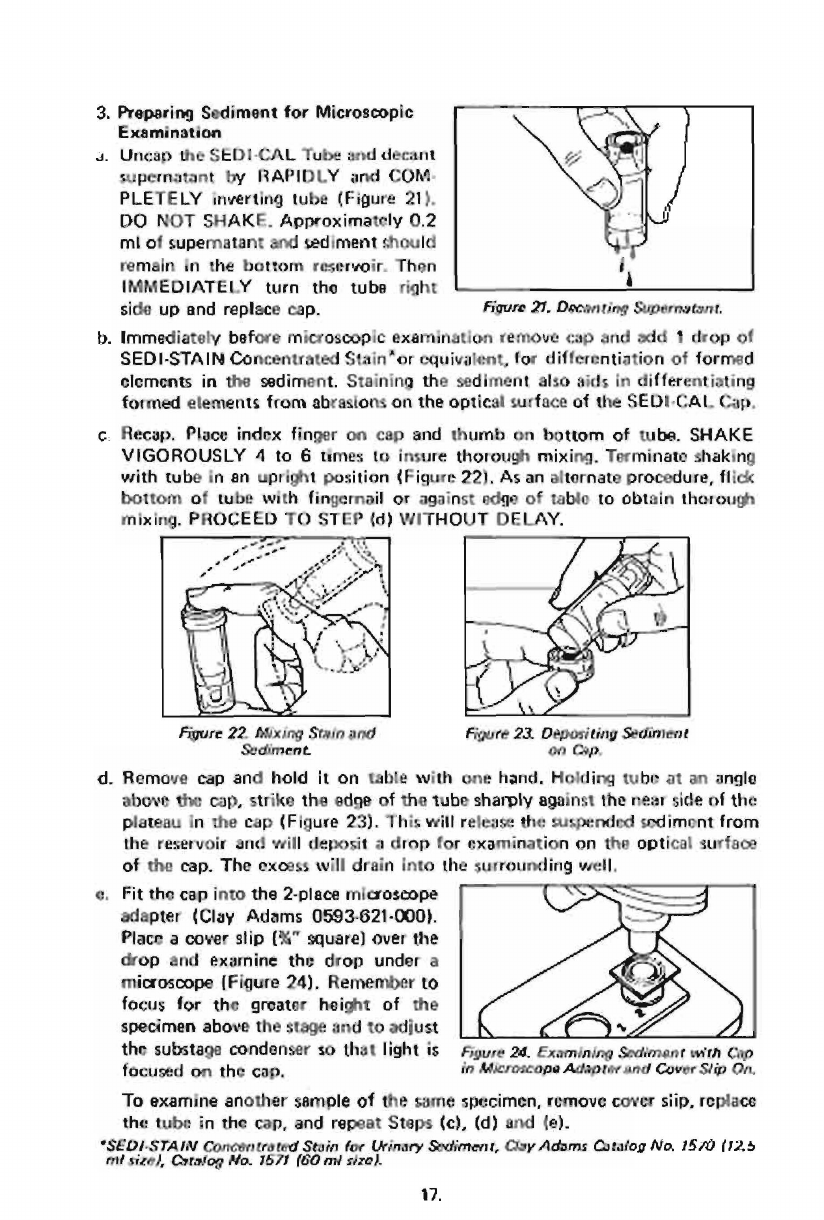
3.
Preparing
Sediment
for
Microscopic
Examination
a.
Uncap
the
SEDI-CAL
Tube
and
decant
supernatant
by
RAPIDLY
and
COM
PLETELY
inverting
tube
(Figure
21).
DO
NOT
SHAKE.
Approximately
0.2
ml
of
supernatant
and
sediment
should
remain
in
thé
bottom
reservoir.
Then
IMMEDIATELY
turn
the
tube
right
side
up
and
replace
cap.
Figure
27.
Decanting
Supernatant.
b.
Immediately
before
microscopic
examination
remove
cap
and
add
1
drop
of
SEDI-STAIN
Concentrated
Stain”
or
equivalent,
for
differentiation
of
formed
elements
in
the
sediment.
Staining
the
sediment
also
aids
in
differentiating
formed
elements
from
abrasions
on
the
optical
surface
of
the
SEDI-CAL
Cap.
c.
Recap.
Place
index
finger
on
cap
and
thumb
on
bottom
of
tuba.
SHAKE
VIGOROUSLY
4
to
6
times
to
insure
thorough
mixing.
Terminate
shaking
with
tube
in
an
upright
position
(Figure
221.
Aşan
alternate
procedure,
flick
bottom
of
tube
with
fingernail
or
against
edge
of
table
to
obtain
thorough
mixing.
PROCEED
TO
STEP
(d)
WITHOUT
DELAY.
Figure
22.
fiixing
Stain
and
Figure
23.
Dapositing
Sediment
Sediment
on
Сэр.
d.
Remove
cap
and
hold
it
on
table
with
one
hand,
Holding
tube
at
an
angle
above
the
cap,
strike
the
edge
of
the
tube
sharply
against
the
near
side
of
the
plateau
in
the
cap
(Figure
23).
This
will
release
the
suspended
sediment
from
the
reservoir
and
will
deposit
a
drop
for
examination
on
the
optical
surface
of
the
cap.
The
excass
will
drain
into
the
surrounding
well,
e.
Fit
the
cap
into
the
2-place
microscope
一
一
一
adapter
(Clay
Adams
0593-621-000).
—>
Place
a
cover
slip
(&”
square)
over
the
==
drop
and
examine
the
drop
under
a
An
microscope
(Figure
24),
Remember
to
+
focus
for
the
greater
height
of
the
=
specimen
above
the
stage
and
to
adjust
ES
~
the
substage
condenser
so
that
light
is
Figure
24.
Examining
Sediment
wiih
Cap
focused
on
the
cap.
in
Microscope
Adaptw
and
Cover
Sip
On,
To
examine
another
sample
of
the
sume
specimen,
remove
cover
siip,
replace
the
tube
in
the
cap,
and
repeat
Steps
(c),
(d)
and
(e).
*"SEDLSTAIN
Concentrated
Stain
for
Urinary
Sediment,
Clay
Adams
Catafog
No,
1870
(12.5
on
size),
Catalog
No.
1573
(60 mi
size).
17.
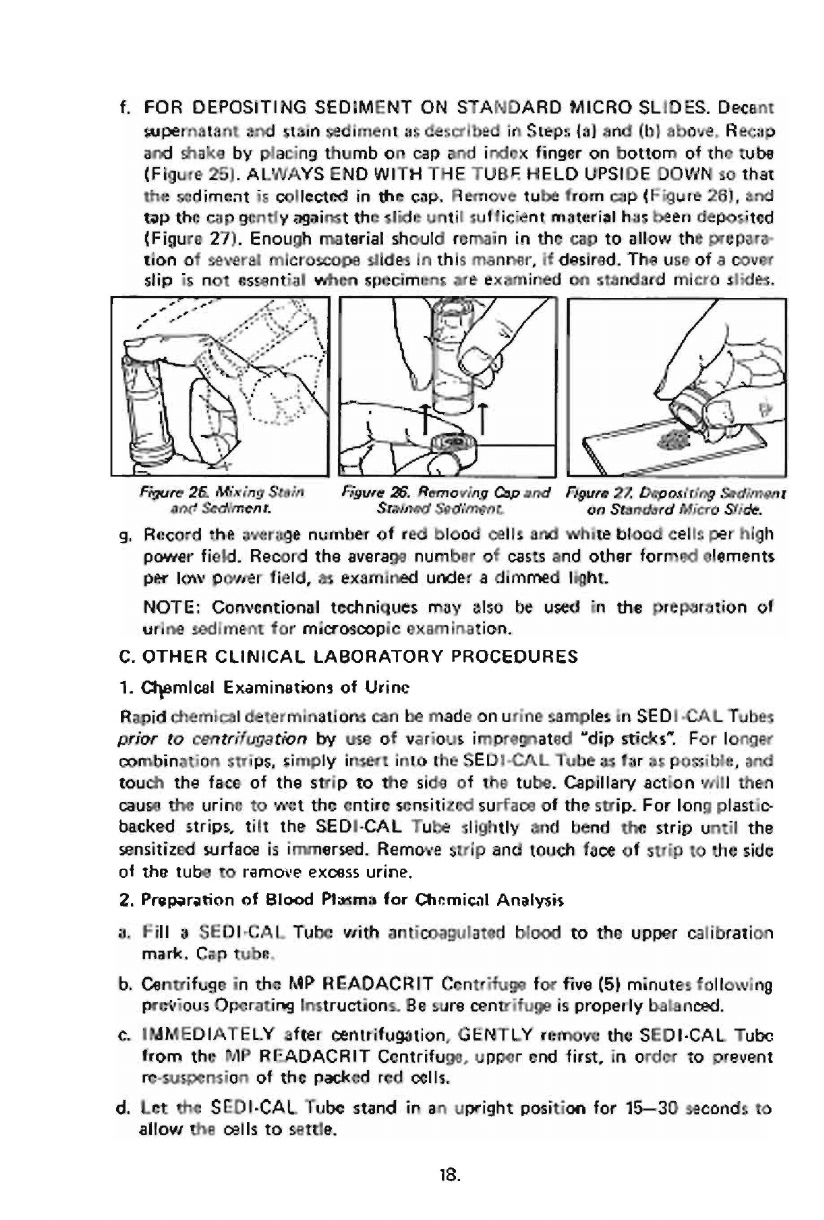
f.
FOR
DEPOSITING
SEDIMENT
ON
STANDARD
MICRO
SLIDES.
Decant
gqupernatant
and
stain
sediment
as
described
in
Steps
(a)
and
(b)
above.
Recap
and
shake
by
placing
thumb
on
cap
and
index
finger
on
bottom
of
the
tuba
(Figure
25).
ALWAYS
END
WITH
THE
TUBF
HELD
UPSIDE
DOWN
so
that
the
sediment
is
collected
in
the
cap.
Remove
tube
from
cap
(Figure
26),
and
tap
the
cap
gently
against
the
slide
until
sufficient
material
has
been
deposited
(Figure
27).
Enough
material
should
remain
in
the
cap
to
allow
the
prepare
tion
of
several
microscopa
slides
in
this
manner,
if
desired.
The
use
of
3
cover
slip
is
not
essantial
when
specimens
are
examined
on
standard
micro
slides.
À
|
l
Гу
À
A
M
Fiaure
26.
Mixing
Stain
Figure
26.
Rernoving
Cap
and
Figure
27,
Depositing
Sediment
ane
Sediment.
Srainad
Sediment
an
Standord
Micro
Side.
g.
Record
the
average
number
of
red
blood
calls
and
white
blood
cells
per
high
power
field.
Record
the
average
number
of
casts
and
other
formed
elements
per
low
power
field,
25
examined
under
a
dimmed
light.
NOTE:
Conventional
techniques
may
also
be
used
in
the
preparation
of
urine
sediment
for
microscopic
examination.
C.
OTHER
CLINICAL
LABORATORY
PROCEDURES
1.
Chemical
Examinations
of
Urine
Rapid
chemical
determinations
can
be
made
on
urine
samples
in
SED!
-CAL
Tubes
prior
to
centrifugation
by
use
of
various
impregnated
“dip
sticks“
For
longer
combination
strips,
simply
insert
into
the
SEDI-CAL
Tube
as
far
as
possible,
and
touch
tha
face
of
the
strip
to
the
side
of
the
tube.
Capillary action
will
then
cause
the
urine
to
wet
the
entire
sensitized
surface
of
the
strip.
For
long
plastic-
backed
strips,
tilt
the
SEDI-CAL
Tube
slightly
and
bend
the
strip
until
the
sensitized
surface
is
immersed.
Remove
strip
and
touch
face
of
strip
to
the
side
of
the
tube
to
remove
excess
urine.
2.
Preparation
of
Blood
Plasma
for
Chemical
Analysis
a,
Fill
à
SEDI-CAL
Tube
with
anticoagulated
blood
to
the
upper
calibration
mark,
Cap
tube.
b.
Centrifuge
in
the
MP
READACRIT
Centrifuge
for
five
(5)
minutes
following
previous
Operating
Instructions.
Be
sure
centrifuge
is
properly
balanced.
с.
IMMEDIATELY
after
centrifugation,
GENTLY
remove
the
SEDI-CAL
Tube
from
the
MP
READACRIT
Centrifuge,
upper
end
first,
in
order
to
prevent
re-suspension
of
the
packed
red
cells.
d.
Let
the
SEDI-CAL
Tube
stand
in
an
upright
position
for
15—30
seconds
to
allow
the
oslls
to
settle.
18.

e.
Remove
cap
and
withdraw
required
amount
of
plasma
with
pipette
or
syringe.
About
1.75
ml
of
clear
plasma
can
be
obtained
in
this
manner.
3.
Preparation
of
Blood
Plasma
for
Prothrombin
Time
Determinations
a.
Fill
a
SEDI-CAL
Tube
to
the
upper
calibration
mark
with
oxalated
{anti-
coagulated)
blood
and
proceed
to
Step
(dh.
If
the
coliected
blood
has
not
been
treated
with
an
anticoagulant,
proceed
as
follaws:
NOTE:
In
the
above
procedure,
blood
must
be
mixed
with
anticoagulant
immediately
after
collection,
and
cantritugatlon
must
take
place
within
30
minutes
of
collection.
b.
Fill
the
SEDI-ÇAL
Tubs
to
the
lower
calibration
mark
with
0.1
M
sodium
oxalate
solution
{anticosgulant).
Use
a
dropping
pipette
to
insure
accurate
filling.
c.
Nove
fill
the
SEDI-CAL
Tube
with
whole
blocd
to
the
upper
calibration
mark,
This
mixture
will
provide
a
dilution
ratio
of
9
parts
blood
to
1
part
anti-
cougulant.
Use
a
dropper
pipette
or
hypodermic
syringe
to
insure
accurate
filling.
d.
Cap
the
SEDI-CAL
Tube
and
invert
gently
several
times
to
mix
thoroughly,
a.
Obtain
plasma
as
in
“Preparation
of
Plasma
for
Chemical
Analysis”
above,
NOTE:
In
individuals
with
normal
hematocrits,
this
procedure
will
yield
about
1.75
ml
of
plasma.
If
two
blood
samples
are
being
centrifuged
at
the
same
time,
be
sure
to
remove
both
SEDI-CAL
Tubes
immediately
after
centrifuga-
tion
and
to
keep
them
in
an
upright
position
until
the
plasma
is
withdrawn,
4.
Other
Micro
Techniques
READACRIT
Centrifuges
can
be
used
for
other
micro:
techniques
requiring
centrifugation
of
capillary
tubas.
Heparinized
capillary
tubes,
75
mm,
red
tipped,
are
available
as
Catalog
No.
10270.
Non-heparinized
capillary
tubes,
76
mm,
blue
upped,
are
available
as
Catalog
No.
1021.
V.
TEST
RESULTS
AND
LIMITATIONS
A.
MICRO-HEMATOCRIT
DETERMINATIONS
Scales
within
the
PRE-CAL
Tube
compertments
of
READACRIT
Centrifuges
provide
a
direct
quantitative
reading
of
hematocrit.
Additional
computations
are
not
required,
Micro
methods
for
the
determination
of
hematocrits
nave
been
widely
used
in
laboratories
for
many
years.
The
results
of
micro-homatocrit
determinations
are
recognized
as
being
fully
equivalent
to
the
results
of
macro
determinations.
B.
URINE
SEDIMENTATION
EXAMINATIONS
Microscopic
examination
of
urinary
sadiment
is
a
semi-quantitative
procedure.
In
cases
where
exact
counts
of
leucocytes,
bacteria,
casts,
ete.,
are
required,
techniques
employing
a
hemacytometer
are
preferred,
1?!
19.
This manual suits for next models
3
Table of contents
Other Becton Dickinson Laboratory Equipment manuals


