Becx Machines OB90M User manual

Weed brush
Type: BECX OB90M
Version: 1
November 2019
Weed brush
OB90M
User manual

Weed brush
Type: BECX OB90M
Version: 1
November 2019
Page 2 of 24
Manufacturer Becx Machines B.V.
De Sonman 35
5066 GJ Moergestel
Tel: +31 (0) 13 2070760
http://www.becxmachines.com
© Copyright 2019
Nothing in this publication may be replicated and/or published in print, photocopy, microfilm, sound
recording, electronically or otherwise without the prior explicit written permission from Becx
Machines B.V.
Becx Machines B.V. retains the right to change parts of the system and the contents of this manual at
any time without prior notification giving or immediate notice to the customer.
Even though Becx Machines B.V. takes the greatest care to guarantee an accurate, and where
necessary, complete description of all parts, it cannot be held liable for damage due to inaccuracies
and/or deficiencies in this manual.

Weed brush
Type: BECX OB90M
Version: 1
November 2019
Page 3 of 24
Foreword
The Becx weed brush is specially developed to quickly and efficiently remove weeds growing in the
street. This machine can be mounted on virtually all wheel loaders/loaders. It makes it extremely
easy to brush or sweep the street.
•Please read this manual carefully before you use the weed brush.
Always observe the safety requirements as set out in Section 3.
•A copy of this manual must be kept with the weed brush and be
available to the user. All important maintenance work and relevant
notes must be recorded by the maintenance company.
•It is the user’s responsibility to select a suitable tool holder for the
weed brush and ensure that it is correctly attached and connected to
the arm.

Weed brush
Type: BECX OB90M
Version: 1
November 2019
Page 4 of 24
Table of contents
FOREWORD.................................................................................................................................. 3
TABLE OF CONTENTS .................................................................................................................... 4
OVERVIEW OF DIAGRAMS ............................................................................................................ 4
DECLARATION OF CONFORMITY (IIA) (COPY)................................................................................. 5
OVERVIEW OF SYMBOLS............................................................................................................... 6
1. TECHNICAL DETAILS............................................................................................................... 7
2SAFETY.................................................................................................................................. 8
2.1 GENERAL...................................................................................................................................... 8
2.2 DURING USE ................................................................................................................................. 8
2.3 OPERATING PERSONNEL:................................................................................................................. 8
2.4 WARNING SYMBOLS ON THE MACHINE .............................................................................................. 9
3DESCRIPTION OF COMPONENTS........................................................................................... 10
3.1 TOOL NESTING PLACE MECHANICAL COMPONENTS ............................................................................ 11
3.2 BRUSH MECHANICAL COMPONENTS ................................................................................................ 12
3.3 HYDRAULIC COMPONENTS ............................................................................................................ 13
4OPERATION......................................................................................................................... 14
4.1 READYING THE WEED BRUSH FOR USE ............................................................................................. 14
4.2 USING THE WEED BRUSH............................................................................................................... 15
5MAINTENANCE.................................................................................................................... 17
6MALFUNCTION ANALYSIS..................................................................................................... 19
7DISPOSAL ............................................................................................................................ 20
8LOGBOOK............................................................................................................................ 21
8.1 MAINTENANCE WORK,REPAIRS/REPLACEMENTS,MALFUNCTIONS AND INSPECTIONS .............................. 21
8.2 REPAIRS /REPLACEMENTS............................................................................................................. 22
8.3 MALFUNCTIONS .......................................................................................................................... 23
8.4 INSPECTIONS............................................................................................................................... 24
Overview of diagrams
FIGURE 1: OVERVIEW PHOTO....................................................................................................................... 10
FIGURE 2: OVERVIEW OF TOOL NESTING PLACE MECHANICAL COMPONENTS ........................................................ 11
FIGURE 3: OVERVIEW OF BRUSH MECHANICAL COMPONENTS ............................................................................ 12
FIGURE 4: OVERVIEW OF HYDRAULIC COMPONENTS......................................................................................... 13

Weed brush
Type: BECX OB90M
Version: 1
November 2019
Page 5 of 24
Declaration of conformity (IIa) (copy)
We:
Becx Machines B.V.
De Sonman 35
5066 GJ Moergestel
declare entirely under our own responsibility that the product:
Description :Becx Weed brush.
Type : BECX OB90M
Serial number :…….....................
with respect to this declaration, conforms to the provisions of the Directives:
Machinery directive 2006/42/EC
In accordance with the following standards:
NEN-EN-12100-1 Safety of machinery. Basic concepts, general principles for design.
Part 1: Basic terminology, methodology
NEN-EN-12100-2 Safety of machinery. General concepts for design. Part 2: Technical
principle and descriptions
NEN-EN 14121-1 Safety of machines –Risk assessment –Part 1: Principles
Director, Erwin Hommen
The Netherlands, Moergestel,
Date: .........................

Weed brush
Type: BECX OB90M
Version: 1
November 2019
Page 6 of 24
Overviewof symbols
All actions and situations risking the safety of the operator and/or technician and where actions must be
carried out carefully will refer to the following symbols in this user manual:
Take note!
Explanation.

Weed brush
Type: BECX OB90M
Version: 1
November 2019
Page 7 of 24
1. Technical details
Description
Value
Unit
General
Sound pressure
See tool holder
dB(A)
Vibration level during normal use
N/A
Physical data
Min. width
1100
mm
Max. width
1630
mm
Length
1415
mm
Height
600
mm
Dead weight
+/- 152
kg
Attachment details
Front side
Depending on the type of tool holder
-
-
Force on the attachment point
1,520
N
Suspension torque
+/- 890
Nm
Connection details
Maximum operating pressure
250
bar
Maximum RPM for brush
210
-/min
Nominal RPM
+/- 225
-/min
Maximum oil flow
60
L/min
Required oil flow for proper results
30
L/min
Brush motor connections
Pressure line connection
15L
Return line connection
15L
Leak line connection
12L
Maximum pressure on the leak line
no pressure
bar
Hydraulic oil
Requirements for filtering hydraulic oil
10
micron
Oil for the drive
HV-46 or
equivalent

Weed brush
Type: BECX OB90M
Version: 1
November 2019
Page 8 of 24
2Safety
2.1 General
•The weed brush may not be modified.
•It is the user’s responsibility to ensure that the correct tool holder is used (see
Section 1:Technical details). To this end, the following points are important:
•The maximum pressure and rotational speed (oil flow) must not be
exceeded. Exceeding these limits may damage the installation and injure
bystanders.
•The tool holder must be sufficiently strong and stable enough to bear the
forces and torques caused by the weed brush in all circumstances.
2.2 During use
•Consult the manual for the tool holder and the additionally attached options
to look up the resulting sound load. As the specified nominal RPMs is
significantly higher than the sound produced by the weed brush, the sound
load from the tool holder is leading.
•The installation may only be used for the work activities it is designed for.
•If people or animals approach or enter the safety zone, the weed brush and
the work activities must be stopped immediately.
•If passers by constantly interrupt the work activities too much, consideration
should be given to fencing off the work area.
•If the weed brush begins to make a different sound and/or starts to vibrate,
the work and the weed brush must be immediately stopped (see 4.2). The
work must not restart until the cause is found and resolved. .
•Inspection and maintenance work must be carried out.
•During inspection and maintenance, the installation must not be used for
other purposes.
•During inspection, maintenance, or cleaning, the hydraulic feed to the weed
brush must be disconnected to prevent it being accidentally switched on.
•The local work and safety regulations must be observed.
•If the installation is to be used in the dark, sufficient lighting must be used
(approx. 50 lux on the place of operation).
•To prevent damage to the installation, the device must be gradually switched
off using the lowest RPMs. Depending on the tool holder used, this is idling
speed or the minimal flow.
2.3 Operating personnel:
•Operating personnel must be older than 18 years of age.
Weed brush
Type: BECX OB90M
Version: 1
November 2019
Page 9 of 24
•Only individuals authorized by the owner may work on or with the installation.
•Operators may only perform work activities that they are trained for. This
applies to both the maintenance work and normal usage.
•The operating personnel must be acquainted with all situations that can
occur.
•If the operating personnel discover faults or risks or do not agree with the
safety measures, this must be reported to the owner or person in charge.
2.4 Warning symbols on the machine
1.
Read the manual before you use the machine!
2.
safety zone
Weed brush
Type: BECX OB90M
Version: 1
November 2019
Page 10 of 24
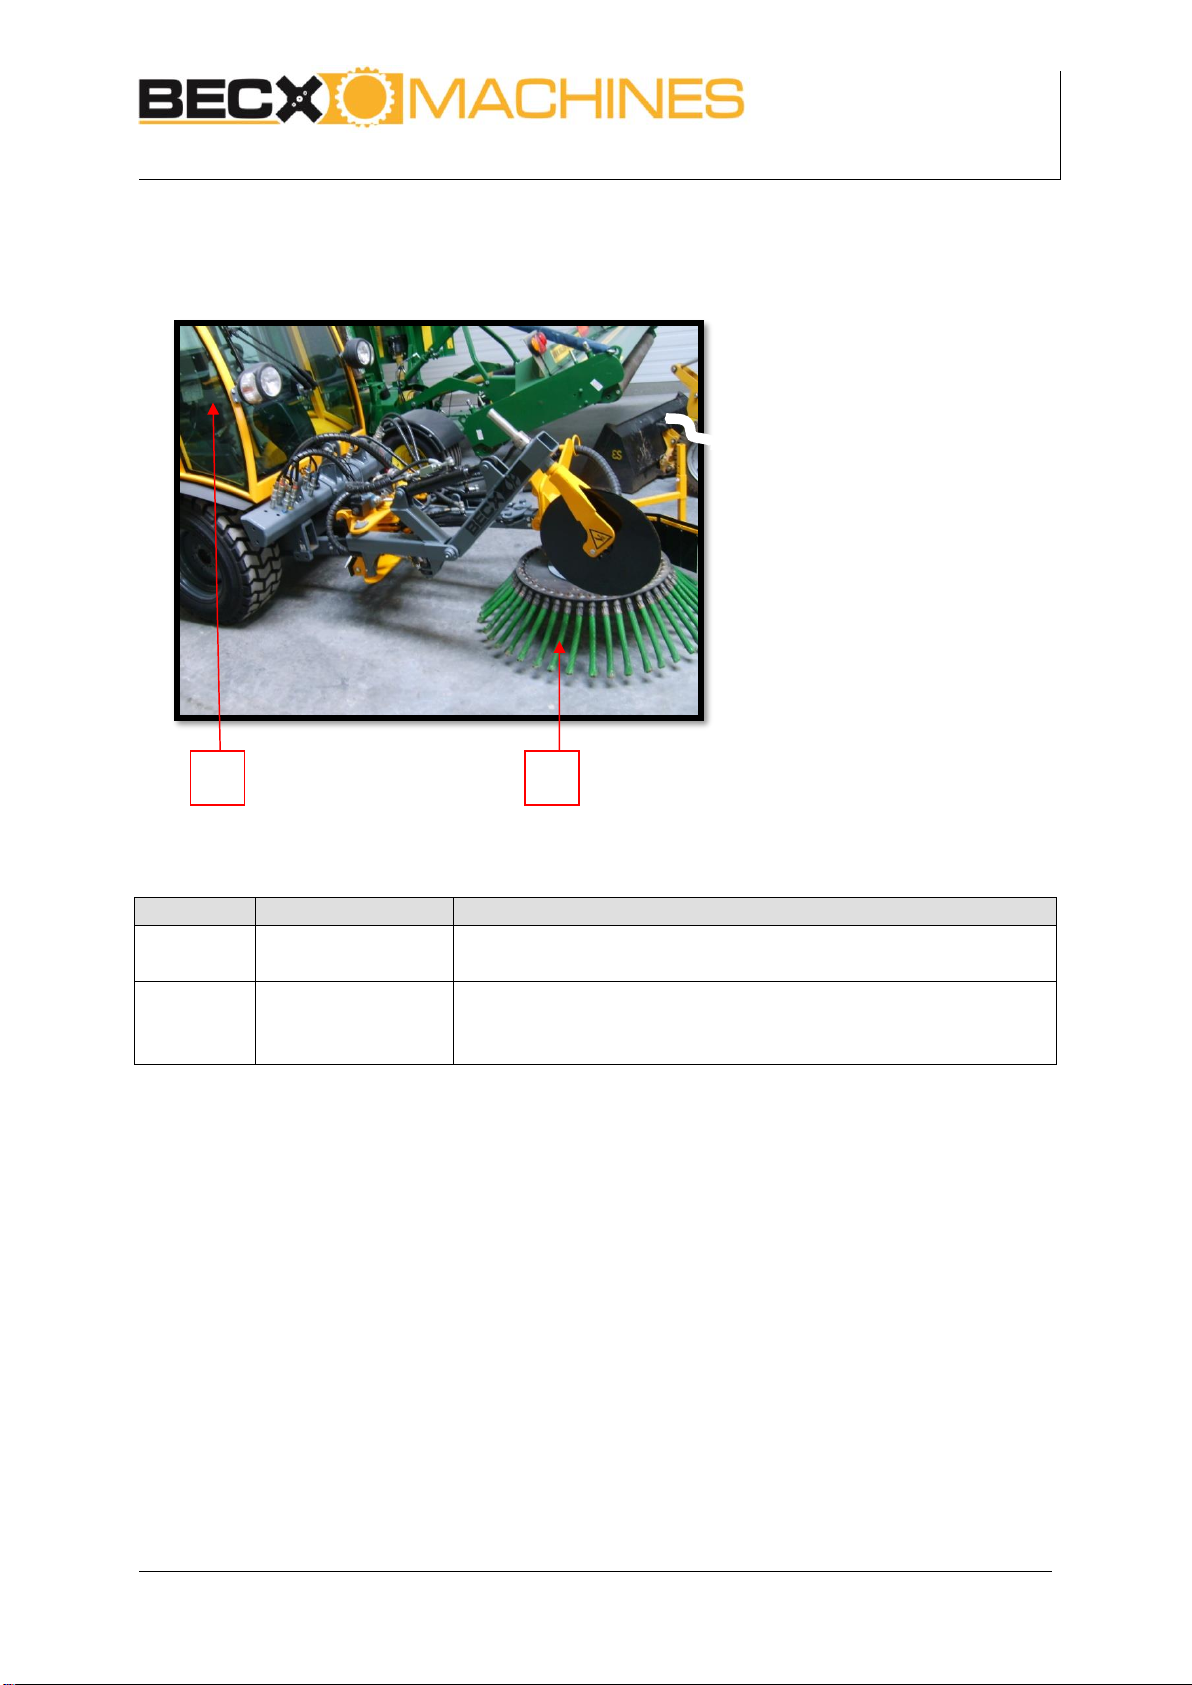
3Descriptionof components
Figure 1: Overview photo
Figure 1
Element
Explanation
1
Brush
•The brush sweeps away the weeds so that these are
completely removed from the ground.
2
Tool holder
•The tool holder is not part of the delivery. It is the user’s
responsibility to ensure that a suitable tool holder is used for
the weed brush.
1
2
Weed brush
Type: BECX OB90M
Version: 1
November 2019
Page 11 of 24
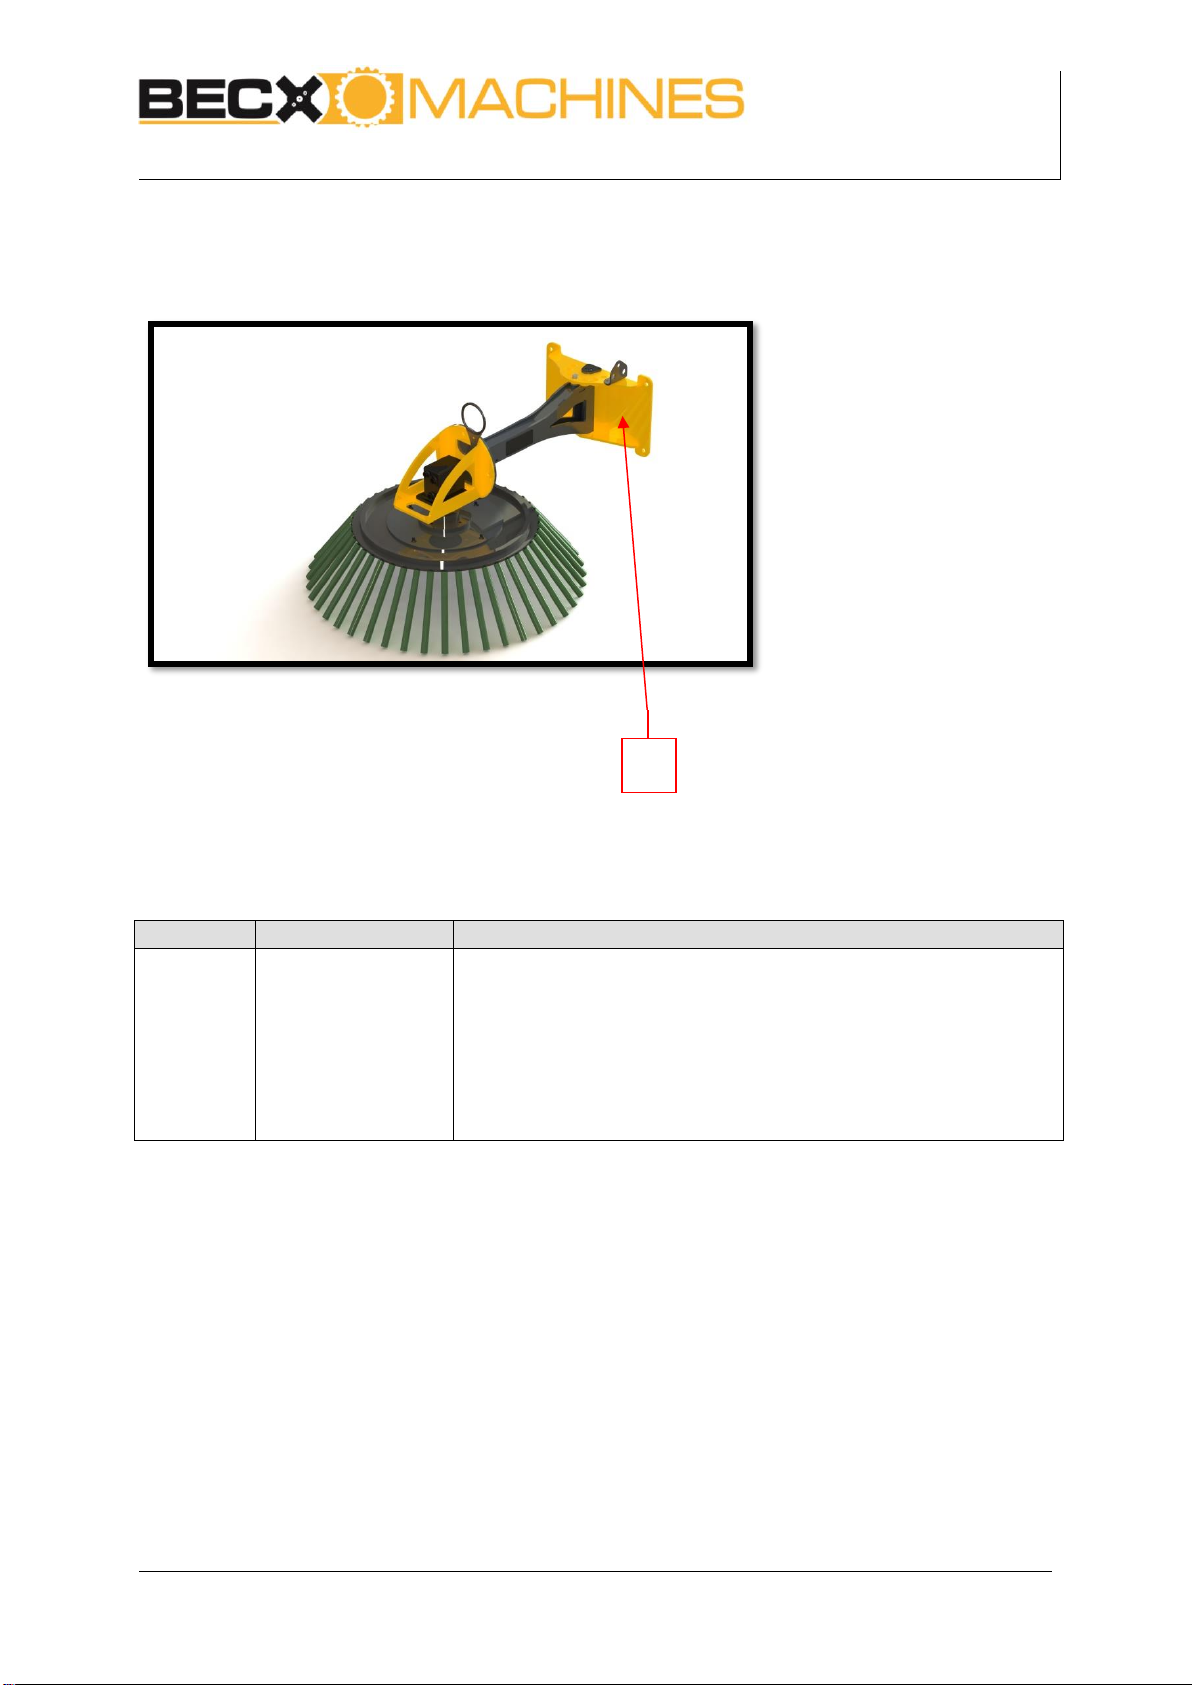
3.1 Tool nesting place mechanical components
Figure 2: Overview of tool nesting place mechanical components
Figure 2
Element
Explanation
1
Tool nesting place
•The unit is fastened to the tool holder using an adapter
(Figure 2:1).
•The type of adapter and its fastening in the tool holder is
dependent on the type of tool holder.
•The up and down movement is achieved by controlling the
tool nesting place. The is not part the brush arm, but part of
the tool holder.
1

Weed brush
Type: BECX OB90M
Version: 1
November 2019
Page 12 of 24
3.2 Brush mechanical components
Figure 3: Overview of brush mechanical components
Figure 4
Element
Explanation
1
Width position
adjustment point
•The brush position can be manually adjusted using the
adjusting pin. (
•Figure 3:1)
2
Brush attachment
•If the brush is worn, it can be easily replaced. To do so, the
insert nuts must be loosened and removed. The brush can
then be removed from the holder. (Figure 4:2)
3
Brush angle
adjustment
•The angle in which the brush must clean the streets can be
manually adjusted using three bolts that can be moved (
•Figure 3:3).
2
3
1

Weed brush
Type: BECX OB90M
Version: 1
November 2019
Page 13 of 24
3.3 Hydraulic components
Figure 4: Overview of hydraulic components
Figure 3
Element
Explanation
1
Brush hydraulic
motor
•The hydraulic motor has a connection for a supply line, a return
line, and a leak line. (Figure 5:1)
2
By-pass valve
•To prevent damage to the hydraulic motor, the hydraulic motor
slows down using this valve.
1
1

Weed brush
Type: BECX OB90M
Version: 1
November 2019
Page 14 of 24
4Operation
4.1 Make the weed brush ready for use
No.
What to do
Action
Result
1
Select the correct tool
holder.
•Ensure that the tool holder is sufficiently
strong and stable enough for the weed
brush (see Section 1:Technical details for
the unladen weight, the load in the nesting
place, and the resulting torque in the
nesting place).
•Ensure that the maximum pressure and
rotational speed (oil flow) cannot be
exceeded.
•Ensure the correct quick-release couplings
are attached for the supply, return, and
leak lines.
•Ensure that the correct adapter is
attached.
Not respecting the
specified limits may
damage the
installation and
injure bystanders.
2
Connect the hoses
•Connect the quick-release couplings for the
supply, return, and leak lines.
•See the tool holder manual for the correct
connection positions.
3
Adjust the oil supply.
•Adjust the generator for the tool holder so
that the maximum pressure and rotational
speed cannot be exceeded.
•This depends on the type of tool holder
used. See the tool holder manual.
4
Adjust the brush to
the desired position
•Various settings allow the brush to be
adjusted so that the optimal setting is
achieved for the tool holder and operator.

Weed brush
Type: BECX OB90M
Version: 1
November 2019
Page 15 of 24
4.2 Using the weed brush
No.
What to do
Action
Result
1
Check the installation
•Check the following points:
•Check the rotational speed of the brush
motor. In practice, 50% of the capacity
(30 liters) is sufficient for decent results.
•Check that the brush motor runs without
vibration and there are no irregular
sounds.
•If one of the above checks discovers a
deficiency, it must first be rectified before
the weed brush can be used.
2
Drive to the work
area
•Always switch off the brush motor when it
is not being used.
3
Switch on the brush
motor
•For detailed instructions, see the tool
holder manual.
•To prevent damage to the installation, it is
important that the weed brush is gradually
switched on or off using the lowest RPMs.
Once the installation is switched on, the
RPMs can be increased.
Switching on or off
at high RPMs causes
high loads on the
installation.
4
Adjust the brush to
the desired position
•Use the width setting and the height
setting to achieve the correct brush
position. For detailed instructions, see the
tool holder manual.
•Check that no one is in the work area.
5
Brushing
•Drive with the tool holder over the street.
6
Stop in the following
situations!
•The weed brush and the work activities
must be stopped immediately in the
following situation:
•People or animals are present in the
work area. The driver must make this
assessment.
•The weed brush starts making a
different sound or starts to vibrate.
If you do not stop
promptly in the
above situations, it
may lead to serious
injury.

Weed brush
Type: BECX OB90M
Version: 1
November 2019
Page 16 of 24
No.
What to do
Action
Result
7
Switch off the weed
brush
•Once the work activities are complete,
switch off the weed brush. For detailed
instructions, see the tool holder manual.
•To prevent damage to the installation, it is
important that the weed brush is gradually
switched on or off using the lowest RPMs.
Once the installation is switched on, the
RPMs can be increased.
Switching on or off
at high RPMs causes
high loads on the
installation.

Weed brush
Type: BECX OB90M
Version: 1
November 2019
Page 17 of 24
5Maintenance
•Components may only be replaced or repaired using components delivered by
or approved by the manufacturer.
•If work activities will be carried out on the installation, the weed brush must
always be disconnected from the power supply. You can do so using the quick-
release couplings.
•Only trained and/or experienced individuals who can demonstrate they have
sufficient knowledge of mechanical and hydraulic installations may perform
the maintenance work.
•The installation may be spray cleaned using a high-pressure jet cleaner.
However, never spray the hydraulic components.
Weekly maintenance
No.
What to do
Action
Result
1
Lubricate pivot points
•Spray grease in the grease nipples. These
are located:
•at all of the articulating points.
2
Tighten bolts
•Check the fastener bolts.
3
Visual inspection
•Visually inspect the structure and the
hydraulic installation for damage and
cracks.
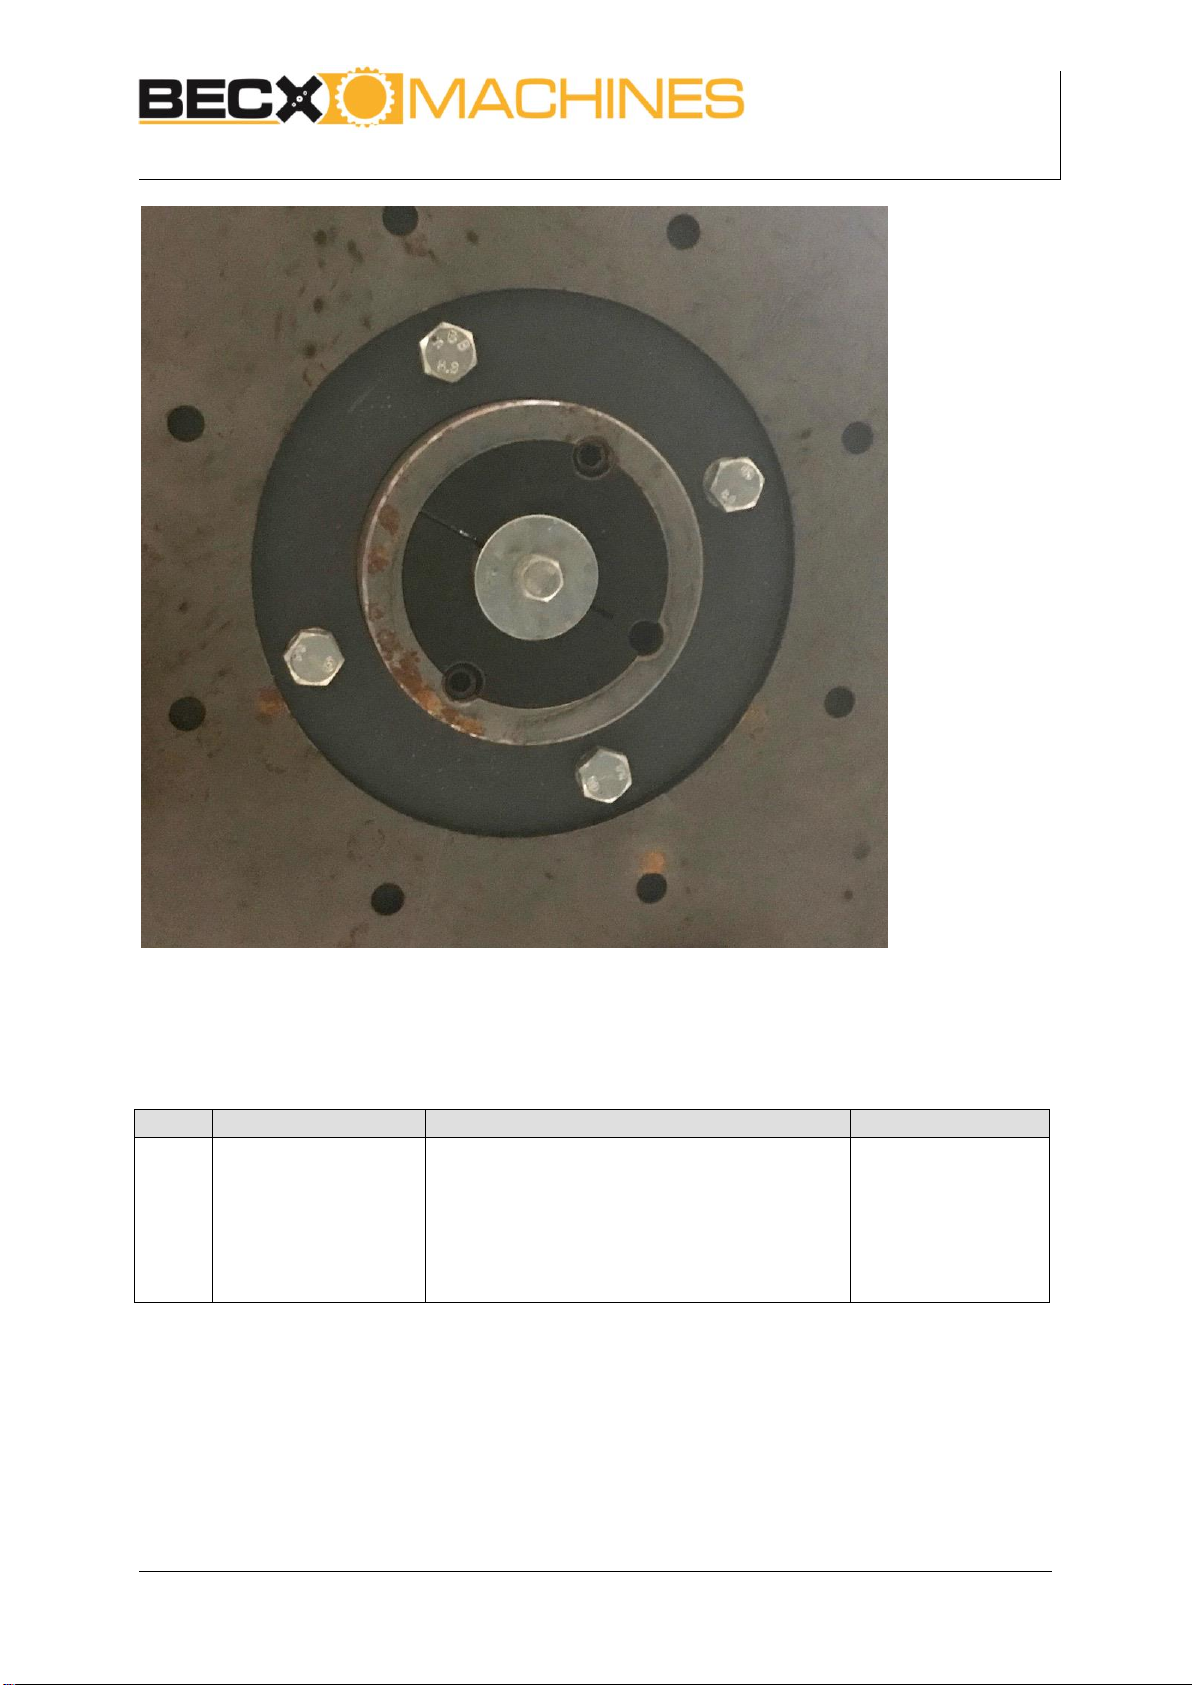
4
Retighten adjusting
bolts
•Whitin 4 working hours, tighten the set
screws of the clamping sleeve mouting on
the motor shaft and then check it regularly!
(45NM) See image on page 18
Weed brush
Type: BECX OB90M
Version: 1
November 2019
Page 18 of 24
Image of clamping sleeve bottom of brush head.
Yearly maintenance
No.
What to do
Action
Result
1
Inspect
•Check the following parts for damage,
cracks, and play:
•The tubes and sleeves of the width
setting.
•The bearing and seal.

Weed brush
Type: BECX OB90M
Version: 1
November 2019
Page 19 of 24
6Malfunction analysis
Malfunction
Solution
1
After switching on, the brush
motor does not rotate
•Check that the hydraulic hoses are connected.
2
The machine works, but has no
or insufficient brush force.
•Check that the motor rotation direction is correct. If this
is not the case, you can change it using the quick-release
coupling to switch the pressure and return hoses.
If you cannot resolve the malfunction using the recommendations in the above table, consult with
your dealer or maintenance department.

Weed brush
Type: BECX OB90M
Version: 1
November 2019
Page 20 of 24
7Disposal
When replacing components or at the end of the lifespan, ensure that all materials are disposed of,
destroyed, or reused in a “legally” responsible and environmentally friendly manner.
Table of contents


