Bee-Ball Pro Netball User manual

Bee Ball Pro Netball
Instruction Manual

Tools Required
Benötigtes Material / Accessoires / Herramientas
Strumenti da lavoro / Benodigdheden
Parts Included
Unterteile / Liste des pièces / Lista de partes
Elenco degli elementi / Onderdelen
One pair of
hands
Spanner and Socket Set
1
Part 1
Hoop/Ring Part 2
Net
Identifying
Bolts
Part 9
Base Struts (x2)
Part 7
Metal Rod - Wheel Axle Part 8
Wheels (x2)
Part 6
Base
*comes part
assembled with
parts 7 & 8
(wheels and axle)
Bolt, Nut &
Washer C (x1)
M8 / 70mm
Bolt A (x4)
plastic handle Bolt, Nut &
Washer D (x2)
M8 / 20mm
Bolt, Nut &
Washer B (x4)
M8 / 16mm
Part 3
Top Pole
Part 4
Middle Pole
Part 5
Bottom Pole
Preparing the Bottom Poles
The bottom and middle poles
both come with two screw holes at
the top (with ‘nuts’ attached) - where
you screw the poles together.
These can be very sti when screwing in
the plastic handle bolts (A) for the rst time.
To make this easier, take one long M8 bolt (C)
and screw this into the holes at the top of the
poles using your socket set, then remove. This will
prepare the thread ready for Step 2 and 5 in these
instructions.
2
Before Installation
Check all parts are present!
Our factory takes every eort to make sure everything is packed in its proper place. But just in case a small part has gone
astray please make sure you check every piece is present before you begin installing - right down to the nuts and bolts.
Assemble with Care
Installation should be completed by an adult. Please make sure you follow all the instructions carefully. If you have any
questions during installation please do not hesitate to contact us on +441865 392439 or email
Please make sure you read all the safety warnings and advice in this instruction manual. Take extra care and attention over
the ballasting instructions as this will make sure your equipment stands rm once you have completed the assembly. We
recommend the use of sand and water - if water is used anti-freeze is necessary to prevent the water from freezing and
cracking the base. Make sure you position the stand somewhere where there is plenty of space to play.
Using the Netball Equipment
Improper installation or use of the netball stand may cause damage to the stand or result in serious injury to the user. We
would advise that children are supervised at all times when using this product.
Do not use the stand in windy weather conditions - adjust to the lowest height and store to prevent any damage.
Please adhere to the warnings below to ensure proper use of this equipment and ultimately to ensure full enjoyment!
Weighing Down the Base
Making sure the base is weighted properly is very important for safety reasons.
We recommend lling your base with sand or a mixture of water and sand or ne gravel - to a total weight of 170kg.
To ll, simply remove the plastic plug/lid in the base and add water using a hose. To add sand or gravel, use a funnel - you
can create a make-shift funnel using a exible plastic board or thick glossy piece of cardboard.
If you are using water you must add anti-freeze to prevent the base from cracking during winter months. We would also
recommend adding an anti-algae solution to the water to prevent algae from growing inside the base (such as bleach or
chlorine).
Moving Your Netball Stand
The stand must be moved by an adult capable of handling the weight of the stand - children should not be
allowed to move the stand.
Stand in front of the system and pull the pole forward slowly until the post is balanced on the wheels in the base.
Roll the stand carefully to the new location and slowly push the system back to a standing position.
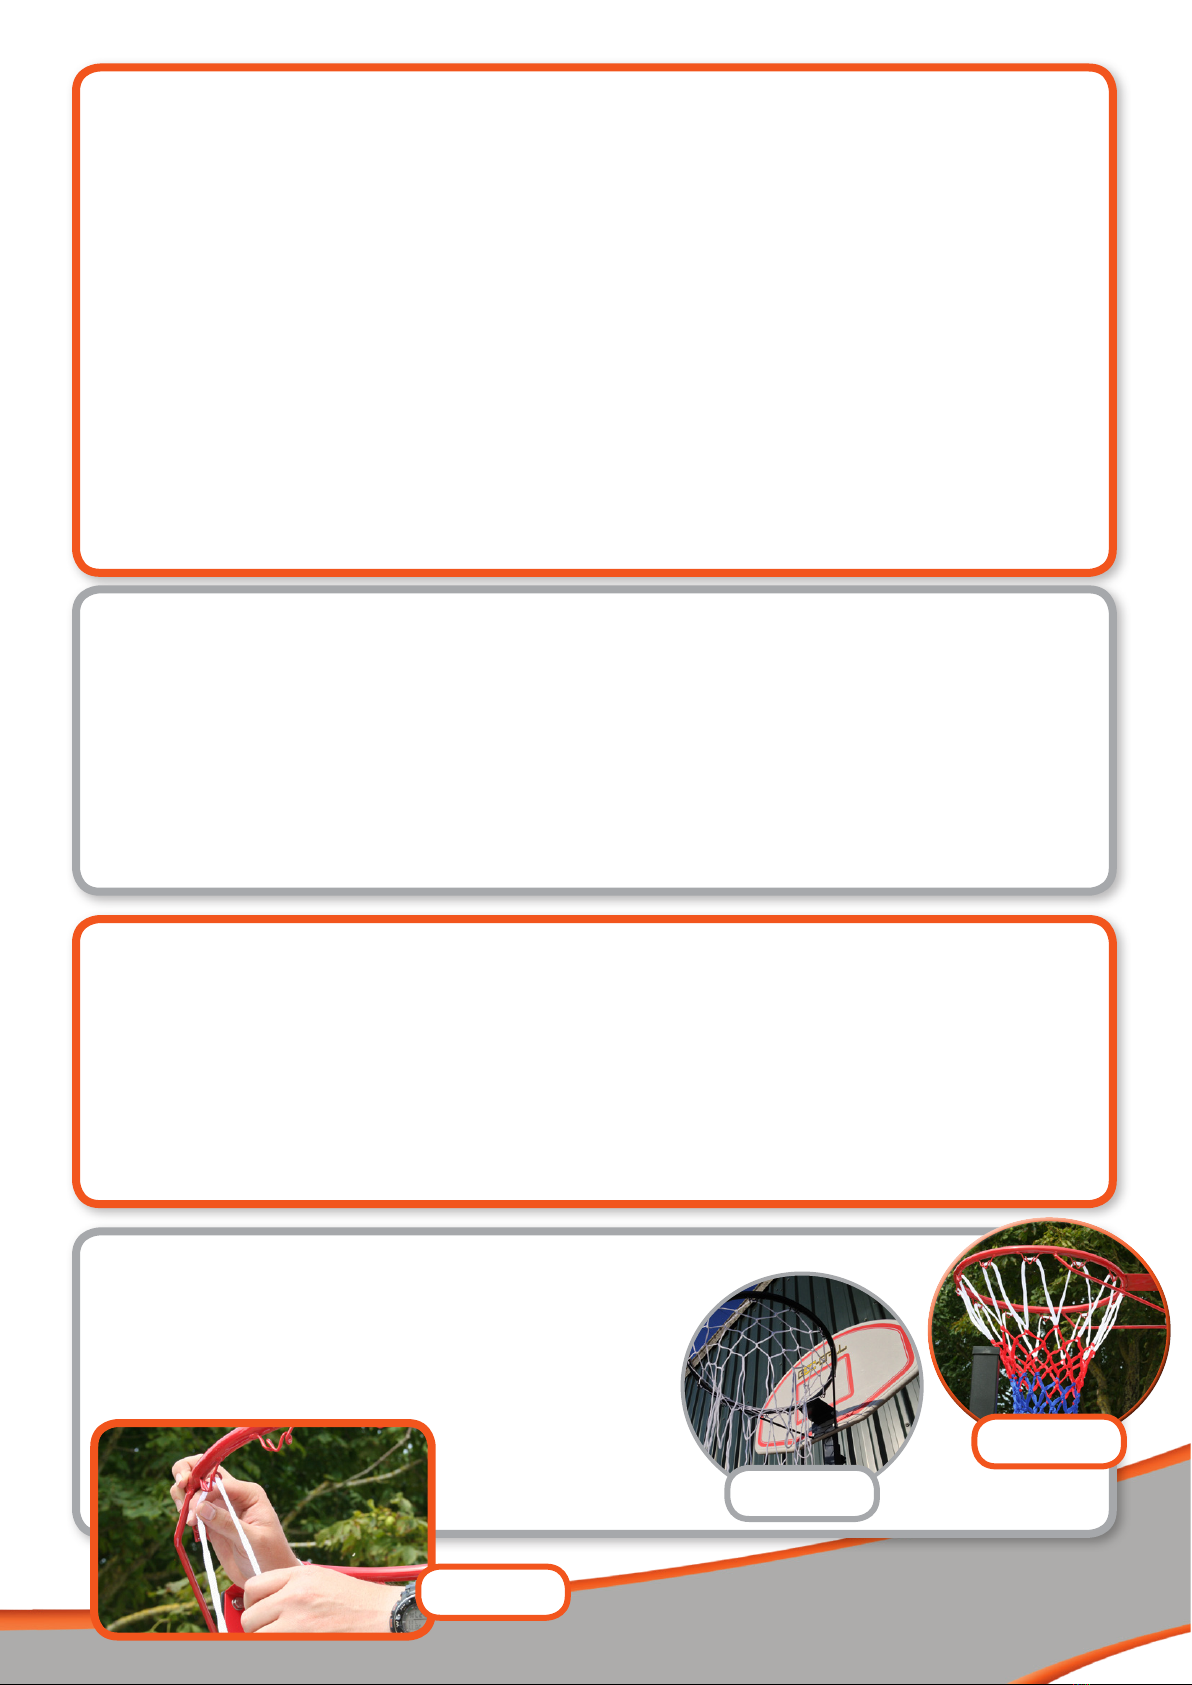
Attaching the Net
When attaching the net to your netball ring, make sure you have
the net the correct way up. The wider loops/wider part of the net
should be at the top. Slide the loops of the net over the metal loops on
the inside of the netball ring - from the inside towards the
outside (see diagram 1). You can also see here a net that has been
assembled correctly and one that has been assembled upside down!
diagram 1
Incorrect
Correct
3
Assembling Your Stand
Bolts
B
Bolts
A
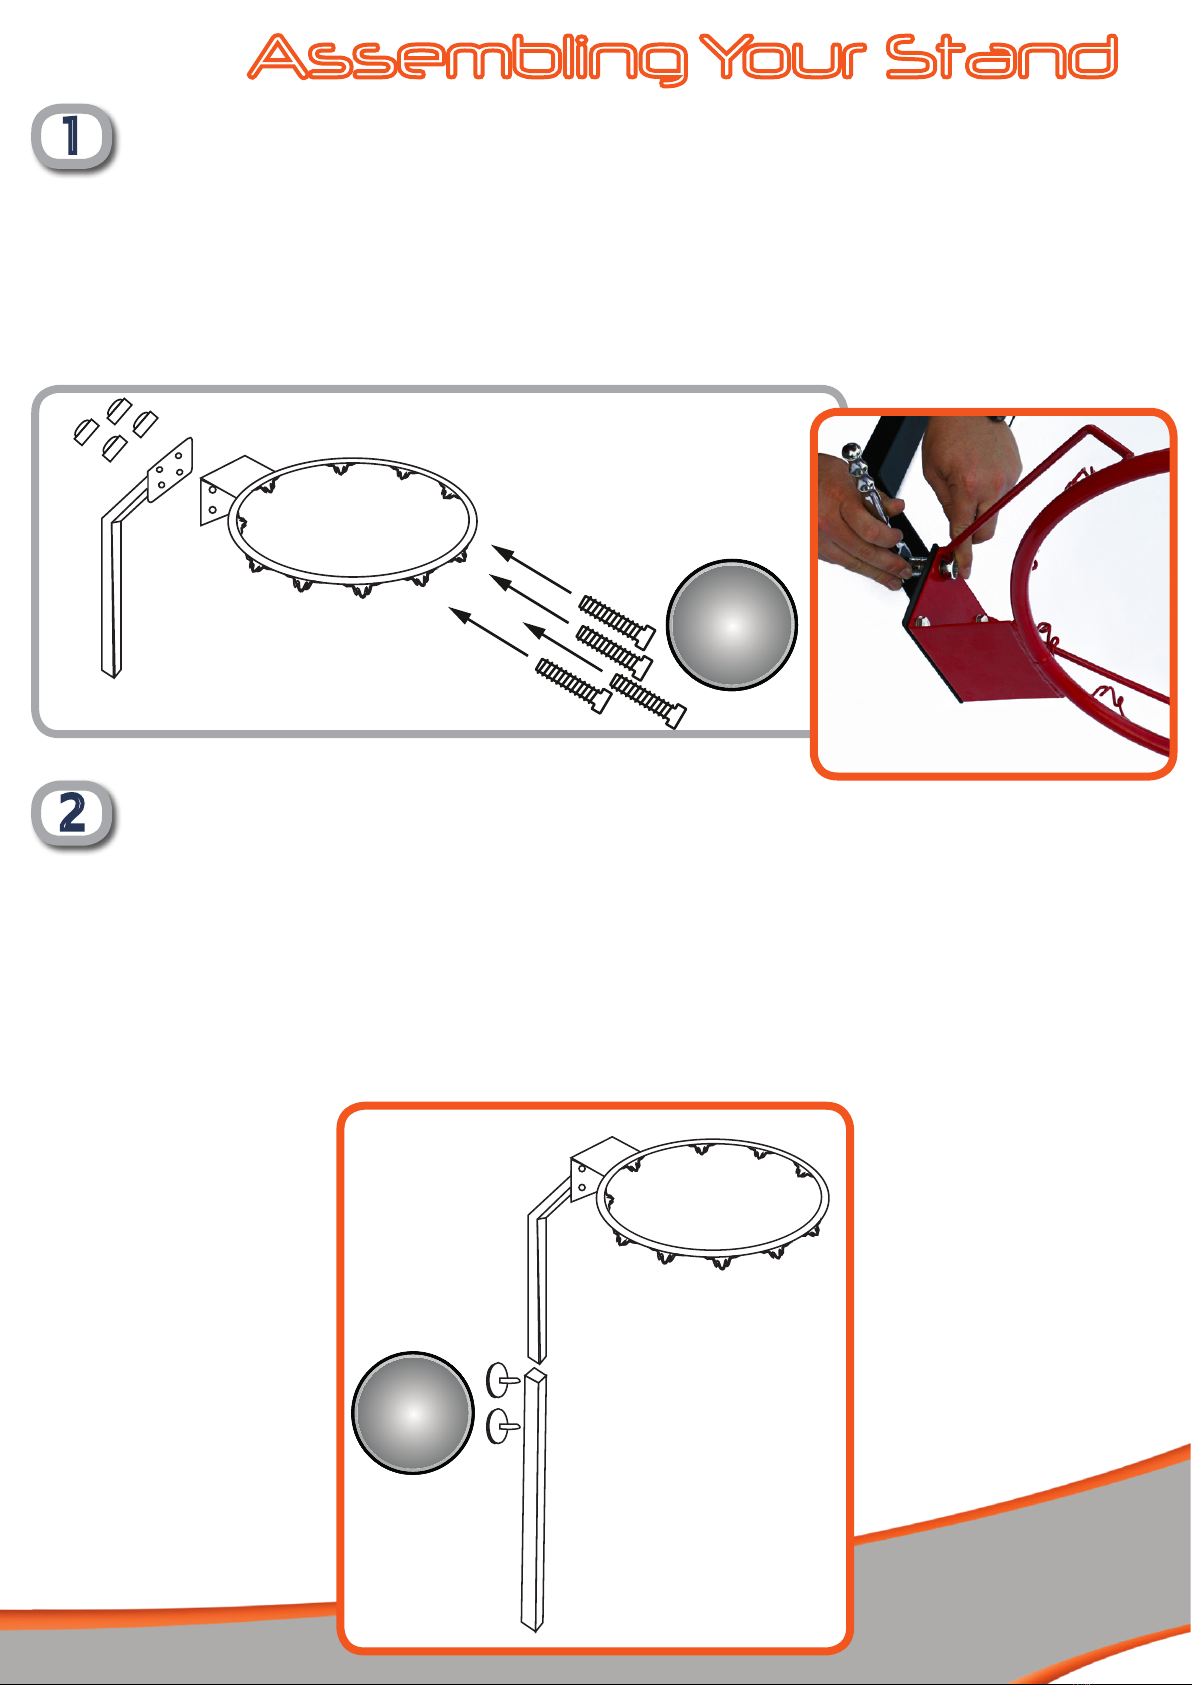
2Join the Top Pole and Middle Pole
You will need:
Parts as assembled in Step 1
Middle Pole (part 4)
2 x Bolts A (plastic handle)
Fix the Middle Pole (part 4) to the Top Pole (which is already attached to the ring from Step 1).
Use two Bolt A’s in the two holes at the top of the middle pole. The Middle Pole will be slightly larger than the top
pole (the Bottom Pole (part 5) is slightly larger again than the Middle Pole).
Once you have done this, carefully place the assembled parts (ring, top and middle pole) to one side.
1Attach Ring to Top Pole
You will need:
Ring (part 1)
Top Pole (part 3)
4 x Bolts B (M8 x 16mm), 4 x Nuts and 8 x Washers B (M8)
Fix the Ring (part 1) to the front of the square metal plate at the top of the Top Pole (part 3) using four Bolts &
Washers B at the front, and securing with the four Washer and Nuts B at the back.
4
3Assemble the Base
You will need:
Base (part 6) includes: Metal Rod - Wheel Axle (part 7) & 2 x Wheels (parts 8)
Bottom Pole (part 5) (widest pole)
Place the base on a solid, at horizontal surface. Fix the Bottom Pole (part 5) to the Base (part 6) by sliding the
Wheel Axle (part 7) out sideways and sliding back through. The Axle keeps both wheels and the bottom pole in
place (see picture below).
You do this in the following order:
Metal Rod > Base > Wheel > Base > Bottom Pole > Base > Wheel > Base
Please Note: you may need to pull the bottom pole
towards you as you pull the axle through so it can reach
the hole on the other side.
2

5
4Attach the Base Struts
You will need:
Parts as assembled in Step 3 (base with wheels and bottom pole)
2 x Base Struts (part 9)
1 x Bolt C (M8 x 70mm), 1 x Nut C (M8) and 2 x Washer C (M8)
2 x Bolt D (M8 x 20mm), 4 x Washer D (M8) + 2 x Nut D (M8)
Attach one end of each of the Base Struts (part 9) to the base itself using Bolts and Washers D (one for each side)
on the top - secure with one nut and washer underneath (see inset image).
Find the hole in the centre of the Bottom Pole (preassembled in Step 3 with base and wheels).
Fix two ends of the Base Struts (parts 9) either side of the Bottom Pole using the single Nut, Bolt and Washer C.
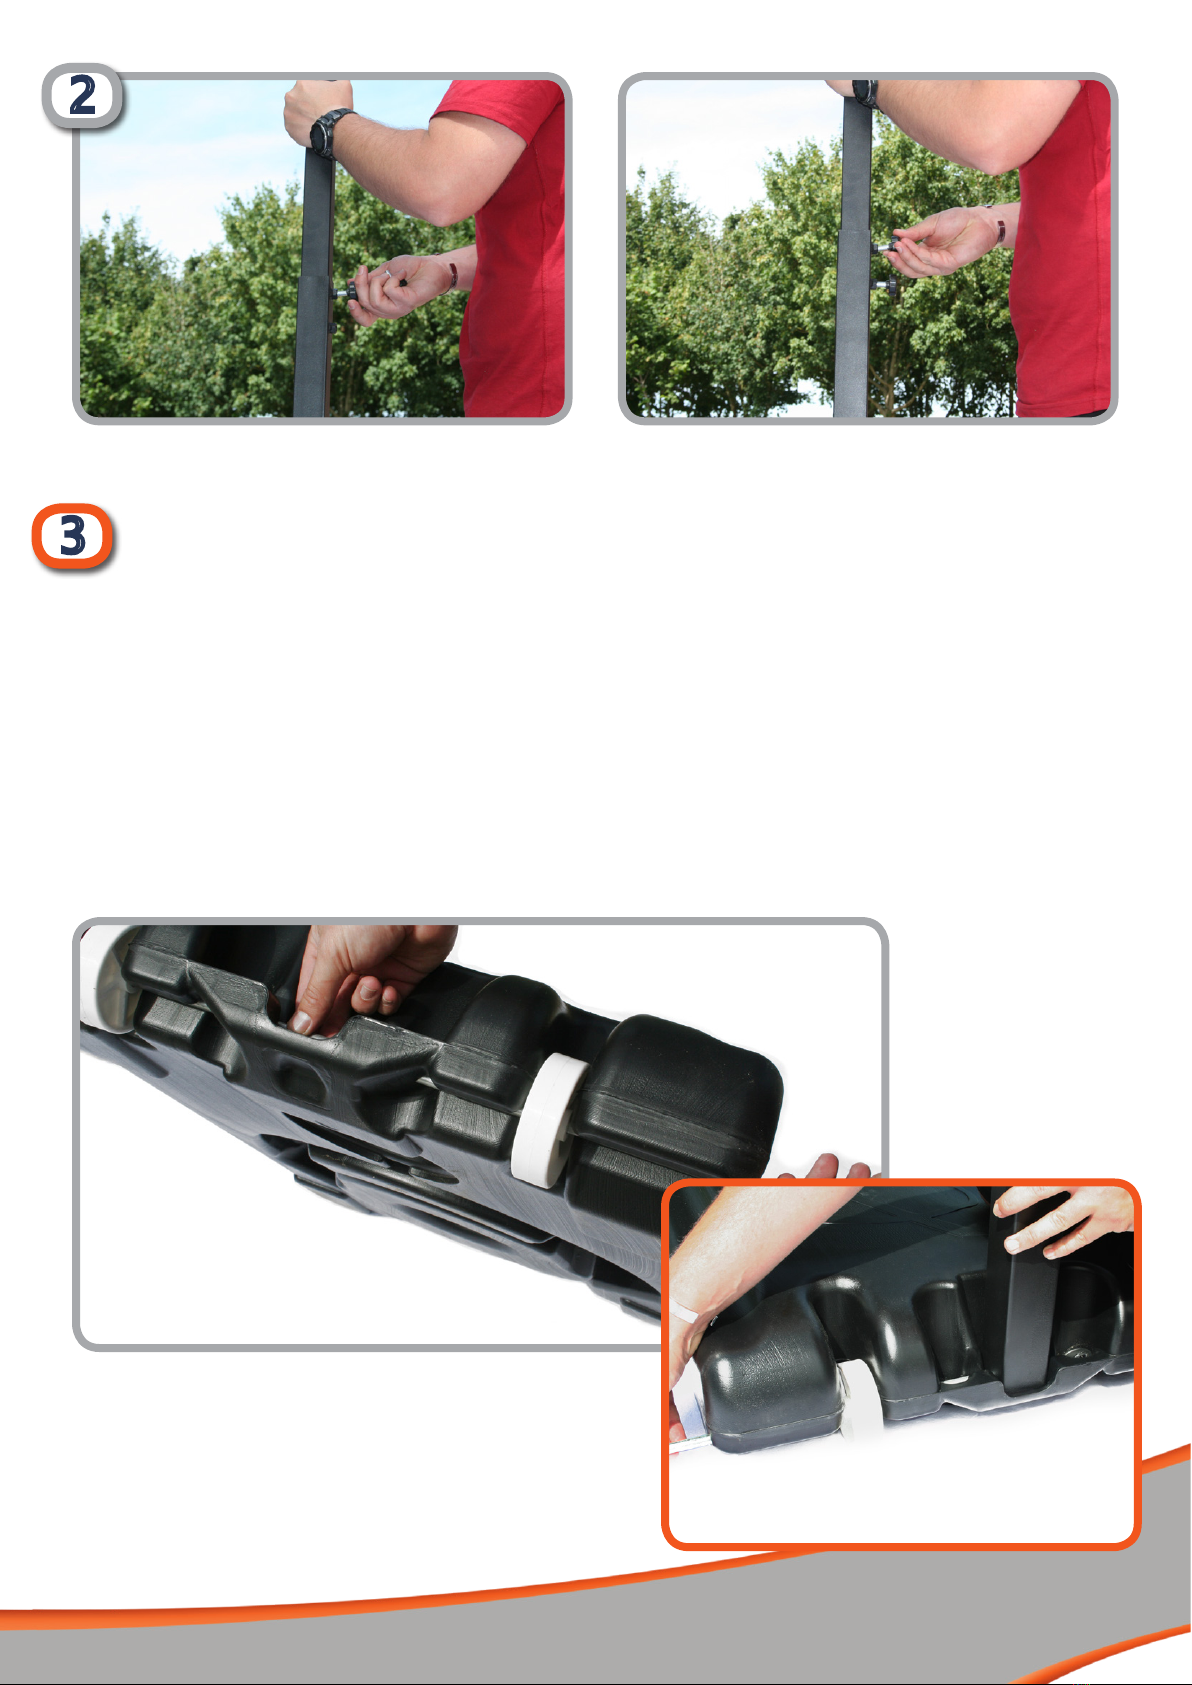
5Complete your Netball Post
You will need:
Pre-assembled parts from Step 2 (top pole with ring connected, and attached
to the middle pole)
Pre-assembled Base and Bottom Pole from Steps 3 & 4
2 x Bolts A (plastic handle)
Attach the Middle Pole (with ring etc. attached) to the Bottom Pole using two
Bolts A - decide on the height you would like your ring then tighten the bolts in
place.
Raise the stand so it is standing upright on its
base. Tighten all your nuts once again to make sure everything is secure and
your stand is complete. If you haven’t already done so, follow the instructions
on
‘Weighing Down the Base’’ on page 2 to ensure it is weighed down correctly.
6
Warning!
For family domestic use only. Not suitable for children under 3 years / 36 months because of small parts which could be a
choking hazard. To be used under the supervision of an adult.
Install the product in a way to avoid risk of entrapment - with sucient gap between the product and other surfaces.
Warnung! Nur für den häuslichen Gebrauch. Für Kinder unter 3 Jahren / 36 Monaten der Deckel ist nicht geeignet , wegen verschluckbare Kleinteile.
Durch verschluckbare Kleinteile besteht Erstickungsgefahr. Nur unter der direkten Aufsicht eines. Erwachsenen benutzen. Bei der Montage des
Produktes in ein Spielgerät oder eine andere Konstruktion muss sichergestellt werden, dass keine Fangstellen für Gliedmasse oder Kleidungstelle
enstehen.
Attention! Exclusivement à usage familial. Ne convient pas aux enfants de moins de 3 ans / 36 mois, présence de petits éléments susceptibles d’être
ingérés ou inhalés - risque d’étouffement.. À utiliser sous la surveillance rapprochée d’un adulte. Au cas où l’on incorpore le produit dans un jeu ou
une construction quelconque, il faudra le faire de façon à éliminer tout risque de coinçage.
¡Advertencia! Exclusivamente para uso doméstico. No conveniente para menores de 3 años / 36 meses - partes pequeñas con riesgo de ingestión
o inhalación - riesgo de atragantamiento.. Se utilizará exclusivamente bajo la vigilancia directa de una persona adulta. La instalación de este
producto en un juego infantil o otra construcción debe estar hecho asi que peligro para quedarse atascado quede excluido.
Attenzione! Solo per uso domestico. Non adatto ai bambini di età inferiore a 3 anni / 36 mesi - presenza di piccoli elementi suscettibili di ingestione
o inalazione - pericolo di soocamento.. Utilizzare sotto la sorveglianza diretta di un adulto. Eettuare il montaggio in modo che si eviti il rischio di
intrappolamento.
Waarschuwing! Alleen voor privé gebruik. Niet geschikt voor kinderen jonger dan 3 jaar / 36 maanden wegens kleine elementen met het
risico op inslikken of inademen - verstikkingsgevaar. Alleen voor privé gebruiken onder toezicht van een volwassene. Het
inbouwen van dit product in een speeltoestel of andere constructie dient zodanig te gebeuren dat voor
beknelling uitgesloten is.
Warning!
Failure to comply with these warnings can lead to injury and/or damage of the netball equipment.
• Do not allow children to hang from the hoop/rim, climb on the netball base or up the pole
• Do not perform‘dunk’moves on this netball stand as it is not designed for this purpose. During play ensure face does
not come close to the ring or net as this could result in injury.
• Do not allow children to move or adjust the system
• Never leave the unit standing upright without proper weight in or on the base to support it
• Make sure you check the base frequently to ensure there is proper support for the stand (see the Inspection and
Maintenance section below)
• Make sure the pole sections are correctly installed - failure to do this could cause the poles to separate during play or
transportation
• The surface beneath the base must be smooth and free of gravel or other sharp objects - punctures cause leakage and
could cause the system to tip over
• Check the system before use to make sure all xtures and ttings are tight (see Inspection and Maintenance below)
• During play, do not wear jewellery (e.g. rings, watches, necklaces) objects may become entangled in the net
• Adverse weather conditions, exposure to extremes of weather, corrosive materials such as salt, herbicides or pesticides
or misuse of the stand could cause corrosion and result in the system failing
• This equipment is intended for home recreational use only and NOT excessive competitive play
• We recommend storing your stand in a cool, dry place to extend the life of your equipment
Inspection & Maintenance
We recommend the following inspection and maintenance.
Looking After Your Netball Stand
Your netball stand - just like any other outdoor play equipment - is designed to be used outside but without proper care
and maintenance will not last as long as you might want.
Weekly to monthly / routine visual inspection
Check all nuts and bolts - if any are loose, tighten them where necessary.
Check the base for any cracks or leakage
Check all pole sections for visible rust and corrosion.
If you nd any corrosion, rust, chips or cracks, use an emery cloth to remove the rust or chipped paint, and clean the area
with a damp cloth. Once it is dry apply two coats of a rust preventative high gloss enamel paint (suitable for metal) to the
area. Allow the paint to dry between coats and ensure it is completely dry before the stand is used.
1 -2 times per year / annual inspection
Check for rust and corrosion of nuts and bolts and replace with galvanised steel replacements where necessary.
Please retain for future reference
The Bee-Ball brand is owned by: Garden Games Limited
Holly House • Pine Woods Road • Longworth
Oxfordshire • OX13 5HG • England
Bee-Ball®
is exclusive to
Big Game Hunters:
+441865 392439
sales@biggamehunters.co.uk
biggamehunters.co.uk
@thePlayExperts
The logo to look out for...
Garden Games Ltd. spreads much wider than the Bee Ball basketball brand. There are many more products
we have created - look out for our Garden Games logo or ower emblem to be sure you have an ocial
Garden Games Limited product. The brand is not just a logo, it is the whole family of ideas,
service and quality that are behind every product.
We are not a huge corporate and do not claim to be -
we are proud of who we are and what we create
so look out for our brand knowing that each product carrying our logo
has a special standard we aim to maintain for years and years to come...
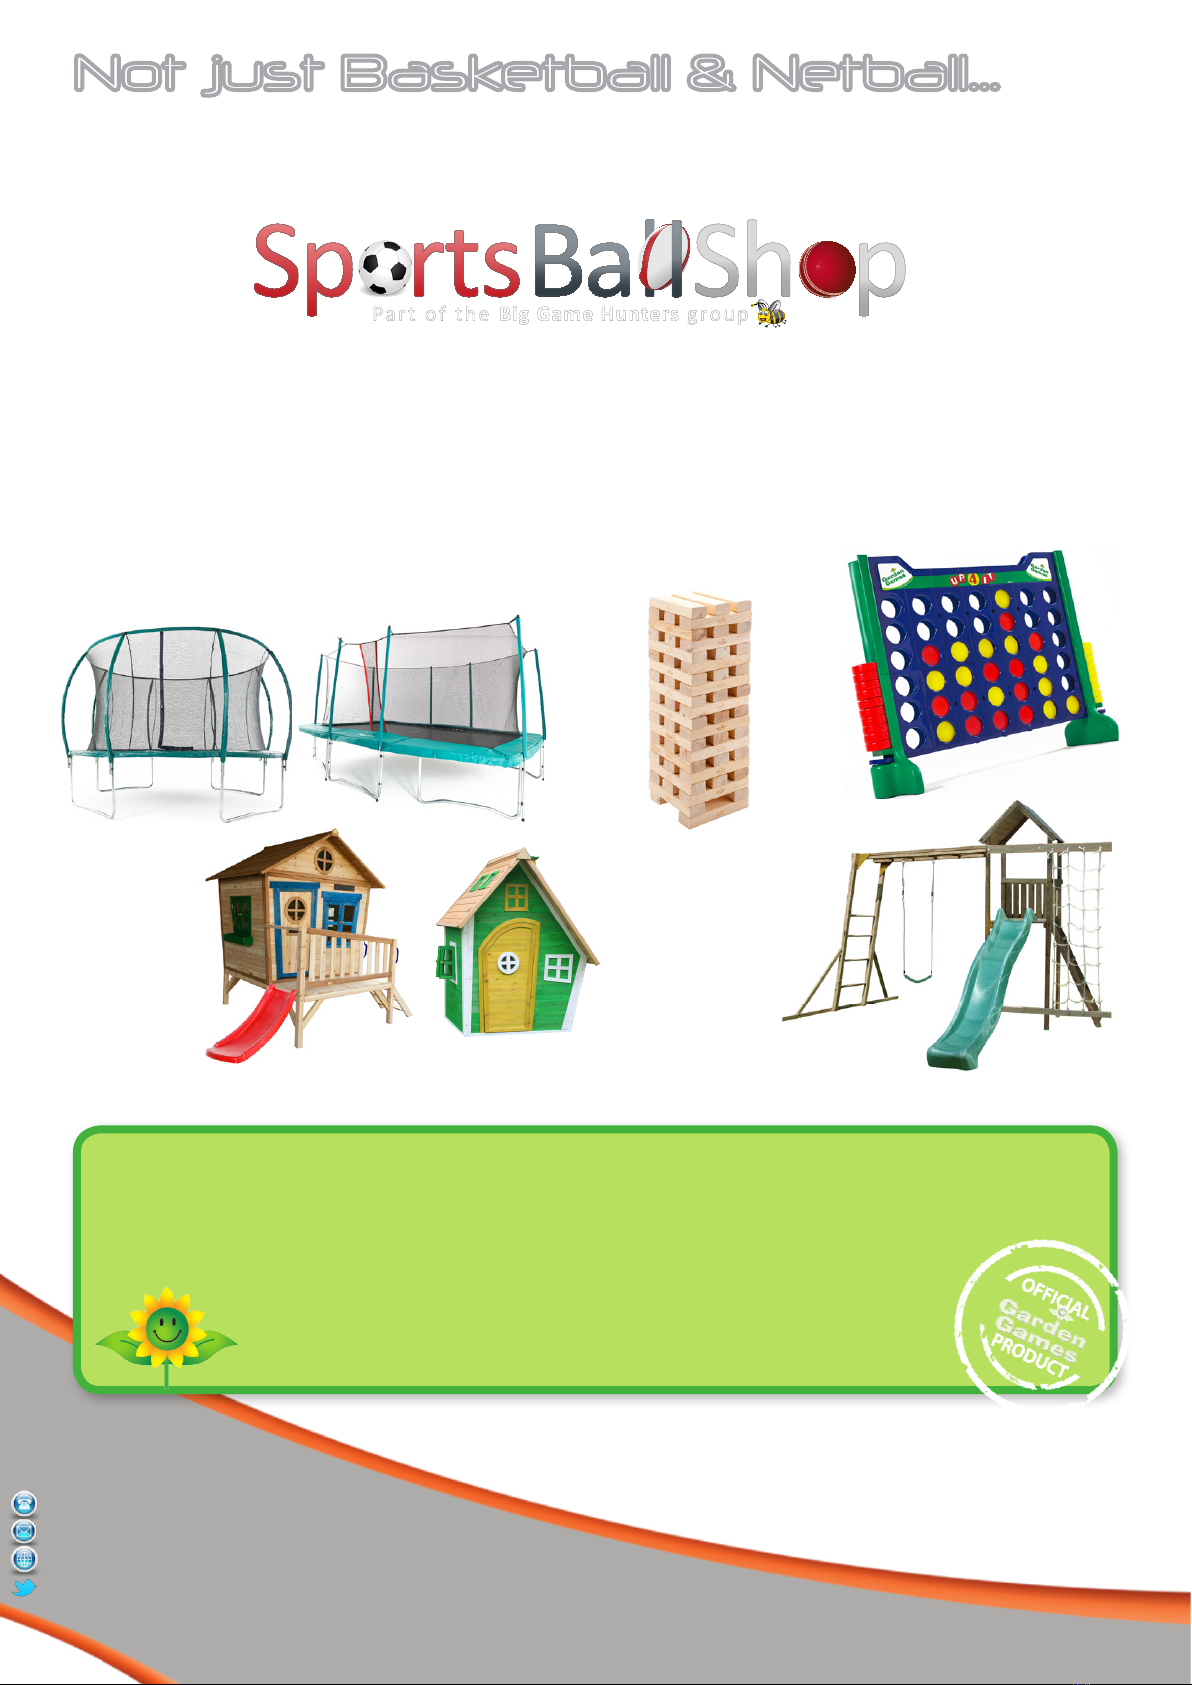
Not just Basketball & Netball...
You may or may not be aware that Bee-Ball is exclusive to the retailer Big Game Hunters
who not only have a huge range of high quality basketball and netball equipment but are
also owners of the UK’s leading sports ball retailer.
Big Game Hunters’ Sports Ball Shop sells a wide range of balls and sports training
equipment including netballs. To browse their range go to sportsballshop.co.uk.
Alongside a wide range of basketball and sports equipment Big Game Hunters also
manufacture and sell a wide range of other outdoor toys, games and play equipment.
Having been in the game since the year 1998 as a retailer we have a lot of experience and
expertise in this area.
Some of our other ranges include...
Part of the Big Game Hunters group
Giant Games
Climbing Frames
information on these and other products can be found at:
www.biggamehunters.co.uk
Big Game Hunters is the retail division of Garden Games Ltd.
Wooden Playhouses
Skyhigh Trampolines
Table of contents
Other Bee-Ball Accessories manuals

Popular Accessories manuals by other brands

Galvin Engineering
Galvin Engineering Flowmatic TZ-IQWAVEB Product installation guide

Trane
Trane BAYCO2K011A installation guide

ORION TELESCOPES & BINOCULARS
ORION TELESCOPES & BINOCULARS 07782 manual

PCB Piezotronics
PCB Piezotronics 118B01 Installation and operating manual

La Crosse Technology
La Crosse Technology TX9U instruction manual

UV Dynamics
UV Dynamics 8.40C Installation & operation manual


