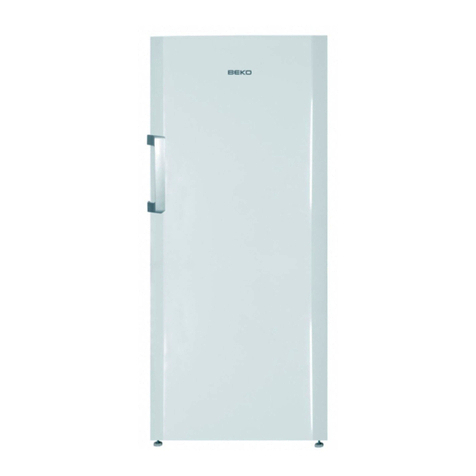
Beko BFFD3626ZSS User manual

BFFD3626SS
BFFD3626ZSS
EN/FR/ES
58 0537 0000/AO-EN-FR-ES
Refrigerator
User Manual
Réfrigérateur
Manuel d’utilisation
Refrigerador
Manual del usuari

Congratulations on the purchase of your new Beko Refrigerator! This refrigerator has been
manufactured in modern facilities with the utmost care and meticulous quality controls. We are so
confident in the quality of this product that we back it with a two year parts and labor warranty, and five
years on the sealed system! Please read this entire user manual before using your product, to ensure
you understand all of its features and benefits and know how to operate it properly. This manual should
be kept in an easily accessible location and passed on to any future owners.
This guide will help you use the product quickly and safely.
Please read the user guide carefully before installing and operating the product.
symbols used throughout this manual and what they represent.
Important information and
useful tips.
Risk of life and property.
Risk of electric shock.
The product’s packaging
is made of recyclable
materials, in accordance with
the National Environment
Legislation.
Fill this out and keep for future reference
Model
Serial No
Date of Purchase
Original Purchaser
Dealer
City
State
Zip Code
Country

3 / 31 EN Refrigerator / User Manual
1 Important Instructions Regarding
Safety and Environment 4
1.1 Intended use . . . . . . . . . . . . . . . . . . . . . . . .4
1.2 General Safety . . . . . . . . . . . . . . . . . . . . . . .4
1.3 Hydrocarbon (HC) Warning . . . . . . . . . . . . . .6
1.4 For Products with a Water Dispenser/Ice
Machine . . . . . . . . . . . . . . . . . . . . . . . . . .6
1.5 Intended Use . . . . . . . . . . . . . . . . . . . . . . . .6
1.6 Children’s Safety . . . . . . . . . . . . . . . . . . . . .7
1.7 Compliance with the WEEE Directive and
Disposing the Waste Product: . . . . . . . . . .7
1.8 Compliance with the RoHS Directive:. . . . . . .7
1.9 Packaging Information . . . . . . . . . . . . . . . . .7
2 Environmental instructions 8
2.1 Compliance with the WEEE Directive and
Disposing of the Waste Product: . . . . . . . .8
2.2 Compliance with RoHS Directive . . . . . . . . . .8
2.3 Package information. . . . . . . . . . . . . . . . . . .8
3 Your Refrigerator 9
4 Installation 10
4.1 Before Installation. . . . . . . . . . . . . . . . . . . .13
4.2 Appropriate installation location. . . . . . . . . .13
4.3 Installing the plastic wedges . . . . . . . . . . . .14
4.4 Electrical connection. . . . . . . . . . . . . . . . . .14
4.5 *Adjusting the feet . . . . . . . . . . . . . . . . . . .14
4.6 Illumination lamp . . . . . . . . . . . . . . . . . . . .15
4.7 Door/Drawer Open Warning . . . . . . . . . . . .15
4.8 Water connection . . . . . . . . . . . . . . . . . . .15
4.9 Connecting the water hose to the refrigerator1 5
4.10 Connecting the water line to the water
supply . . . . . . . . . . . . . . . . . . . . . . . . . . .16
4.11 Installing the Internal Water Filter . . . . . .16
4.12 Before using the water dispenser . . . . . . .16
5 Preparation 17
6 Display and operating the product 18
6.1Indicator panel . . . . . . . . . . . . . . . . . . . . . .18
2 1
ACTIVATING OF FILTER COUNTER . . . . . . . . . . .21
2 2
ACTIVATING/DEACTIVAING OF ICE-OFF FUNCTION2 2
6.4 Freezing fresh food. . . . . . . . . . . . . . . . . . .23
6.5 Recommendations for preserving the frozen
food . . . . . . . . . . . . . . . . . . . . . . . . . . . .23
6.6 Deep-freeze information . . . . . . . . . . . . . . .23
6.7 Placing the food . . . . . . . . . . . . . . . . . . . . .24
6.8 Crisper bins . . . . . . . . . . . . . . . . . . . . . . . .24
6.9 Deli Drawer . . . . . . . . . . . . . . . . . . . . . . . .24
6.10 Humidity controlled crisper . . . . . . . . . . . .24
(EverFresh+) . . . . . . . . . . . . . . . . . . . . . . . . . .24
6.11 Butter & Cheese section . . . . . . . . . . . . .25
6.12 Icematic . . . . . . . . . . . . . . . . . . . . . . . . .25
6.13 Movable Middle Section . . . . . . . . . . . . . .25
6.14 Cool Control Storage Compartment . . . . .25
6.15 Blue light . . . . . . . . . . . . . . . . . . . . . . . . .26
6.16 Odour filter. . . . . . . . . . . . . . . . . . . . . . . .26
7. Maintenance and cleaning 27
7.1 Avoiding bad odors . . . . . . . . . . . . . . . . .27
7.2 Protecting the plastic surfaces . . . . . . . . .27
8. Troubleshooting 28

4 319 EN Refrigerator / User Manual
1 Important Instructions Regarding Safety and Environment
This chapter contains safety information
that will help you avoid the risk personal
injury or property damage. Failure to
follow these instructions shall render any
product warranty void.
1.1 Intended use
A
WARNING:
the appliance enclosure or in
the built-instructure, clear of
obstruction.
A
WARNING:
Do not use mechanical
devices or other means to
accelerate the defrosting
process, other than those
recommended by the
manufacturer.
A WARNING:
Do not damage the refrigerant
circuit.
A
WARNING:
Do not use electrical
appliances inside the food
storage compartments of the
appliance, unless they are of
the type recommended by the
manufacturer.
This appliance is intended to be used in
household and similar applications such
as
– staff kitchen areas in shops, offices and
other working environments;
– farm houses and by clients in hotels,
motels and other residential type
environments;
– bed and breakfast type environments;
– catering and similar non-retail
applications.
1.2 General Safety
This appliance is not intended for use by
persons (including children) with reduced
physical, sensory or mental capabilities, or lack
of experience and knowledge, unless they have
been given supervision or instruction concerning
use of the appliance by a person responsible for
their safety. Children should be supervised to
ensure that they do not play with the appliance.
Failure to follow the instructions and
uncontrolled use of the product lead to
dangerous results!
Unplug the product if you encounter a
failure during use.
If the product malfunctions, it must
not be operated until repaired by the
authorised service provider. Risk of
electric shock!
Plug the product into a grounded socket
protected by a fuse that corresponds
to the value on its nameplate. Have
a qualified electrician ground the
product. Our company cannot be held
responsible for damages resulting
from the failure to use the product with
a grounded socket pursuant to local
regulations.
Unplug the product when not in use.
Never wash the product by spreading
or pouring water onto it! Risk of electric
shock!
Never touch the plug with wet hands!
Never unplug the product by pulling the
cable. Always pull the plug by holding
the socket.
Do not plug the refrigerator if the wall
socket is loose.
Never connect your refrigerator to
energy saving devices. Such systems

5 / 31 EN Refrigerator / User Manual
Important instructions for safety and environment
1 Important Instructions Regarding Safety and Environment
are harmful to your product.
Unplug the product during installation,
care, cleaning and repairing procedures.
Always have the Authorised Service
Provider install the product and
establish its electrical connections. The
manufacturer cannot be held responsible
for damages caused by procedures
performed by unauthorised persons.
Do not eat cone ice cream or ice cubes
immediately after you take them out
of the freezer compartment! This may
cause frostbite in your mouth!
Do not touch frozen food with wet
hands! They may stick to your hand!
Do not put bottled or canned liquid
beverages in the freezer compartment.
They may burst!
Never use steam or steam cleaners to
clean or defrost the refrigerator. Steam
gets into contact with the live parts in
your refrigerator, causing short circuit or
electric shock!
WARNING: When positioning the
appliance, ensure the supply cord is not
trapped or damaged.If the supply cord
is damaged, it must be replaced by the
manufacturer, its service agent or similarly
qualified persons in order to avoid a hazard.
WARNING: Do not locate multiple
portable socket-outlets or portable power
supplies at the rear of the appliance.
Do not use mechanical devices or other
means to accelerate the defrosting
process other than those recommended
by the manufacturer.
Never use the parts in your refrigerator
such as the door and drawer as a means
of support or step. This may cause the
product to tip over or damage the parts
of it.
Do not damage the parts where the
refrigerant is circulating with drilling or
cutting tools. The refrigerant that might
blow out when the gas channels of the
evaporator, pipe extensions or surface
coatings are punctured causes skin
irritations and eye injuries.
Do not cover or block the ventilation
holes in your refrigerator with any object.
Place the beverage with higher proofs
tightly closed and vertically.
Do not use gaseous sprays near the
product since there is the risk or fire or
explosion!
Flammable items or products that
contain flammable gases (e.g. spray) as
well as explosive materials should never
be kept in the appliance.
Do not place vessels filled with liquid
onto the product. Splashing water on an
electrical part may cause electric chock
or the risk of fire.
Do not store items that need precise
temperature adjustment (such as
vaccines, heat-sensitive medication,
science materials etc.) in the refrigerator.
If you are not going to use the product
for a long time, unplug it and remove the
food in it.
If there is a blue light on the refrigerator,
do not look at this light with optical tools.
Exposing the product to rain, snow,
sun or wind is dangerous in terms of
electrical safety.
In products with mechanical control
(thermostat), wait for 5 minutes to plug
in the product again after unplugging.
Do not overload the refrigerator. Objects
in the refrigerator may fall down when
the door is opened, causing injury or
damage. Similar problems may arise if
any object is placed onto the product.
If the product has a door handle, do not
pull the handle when re-locating the
product. The handle might be loose.
Be careful not to jam your hand or any
other body part in the moving parts of
the refrigerator.

6 319 EN Refrigerator / User Manual
Important instructions for safety and environment
Do not put your hand or any other
foreign materials into the ice machine
while it is operating.
1.3 Hydrocarbon (HC) Warning
If your product’s cooling system
contains R600a:
This gas is flammable. Therefore, pay
attention not to damage the cooling
system or the piping during use and
transportation. If damaged, keep the
product away from potential fire sources
that may cause it to catch fire and
ventilate the room where the product is
placed.
C
If the product is damaged and
if you see gas leak, please
keep away from the gas. It may
cause frostbite when it gets into
contact with the skin.
(including R134)
CIgnore this warning if the cooling
system of your product contains
R134a.
C
Type of gas used in the product
is stated on the type plate which
is on the left wall inside the
refrigerator.
AWARNING:
Never throw the product into fire
for disposal.
1.4 For Products with a Water
Dispenser/Ice Machine
Use only drinking water. Do not fill the
water tank with fruit juice, milk, fizzy
beverages, alcoholic beverages or any
other liquids incompatible for use in the
water fountain. This may cause risk to
your health and safety.
Do not allow the children to play with
the water dispenser or Ice Maker to
prevent accidents and injuries.
Do not insert your fingers or other
objects inside the hole of the water
dispenser, ice channel or inside the
container of the Ice Maker. This may
cause injuries or material damages.
Pressure for cold water inlet shall be
maximum 90 psi (620 kPa). If your
water pressure exceeds 80 psi (550
kPa), use a pressure limiting valve in
your mains system. If you do not know
how to check your water pressure, ask
for the help of a professional plumber.
If there is a risk of water impact in
your installation, always use a water
impact protection equipment in that
installation. Please consult professional
plumbers if you are not sure if there is
water impact in your installation.
Do not make installation on the hot
water inlet.
Take the necessary measures against
the freezing risk of the hoses. The
water temperature operating range
must be 0.6°C (33°F) minimum and
38°C (100°F) maximum.
A
WARNING:
Never connect the product
to a cold water mains with a
pressure of 550 kPa (80 psi)
or above.
1.5 Intended Use
This product has been designed for
domestic use. It is not suitable for
commercial use and it must not be
used out of its intended use.
It must be used only for storing food.
The manufacturer will not take any
responsibility for damages resulting
from improper use or transport.

7 / 31 EN Refrigerator / User Manual
Important instructions for safety and environment
Original spare parts will be available for
10 years after the purchase date of the
product.
1.6 Children’s Safety
If there is a lock on the door of the
product, the key should be kept out of
the reach of children.
Do not let children play with the product.
A
CAUTION:
To Prevent A Child From Being
Children And Not In The Vicinity Of
Freezer Or Refrigerator.
A
WARNING:
Before disposing your old
refrigerator or freezer:
Children may get locked
inside.
Remove the doors.
Leave the shelves to prevent
children from getting inside
the product easily.
1.7 Compliance with the WEEE
Directive and Disposing
the Waste Product:
This product conforms to the EU
WEE Directive (2012/19 EU). This
product bears a classification symbol
for waste electrical and electronic
equipment (WEEE). This product has
been manufactured from high quality
parts and materials which can be
reused and are suitable for recycling. Therefore,
do not dispose the product with normal domestic
waste or other waste at the end of its service life.
Take it to a collection centre for recycling electrical
and electronic equipment. Please consult local
authorities to learn about the locations of such
collection centres.
1.8 Compliance with the
RoHS Directive:
The unit you have purchased conforms to the EU
RoHS Directive (2011/65/EU). It does not contain
harmful or prohibited materials specified in the
Directive.
1.9 Packaging Information
Packaging materials of the product have been
manufactured from recyclable materials in
accordance with our National Environment
Regulations. Do not dispose the packaging
materials with normal domestic waste or other
types of waste. Take these materials to a
recycling point designated by local authorities.
A
DANGER:
Risk of Fire or Explosion:
This product uses flammable
refrigerant.
Do not use mechanical devices to
defrost the refrigerator.
Do not use chemicals for cleaning.
Do not pierce the refrigerant pipe.
If the refrigerant pipe is pierced, it
must be repaired only by licensed
service personnel.
Please consult the repair/user manual
before cleaning the product. All safety
instructions must be followed.
Dispose the product according to
federal or local regulations.

8 319 EN Refrigerator / User Manual
2.1 Compliance with the WEEE
Directive and Disposing
of the Waste Product:
This product complies with EU WEEE Directive
(2012/19/EU). This product bears a classification
symbol for waste electrical and electronic
equipment (WEEE).
This symbol indicates that this product
shall not be disposed with other
household wastes at the end of its
service life. Used device must be
returned to offical collection point for
recycling of electrical and electronic devices. To
find these collection systems please contact to
your local authorities or retailer where the product
was puchased. Each household performs
important role in recovering and recycling of old
appliance. Appropriate disposal of used appliance
helps prevent potential negative consequences for
the environment and human health.
2.2 Compliance with RoHS Directive
The product you have purchased complies with EU
RoHS Directive (2011/65/EU). It does not contain
harmful and prohibited materials specified in the
Directive.
2.3 Package information
Packaging materials of the product are
manufactured from recyclable materials
in accordance with our National
Environment Regulations. Do not
dispose of the packaging materials together with
the domestic or other wastes. Take them to the
packaging material collection points designated by
the local authorities.
2 Environmental instructions

9 / 31 EN Refrigerator / User Manual
CFigures in this user manual are schematic and may not match the product exactly. If the subject parts
are not included in the product you have purchased, then those parts are only valid for other models.
*2
*3
4
5
6
7
*8
9
1
10
11
5
1- Control and indicator panel
2- Butter & Cheese section
3- 70 mm moving door shelf
4- Fridge compartment glass shelf
5- Fridge compartment crisper
6- Gallon door shelf
7- Chiller compartment
8- Icebox drawer
9- Multizone compartment glass shelf/cooler
10- Freezer compartment drawers
11- Multizone Compartment's drawer
* OPTIONAL
3 Your Refrigerator

10 319 EN Refrigerator / User Manual
4 Installation

11 / 31 EN Refrigerator / User Manual
Installation

12 319 EN Refrigerator / User Manual
Installation

13 / 31 EN Refrigerator / User Manual
Installation
4.2 Appropriate installation location
from heat sources such as cooktops, ovens,
space heaters, radiators and stoves at least
must not be subjected to direct sun light and
kept in humid places after installation.
as rugs or carpets.
prevent wobbling.
temperature falls below 50F°/10ºC.
CIf two refrigerators are to be installed side
by side, there should be at least 1 1/2
(4 cm) distance between them.
around the appliance to ensure free air
circulation.
refrigerator and the rear wall. To ensure this,
attach the gray, rectangular buffers, to be
installed on the top rear of the refrigerator.
These are shipped inside the crisper drawer in
the Fresh Food compartment.
4.1 Before Installation
measurements are sufficient to receive the
product and that the appropriate electrical and
plumbing connections are present.
installation of the product. To make the product
ready for use, make sure that the electricity
installation is appropriate before calling the
Authorized Service Agent. If not, call a qualified
electrician to have any necessary arrangements
carried out.
Part number of the filter is 4918450200 and
you can use this part number when ordering
replacement filters.
CPreparation of the location and electrical
installation at the place of installation is
under customer's responsibility.
CPlumbing: The refrigerator should only
be connected to the cold water line.
BProduct must not be plugged in during
installation. Otherwise, there is the risk of
death or serious injury!
B
WARNING: Installation and electrical
connections of the product must be carried
out by the Authorized Service Agent.
Manufacturer shall not be held liable for
damages that may arise from procedures
carried out by unauthorized persons.
A
WARNING: Prior to installation, visually
check if the product has any defects on
it. If so, do not have it installed. Damaged
products cause risks to your safety.

14 319 EN Refrigerator / User Manual
Installation
BWARNING: Damaged power cable must
be replaced by the Authorized Service
Agents.
B
WARNING: If the product has a failure, it
should not be operated unless it is repaired
by the Authorized Service Agent! There is
the risk of electric shock!
4.5 *Adjusting the feet
After moving the refrigerator into place, we
recommend lowering the feet to secure the
if the product is not balanced. Twist the feet in
the desired direction according to the illustration
below. Adjusting the feet can also be used to align
the doors.
4.3 Installing the plastic wedges
Plastic wedges supplied with the product are
used to create the distance for the air circulation
between the product and the rear wall.
1.
To install the wedges, remove the screws on the
product and use the screws supplied together with the
wedges.
2.
Insert the 2 plastic wedges onto the rear ventilation
cover as illustrated in the figure.
4.4 Electrical connection
120VAC, 60Hz, Dedicated 15Amp
Circuit.
but any failure of the GFCI could cause
food spoilage, which is not covered by the
manufacturer’s warranty.
regulations.
after installation.
or multi-plugs.
To adjust the doors vertically,
Loosen the fixing nut located at the bottom.
Rotate the adjusting nut according to the position
of the door (clockwise/counter-clockwise).
Tighten the fixing nut in order to fix the position.
To adjust the doors horizontally,
Loosen the fixing nut located at the top.

15 / 31 EN Refrigerator / User Manual
Installation
B
WARNING: First unplug the product.
Product must not be plugged in when
adjusting the feet. There is the risk of
electric shock!
adjusting nut
fixing nut
fixing nut
adjusting nut
Rotate the side adjusting nut according to the
position of the door (clockwise/counter-clockwise).
Tighten the fixing nut which is at the top in order to
fix the position.
4.6 Illumination lamp
Do not attempt to repair yourself but call the
Authorized Service Agent if the LED illumination
lamps do not go on.
The lamp(s) used in this appliance is not suitable
for household room illumination. The intended
purpose of this lamp is to assist the user to place
foodstuffs in the refrigerator/freezer in a safe and
comfortable way.
4.7 Door/Drawer Open Warning
An audio warning signal will be given when the
door of your product is left open for 1 minute. This
warning will be muted when the door is closed or if
any of the display buttons are pressed.
Display
4.8 Water connection
First you must connect the water hose to the
refrigerator.
AWARNING: Refrigerator and the pump, if
any, must be unplugged during connection.
4.9 Connecting the water
hose to the refrigerator
3.
Remove the valve channel cover (A) from the water
inlet valve.
4.
Connect the water line (C) to the inlet valve (B) and
tighten by hand to secure it. It is not necessary to use
pliers, but if there is a leak, you may tighten slightly
with a pair of pliers.

16 319 EN Refrigerator / User Manual
Installation
4.10 Connecting the water line
to the water supply
Connect the water line to a water supply valve. If a
valve is not present or you are not sure, consult a
qualified plumber.
4.11 Installing the Internal
Water Filter
Installing the internal water filter consists of two
steps:
1.
Press and hold the Freezer Temp Set key for 3
seconds, or until the no ice icon appears in the display.
2.
Slide the filter cover forward to open the filter
compartment.
3.
Tilt the bypass plug down and pull straight out to
remove it.
4.
Insert the filter into the housing and push it up to a
horizontal position.
5.
Close the filter cover and push it back into place.
6.
Press and hold the Freezer Temp Set key
again for 3 seconds.
The Filter End of Life warning will appear in
approximate 130 days, requiring you to replace
the filter with the same steps as listed above. After
key for 3 seconds, or until the Filter End of
Life Warning goes out in the display.
4.12 Before using the water dispenser
The water system connections should be made
by an Authorized Service Agent, with the necessary
tools.
only with water. Do not attempt to connect to
beverages such as soft drinks or juices.
bled out of the system before the intial use.
To remove the air in the line, place a container
beneath the water dispenser nozzle and depress
the dispenser paddle for 1-2 minutes until only
water comes out.
consumed.It will take approximately 12 hours
before the water being dispensed cools down to
refrigerated temperatures.
paddle before removing your container, as this
will reduce the potential for dripping into the
dispenser tray.

17 / 31 EN Refrigerator / User Manual
5 Preparation
C
starts up. The liquids and gases sealed
within the refrigeration system may also
give rise to noise, even if the compressor is
not running and this is quite normal.
CFront edges of the refrigerator may
feel warm. This is normal. These areas
are designed to be warm to avoid
condensation.
To allow the fresh food compartment keep its
ideal storage temperature, sensor must not be
covered by food.
Before starting to use the product, check that all
preparations are made in accordance with the
instructions in sections "Important instructions for
safety and environment" and "Installation".
Clean the interior of the refrigerator as
recommended in the “Maintenance and
interior is dry before operating.
Plug the refrigerator into the grounded wall
outlet. When the door is opened the interior
illumination will turn on.
To be able store maximum food in the freezer
compartment of your refrigerator, the upper
drawer has to be removed and placed on top
of glass shelf. Power consumption stated for
your refrigerator has been determined after
removing the icematic and the upper drawers
as to allow maximum loading. It is strongly
recommended to use the lower drawers in the
freezer and the multizone compartment while
loading.
Run the refrigerator without putting any food
for 6 hours and do not open its door unless
absolutely required.
Do not allow the food to touch the temperature
sensor in fresh food compartment.

18 319 EN Refrigerator / User Manual
6 Display and operating the product
C*optional: Figures in this user manual are schematic and may not match the product exactly. If the
subject parts are not included in the product you have purchased, then those parts are valid for other
models.
6.1 Indicator panel
Touch-control indicator panel allows you to set the temperature and control the other functions of the
refrigerator. Just press the relevant buttons for function settings.

1.On/Off function
Press the On/Off button for 3 seconds to turn off
or turn on the fridge.
2.Quick freeze function button
Press this button to activate or deactivate the
quick freeze function. When you activate the
function, the freezer compartment will be cooled
to a temperature lower than the set value.
CUse the quick freeze function when you
want to quickly freeze the food placed
in freezer compartment. If you want
to freeze large amounts of fresh food,
activate this function before putting the
food into the product.
CIf you do not cancel it, Quick Freeze
will cancel itself automatically after 4
hours at the most or when the fridge
compartment reaches to the required
temperature.
C
This function is not recalled when
power restores after a power failure.
3.Select button
Use this button to select the cabin whose
temperature you want to change. Switch
between the cabins by pressing this button.
The selected cabin can be understood from the
cabin icons (6, 25, 24 ). Whichever cabin icon
is power on, the cabin, whose temperature set
value you want to change, is selected. Then, you
can change the set value by pressing the cabin
set value Temperature Adjustment button (4)
4.Temperature Adjustment / Temperature
Decrease
When pressed, decreases the temperature of
the selected compartment.
5-Quick freeze Indicator
This icon lits when the Quick freeze function
is active.
6. Fridge compartment indicator
When this indicator is active, the temperate
of the fridge compartment is displayed
on the temperature value indicator.Fridge
compartment can be set to 8, 7, 6, 5,
4, 3, 2 or 1°C / 46, 45, 44, 43, 42, 41,
40,39,38,37,36,35,34 or 33°F by pressing
Temperature Adjustment button (4).
7. Temperature value indicator
Shows the temperature value of the selected
compartment.
8. Fahrenheit indicator
It is a Fahrenheit indicator. When the
Fahrenheit indication is activated, the
temperature set values are shown in
Fahrenheit and the relevant icon turns on.
9. Joker fridge icon
When you select the joker fridge icon using
(17) the joker cabin turns into a fridge cabin
and operates as a cooler.
10. Joker cabin icon
It shows joker cabin icon.
Display and operating the product
1 2 3 4
5678910
*11
12 13 14
15
16 17 18
19
20
21
22
23
24
2526

19 / 31 EN Refrigerator / User Manual
Display and operating the product
11. Joker freezer icon
When you select the joker freezer icon using
the joker cabin turns into a freezer cabin and
operates as a freezer.
12. Power failure/High temperature / error
warning
This indicator illuminates during power failure,
high temperature failures and error warnings.
During long-term power failures, the highest
temperature value that the freezer compartment
reaches will blink on the digital display. After
checking the food located in the freezer
compartment, press the alarm off button (19) to
clear the warning.
13.Setting the Celsius and Fahrenheit
indicator
Hover over this key using the FN key and select
the relevant temperature type is selected, the
Fahrenheit and Celsius indicator turns on.
14. Vacation function icon
Press the FN key (until it reaches the umbrella
icon) to activate the vacation function. When you
hover over the vacation function icon, it start
flashing. Thus, you can understand whether the
vacation function will be activated or deactivated.
function indicator lights continuously and thus
key to cancel the vacation function. Thus, the
vacation function indicator will start flashing and
the vacation function will be cancelled.
15. Quick cooling function indicator
It turns on when the quick fridge function is
activated.
16. FN button
Using this key, you can switch between the
functions that you want to select. Upon pressing
this key, the icon, whose function is required
to be activated or deactivated, and this icon’s
indicator starts flashing. The FN button gets
need to press this button to change the functions
again.
17. OK button
After navigating the functions using the FN
button, when the function is cancelled via the
the function is activated, it remains on. The
indicator continues to flash in order to show
the icon it is on.
18. Quick cooling function button
The button has two functions. To activate or
deactivate the quick cool function, press it
briefly. Quick Cool indicator will turn off and the
product will return to its normal settings.
19. Alarm off warning
In case of power failure/high temperature
alarm, after checking the foods in the freezer
compartment, press the alarm off button to
clear the High temperature warning icon (12).
20. Filter reset
The filter is reset when the alarm off button
(19) is pressed for 3 seconds. Filter reset icon
goes off.
21. Eco fuzzy function icon
Press the FN key (until it reaches the letter e
icon) to activate the eco fuzzy. When you hover
over the eco fuzzy icon it start flashing. Thus,
you can understand whether the eco fuzzy
function will be activated or deactivated. When
icon lights continuously during this process. If
you do not press any button after 20 seconds,
the icon remains on. Thus, the eco fuzzy
function is activated. In order to cancel the eco
fuzzy function, hover over the icon again and
icon will start flashing. If you do not press any
button within 20 seconds, the icon will go off
and the eco fuzzy function will be cancelled.
22. Ice machine off icon
Press the FN key (until it reaches the ice icon)
to switch off the ice machine. The ice machine
off icon start flashing when you hover over
it, thus you can understand whether the ice
machine will be turned on or off. When you

20 319 EN Refrigerator / User Manual
lights continuously during this process. If you
do not press any button after 20 seconds, the
icon and the indicator remains on. Thus, the
ice machine is switched off. In order to switch
on the ice machine again, hover over the icon.
The ice machine off icon will start flashing.
If you press ok button, the icon will go off
and thus the ice machine will be switched on
again.
CIndicates whether the icematic is on
or off.
CWater flow from water tank will
stop when this function is selected.
However, ice made previously can be
taken from the icematic.
23. Filter reset icon
This icon turns on when the filter needs to be
reset.
24. Celsius indicator
It is a Celsius indicator. When the Celsius
indication is activated, the temperature set
values are shown in Celsius and the relevant
icon turns on.
25. Joker compartment indicator
When this indicator is active, the temperate
of the joker compartment is displayed on the
temperature value indicator. Le compartiment
Joker peut être réglé sur 10, 8, 6, 4, 2, 0, -2
et -6 °C /50, 46, 42, 39, 35, 32, 28 et 21 °F
en mode réfrigérateur et sur -15, -16, -18,
-19, -20, -21 et -22 °C /5, 3, 0, -2, -4, -5 et
-7 °F en mode congélateur en appuyant sur
le bouton de réglage de température (4).
26. Freezer compartment indicator
When this indicator is active, the temperate
of the freezer compartment is displayed
on the temperature value indicator.Freezer
compartment can be set to -15, -16, -18,
-19, -20, -21 and -22 °C /5, 3, 0, -1, -2,
-3, -4, -5, -6, -7 and -8 °F by pressing
Temperature Adjustment button (4).
This manual suits for next models
1
Table of contents
Languages:
Other Beko Refrigerator manuals

Beko
Beko TLDA 662 Owner's manual

Beko
Beko LSA 426 User manual

Beko
Beko FSE1074 CHN User manual

Beko
Beko BTS 116000 User manual

Beko
Beko FGA953-956 User manual

Beko
Beko RCHA270K30WN User manual

Beko
Beko CN152220DE 1 User manual

Beko
Beko CN 153220 E User manual

Beko
Beko GNE114622X User manual

Beko
Beko TSE 1284 User manual

Beko
Beko BBBF3019IMWE User manual

Beko
Beko DBK386WDR+ User manual

Beko
Beko DSA25020 User manual

Beko
Beko RCNE720E3VZW User manual

Beko
Beko DDEN507XD+ User manual

Beko
Beko CDA 541 User manual

Beko
Beko CFG1691DX User manual

Beko
Beko FN 132820 User manual

Beko
Beko RDNE650E40DXBR User manual

Beko
Beko TF546APW User manual