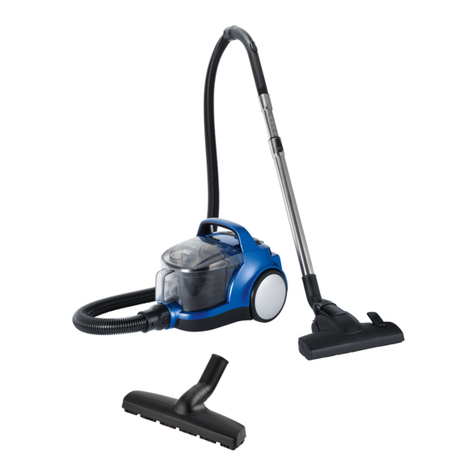
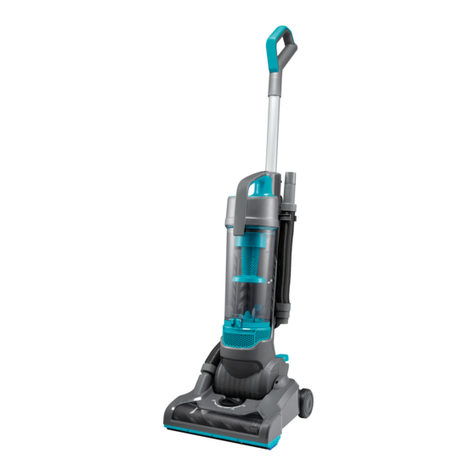
Beko VCC 6480 User manual

VCC 6480
Vacuum Cleaner
User Manual
01M-8835783200-3916-01
EN FR RO SL SV
CS BG HU PL

Please read this manual first!
Dear Valued Customer,
Thank you for preferring this Beko appliance. We hope that you get the best results
from your appliance which has been manufactured with high quality and state-of-the-
art technology. For this reason, please read this user manual and all other provided
documents carefully before using the appliance and keep it as a reference for future
use. If you hand over the appliance to someone else, give the user manual as well.
Follow the instructions by paying attention to all the information and warnings in the
user manual.
Meanings of the Symbols
Following symbols are used in various sections of this manual:
C
Important nformaton and useful
hnts about usage.
AWARNING:
Warnngs aganst
dangerous stuatons concernng the
securty of lfe and property.
Protecton class for electrc shock.
This product has been produced in environmentally friendly, modern facilities.
Made in P.R.C.
Does not contain PCB.

Vacuum Cleaner / User Manual 3 / 95 EN
CONTENTS

4 / 95 EN Vacuum Cleaner / User Manual
Ths secton contans safety
nstructons that wll help protect
from rsk of personal njury or
property damage.
Falure to follow these
nstructons nvaldates the
granted warranty.
1.1 General safety
•Ths applance comples wth
the nternatonal securty
standards.
•Ths applance can be used by
chldren aged from 8 years and
above and persons wth reduced
physcal, sensory or mental
capabltes or lack of experence
and knowledge f they have
been gven supervson or
nstructon concernng use of
the applance n a safe way
and understand the hazards
nvolved. Chldren shall not play
wth the applance. Cleanng
and user mantenance shall not
be made by chldren wthout
supervson.
•Do notuse tf thepower cableor
the applance tself s damaged.
Contact an authorzed servce.
•Your mans power supply should
comply wth the nformaton
suppled on the ratng plate of
the applance.
•The mans supply of the
applance must be secured wth
a mnmum 16 A fuse.
•Do not use the applance wth
an extenson cord.
•In order to prevent the power
cable from gettng damaged,
make sure that t doesn’t get
stuck, twsted or rub aganst
sharp surfaces.
•Do not touch the applance or ts
plug when t s plugged f your
hands are damp or wet.
•Do not pull the power cable when
unpluggng the applance.
•Do not vacuum flammable
materals and when vacuumng
cgarette ashes make sure that
t got cold.
•Do not vacuum water or other
lqud materals.
•Protect the applance from ran,
humdty and heat sources.
1Important safety and envronmental nstructons

Vacuum Cleaner / User Manual 5 / 95 EN
•Never use the applance
n or near to combustble
or nflammable places and
materals.
•Unplug the applance before
cleanng and mantenance.
•Do not dp the applance or ts
cable n water to clean t.
•Check the hose of the applance
regularly. Do not use f t s
damaged and contact an
authorzed servce.
•Do not attempt to dsmantle the
applance.
•Only use the orgnal parts or
parts recommended by the
manufacturer.
•If heavly used for cleanng dust
such as cement or grout the
dust ndcator wll lt earler then
expected, n such case replace
the dust bag even t s empty.
•Do not use the applance
wthout flters; otherwse t can
get damaged.
•When vacuumng the stars,
the applance should be located
below the user.
•If your store the package
materal, keep t out of the
reach of chldren.
1.2 Complance wth the WEEE
Drectve and dsposal of
waste products
Ths product does not nclude harmful and
prohbted materals specfed n the
“Regulaton for Supervson of the Waste
Electrc and Electronc Applances” ssued
by the Mnstry of Envronment and Urban
Plannng. Ths applance conforms to the WEEE
regulaton. Ths product has been manufactured
wth hgh qualty parts and materals whch can be
reused and are sutable for recyclng. Therefore,
do not dspose the product wth normal domestc
waste at the end of ts servce lfe. Take t to a
collecton pont for the recyclng of electrcal and
electronc equpment. Ask the local authorty n
your area for these collecton ponts. Contrbute to
the preservaton of envronment and natural
sources by takng the used products to the
recyclng ponts.
1.3 Package nformaton
Package of the product s made of
recyclable materals n accordance wth
our Natonal Legslaton. Do not dspose
of the packagng materals together wth
the domestc or other wastes. Take them to the
packagng materal collecton ponts desgnated
by the local authortes.
1Important safety and envronmental nstructons

6 / 95 EN Vacuum Cleaner / User Manual
2.1 Overvew
The values whch are declared n the markngs affxed on your applance or other prnted documents suppled wth t represent
the values whch were obtaned n the laboratores pursuant to the pertnent standards. These values may vary accordng to the
usage of the applance and ambent condtons.
2Your vacuum cleaner
1. Dsplay and touch control panel
2. Cable wndng button
3. On/Off button
4. Wheel
5. Hose cap
6. Sucton nozzle
7. Upper cover
8. Button for openng the dust contaner
9. Carrage handle
10. Hose
11. Parquet/carpet brush adjustment latch
12. Parquet/carpet brush
13. Telescopc tube adjustment latch
14. Telescopc tube
15. Vacuum control
16. Handle
17. Hard floor brush
2.2 Techncal data
Power :
800 W
Sound level :
73 dBA
Net weight :
5,1 kg
Supply voltage :
220-240 V~, 50-60 Hz
Dust volume :
3,5 L
Operating radius :
10 m
Energy class :
A
Filter :
HEPA13
Dust collecting on
carpet :
C
Dust collecting on
hard surface :
A
Dust emission :
A
Techncal and desgn modfcatons are reserved.
1
2
3
4
8
9
10
65
16
15
14
13
12 11
7
17

Vacuum Cleaner / User Manual 7 / 95 EN
3Operaton
3.1 Intended use
The applance was desgned for household use
and s not sutable for ndustral use.
3.2 Insertng/removng the
hose
1. Push the hose nozzle (10) n the arrow drecton
nto to the hose nlet (5).
•The fasteners on the hose nozzle (5) should
clck nto poston.
2. Press the fasteners on the hose nozzle (10) n
order to remove the hose (5).
3.3 Insertng/removng the
telescopc tube
1. Insert the telescopc tube (14) nto the end of
the handle (16).
2. Pull the telescopc tube (14) from the handle
(16) to remove t.
3. Push the heght settng swtch (14) n the arrow
drecton and pull from ts end n order to adjust
the length of the telescopc tube (13).
3.4 Attachng/removng the
parquet/carpet brush
1. Attach the telescopc tube (14) to the parquet/
carpet brush (12).
2. Pull the telescopc tube (14) from the parquet/
carpet brush (12) to remove t.
3.5 Adjustng the parquet/
carpet brush
Shft the latch (11) on the parquet/carpet brush
(12) or;
•to “ ” poston for hard floors and parquet.
•to “ ” poston for carpets and rugs.
3.6 Operaton
1. Pull the plug behnd the applance and plug t n
the socket.
2. Press the ON/OFF button (3) to start or stop the
applance.

8 / 95 EN Vacuum Cleaner / User Manual
3.6.1 Adjustng the sucton
power
You can adjust the sucton power usng the + / -
keys of the touch control panel (1) found on the
vacuum cleaner.
1 2 3 4 5
1. Use your applance at level to clean sofas.
2. Use your applance at level to clean curtans
and table cloths.
3. Use your applance at level to clean carpets.
4. Use your applance at level to clean rugs.
5. Use your applance at level to clean hard
surfaces.
3.6.2 Sucton power adjustment
control
You can lower the sucton power of the parquet/
carpet brush at a certan level by pullng backward
the sucton power adjustment control (15) located
on the handle (16) wthout the need to use the
control panel (1) found on the product.
3.6.3 Dust ndcator
When your dust bag s full, all cons on the dsplay
and on the touch control panel (1) wll start to
flash smultaneously. Replace the dust bag.
3.7 Accessores
Crevice tool
Sutable for cleanng “hard-to-
reach” areas ncludng spaces bet-
ween chars and furnture.
Upholstery tool
Sutable for floors, cleanng
starways, automobles, sofas and
chars etc.
AWARNING:
Do not use t by
holdng the outer end of the handle
(16).
3.8 Hard floor brush
The hard floor brush (17) was developed for use
on hard floors such as tle, ceramc, parquet,
wooden floors etc.
It prevents potental scratches whle cleanng
hard floors thanks to ts specally-developed soft
har.
3Operaton

Vacuum Cleaner / User Manual 9 / 95 EN
3Operaton
3.9 Warnngs regardng the
energy label
Ths s a general-purpose vacuum cleaner. In
order to reach the hghest energy effcency and
cleanng performance class specfed n carpet
and parquet cleanng, please use the regular
hgh-performance parquet/carpet brush (12).
The specfed values regardng the energy label
were determned accordng to the predefned
measurement methods (n lne wth EN60312-1).
3.10 Turnng off the vacuum
cleaner and parkng
1. Turn off the devce by pressng the ON/OFF
button (3) and plug t out.
2. Wnd the power cable by pressng the power
cable wndng button (2).
Vertical parking
Attach the hook of the parquet/carpet brush to
the parkng slot under the applance.
Horizontal parking
Attach the hook of the parquet/carpet brush to
the parkng slot behnd the applance.

10 / 95 EN Vacuum Cleaner / User Manual
4Cleanng and care
Before cleanng your applance, turn off and
unplug.
AWARNING:
Never use gasolne,
solvent, corrosves, metal objects
or hard brushes for cleanng your
applance.
4.1 Replacng the dust bag
When your dust bag s full, all cons on the dsplay
and on the touch control panel (1) wll start to
flash smultaneously. Replace the dust bag.
1. Open the upper cover (8) by pressng the button
for openng the dust contaner (7).
2. Remove the dust bag from the bag holder by
pullng t from ts tray.
3. Dspose the full dust bag.
4. Holdng ts tray, push the new dust bag nto the
bag holder. Ensure that t s fully seated.
5. Close the upper cover (7) of the applance.
AWARNING:
Do not force the
upper cover (7) to close t, otherwse
the plastc parts can be damaged.
A
WARNING:
Dust bags not
purchased from authorzed dealers
orservcesarenotorgnal.Suchdust
bags have a lesser qualty and they
become torn n a shorter perod and
render your applance noperable.
Faults caused by usng unauthentc
dust bags are not covered by the
scope of the warranty.
AWARNING:
Do not wash a dust
bag.
4.2 Cleanng the flters
HEPA flterSponge flterMotor
protecton
flter
After 5 dust bag replacements (ths number vares
dependng on the usage frequency and area),
clean the flters.
Whle you empty the dust accumulated n the
dust contaner to clean the contaner, you need to
clean the motor protecton flter, the foam flter
and HEPA flter as well.
AWARNING:
For dryng flters,
do not use applances such as
hardryers, stoves or other sources
of hot ar.
A
WARNING:
Do not mount back
the flters before they are dred
properly; otherwse a smell of
humdty may dssemnate on the
ar, water may splash from the rear
part or flters may get damaged.
AWARNING:
Put the flters back
to ther orgnal place when they are
dry.

Vacuum Cleaner / User Manual 11 / 95 EN
4.2.1 Motor protecton flter
1. Open the upper cover (8) by pressng the button
for openng the dust contaner (7).
2. Push the flter cover latches towards the arrow
drecton shown to open up the flter ld.
3. Remove the sponge from ts cagng.
4. Shake off and rnse t wth water. After rnsng,
gently squeeze the sponge..
4.2.2 Sponge flter
1. Push down the rear cover openng latch to open
the cover.
2. Remove the sponge placed on the back of the ld
to rnse t.
3. After rnsng, gently squeeze the sponge.
4.2.3 HEPA flter
1. Press the rear ld button to open and remove
the HEPA flter.
2. Shake off and rnse t wth water.
3. Leave the HEPA flter for dryng after rnsng.
4.3 Storage
•Store the applance carefully when you do no
want to use t for a long tme.
•Plug out the applance.
•Keep t away from chldren.
4Cleanng and care
Table of contents
Other Beko Vacuum Cleaner manuals

Beko
Beko 01M-8911593200-2322-05 User manual

Beko
Beko BKS 1210 User manual

Beko
Beko VRX 221 DR User manual

Beko
Beko VRT 71025 VW User manual

Beko
Beko VRR 60314 VW User manual

Beko
Beko VCO 42701 AB User manual

Beko
Beko VCO 6325 AB User manual

Beko
Beko VRT 74225 VI User manual

Beko
Beko VCO 6325 FD User manual

Beko
Beko VCO 4320 WR User manual

Beko
Beko VRT 61814 VR User manual

Beko
Beko BKS 9218 User manual

Beko
Beko VRS 82740 VF User manual

Beko
Beko 01M-8816523200-4720-03 User manual

Beko
Beko VCO 32801 AF User manual

Beko
Beko VCM 7180 P User manual

Beko
Beko BKS 9220 T User manual

Beko
Beko BKS 1350 T User manual

Beko
Beko BKK 1182 P User manual

Beko
Beko VCO 62602 AB User manual