Beko WCV7612X0 User manual

2302061384_EN/ 15-01-19.(11:35)
Washing Machine
User’s Manual
WCV7612X0
EN
Document Number=

1 General safety instructions
•While there is still water inside
the product, never open the
loading door or remove the filter.
Otherwise, risk of flooding and
injury from hot water will occur.
•Do not force open the locked
loading door. Door can be
opened a few minutes after the
washing cycle ends. In case
of forcing the loading door to
open, the door and the lock
mechanism may get damaged.
•Use detergents, softeners
and supplements suitable for
automatic washing machines
only.
•Follow the instructions on
the label of textiles and the
detergent package.
1.2 Hot surface safety
A
CAUTION!
•While washing the laundry
at high temperatures, the
loading door glass will get hot.
Considering this fact, during
washing operation keep the
children away from the loading
door of the product to prevent
them touching it.
This section includes security
instructions which may help prevent
the injuries and material damage risks.
All kinds of warranties shall be invalid if
these instructions are not observed.
1.1 Lfe and property safety
A
CAUTION!
•Never place the product on a
carpet-covered floor. Electrical
parts will get overheated since
air cannot circulate from under
the device. This will cause
problems with your product.
•Unplug the product if it is not in
use.
•Always have the installation and
repairing procedures carried
out by the Authorised Service
Agent. The manufacturer shall
not be held liable for damages
that may arise from procedures
carried out by unauthorised
persons.
•The water supply and
draining hoses must be
securely fastened and remain
undamaged. Otherwise, water
leak may occur.
This product was manufactured using the latest technology in environmentally friendly conditions.

3 / EN
Washing Machine / User’s Manual
1.3 Chldren’s safety
A
CAUTION!
•This product can be used by
the children who are at the
age of 8 and over and the
people whose physical, sensory
or mental skills are not fully
developed or who do not have
necessary required experience
and knowledge as long as they
are supervised or trained about
the safe use of the product and
its risks. Children should not
play with the device. Cleaning
and maintenance works should
not be performed by children
unless they are supervised by
someone. Children of less than
3 years should be kept away
unless continuously supervised.
A
CAUTION!
•Packaging materials may be
dangerous for the children.
Keep packaging materials in a
safe place away from reach of
the children.
•Electrical products are
dangerous for the children.
Keep the children away from
the product when it is in use.
Do not allow them to play
with the product. Use child
lock to prevent children from
intervening with the product.
A
CAUTION!
•Do not forget to close the
loading door when leaving the
room where the product is
located.
•Store all detergents and
additives in a safe place away
from the reach of the children
by closing the cover of the
detergent container or sealing
the detergent package.
1.4 Electrcal safety
B
DANGER!
•If the product has a failure, it
should not be operated unless
it is repaired by the Authorised
Service Agent. Risk of electric
shock!
•This product is designed to
resume operating in the event
of powering on after a power
interruption. If you wish to
cancel the programme, see
“Cancelling the programme”
section.

4 / EN
Washing Machine / User’s Manual
B
DANGER!
•Plug the product into a
grounded outlet protected by
a 16 A fuse. Do not neglect to
have the grounding installation
made by a qualified electrician.
Our company shall not be
liable for any damages that
will arise when the product
is used without grounding
in accordance with the local
regulations.
B
DANGER!
•Do not wash the product by
spraying or pouring water onto
it! Risk of electric shock!
•Never touch the power cable
plug with wet hands! Do not
grab the power cord to unplug
the machine, always unplug it
by holding the socket with one
hand, and pulling the plug with
the other hand.
•Product should be unplugged
during installation, maintenance,
cleaning and repair procedures.
B
DANGER!
•If the power cable is damaged,
it must be replaced by the
manufacturer, after sales service
or a similarly qualified person
(preferably an electrician) or
someone designated by the
importer in order to avoid
possible risks.
2.Important instructions for
environment
2.1 Compliance with WEEE Directive
This product complies with EU
WEEE Directive (2012/19/EU).
This product bears a classification
symbol for waste electrical and
electronic equipment (WEEE).
This product has been manufactured with
high quality parts and materials which can
be reused and are suitable for recycling. Do
not dispose of the waste product with normal
domestic and other wastes at the end of its
service life. Take it to the collection center
for the recycling of electrical and electronic
equipment. Please consult your local
authorities to learn about these collection
centers.
Compliance with RoHS Directive:
The product you have purchased complies
with EU RoHS Directive (2011/65/EU). It
does not contain harmful and prohibited
materials specified in the Directive.
2.2 Package information
Packaging materials of the product are
manufactured from recyclable materials in
accordance with our National Environment
Regulations. Do not dispose of the
packaging materials together with the
domestic or other wastes. Take them to
the packaging material collection points
designated by the local authorities.
3.Intended use
• Thisproducthasbeendesignedfordomestic
use. It is not for commercial purposes or it
should not be used out of its intended use.
• Theproductmustonlybeused
for washing and rinsing of laundry
that are marked accordingly.
• Themanufacturerwaivesanyresponsibility
arisen from incorrect usage or transportation.
• Theservicelifeofyourproductis10years.
During this period, original spare parts will be
available to operate the appliance properly.

5 / EN
Washing Machine / User’s Manual
4 Technical specifications
Electrical input (V/Hz)
Total current (A)
Total power (W)
Main model code
Maximum spin speed (rpm)
Complying Commission Delegated Regulation (EU) No 1061/2010
Supplier name or trademark
Model name
Rated capacity (kg)
Height (cm)
Width (cm)
Depth (cm)
Net weight (±4 kg.)
Single Water inlet / Double Water inlet
•Available
Beko
1200
84
60
55
60
• / -
230V~ /60Hz
10
9210
WCV7612X0
7
2200

6 / EN
Washing Machine / User’s Manual
4.1 Installation
• Applytothenearestauthorisedservice
agent for the installation of your product.
• Preparationofthelocationandelectrical,
tap water and waste water installations at
the place of installation is under customer's
responsibility.
• Makesurethatthewaterinletanddischarge
hoses as well as the power cable are not
folded, pinched or crushed while pushing
the product into its place after installation or
cleaning procedures.
• Makesurethattheinstallationandelectrical
connections of the product are performed
byauthorisedservice.Manufacturershall
not be held liable for damages that may
arise from procedures carried out by
unauthorised persons.
• Priortoinstallation,visuallycheckifthe
product has any defects on it. If so, do not
have it installed. Damaged products cause
risks for your safety.
4.1.1 Appropriate installation location
• Placetheproductonahardandlevelfloor.
Do not put it onto a carpet with high pile or
other similar surfaces.
• Whenthewashingmachineanddryerare
placed on top of each other, their total
weight –when loaded– amounts to 180 kg.
Place the product on a solid and flat floor
that has sufficient load carrying capacity!
• Donotplacetheproductonthepowercable.
• Donotinstalltheproductinthe
environments where the temperature falls
below 0 ºC.
• Leavingagapatthesidesofthemachineis
suggested to reduce vibration and noise
• Onagraduatedfloor,donotplacethe
product next to the edge or on a platform.
• DonotplaceheatsourcessuchasHobs,
Irons, Ovens, etc. on the washing machine
and do not use them on the product.
4.1.2 Removing packaging reinforcement
Tilt the machine
backwards to remove the
packaging reinforcement.
Remove the packaging
reinforcement by pulling
the ribbon. Do not make
this operation alone by
yourself.
4.1.3 Removing the
transportation locks
1 Loosenallboltswithanappropriatewrench
until they turn freely.
2 Remove the transport safety bolts by
turning them slightly.
3 Insert the plastic covers in the bag
containing the user manual to the openings
on the rear panel.
A
CAUTION!
•Remove the transportation safety bolts
before operating the washing machine!
Otherwise, the product will be damaged.
C
INFORMATION
•Keep the transportation safety
bolts in a safe place to reuse when
the washing machine needs to
be moved again in the future.
•Install the transport safety bolts in reverse
order of the disassembly procedure.
•Never move the product without
the transportation safety bolts
properly fixed in place!
4.1.4 Connecting water supply
C
INFORMATION
•The water supply pressure required to
run the product is between 1 to 10 bars
(0.1–1MPa).Itisnecessarytohave
10 – 80 liters of water flowing from the
fully open tap in one minute to have your
machine run smoothly. Attach a pressure
reducing valve if water pressure is higher.
A
CAUTION!
•Modelswithasinglewaterinletshould
not be connected to the hot water
tap. In such a case the laundry will get
damaged or the product will switch to
protection mode and will not operate.
•Do not use old or used water inlet
hoses on the new product. It may
cause stains on your laundry.

7 / EN
Washing Machine / User’s Manual
1 Tighten the nuts of the hose by hand.
Never use a tool when tightening the nuts.
2 When hose connection is completed,
check whether there is leak problems at the
connection points by opening the taps fully. If
any leaks occur, turn off the tap remove the
nut. Retighten the nut carefully after checking
the seal. In order to prevent the water leaks
and resultant damages, keep the taps closed
when you do not use the product.
4.1.5 Connecting the drain
hose to the drain
• Attachtheendofthedrainhosedirectlyto
waste water drain, lavatory or bathtub.
A
CAUTION!
•Your drain house will be flooded if the
hose comes out of its housing during
waterdischarge.Moreover,thereisriskof
scalding due to high washing temperatures!
In order to prevent such situations and
make sure that the machine performs water
intake and discharge processes without
any problem, fix the drain hose securely.
40 cm
100 cm
• Connectthedrainhosetoaminimumheight
of 40 cm and a maximum height of 100 cm.
• Incasethedrainhoseiselevatedafterlaying
it on the floor level or close to the ground
(less than 40 cm above the ground), water
discharge becomes more difficult and the
laundry may come out excessively wet.
Therefore, follow the heights described in
the figure.
• Topreventthewastewatertogoback
into the machine again and to ensure easy
drainage, do not immerse the end of the
hose into the waste water or do not insert
it into the drain for more than 15 cm. If it is
too long, cut it short.
• Theendofthehoseshouldnotbebent,
it should not be stepped on and the hose
must not be pinched between the drain and
the machine.
• Ifthelengthofthehoseistooshort,use
it by adding an original extension hose.
Lengthofthehosemaynotbelongerthan
3.2 m. To avoid water leak failures, the
connection between the extension hose and
the drain hose of the product must be fitted
well with an appropriate clamp as not to
come off and leak.
4.1.6 Adjusting the feet
A
CAUTION!
•In order to ensure that the product
operates more silently and vibration-
free, it must stand level and balanced
on its feet. Balance the machine by
adjusting the feet. Otherwise, the product
may move from its place and cause
crushing and vibration problems.
•Do not use any tools to loosen the lock
nuts. Otherwise, they will get damaged.
1 Loosenthelocknutsonthefeetbyhand.
2 Adjust the feet until the product stands in a
stable and balanced way.
3. Tighten all lock nuts by hand again.

8 / EN
Washing Machine / User’s Manual
4.1.7 Electrical connection
Connect the product to a grounded outlet
protected by a 16 A fuse. Our company shall
not be liable for any damages that will arise
when the product is used without grounding in
accordance with the local regulations.
• Connectionmustcomplywithnationalregulations.
• Thewiringfortheelectricaloutletcircuit
must be sufficient to meet the appliance
requirements. Use of a Groud Fault Circuit
Interrupter (GFCI) is recommended.
• Powercableplugmustbewithineasyreach
after installation.
• Ifthecurrentvalueofthefuseorbreaker
in the house is less than 16 Amps, have a
qualified electrician install a 16 Amp fuse.
• Thevoltagespecifiedinthe"Technical
specifications"sectionmustbeequalto
your mains voltage.
• Donotmakeconnectionsviaextension
cables or multi-plugs.
A
CAUTION!
•Damaged power cables must be replaced
by the Authorised Service Agents.
4.1.8 Initial use
Before starting to
use the product
make sure that
the preparations
are made which
are in line with the
“Important Safety
and Environment Instructions” and the
instructions in the “Installation” section.
To prepare the product for washing laundry,
perform first operation in Drum Cleaning
programme. If this program is not available
in your machine, apply the method which is
described in the section 4.4.2.
C
INFORMATION
•Use an anti-limescale suitable
for the washing machines.
•Some water might have remained
in the product due to the quality
control processes in the production.
It is not harmful for the product.
4.2 Preparation
4.2.1 Sorting the laundry
* Sort laundry according to type of fabric,
color, and degree of soiling and allowable
water temperature.
* Always obey the instructions given on the
garment tags.
4.2.2 Preparing laundry for washing
• Laundryitemswithmetalattachmentssuch
as, underwired bras, belt buckles or metal
buttons will damage the machine. Remove
the metal pieces or wash the clothes by
putting them in a laundry bag or pillow case.
• Takeoutallsubstancesinthepocketssuchas
coins, pens and paper clips, and turn pockets
inside out and brush. Such objects may
damage the product or cause noise problem.
• Putsmallsizeclothessuchasinfant'ssocks
and nylon stockings in a laundry bag or
pillow case.
• Placecurtainsinwithoutcompressingthem.
Remove curtain attachment items.
• Fastenzippers,sewloosebuttonsand
mend rips and tears.
• Wash“machinewashable”or“hand
washable” labeled products only with an
appropriate programme.
• Donotwashcoloursandwhitestogether.
New, dark coloured cottons release a lot of
dye. Wash them separately.
•
Tough stains must be treated properly before
washing. If unsure, check with a dry cleaner.
• Onlyusethedyes/colorchangersand
descaling agents which are appropriate
to machine wash. Always follow the
instructions on the package.
• Washtrousersanddelicatelaundryturned
inside out.
• KeeplaundryitemsmadeofAngorawoolin
thefreezerforafewhoursbeforewashing.
This will reduce pilling.
•
Laundrythataresubjectedtomaterialssuch
as flour, lime dust, milk powder, etc. intensely
must be shaken off before placing into the
machine. Such dusts and powders on the
laundry may build up on the inner parts of
the machine in time and can cause damage.
4.2.3 Things to be done
for energy saving
Following information will help you use the product
in an ecological and energy-efficient manner.

9 / EN
Washing Machine / User’s Manual
• Operatetheproductinthehighest
capacity allowed by the programme you
have selected, but do not overload; see,
"Programmeandconsumptiontable".See,
“Programmeandconsumptiontable"
• Alwaysfollowtheinstructionsonthe
detergent packaging.
• Washslightlysoiledlaundryatlowtemperatures.
• Usefasterprogrammesforsmallquantities
of lightly soiled laundry.
•
Do not use prewash and high temperatures
for laundry that is not heavily soiled or stained.
• Ifyouplantodryyourlaundryinadryer,
select the highest spin speed recommended
during washing process.
•
Do not use more detergent than the
recommended amount specified on its package.
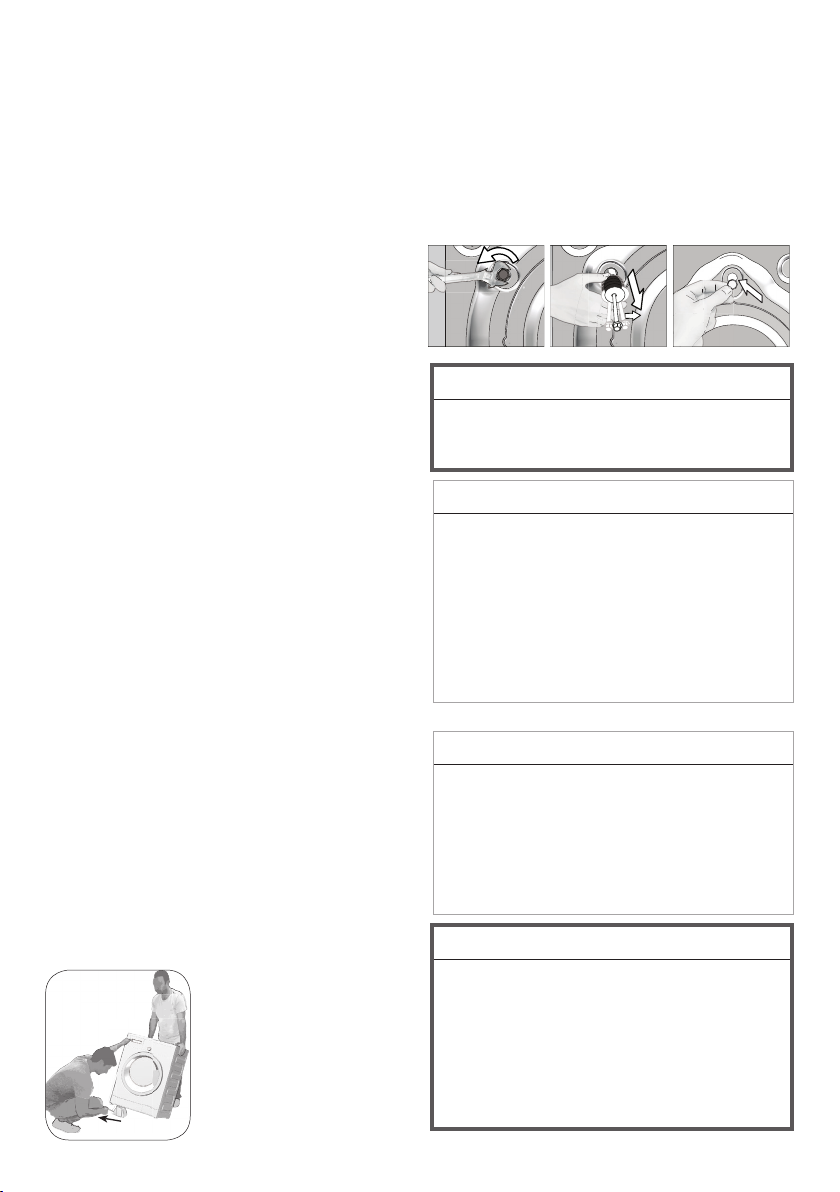
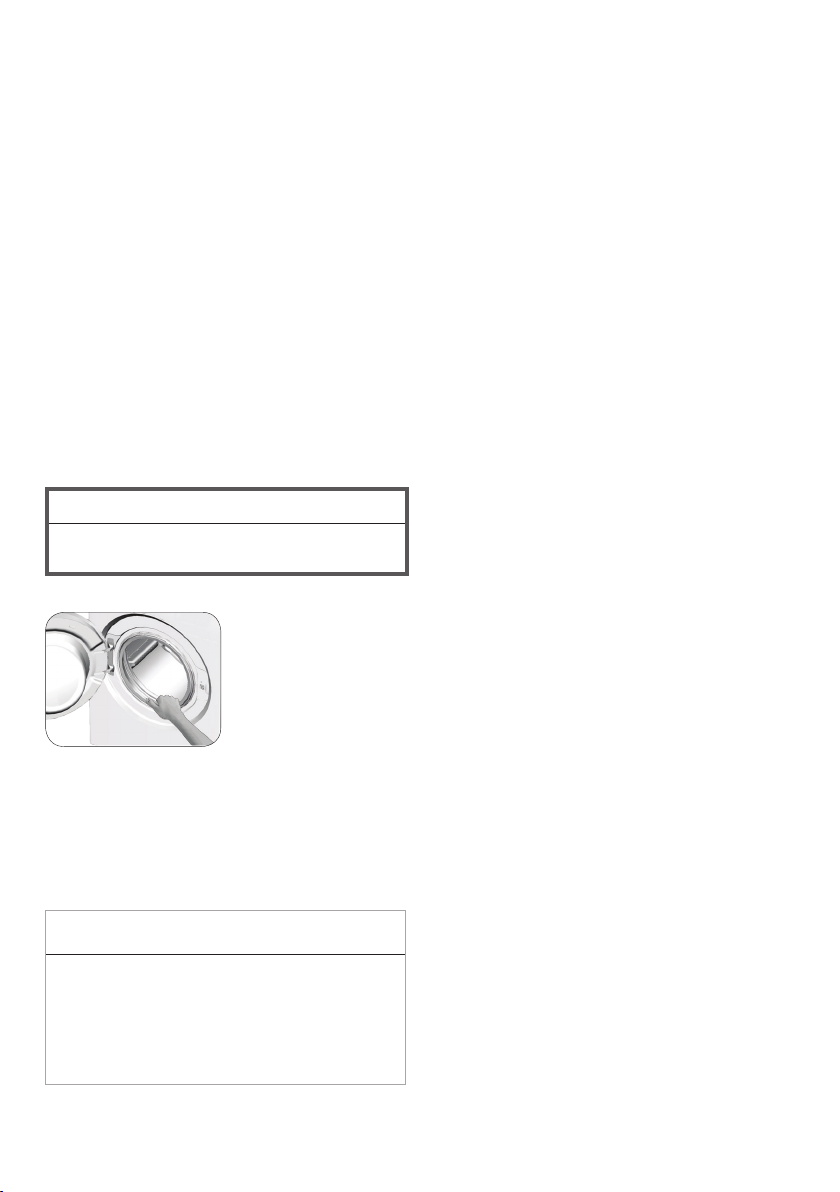
4.2.4 Loading the laundry
1. Open the laundry cover.
2. Put the laundry items into the machine in a
loose manner.
3.
Push and close the loading cover until you
hear the locking sound. Ensure that no items
are caught in the door. The loading door is
locked while a programme is running. The
door can only be opened a while after the
programme comes to an end.
4.2.5 Correct load capacity
The maximum load capacity depends on the
type of laundry, the degree of soiling and the
washing programme desired.
Machineautomaticallyadjuststhewater
amount according to the weight of the laundry
put inside it.
A
WARNING!
•Follow the information in the
“Programme and consumption table”.
When overloaded, machine’s washing
performancewilldrop.Moreover,noise
and vibration problems may occur.
4.2.6 Using detergent and softener
C
INFORMATION
•When using detergent, softener, starch, fabric
dye, bleacher and decolorant, descaling
agents; read the manufacturer’s instructions
written on the package and follow the dosages
specified. Use measuring cup if available.
1
3
2
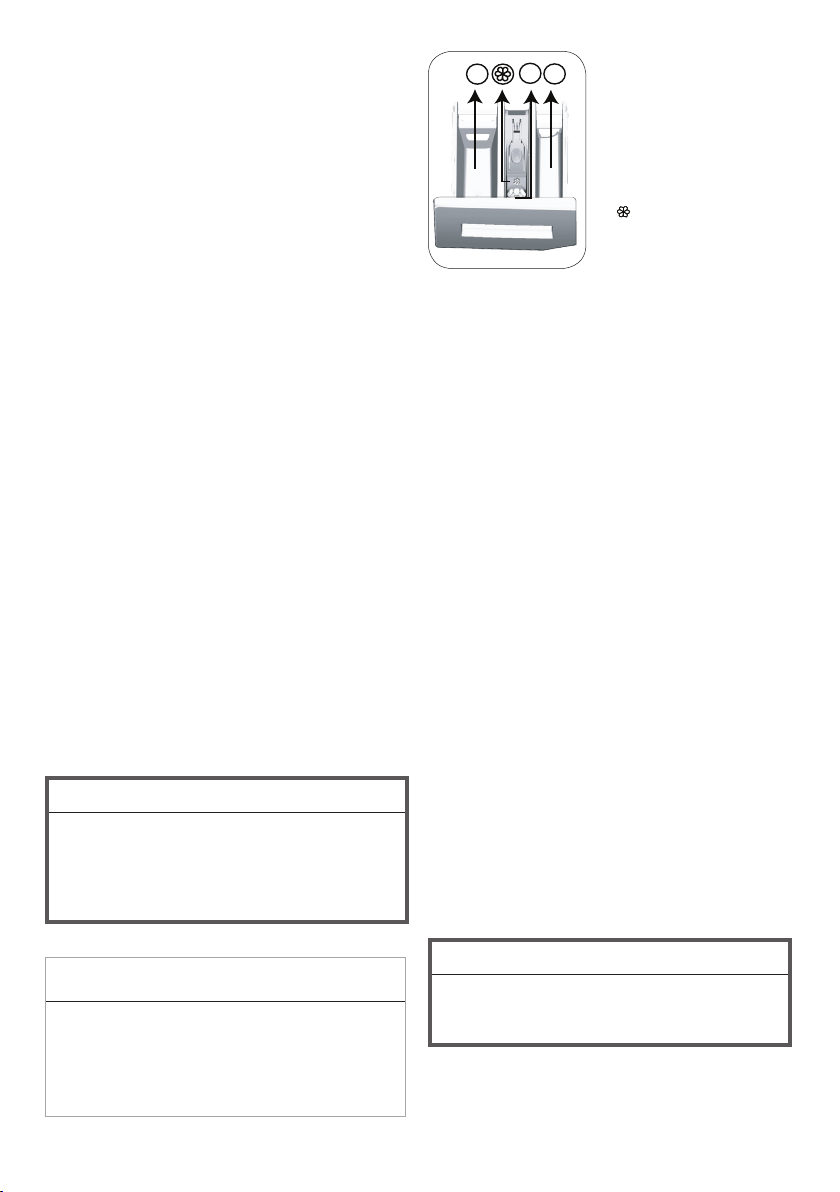
The detergent drawer
is composed of three
compartments:
– (1) for prewash
– (2) for main wash
– (3) for softener
– ( ) in addition, there
is a siphon piece in the
softener compartment.
Detergent, softener and other cleaning agents
• Adddetergentandsoftenerbeforestarting
the washing programme.
• Whilethewashingcycleisinprogress,do
not leave the detergent dispenser open!
• Whenusingaprogrammewithoutprewash,
do not put any detergent into the prewash
compartment(compartmentnr."1").
• Inaprogrammewithprewash,donot
put liquid detergent into the prewash
compartment(compartmentnr."1").
• Donotselectaprogrammewithprewashif
you are using a detergent bag or dispensing
ball. Place the detergent bag or the dispensing
ball directly among the laundry in the machine.
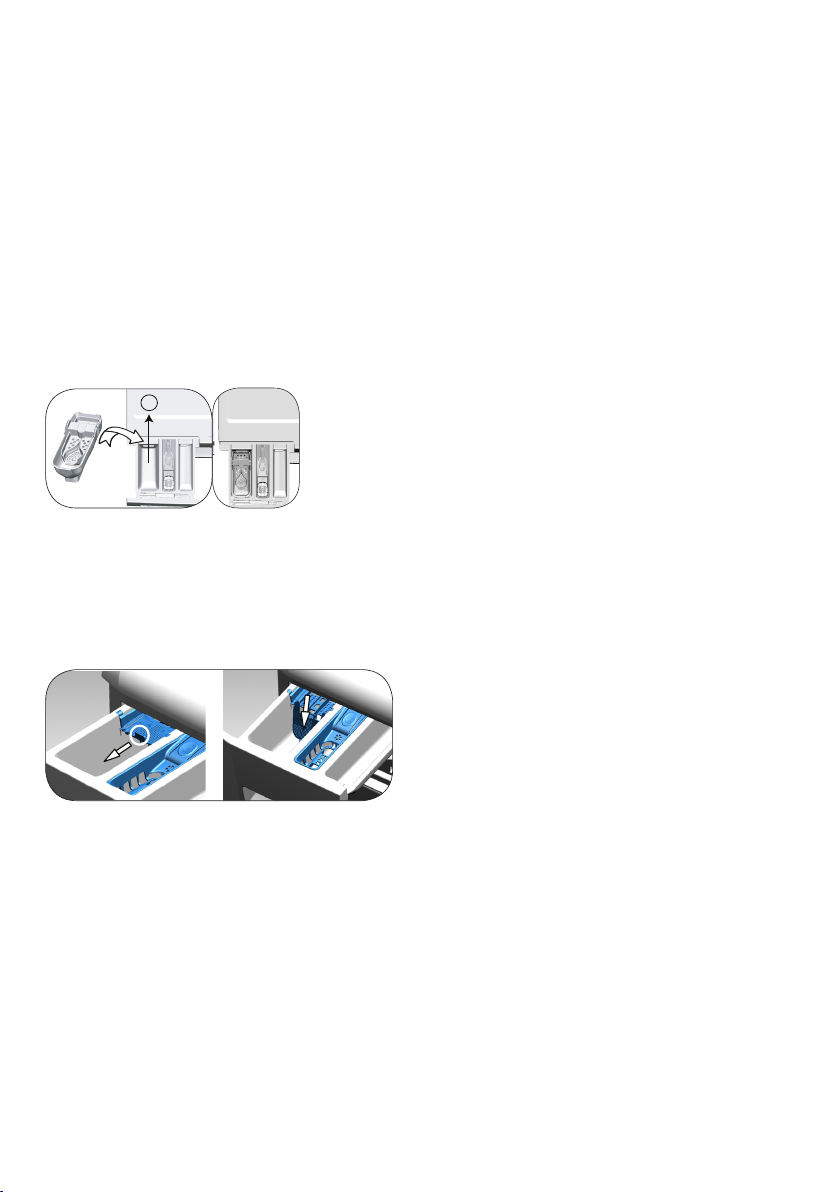
• Ifyouareusingliquiddetergent,do
not forget to place the liquid detergent
container into the main wash compartment
(compartment number “2”).
Choosing the detergent type
Detergent type to be used depends on the
fabric type and color.
• Usedifferentdetergentsforcolouredand
white laundry.
• Washyourdelicateclothesonlywithspecial
detergents (liquid detergent, wool shampoo,
etc.) used solely for delicate clothes.
• Whenwashingdarkcolouredclothesandquilts,
it is recommended to use liquid detergent.
• Washwoolenswithspecialdetergentmade
specifically for woolens.
A
CAUTION!
•Use only detergents manufactured
specifically for washing machines.
•Do not use soap powder.
Adjusting detergent amount
The amount of washing detergent to be used
depends on the amount of laundry, the degree
of soiling and water hardness.

10 / EN
Washing Machine / User’s Manual
• Donotuseamountsexceedingthedosage
quantities recommended on the detergent
package to avoid problems of excessive
foam, poor rinsing, financial savings and
finally, environmental protection.
• Uselesserdetergentforsmallamountsor
lightly soiled clothes.
Using softeners
Pour the softener into the softener
compartment of the detergent drawer.
• Donotexceedthe(>max<)levelsignonthe
softener compartment.
• Ifthesoftenerhaslostitsfluidity,diluteitwith
water before putting it in the detergent drawer.
Using liquid detergents
If the product contains a liquid detergent cup:
2
2
• Puttheliquiddetergentcontainerintothe
compartment no “2”.
• Iftheliquiddetergentlostitsfluidity,dilute
it with water before putting it into the
detergent container.
If the product is equipped with a liquid
detergent part:
• Whenyouwanttouseliquiddetergent,pull
the apparatus towards yourself. The part
that falls down will serve as a barrier for the
liquid detergent.
• Ifrequired,cleantheapparatuswithwater
when it is in place or by removing it.
• Ifyouwillusepowderdetergent,the
apparatus must be secured at top position.
If the product does not contain a liquid
detergent cup:
• Donotuseliquiddetergentfortheprewash
in a programme with prewash.
• Liquiddetergentstainsyourclotheswhen
used with Delayed Start function. If you are
going to use the Delayed Start function, do
not use liquid detergent.
Using gel and tablet detergent
•
If the gel detergent thickness is fluidal and
your machine does not contain a special liquid
detergent cup, put the gel detergent into the
main wash detergent compartment during
first water intake. If your machine contains a
liquid detergent cup, fill the detergent into this
cup before starting the programme.
• Ifthegeldetergentthicknessisnotfluidalor
in the shape of capsule liquid tablet, put it
directly into the drum before washing.
• Puttabletdetergentsintothemainwash
compartment(compartmentnr."2")or
directly into the drum before washing.
Using starch
• Puttheliquidsoda,powdersodaorthe
fabric dye into the softener compartment.
• Donotusesoftenerandstarchtogetherina
washing cycle.
• Wipetheinsideofthemachinewithadamp
and clean cloth after using starch.
Using limescale remover
• Whenrequired,uselimescaleremovers
manufactured specifically for washing
machines only.
Using bleaches
• Addthebleachatthebeginningofthe
washing cycle by selecting a prewash
program. Do not put detergent in the
prewash compartment. As an alternative
application, select a programme with extra
rinse and add the bleaching agent while the
machine is taking water from the
detergent
compartment during first rinsing step.
• Donotusebleachingagentanddetergent
by mixing them. Use just a little amount
(approx. 50 ml) of bleaching agent and
rinse the clothes very well as it causes skin
irritation. Do not pour the bleach onto the
laundry and do not use it with the colored items.
• Whenusingoxygen-baseddecolorant,
select a program which washes the laundry
at a low temperature.
• Oxygen-baseddecolorantcanbeusedwith
the detergent; however, if it is not at the
same consistence, first put detergent in the
compartment number “2” in the detergent
dispenser and wait for the machine to flush
the detergent when taking in water. While
the machine continues taking in water, add
decolorant in the same compartment.

11 / EN
Washing Machine / User’s Manual
4.2.7 Tips for efficient washing
Clothes
Light Colours and
Whites Colours Black/Dark
Colours
Delicates/
Woolens/Silks
(Recommended
temperature range based
on soiling level: 40-90 oC)
(Recommended
temperature range based
on soiling level: cold-40
oC)
(Recommended
temperature
range based on
soiling level: cold
-40 oC)
(Recommended
temperature range
based on soiling
level: cold -30 oC)
Soiling Level
Heavily
Soiled
(difficult
stains such
as grass,
coffee,
fruits and
blood.)
It may be necessary to
pre-treat the stains or
perform prewash. Powder
and liquid detergents
recommended for whites
can be used at dosages
recommended for
heavily soiled clothes. It
is recommended to use
powder detergents to
clean clay and soil stains
and the stains that are
sensitive to bleaches.
Powder and liquid
detergents recommended
for colors can be used at
dosages recommended
for heavily soiled clothes.
It is recommended to use
powder detergents to
clean clay and soil stains
and the stains that are
sensitive to bleaches. Use
detergents without bleach.
Liquiddetergents
suitable for
colors and dark
colors can be
used at dosages
recommended
for heavily soiled
clothes.
Prefer liquid
detergents
produced for
delicate clothes.
Woolen and silk
clothes must
be washed with
special woolen
detergents.
Normally
Soiled
(For example,
stains caused
by body on
collars and
cuffs)
Powder and liquid
detergents recommended
for whites can be used at
dosages recommended
for normally soiled
clothes.
Powder and liquid
detergents recommended
for colors can be used at
dosages recommended
for normally soiled clothes.
Detergents which do not
contain bleach should be
used.
Liquiddetergents
suitable for
colors and dark
colors can be
used at dosages
recommended for
normally soiled
clothes.
Prefer liquid
detergents
produced for
delicate clothes.
Woolen and silk
clothes must
be washed with
special woolen
detergents.
Lightly
Soiled
(No visible
stains
exist.)
Powder and liquid
detergents recommended
for whites can be used at
dosages recommended
for lightly soiled clothes.
Powder and liquid
detergents recommended
for colors can be used at
dosages recommended
for lightly soiled clothes.
Detergents which do not
contain bleach should be
used.
Liquiddetergents
suitable for
colors and dark
colors can be
used at dosages
recommended
for lightly soiled
clothes.
Prefer liquid
detergents
produced for
delicate clothes.
Woolen and silk
clothes must
be washed with
special woolen
detergents.

12 / EN
Washing Machine / User’s Manual
4.3 Operating the product
4.3.1 Control panel
1 - Programme Selection Knob (Uppermost
position On / Off)
2 - Display
3 - End Time Adjustment Button
4 - Programme Follow-up Indicator
5 - Start/Pause Button
6 - Auxiliary Function Button 3
7 - Auxiliary Function Button 2
8 - Auxiliary Function Button 1
9 - Spin Speed Adjustment Button
10 - Temperature Adjustment Button
4.3.2 Preparing the machine
1. Makesurethatthehosesareconnected
tightly.
2. Plug in your machine.
3. Turn the tap on completely.
4. Place the laundry in the machine.
5. Add detergent and fabric softener.
4.3.4 Programme and consumption table
4.3.3 Programme selection and
tips for efficient washing
1. Select the programme suitable for the type,
quantity and soiling degree of the laundry
inaccordancewiththe"Programmeand
consumptiontable"andthetemperature
table below.
2. Use the Programme Selection knob to
select the desired programme.
Max. Load (kg)
Water Consumption (l)
Energy Consumption (kWh)
Max. Speed***
Pre wash
Fast +
Extra rinse
Selectable temperature
range °C
90 7 92 2.25 1600 • • • Cold- 90
60 7 92 1.70 1600 • • • Cold- 90
40 7 89 1.05 1600 • • • Cold- 90
Cottons Eco 60 7 49 0.93 1600 Cold- 60
60 3 65 1.20 1200 • • • Cold- 60
40 3 63 0.75 1200 • • • Cold- 60
90 7 62 2.00 1400 • • Cold- 90
60 7 62 1.10 1400 • • Cold- 90
30 7 60 0.20 1400 • • Cold- 90
Mini / Mini14 +Fast 30 2 41 0.15 1400 • • Cold- 30
Mix 40 40 3.5 65 0.75 800 • • Cold- 40
Wool/HandWash 40 1.5 55 0.55 1200 •Cold- 40
Delicates 40 3.5 51 0.65 1200 •Cold- 40
Down Wear 60 2 70 1.25 1000 •Cold- 60
Outdoor/Sports (Goratex) 40 3.5 44 0.45 1200 •Cold- 40
Darkwash/Jeans 40 3 82 0.85 1200 •* Cold- 40
Stain 60 3.5 70 1.50 1600 • • 30 - 60
Shirts 60 3 59 1.20 800 • • • Cold- 60
Hygiene 90 7 119 2.40 1600 * 20-90
Drum Clean 90 - 73 2.10 600 90
Synthetics
Mini / Mini14
Programme
EN Auxiliary funct ions
Cottons
60°
1200
20°
90°
40°
30°
1000
800
600
1 2 3 4
57 68910

13 / EN
Washing Machine / User’s Manual
• :Selectable
* : Automatically selected, cannot be cancelled.
**:EnergyLabelProgramme(EN 60456 Ed.3)
***: If the maximum spin speed of the machine
is lower, you can select values up to the
maximum spin speed value.
- : See the programme description for
maximum load.
**"CottonEco40°CandCottonEco
60°Carestandardprogrammes."
These programmes are known as
"40°Ccottonstandardprogramme"
and"60°Ccottonstandard
programme"andindicatedwith
on the panel.
C
INFORMATION
•Water and power consumption may
vary subject to the changes in water
pressure, water hardness and water
temperature, ambient temperature,
type and amount of laundry, selection
of auxiliary functions and spin speed,
and changes in the mains voltage.
•When selecting a programme, you can
see the washing duration on the display of
your machine. Depending on the amount
of laundry you have loaded into the
machine, there might be a difference of 1
to 1.5 hours between the duration shown
on the display and the actual duration of
the washing programme. The duration
will be corrected automatically right after
the washing programme has started.
•The auxiliary functions in the table may vary
according to the model of your machine.
•Auxiliary function selection modes can be
changed by the manufacturing company.
Existing selection modes can be removed
or new selection modes can be added.
4.3.5 Main programmes
Depending on the type of fabric, use the
following main programmes.
• Cottons
You can wash your durable cotton laundry
(sheets, bedlinen, towels, bathrobes,
underwear etc.) in this programme. When you
press the quick wash function key, programme
duration becomes notably shorter but effective
washing is ensured thanks to intense washing
movements. If the quick wash function is
not selected, superior washing and rinsing
performance is ensured for your heavily soiled
laundry.
• Synthetics
You can use this programme to wash t-shirts,
syntetic/cotton mix fabrics etc. Programme
duration is notably shorter and efficient
washing performance is ensured. If the quick
wash function is not selected, superior
washing and rinsing performance is ensured
for your heavily soiled laundry.
• Wool/Hand Wash
Use this programme to wash your woolen/
delicate clothes. Select the appropriate
temperature complying with the tag of your
clothes. Your laundry will be washed with very
delicate movements to avoid any damage.
The wool wash cycle of this
machine has been approved
by The Woolmark Company
for the washing of machine
washable wool products
provided that the products
are washed according to the
instructions on the garment label and those
issued by the manufacturer of this washing
machine.M1730.
The Woolmark symbol is a Certification mark
in many countries.
4.3.6 Additional programmes
For special cases, additional programmes are
available in the machine.
C
INFORMATION
•Additional programmes may differ
according to the model of the machine.
• Cottons Eco
Use to wash your normally soiled, durable
cotton and linen laundry. Although it washes
longer than all other programmes, it provides
high energy and water savings. Actual
water temperature may be different from the
washing temperature stated. When washing
less amount of laundry (e.g. half the capacity
or less), duration of programme steps may
automatically become shorter. In this case,
energy and water consumption will decrease
more, providing a more economic wash.

14 / EN
Washing Machine / User’s Manual
• Hygiene
Use this programme for laundry that requires
an intense, long, anti-allergic and hygienic
washing cycle at high temperature. A high
level of hygiene is ensured thanks to the long
heating and additional rinsing step.
• Theprogrammewastestedbythe"VDE"
institutewhilethetemperaturewas20°C,
and its efficiency in bacteria and mould
elimination was certified.
• Theprogrammehasbeentestedby“The
British Allergy Foundation - Allergy UK”
whilethetemperaturewas60°C,andits
efficiency in eliminating bacteria and mould,
as well as allergens, was certified.
Allergy UK is the trademark of
the British Allergy Foundation.
The Seal of Approval has been
designed to provide guidance to
persons who want information
whether the product significantly
decreases the amount of allergens in the
environment it is installed or whether it limits/
reduces/eliminates the allergens. Its purpose
is to provide evidence that the products have
been tested scientifically or reviewed to
provide measurable results.
•Delicates
You can use this programme to wash delicate
laundry such as cotton/synthetic mix knitted
clothes or socks. Washing movements in
this programme are more delicate. Set the
temperature to 20 degrees or use the Cold
Wash option for clothes whose colour you wish
to preserve.
•Mini/Mini 14
Use this programme to wash your lightly soiled
cotton clothes in a short time. The programme
duration can be reduced down to 14 minutes
when the quick wash function is selected. When
the quick wash function is selected, maximum 2
(two) kg of laundry must be washed.
•Dark Care / Jeans
Use this programme to preserve the colour
of your dark-coloured clothes and jeans. This
programme provides high efficiency in washing,
thanks to a special drum movement, even at low
temperatures. It is recommended to use liquid
detergent or woolen shampoo for dark coloured
laundry. Do not wash your delicate clothes that
contain wool etc. in this programme.
• Mix 40
You can use this programme to wash cottons
and synthetics together without the need to
sort them.
Shirts
Use this programme to wash shirts made
of cotton, synthetic and synthetic blended
fabrics together. This programme ensures that
your clothes wrinkle less. When the quick wash
function is selected, the Pre-treatment
algorithm is used.
•Applythepre-treatmentchemicaldirectly
onto the clothes, or add it together with the
detergent when the machine starts to take in
water from the main wash compartment. This
way, it will take you much shorter to get the
performance you would normally get witha
regularwashingcycle.Lifeofyour shirts will be
longer.
Outdoor / Sports
Use this programme to wash outdoor/sports
clothes that contain cotton/synthetic mix, as well
as waterproof cloths like gore-tex. This
programme washes your laundry delicately
thanks to its special turning movements.
Down Wear
Use this programme to wash down coats,
vests, jackets etc. that bear a “machine-
washable” tag. Thanks to special spin profiles,
it is ensured that water reaches the air gaps
between feathers.
•Stain Expert
The machine has a special stain programme
which enables the removal of different types
of stains in the most effective way. Use this
programme only for durable colourfast cotton
laundry. Do not wash delicate and pigmenting
clothes and laundry in this programme. Before
washing, garment tags should be checked
(recommended for cotton shirts, trousers,
shorts, t-shirts, baby clothes, pyjamas,
aprons, table clothes, bed sheets, duvet
covers, pillowcases, bath-beach towels,
towels, socks, cotton underwear that are
suitable for washing at high temperature and
long time). In the automatic stain programme,
you can wash 24 types of stains divided into
two different groups according to quick
function selection. You can see stain groups
based on the selection of the quick function.
You can find stain groups based on quick
function below:

15 / EN
Washing Machine / User’s Manual
4.3.7 Special programmes
For specific applications, select any of the
following programmes.
• Rinse
Use when you want to rinse or starch separately.
• Spin+Drain
Use this program to remove the water on the
clothe/in the machine.
Before selecting this programme, select the
desired spin speed and press Start/Pause
button. First, the machine will drain the water
inside of it. Then, it will spin the laundry at
the selected spin speed, and drain the water
coming off of the laundry.
If you only want to drain the water without
spinning the laundry, select the “Spin+Pump
programme, and use the Spin Speed
Adjustment button to select the No Spin
function. Press the Start/Pause button.
C
INFORMATION
•Use a lower spin speed for
delicate laundries.
4.3.8 Temperature selection
Whenever a new programme is selected, the
recommended temperature for the selected
programme appears on the temperature
indicator.
To decrease the temperature, press the
Temperature Adjustment button. Temperature
will decrease gradually. When the cold level is
selected, temperature level lights will not be on.
C
INFORMATION
•If the programme has not reached
the heating step, you can change
the temperature without switching
the machine to Pause mode.
4.3.9 Spin speed selection
Whenever a new programme is selected, the
recommended spin speed of the selected
programme is displayed on the spin speed
indicator.
To decrease the spin speed, press the Spin
Speed Adjustment button. Spin speed
decreases gradually. Then, depending on the
modeloftheproduct,"RinseHold"and"No
Spin"optionsappearonthedisplay.When
the “No Spin” function is selected, rinse level
indicator lights will not be on.
Rinse hold
If you are not going to unload your clothes
immediately after the programme ends, you
can use rinse hold function to keep your
laundry in the final rinsing water in order to
prevent them from getting wrinkled when
there is no water in the machine. Press Start/
Pause button after this process if you want to
drain the water without spinning your laundry.
Programme will resume where it left off, drain
the water and then it will be complete.
If you want to spin the laundry held in water,
adjust the Spin Speed and press Start/Pause
button. Programme will resume. Water will
be drained, laundry will be spun and the
programme will end.
C
INFORMATION
•If the programme has not reached
the spin step, you can change
the spin speed without switching
the machine to Pause mode.
4.3.10 Auxiliary function selection
Select the desired auxiliary functions before
starting the programme. You can also select
or cancel auxiliary functions suitable for the
running programme without pressing the Start/
Pause button while the machine is operating.
To do this, the machine must be in a step
before the auxiliary function you are going to
select or cancel. If the auxiliary function cannot
be selected or canceled, light of the relevant
function will flash 3 times to warn the user.
When quick function is selected:
Blood Tea Red Wine
Chocolate Coffee Curry
Pudding Fruit juice Jam
Egg Ketchup Coal
When quick function is not selected:
Butter Sweat Salad Dressing
Grass Collar Soil Make-up
Mud Food Machine Oil
Coke Mayonnaise Baby Food
•Select the stain programme.
•Select the stain you want to clean by locating it in
the groups above and selecting the related group
with the quick auxiliary function button.
•Read the garment tag carefully and ensure that
correct temperature and spin speed are selected.

16 / EN
Washing Machine / User’s Manual
4.3.10.1 Auxiliary functions
• Prewash
A Prewash is only worthwhile for heavily soiled
laundry. Not using the Prewash will save
energy, water, detergent and time.
C
INFORMATION
•Prewash without detergent is
recommended for tulle and curtains.
• Fast+
When this function is selected, durations of
relevant programmes get shorter by 50%.
Thanks to the optimised washing steps,
high mechanic activity and optimum water
consumption, high washing performance is
achieved in spite of the reduced duration.
• Extra Rinse
This function enables the machine to carry
out another rinsing cycle in addition to the
one carried out after the main wash. Thus, the
risk for sensitive skins (babies, allergic skins,
etc.) to be effected by the minimal detergent
remnants on the laundry can be reduced.
4.3.10.2 Functions/Programmes
Selected by Pressing the Function
Buttons for 3 Seconds
• Drum Cleaning
To select this programme, press and hold the
auxiliary function button 1 for 3 seconds.
Use it regularly (every 1-2 months) to clean
the drum and ensure the required hygiene is
provided. Run the programme while the machine
is totally empty. To obtain better results, put
powder lime-scale remover for washing machines
into the detergent compartment no. “2”. When
the programme is over, leave the loading door
ajar so that the inside of the machine gets dry.
C
INFORMATION
•This is not a washing programme.
It is a maintenance programme.
•
Do not run this programme when there are any
objects in the machine. If you try to do so, the
machine will automatically detect that there is
load inside and abort the programme.
• Child Lock
You can prevent children from tampering with
themachinebyusingtheChildLockfeature.
Thus you can avoid any changes in a running
programme.
C
INFORMATION
•If the Programme Selection knob is turned
whentheChildLockisenabled,"Con"
appearsonthedisplay.WhiletheChildLock
is enabled, you cannot make any change in
the programmes, the selected temperature,
the speed or the auxiliary functions.
•Even if another programme is selected
with the Programme Selection knob while
theChildLockisenabled,previously
selected programme will continue running.
To enable Child Lock:
Press and hold the Auxiliary Function button 2
for 3 seconds. While you’re holding the button
pressed for 3 seconds, C03, C02 and C01 will
be displayed respectively. Then, while the light
of the Auxiliary Function Button 2 is flashing,
“Con” will be displayed, indicating that the child
lock has been enabled. If you press any button
or turn the Programme Selection knob while the
ChildLockisenabled,thesamewarningwillbe
displayed.
To disable Child Lock:
Press and hold the Auxiliary Function button 2
for 3 seconds while the programme is running.
While you’re holding the button pressed for 3
seconds, C03, C02 and C01 will be displayed
respectively. Then, while the light of the
Auxiliary button 2 is flashing, “COF” will be
displayed, indicating that the child lock has
been disabled.
C
INFORMATION
•In addition to the method above, to
deactivatetheChildLock,switchthe
Programme Selection knob to On/Off
position when no programme is running,
and select another programme.
•ChildLockwillnotbedisabledafter
a power failure or unplugging.
C
INFORMATION
•If a second auxiliary function conflicting
with the first one is selected before starting
the machine, the function selected first
will be canceled and the second auxiliary
function selection will remain active.
•An auxiliary function which is not
compatible with the programme
cannotbeselected.(See"Programme
andconsumptiontable")
•Auxiliary Function buttons may vary
according to the model of the machine.

17 / EN
Washing Machine / User’s Manual
• Anti-Crease+
If you press and hold the auxiliary function
button 3 for 3 seconds, this function will
be selected and the programme follow-up
light of the relevant programme will turn on.
When this function is selected, the drum will
rotate for up to eight hours to ensure that
the clothes do not crease at the end of the
programme. At any time during these eight
hours, you can cancel the programme and
unload the machine. Just press any button
or turn the programme selection knob to end
the function. The programme follow-up light
will remain on even if you end the function by
pressing any button. If you end the function
by turning the programme selection knob, the
programme follow-up light will remain on or go
off depending on the selected programme. If
you do not cancel the function by pressing the
Auxiliary Function button 3 for 3 seconds, it
will be used in the next washing cycles as well.
4.3.11 - End Time Adjustment
The End Time Adjustment function allows you
to set the end time of the programme up to 19
hours. You can increase this time by 1-hour
intervals.
C
INFORMATION
•Please do not use liquid detergent
if you have selected the End
Time Adjustment function. Stains
might remain on the clothes.
1. Open the loading door, place the laundry
and add detergent, etc.
2. Select the washing programme,
temperature, spin speed and, if required,
the auxiliary functions.
3. Press the End Time Adjustment button and
select the desired time.
4. Press the Start/Pause button. The delayed
end time you have set will be displayed.
Countdown will start for delayed end. On
the display, “_” will move up and down next
to the delayed end time.
C
INFORMATION
•If the programme has not started,
you can add laundry into the machine
during the delayed end time.
5. At the end of the countdown, duration of
the selected programme will be displayed.
“_” will disappear and the selected
programme will start.
Changing the delayed end time
If you want to change the time during countdown:
1.
Press the End Time Adjustment button
.
When pressed for the first time, the
programme duration will be rounded up
to the closest whole number time. Each
following press will increase the time by an
hour.
2. If you want to decrease the delayed end
time, press the End Time Adjustment button
consecutively until the desired time is
displayed.
Cancelling the delayed end function
If you want to cancel the delayed end
time countdown and start the programme
immediately:
1. Press the End Time Adjustment button
until the Delayed End time is equal to
the selected programme time, or set
the Programme Selection knob to any
programme. This way, the Delayed End time
will be cancelled. The End/Cancel light will
flash continuously.
2. Then, select the programme you want to
run again.
3. Press Start/Pause button to start the
programme.
4.3.12 Starting the programme
1. Press Start/Pause button to start the
programme.
2. Programme follow-up light showing the
startup of the programme will turn on.
C
INFORMATION
•If no programme is started or no key is
pressed within 10 minutes during the
programme selection process, the display
lights will go off. Once the Programme
Selection knob is turned or any button is
pressed, display lights will turn on again.

18 / EN
Washing Machine / User’s Manual
4.3.13 Progress of programme
Progress of a running programme can be
followed from the Programme Follow-up
indicator. At the beginning of each programme
step, the relevant indicator light will turn on.
C
INFORMATION
•If the “Anti-crease+” auxiliary function
hasbeenselected,“End”LEDand“Anti-
crease+”LEDwillbeonatthesame
time while this step is continuing.
•To end the programme while the
“Anti-crease+” step is running,
simply press any button or turn the
programme selection knob.
You can change the auxiliary functions, speed
and temperature settings without stopping
the programme flow while the programme is
running. To do this, the change you are going
to make must be something that will be carried
out after the programme step that is running.
If the change is not suitable,
relevant lights will
flash 3 times.
C
INFORMATION
•If the machine does not proceed to the
spinning step, the Rinse Hold function
might be active or the automatic
unbalanced load detection system might
be activated due to the unbalanced
distribution of the laundry in the machine.
4.3.14 Loading door lock
There is a locking system on the loading door
of the machine that prevents opening of the
loading door in cases when the water level is
unsuitable.
Loadingdoorlightwillstartflashingwhenthe
machine is switched to Pause mode. The
machine checks the level of the water inside.
If the level is suitable, the loading door light will
turn off and the loading door can be opened
within 1-2 minutes.
If the level is unsuitable, the loading door light
will remain on and the loading door cannot be
opened. If you are obliged to open the loading
doorwhiletheLoadingDoorlightison,you
must cancel the current programme. See
"Cancellingtheprogramme"
4.3.15 Changing the selections
after programme has started
Switching the machine to pause mode
Press the Start/Pause to switch the machine
to pause mode while a programme is running.
The light of the current programme will flash on
the Programme Follow-up indicator, indicating
that the machine has switched to pause mode.
Also, when the loading door is ready to be
opened,theLoadingDoorlightwillturnoffin
addition to the programme step light.
Changing the auxiliary function, speed and
temperature
Depending on the step the programme has
reached, you can cancel or select auxiliary
functions. See “Auxiliary function selection”.
You can also change the speed and
temperaturesettings.See"Spinspeed
selection"and"Temperatureselection".
C
INFORMATION
•If no change is allowed, the
relevant light will flash 3 times.
Adding and removing laundry
1. Press the “Start/Pause” button to pause the
machine. The programme follow-up light of
the relevant step during which the machine
was switched into the pause mode will flash.
2. WaituntiltheLoadingDoorcanbeopened.
3. Open the loading door and add or take out
laundry.
4. Close the loading door.
5. Makechangesinauxiliaryfunctions,
temperature and speed settings if
necessary.
6. Press the “Start/Pause” button to start the
machine.
4.3.16 Cancelling the programme
To cancel the programme, turn the Programme
Selection knob to select another programme.
Previous programme will be cancelled. End/
Cancel light will flash continuously to notify that
the programme has been canceled.
When you turn the Programme Selection knob,
the machine will end the programme but will not
discharge the water inside. When you select
and start a new programme, the newly selected
programme will start depending on the step
the previous programme was canceled in. For
example, the machine may take in additional
water or continue to wash with the water inside.

19 / EN
Washing Machine / User’s Manual
C
INFORMATION
•Depending on the step where the
programme was canceled in, you may have
to add detergent and softener again for
the programme you have selected anew.
4.3.17 End of programme
At the end of the programme, “End” will be
displayed.
1. Wait until the light of the loading door goes
off completely.
2. Press the On/Off button to switch off the
machine.
3. Take out your laundry and close the loading
door. Your machine is now ready for the
next washing cycle.
4.3.18 Your machine has the
"Pause Mode" function.
After using the On/Off button to switch on the
machine, if you do not start any programme
in the selection step or do not perform
anything else, or if you do not do anything in
10 minutes after the selected programme has
ended, the machine will automatically switch
to energy saving mode. Also, if your product
has a display that shows programme time,
this display will completely turn off. If you turn
the Programme Selection knob or touch any
button, the lights and the display will switch
back to the previous position. The selections
you make when exiting the energy efficiency
mode may change. Check if your selections
are correct before starting the programme. If
necessary, make adjustments again.This is not
an error.
4.4 Maintenance and cleaning
Service life of product extends and frequently
experienced problems will be reduced if it is
cleaned at regular intervals.
4.4.1 Cleaning the detergent drawer
Clean the detergent
drawer at regular intervals
(every 4-5 washing cycles)
as shown below in order
to prevent accumulation of
powder detergent in time.
Lifttherearpartofthesiphontoremoveitas
illustrated.
If more than normal amount of water and
softener mixture starts to gather in the softener
compartment, the siphon must be cleaned.
1 Press the dotted point on the siphon in the
softener compartment and pull towards you
until the compartment is removed from the
machine.
2. Wash the detergent drawer and the
siphon with plenty of lukewarm water in a
washbasin. In order to prevent the residues to
contact your skin, clean it with an appropriate
brush by wearing a pair of gloves.
3 Insert the drawer back into its place after
cleaning and make sure that it is seated well.
4.4.2 Cleaning the loading
door and the drum
For products with drum cleaning programme,
please see Operating the product -
Programmes.
C
INFORMATION
•Repeat Drum Cleaning process
in every 2 months.
•Use an detergent / anti-limescale
suitable for the washing machines.
After every washing
make sure that no foreign
substance is left in the
drum.

20 / EN
Washing Machine / User’s Manual
If the holes on the bellow shown in the figure is
blocked, open the holes using a toothpick.
C
INFORMATION
•Foreign metal substances will cause
rust stains in the drum. Clean the
stains on the drum surface by using
cleaning agents for stainless steel.
A
WARNING
•Never use steel wool or wire wool.
These will damage the painted,
chromated and plastic surfaces.
4.4.3 Cleaning the body
and control panel
Wipe the body of the machine with soapy
water or non-corrosive mild gel detergents as
necessary, and dry with a soft cloth.
Use only a soft and damp cloth to clean the
control panel.
4.4.4 Cleaning the water intake filters
There is a filter at the end of each water intake
valve at the rear of the machine and also at
the end of each water intake hose where they
are connected to the tap. These filters prevent
foreign substances and dirt in the water to
enter the washing machine. Filters should be
cleaned as they do get dirty.
1. Close the
taps.
2. Remove the
nuts of the
water intake
hoses to
access the
filters on the
water intake
valves.
Clean them with an appropriate brush. If the
filters are too dirty, remove them from their
places with a pliers and clean in this way.
3.
Take out the filters on the flat ends of the
water intake hoses together with the gaskets
and clean thoroughly under running water.
4. Replace the seals and filters carefully and
tighten their nuts by hand.
4.4.5 Draining remaining water
and cleaning the pump filter
The filter system in your machine prevents
solid items such as buttons, coins and fabric
fibers clogging the pump impeller during
discharge of washing water. Thus, the water
will be discharged without any problem and the
service life of the pump will extend.
If the machine fails to drain water, the pump filter
is clogged. Filter must be cleaned whenever it
is clogged or in every 3 months. Water must be
drained off first to clean the pump filter.
In addition, prior to transporting the machine
(e.g., when moving to another house) and in
caseoffreezingofthewater,watermayhave
to be drained completely.
A
CAUTION!
•Foreign substances left in the pump
filter may damage your machine
or may cause noise problem.
•If the product is not being used,
shut the tap shut, remove mains
pipe and drain the water inside the
machineagainstanylikelyfreezing.
•After each use, turn off the water tap to
which the mains hose is connected.
In order to clean the dirty filter and discharge
the water:
1 Unplug the machine to cut off the supply
power.
A
CAUTION!
•Temperature of the water inside the
machine may rise up to 90 ºC. To avoid
the burning risk, clean the filter after the
water inside the machine is cooled down.
2. Open the filter cover.
Table of contents
Other Beko Washer manuals

Beko
Beko 8143 CMK User manual

Beko
Beko WIR76540F1 User manual

Beko
Beko WCY71233W User manual

Beko
Beko WTV8746XDOS1 User manual

Beko
Beko B5WT512410W User manual

Beko
Beko WM 7023W User manual

Beko
Beko WMD 78127 User manual

Beko
Beko WTE 6512 B0 User manual

Beko
Beko WUE7512XSST User manual

Beko
Beko WITV 8612 XW0 User manual

Beko
Beko WM 6103 W Manual

Beko
Beko B3WFU 78225 WB User manual

Beko
Beko WRS 5511 BWW User manual

Beko
Beko WCV 8646 X0 User manual

Beko
Beko WTIK74151F User manual

Beko
Beko WMY 60821 PTYB3 User manual

Beko
Beko WTV 7714 MM User manual

Beko
Beko WMD 26101T User manual

Beko
Beko WCV8736XS0 User manual

Beko
Beko WMB 71643 PTL User manual