manuals.online logo
Brands
  1. Home
  2. •
  3. Brands
  4. •
  5. Belden
  6. •
  7. Monitor
  8. •
  9. Belden Miranda KMV-3901 User manual

Belden Miranda KMV-3901 User manual

This manual suits for next models

1

Other Belden Monitor manuals

Belden GRASS VALLEY KALEIDO Series Supplement

Belden

Belden GRASS VALLEY KALEIDO Series Supplement

Belden Grass Valley KALEIDO-X16 Supplement

Belden

Belden Grass Valley KALEIDO-X16 Supplement

Belden Miranda Kaleido-X (4RU) User manual

Belden

Belden Miranda Kaleido-X (4RU) User manual

Belden grass valley MV-831 User manual

Belden

Belden grass valley MV-831 User manual

Belden Miranda Kaleido-X16 How to use

Belden

Belden Miranda Kaleido-X16 How to use

Belden Grass Valley KALEIDO-IP X310 Supplement

Belden

Belden Grass Valley KALEIDO-IP X310 Supplement

Belden Grass Valley KALEIDO-IP X310 Supplement

Belden

Belden Grass Valley KALEIDO-IP X310 Supplement

Belden Grass Valley Kaleido-X User manual

Belden

Belden Grass Valley Kaleido-X User manual

Belden Grass Valley Kaleido-X 4RU Supplement

Belden

Belden Grass Valley Kaleido-X 4RU Supplement

Belden grass valley MV-831 User manual

Belden

Belden grass valley MV-831 User manual

Belden grass valley Kaleido-IP X320 Supplement

Belden

Belden grass valley Kaleido-IP X320 Supplement

Belden KMX-4911 User manual

Belden

Belden KMX-4911 User manual

Belden grass valley KALEIDO-MX 4K Operating and installation instructions

Belden

Belden grass valley KALEIDO-MX 4K Operating and installation instructions

Belden KMX-4911 Operating and installation instructions

Belden

Belden KMX-4911 Operating and installation instructions

Belden GRASS VALLEY KALEIDO-MX 1RU Supplement

Belden

Belden GRASS VALLEY KALEIDO-MX 1RU Supplement

Belden GRASS VALLEY KMV-3901 Supplement

Belden

Belden GRASS VALLEY KMV-3901 Supplement

Belden grass valley Kaleido-IP X320 Supplement

Belden

Belden grass valley Kaleido-IP X320 Supplement

Belden grass valley MV-841 Series User manual

Belden

Belden grass valley MV-841 Series User manual

Belden Grass Valley KMX-3921 Supplement

Belden

Belden Grass Valley KMX-3921 Supplement

Belden Grass Valley Kaleido-Modular-X Operating and installation instructions

Belden

Belden Grass Valley Kaleido-Modular-X Operating and installation instructions

Belden Grass Valley Kaleido-X Supplement

Belden

Belden Grass Valley Kaleido-X Supplement

Belden grass valley KALEIDO-IP VM User manual

Belden

Belden grass valley KALEIDO-IP VM User manual

Belden Grass Valley Kaleido-Modular-X Supplement

Belden

Belden Grass Valley Kaleido-Modular-X Supplement

Belden Grass Valley Kaleido-Modular-X Operating and installation instructions

Belden

Belden Grass Valley Kaleido-Modular-X Operating and installation instructions

Popular Monitor manuals by other brands

Samsung ME32C user manual

Samsung

Samsung ME32C user manual

ViewSonic VA926-LED user guide

ViewSonic

ViewSonic VA926-LED user guide

Furuno Mu 120c Operator's manual

Furuno

Furuno Mu 120c Operator's manual

Asus VB171D - 17" LCD Monitor Service manual

Asus

Asus VB171D - 17" LCD Monitor Service manual

AOC 9GLR Technical specifications

AOC

AOC 9GLR Technical specifications

DMG RAFFAELLO manual

DMG

DMG RAFFAELLO manual

AOC LM720 - 17" Technical specifications

AOC

AOC LM720 - 17" Technical specifications

Sony Trinitron GDM-F500 Service manual

Sony

Sony Trinitron GDM-F500 Service manual

Memorex MT1701 user guide

Memorex

Memorex MT1701 user guide

ViewSonic VE510s-4 Service manual

ViewSonic

ViewSonic VE510s-4 Service manual

Farenheit T-1503CM instruction manual

Farenheit

Farenheit T-1503CM instruction manual

Ditel DINOS DN129/AT Quick installation guide

Ditel

Ditel DINOS DN129/AT Quick installation guide

Sony SDM-S51 Specifications

Sony

Sony SDM-S51 Specifications

Kenwood DMX1025BT quick start guide

Kenwood

Kenwood DMX1025BT quick start guide

Dell S2409WFP user guide

Dell

Dell S2409WFP user guide

EverFocus EN-7517E instruction manual

EverFocus

EverFocus EN-7517E instruction manual

Dell P3222QE user guide

Dell

Dell P3222QE user guide

Panasonic TH152UX1 - 152" PLASMA TV Service manual

Panasonic

Panasonic TH152UX1 - 152" PLASMA TV Service manual

manuals.online logo
manuals.online logoBrands
  • About & Mission
  • Contact us
  • Privacy Policy
  • Terms and Conditions

Copyright 2025 Manuals.Online. All Rights Reserved.

Quick Start Guide
M866-9905-109
12 January 2014
ii
Notices
Copyright & Trademark Notice
Copyright © 2010–2014, Miranda Technologies Partnership. All rights reserved.
Belden, Belden Sending All The Right Signals, and the Belden logo are trademarks or
registered trademarks of Belden Inc. or its affiliated companies in the United States and
other jurisdictions. Miranda, KMV-3911, KMV-3901, Kaleido-X, iControl, and Densité are
trademarks or registered trademarks of Miranda Technologies Partnership. Belden Inc.,
Miranda Technologies Partnership, and other parties may also have trademark rights in
other terms used herein.
Terms and Conditions
Please read the following terms and conditions carefully. By using Kaleido multiviewer
documentation, you agree to the following terms and conditions.
Miranda Technologies Partnership (“Miranda”) hereby grants permission and license to
owners of Kaleido multiviewers to use their product manuals for their own internal
business use. Manuals for Miranda products may not be reproduced or transmitted in any
form or by any means, electronic or mechanical, including photocopying and recording, for
any purpose unless specifically authorized in writing by Miranda.
A Miranda manual may have been revised to reflect changes made to the product during its
manufacturing life. Thus, different versions of a manual may exist for any given product.
Care should be taken to ensure that one obtains the proper manual version for a specific
product serial number.
Information in this document is subject to change without notice and does not represent a
commitment on the part of Miranda.
Warranty information is available in the Support section of the Miranda Web site
(www.miranda.com).
The SDHC Logo is a trademark of SD-3C, LLC.
Title KMV-3901/3911 Quick Start Guide
Part Number M866-9905-109
Revision 12 January 2014, 1:18 pm
iii
KMV-3901/3911
Quick Start Guide
Electromagnetic Compatibility
This equipment has been tested for verification of compliance with FCC Part 15,
Subpart B requirements for class A digital devices.
This equipment has been tested and found to comply with the requirements of the
EMC directive 2004/108/EC:
• EN 55022 Class A radiated and conducted emissions
• EN 61000-3-2 Limits for harmonic current emissions
• EN 61000-3-3 Limitation of voltage changes, voltage fluctuations and flicker
• EN 61000-4-2 Electrostatic discharge immunity
• EN 61000-4-3 Radiated, radio-frequency, electromagnetic field immunity
• EN 61000-4-4 Electrical fast transient/burst immunity
• EN 61000-4-5 Surge transient immunity
• EN 61000-4-6 Conducted disturbances immunity
• EN 61000-4-8 Power frequency magnetic field immunity
• EN 61000-4-11 Voltage dips, short interruptions and voltage variations
immunity
Note: This equipment has been tested and found to comply with the
limits for a Class A digital device, pursuant to part 15 of the FCC Rules.
These limits are designed to provide reasonable protection against
harmful interference when the equipment is operated in a commercial
environment. This equipment generates, uses, and can radiate radio
frequency energy and, if not installed and used in accordance with the
instruction manual, may cause harmful interference to radio
communications. Operation of this equipment in a residential area is
likely to cause harmful interference in which case the user will be
required to correct the interference at his own expense.
1
Setting Up Your Multiviewer
Welcome to the Kaleido family of multiviewers! This Quick Start Guide is designed to help
you get your Kaleido-Modular KMV-3901/3911 multiviewer up and running for the first
time. The following sections will guide you through the installation of a KMV-3901/3911
system in its default configuration.
Summary
Introduction . . . . . . . . . . . . . . . . . . . . . . . . . . . . . . . . . . . . . . . . . . . . . . . . . . . . . . . . . . . . . . . . . . . . . . . . . . 1
Getting Organized . . . . . . . . . . . . . . . . . . . . . . . . . . . . . . . . . . . . . . . . . . . . . . . . . . . . . . . . . . . . . . . . . . . . 2
Step 1: Physical Setup . . . . . . . . . . . . . . . . . . . . . . . . . . . . . . . . . . . . . . . . . . . . . . . . . . . . . . . . . . . . . . . . . 4
Step 2: Networking Setup . . . . . . . . . . . . . . . . . . . . . . . . . . . . . . . . . . . . . . . . . . . . . . . . . . . . . . . . . . . . . . 8
Step 3: XEdit Installation . . . . . . . . . . . . . . . . . . . . . . . . . . . . . . . . . . . . . . . . . . . . . . . . . . . . . . . . . . . . . . 18
Introduction
Miranda's Kaleido family of multiviewers ranges from quad-splits to large-scale, multi-room
monitoring systems, with outstanding image quality and signal flexibility. The Kaleido
multiviewers are available in different models: the new Kaleido-MX, the Kaleido-IP, the
Kaleido-X (7RU), the Kaleido-X (4RU), the Kaleido-X16, and the Kaleido-XQUAD frames, as
well as the new Kaleido-Modular-X cards, and the Kaleido-Modular KMV-3901/3911 cards.
The Kaleido-Modular KMV-3911 and KMV-3901 cards can display up to eight 3Gbps, HD,
or SD inputs in up to eight video windows across one or two high-resolution outputs. By
using optional cascading bridges, up to three KMV-3901/3911 cards can be configured into
a single- or dual-output system supporting up to 24 inputs.
At the heart of every multiviewer system is the Kaleido-X software, which includes two
client applications:
•XAdmin is a Web client that your system administrator will use to manage the
multiviewer system.
•XEdit is a client application used to create layouts for the monitor wall, and to configure
the multiviewer, from your PC or laptop.
A Kaleido-Modular KMV-3901/3911 multiviewer system in its default configuration includes
a number of layout presets. The default output head configuration is set to automatically
detect the resolution of the associated display. If this information is not available, it will fall
back to 1920 × 1080 @ 60 Hz (HDTV). The Kaleido-Modular range offers the most space-
and energy-efficient multiviewer system. Housed in a Densité3+ FR1, Densité3or Densité3
mini frame, the expandable, eight-input, dual-output KMV-3911 card replaces the earlier
KMV-3901 model in the Kaleido-Modular range. A single 3 RU Densité 3 frame can hold up
to 10 KMV-3911 (or KMV-3901) multiviewer cards, providing up to 20 quad-split outputs.
The highly compact, half-1 RU Densité 3 mini frame can hold a single multiviewer card,
providing up to two quad-split outputs. The Densité3+ FR1 frame can hold two multiviewer
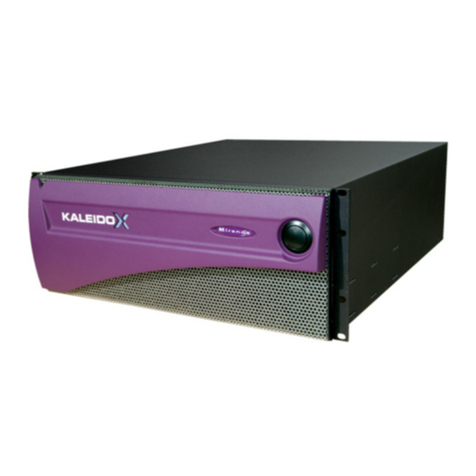
2
Setting Up Your Multiviewer
Getting Organized
cards, providing up to four quad-split outputs. The Kaleido-Modular range is ideal for
production monitoring in trucks. It integrates tightly with other Densité signal processing
cards, routers and production switchers.
Overview of single card functionality
Kaleido-Modular KMV-3901/3911 systems are available in the following sizes: 4 × 1, 4 × 2,
8× 1, 8 × 2, 12 × 1, 12 × 2, 16 × 1, 16 × 2, 20 × 1, 20 × 2, 24 × 1 and 24 × 2. In addition to the
earlier model’s features, the KMV-3911 supports up to two HD-SDI monitoring outputs.
Getting Organized
This section provides information about system requirements, and items shipped with your
KMV-3901/3911 card.
Required Materials
Your KMV-3901/3911 system package includes the following:
• KMV-3911 (or KMV-3901) card (front and rear modules)
• One or two 35-cm (14-inch) DIN-to-BNC cable adapters (for KMV-3911 models with HD-
SDI monitoring output option only)
• The KMV-3901/3911 Quick Start Guide (this document)
• DVD including the Release Notes for the current version of the Kaleido-X software, the
Kaleido-X User’s Manual, database samples, Quick Start guides and hardware reference
manuals for all multiviewer models
Note: In line with our commitment to environmental preservation, only the
Quick Start Guide for your multiviewer model, and some ancillary
documents (e.g. welcome letters, warranty cards) are distributed in printed
form. All manuals are available on the DVD that shipped with your
multiviewer. See the “Documentation” section of the Release Notes for a
complete list. You can obtain the latest version of the manuals, the Release
Notes, as well as software and useful data, from the Software and
documentation section of Miranda’s support portal.
3
KMV-3901/3911
Quick Start Guide
In addition to the above, you will need the following (not supplied):
•Upto2displays
• A dedicated 100Base-T Ethernet switch with enough ports for the KMV-3901/3911,
client PCs, and Kaleido-RCP2 units
• Client PC (see below for system requirements)
• Cables (to connect your multiviewer to video sources, to displays, and to the network):
System Requirements for a Client PC
A client PC running Windows XP (or Windows 7) is required to access the XAdmin Web
client, as well as to run the XEdit application.
Step 1: Physical Setup
Cable type Purpose
CAT-5 For Ethernet connectivity
Display cables Either extension modules—for example Miranda’s DXF-200 (part
number DXF-200-C)—or standard HDMI cables (non-locking)
Video cables Standard coaxial cables with BNC connectors
Notes
• On all Miranda multiviewers, the network adapters are set to auto-
negotiate. By default, the connection speed and duplex mode will be set
automatically based on the corresponding port settings on the switch.
• If you have two displays, make sure the HDMI connectors on the
multiviewer side have the same dimensions. Otherwise, the multiviewer’s
built-in locking mechanism will not be able to secure the smaller of the
two connectors. You may order suitable HDMI cables from Miranda—
HDMI to DVI female cable (1ft), part no. KXC-HDMI-DVI.
Minimum configuration 1 GB of RAM
Pentium 4 at 1 GHz
Recommended At least 2 GB of RAM
Core 2 Duo at 2 GHz, or better
Hard disk At least 125 MB free
IMPORTANT
Make sure the KMV-3901/3911 cards are NOT connected to the network
To avoid IP-address conflicts during this initial physical setup make sure none
of the multiviewer cards are connected to the network—i.e. make sure there
is no cable connected to your cards’ ETH port—before powering up the
Densité frame.
4
Setting Up Your Multiviewer
System Requirements for a Client PC
To set up the multiviewer hardware
1 Referring to the Guide to Installation and Operation that shipped with your
Densité 3+ FR1, Densité 3 mini or Densité 3 housing frame, mount the KMV-3901/3911
multiviewer card and associated rear panel in the housing frame, and then power up
the frame.
Leave the frame door open so that you can monitor all the card’s LEDs.
The KMV-3901/3911 card starts up. The startup sequence takes approximately five
minutes, during which time the Status LED is blinking orange:
Once the startup has completed, the Status LED should be red (steady) because the
card is not connected to the network yet:
Densité CPU-ETH2 Enhanced Ethernet Controller Card
A Densité frame housing a KMV-3901/3911 multiviewer card must have a
controller card (Densité CPU-ETH2 Enhanced Ethernet Controller Card) with
firmware version 2.0.4 or later. A controller with an earlier version of the
firmware cannot provide a time reference to the multiviewer card. Make sure
the controller’s internal clock is set to the correct date and time. The clock
settings will persist for 10 days after a power loss. Should you need to change
the time on a Densité CPU-ETH2 controller, then make sure to restart all
multiviewers located in the same housing frame as the controller card. Refer
to the Densité CPU-ETH2 Enhanced Ethernet Controller Card Guide to
Installation and Operation for more information.
Note: For more information on the card’s LEDs, refer to the KMV-3901/3911
Guide to Installation and Operation, available on the DVD that shipped with
your system.
Green Blinking orange Red Blinking red
Normal Booting (or the card is
selected for local control)
No Ethernet / SD card
error
Fan failure / no rear /
duplicate IP address
IMPORTANT (continued)
Select button
Status LED
Boot LED,
Power LED,
CPU Status LED (other side of board)
SDI LEDs
USB connector (other side of board)
5
KMV-3901/3911
Quick Start Guide
2 Connect a client PC, and the Kaleido-RCP2 (if available) to a dedicated 100Base-T
Ethernet switch (see Cabling Diagram, on page 8). You can also connect a mouse and a
keyboard to your Kaleido-RCP2.
The KMV-3901/3911 multiviewer has been configured to automatically detect the
resolution of any connected display. If the required information is not available, then a
fall-back resolution of 1920 × 1080 @ 60 Hz (HDTV) is used.
3 Connect one output of the multiviewer to a display that supports this resolution (see
Cabling Diagram, on page 8). If you wish to use a different resolution, see Changing the
Output Resolution, below, for detailed instructions.
4 Connect one or more video sources to your multiviewer’s inputs (see Cabling Diagram,
on page 8).
5 Check that all SDI LEDs associated with the connected video inputs are green:
Notes
• The Kaleido-RCP2 is an optional device, and may not have been shipped
with your KMV-3901/3911 system. For information on this and other
options for your multiviewer system, please contact your Miranda sales
representative.
• You may need to upgrade your Kaleido-RCP2 devices (if available) to the
latest firmware. The update file can be found on the DVD that shipped with
your multiviewer, and on Miranda’s support portal. Please refer to the
Kaleido-RCP2 Guide to Installation and Operation (available on the DVD, and
from the portal) for instructions on how to determine the firmware level,
and how to perform the upgrade.
Note: If your display is not collocated with your Densité frame you may
choose to employ a DXF-200 transmitter/receiver device that allows you to
install a display up to 1,000 meters (3,300 feet) from the signal source. For
more information on the DXF-200, refer to the DXF-200 DVI/HDMI Optical
Extension System User’s Manual (part no. M916-9900-104).
Select button
Status LED
SDI LEDs
2
1
3
4
5
6
7
8
6
Setting Up Your Multiviewer
Changing the Output Resolution
To change a display’s resolution from the Densité controller’s local control panel
1 Press the Select button on the front edge of the KMV-3901/3911 card.
The Status LED on the selected card flashes orange, and the associated control menu
appears on the LCD display of the Densité frame’s local control panel.
2 On the local control panel, press the [–] button twice, until RESOLUTION appears on the
LCD display:
IMPORTANT
All KMV-3901/3911 cards within a housing frame must have their output
heads configured with the same refresh rate. If your frame is referenced, then
the heads’ refresh rate must also match the reference signal's refresh rate.
Note: You can navigate the control menu by using the four buttons located
beneath the display:
• Press the [+] and [–] buttons, to navigate between menu options or
between parameter values.
• Press SEL to access the next menu level. When a parameter value is shown
on the display, modify the value by using the [+] and [–] buttons, and then
press SEL to apply the new value.
• Press ESC to go back to the previous menu level.
• Once you have completed your changes, press the Select button on the
front edge of the KMV-3901/3911 card to exit the control menu.
Select button
Status LED
Boot LED,
Power LED,
CPU Status LED (other side of board)
SDI LEDs
USB connector (other side of board)