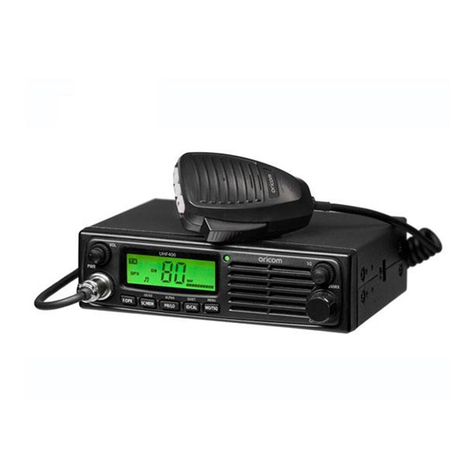
BelFone BF-TM8500 User manual

1
User Notification
Government law prohibits the operation of unlicensed radio transmitters within
the territories under government control.
Illegal operation is punishable by fine or imprisonment or both.
THANK YOU
We are grateful you choose BelFone series professional radio communications
products!
Since 1989, in order to lead the market, BelFone has been always engaging in
research and exploration of radio communications technologies. We make
every effort to research and design products according to modern complicated
communications environment, and offer complete and customized
communication solutions to clients. Our products will satisfy you due to its
excellent performance and outstanding communications. No matter what field
you are in, you will be satisfied with the radio.
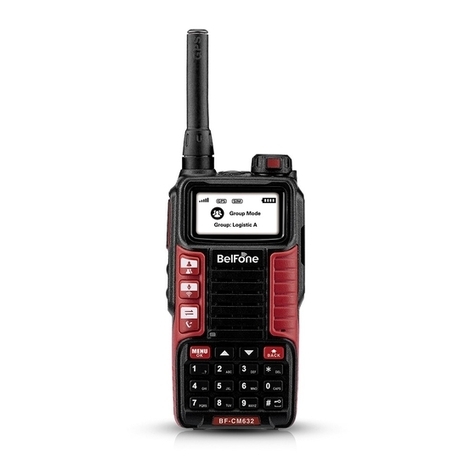
DMR digital FM transceiver model: BF-TM8500

2
Precautions
It’s important that the operator is aware of and understands hazards common
to the operation of any radio. It’s important that the operator is aware of
common radio operation hazards. Please observe the following safety
precautions to prevent radio damage or personal injury during operation,
service and repair of this radio.
◆The usage rate recommended is 1 minute for TX and 4 minutes for RX,
when the radio is used for transmission for long time, the radiator and chassis
will be hot.
◆Do not place the transceiver under direct sunlight for a long time, in extreme
warm, damp, dusty areas, and on uneven surface.
Warning!
◆In explosive atmospheres(inflammable gas, dust particles, powder-covered,
etc.), please turn the power off.
◆Do not carry spare fuel containers in the trunk of your vehicle if your
transceiver is mounted in the trunk area.
◆Various electronic equipment in your vehicle may malfunction if they are not
properly protected from the radio frequency energy which is present while
transmitting. If your vehicle contains such equipment, consult the dealer for aid
in determining if they will perform normally while transmitting.

3
◆If warning signals are released when use the radio, please obey the rule and
turn off the transceiver.
◆Please avoid to use the radio while driving, which may be against the traffic
rules.
◆If you notice any problems of the radio, please turn it off firstly. Then contact
with local dealer. Do not service/ repair this radio unless instructed by this
manual or refer it to qualified licensed or technicians only.
◆If you want to use the machine for secondary development, please contact
with BelFone’s technical engineer or dealer for technical assistance.
◆Please keep radio surface clean and dry, wipe it by cloth moistened with
clean water and mild dishwashing liquid.

4
Contents
Supplied Accessories......................................................................................................................... 5
Installation of Accessories ................................................................................................................ 6
Getting Acquainted ......................................................................................................................... 11
Basic Operation ............................................................................................................................... 14
LCD Icons ............................................................................................................................... 14
Turning the power on /off ....................................................................................................... 15
Adjusting the volume .............................................................................................................. 15
Selecting a Channel ................................................................................................................. 15
Selecting a Zone ...................................................................................................................... 15
Dual Modes Switching ............................................................................................................ 15
Call .......................................................................................................................................... 16
Receiving and calling back ..................................................................................................... 18
Button Setting ......................................................................................................................... 18
Functions and Operations ................................................................................................................ 20
Contacts ................................................................................................................................... 20
Scan ......................................................................................................................................... 22
Zone ........................................................................................................................................ 23
SMS......................................................................................................................................... 23
Call Logs ................................................................................................................................. 24
Settings .................................................................................................................................... 25
Digital Emergency Operation/ Alarm ..................................................................................... 28
Analog Emergency Operation/ Alarm ..................................................................................... 29
Alone Worker .......................................................................................................................... 30
Positioning Service ................................................................................................................. 30
Voice Recording ...................................................................................................................... 32
Bluetooth Service .................................................................................................................... 32
Voice Encryption ..................................................................................................................... 33
Dual Capacity Direct Mode .................................................................................................... 33
Pseudo Trunk .......................................................................................................................... 34
Radio Priority-Based Interrupt ................................................................................................ 34
Roam ....................................................................................................................................... 35
Time Out Timer (TOT) ........................................................................................................... 35
TX Permission......................................................................................................................... 35
Analog Feature ........................................................................................................................ 36
Analog Signaling..................................................................................................................... 37
2-Tone Signaling ............................................................................................................. 37
5-Tone Signaling ............................................................................................................. 38
DTMF Signaling ............................................................................................................. 39
Specifications ................................................................................................................................ 40
Statement......................................................................................................................................... 41

S
u
Not
e
fact
o
A
ft
e
tab
co
n
A
c
c
Mi
c
DC
Not
e
u
pplie
e
s: The acc
e
o
ries.
e
r carefull
y
le below.
n
tact with
d
c
essories
M
Mo
Mic
r
D
C
Inst
W
c
rophone
power ca
b
e
s: Use acc
d Acc
e
e
ssories lis
t
y
unpackin
If any ite
m
d
eale
r
im
m
Items
M
icrophon
unting bra
c
r
ophone h
a
C
power c
a
Screws
Fuse
ruction M
a
W
arranty C
a
Certificat
e
b
le
essories on
e
ssori
e
t
ed below a
r
g the tran
s
m
s are mi
s
m
ediately.
e
c
ket
a
nge
r
a
ble
a
nual
a
rd
e
Mountin
g
Scr
e
ly specified
5
e
s
r
e covered
b
s
ceiver, pl
e
s
sing or
d
g
bracket
e
ws
by BelFon
e
b
y BelFone
d
e
ase confi
r
d
amaged
d
e
.
d
ealer, auth
r
m the ite
m
d
uring shi
p
Quantity
1
1
1
1
2
1
1
1
1
Microph
Fuse
orized age
n
m
s listed i
n
p
ment, pl
e
one hang
e
n
ts or
n
the
e
ase
e
r

I
n
Mo
To
ve
h
ve
h
an
d
Ins
t
sel
f
sp
e
A
n
t
Be
f
Th
e
an
t
aff
e
n
stalla
bile Trans
c
installth
e
h
iclethat
m
h
icleisin
m
d
shielde
d
t
allthem
f
-tapping
e
cifiedM
o
t
enna Inst
a
f
oreoper
a
e
success
t
ennaan
d
e
ctedby
a
tion o
f
c
eiver Inst
a
e
transcei
v
m
inimize
s
m
otion.T
d
fromdir
e
ounting
b
screws.E
o
untingb
r
a
llation
a
ting,yo
u
of your
d
itscorre
c
a
ntennas
y
f
Acc
e
a
llation
v
er,select
s
danger
t
rytocho
o
e
ctsunlig
b
racketin
nsuretha
t
r
acketan
d
u
mustin
s
installati
o
c
tinstalla
t
y
steman
d
6
e
ssori
e
asafe,c
o
t
oyourp
a
o
sethelo
ht.
thevehic
t
allhard
w
d
screwst
s
tallanef
f
o
n will
d
t
ion.The
T
d
itsinsta
l
e
s
o
nvenient
a
ssengers
cationw
h
leusingt
h
w
areisti
g
oinstall.
f
icient,w
e
d
epend l
a
T
ransceiv
e
l
lationqu
a
location
i
andyour
h
ichiswel
h
esuppli
e
g
htened;
p
e
ll-tuned
a
a
rgely on
e
rperfor
m
a
lity.
i
nsideyo
u
selfwhile
l-ventilat
e
e
d
p
leaseus
e
a
ntenna
f
the typ
e
m
ancewil
u
r
the
e
d
e
f
irst.
e
of
lbe

Th
e
ob
s
th
e
No
t
Po
w
Be
If
t
ou
t
e
antenn
a
s
taclesar
o
e
centero
f
t
es:
Use a low-
transceive
r
having an i
and dama
g
Transmit
t
damaget
beforetr
a
Allfixed
s
therisko
f
w
er Cable
suretou
s
t
he curre
n
t
putpow
e
a
forab
a
o
und;the
f
thecarr
o
loss coaxial
r
input impe
d
mpedance
o
g
e transceiv
e
t
ingwitho
u
hetransc
e
a
nsmitting
s
tationssh
f
fire,elec
t
Connecti
o
s
ea12V
n
t capaci
t
e
rmayd
r
a
se statio
n
antenna
o
of;the
h
feed line th
d
ance. Cou
p
o
ther than
5
e
r.
u
tconnect
e
e
iver.Alwa
y
.
ouldbee
q
t
ricshock,
o
n
vehicleb
a
t
y to the
r
opexces
s
7
n
shall b
e
fortrans
c
h
igherant
e
at also has
p
ling the an
t
5
0 Ω reduc
e
e
dantenn
a
y
sconnec
t
q
uippedw
i
ortransce
a
tterytha
transcei
v
s
ivelyan
d
e
setina
c
eiveriss
u
e
nnawill
a impedan
c
t
enna to th
e
e
s the effici
e
a
orother
t
theanten
i
thalight
n
iverdama
g
thassuff
v
er is ins
d
generat
e
highgr
o
u
itablefo
gainbett
e
c
e of 50 Ω,
t
e
transceive
r
e
ncy of the
a
matchedl
o
natothe
t
n
ingarrest
e
g
e.
icientcur
r
ufficient,
e
warnin
g
o
und wit
h
rinstallin
g
e
rcovera
g
t
o match th
e
r
via feed li
n
a
ntenna sy
s
o
admay
t
ransceive
r
e
rtoredu
c
r
entcapa
c
the tran
s
g
tone.N
e
h
out
g
in
g
e.
e
n
es
s
tem
r
c
e
c
ity.
s
mit
e
ver

co
n
tra
n
To
ne
g
No
t
◆
T
bat
t
cor
r
off
t
◆
u
co
n
ter
m
◆
C
to
o
◆
D
n
nect the
n
sceivert
o
prevent
t
g
ativeba
t
t
es:
T
his transc
e
t
ery to po
w
r
ect polari
t
t
he batter
y
u
sing spe
c
n
nects to
t
m
inal, b
e
C
onfirm th
o
perate.
D
o not re
m
transcei
v
o
24Vpo
w
t
he risk
o
t
teryterm
e
iver is d
e
w
er the tra
t
y and the
y
as follow
i
c
ified tran
s
t
he positiv
e
e
carefully
e correct
a
m
ove the
v
er to a 2
w
erpleas
e
o
f short c
i
inalbefo
r
e
signed fo
r
nsceiver.
B
voltage of
i
ng:
s
ceiver po
e
(+) ter
m
to prevent
a
nd securi
t
fuse hold
e
8
4 V batt
e
e
selecta
i
rcuits, di
s
r
econnec
t
r
a 13.8 V
B
efore ins
t
the batter
y
wer cable
m
inal and
b
the risk o
f
t
y of the c
o
e
rs from
t
e
ry. If ne
c
specified
s
connect
t
ingthet
r
power s
o
t
alled the
d
y
. Pay att
e
to conne
c
b
lack con
n
f
short circ
o
nnection
s
t
he cable,
c
essary to
DC-DCb
a
other wir
r
ansceive
r
o
urce. Nev
e
d
evice, pl
e
e
ntion to c
o
c
t battery
n
ects to t
h
uits durin
g
s
, then tur
n
otherwis
e
connect
a
ttery.
ing from
r
.
e
r use a
2
e
ase chec
k
o
nnect an
d
terminals;
h
e negativ
e
g
connecti
n
n
on the p
o
e
the inco
r
the
the
2
4 V
k
the
d
cut
red
e
(-)
n
g.
o
wer
r
rect

co
n
Mi
c
Pu
t
mi
c
loc
k
mi
c
Fix
e
In
o
se
p
rec
Th
e
ins
t
n
nection m
c
rophone I
n
t
the groo
v
c
rophone i
k
ing tab cl
c
rophone l
a
e
d Station
o
rdertou
p
arate13.
8
ommend
e
e
powers
u
t
alliton
w
ay lead to
n
stallation
v
es of the
nterface
o
icks. To p
u
a
tch out.
Installatio
sethistra
8
VDCp
o
e
dcurren
t
u
pplyan
d
w
allbysu
i
the devic
e
hand micr
o
o
f the mo
b
u
ll microp
h
n
nsceiver
f
o
wersup
p
t
capacit
y
d
fixedsta
t
i
tablebra
c
9
e
get smo
k
o
phone pl
u
b
ile, pleas
e
h
one awa
y
f
orfixeds
t
p
ly(noti
n
y
ofyour
p
t
ioncan
p
c
ket.
k
e.
u
g on the
e
press d
o
y
from tran
t
ationop
e
n
cludedi
n
p
owersu
p
p
laceon
w
top and i
n
o
wn a littl
sceiver, p
u
e
ration,y
o
n
theacc
e
p
plyis15
A
w
orktable
;
n
sert it int
o
e bit until
u
ll the he
a
o
uwillne
e
e
ssories).
A
ormor
e
;
alsoyou
o
the
the
a
d of
e
da
The
e
.
can

◆
tra
n
◆
◆
th
e
(R
e
◆
Not
e
usi
n
Re
p
Aft
co
n
au
t
Before fi
n
sceivert
o
Ensuretr
a
Connect
t
e
DCpow
e
e
d:positiv
Pressthe
e
:
For your
n
g the BF s
p
p
lacing Fu
s
Ifthefu
s
erthepr
o
n
tinueto
b
t
horized
d
nished al
o
anAC
o
a
nsceiver
t
hetrans
c
e
rcablea
e,Black:
n
connect
o
transceive
r
p
ecified po
w
s
es
s
eblows,
o
blemisr
e
b
low,dis
c
d
ealeror
a
l connec
t
o
utlet.
andDC
p
c
eiver’sD
ndconfir
m
n
egative).
o
rsfirmly
t
r
to fully ex
w
er supply.
determin
e
e
solved,r
c
onnectt
h
a
nauthori
10
t
ions, Ple
a
p
owerare
Cpower
m
thecor
t
ogether
u
hibit its pe
r
e
thecau
s
eplaceth
e
h
epower
c
zedservi
c
a
se don’
t
cutoff.
connecto
rectpola
r
u
ntilthel
o
r
formance
c
s
e,thenc
o
e
fuse.If
n
c
ableand
c
ecenter
f
t
directly
rtothe
c
r
ityofthe
o
ckingta
b
c
apabilities,
o
rrectthe
n
ewlyinst
contact
y
f
orassist
a
connect
c
onnecto
r
connecti
o
b
clicks.
we recom
m
problem
.
alledfus
e
y
our
a
nce.
the
r
on
o
ns.
m
end
.
e
s

G
Fr
o
1
o
2
L
3
4
c
5
6
d
q
7
O
ettin
g
o
nt Pa
n
Power swi
power on,
o
ff.
L
ED Indic
a
Micropho
n
Left Key:
c
hannel, l
o
Program
m
Down Ke
y
d
ecrease
t
press to d
e
q
uickly.
O
K Key:
P
Menu
Acqu
n
el
tch key: s
h
long pres
s
a
tor
n
e Jack
Short pr
e
o
ng press
t
m
able Key
F
y
: Short p
r
t
he volum
e
e
crease
th
P
ress to c
o
ainte
d
h
ort press
s
to turn p
o
e
ss to s
e
t
o select a
F
3
r
ess to
e
level or l
o
e volume
l
o
nfirm or g
11
d
to turn
o
wer
8
9
1
e
lect a
zone
1
1
o
ng
l
evel
1
o to
1
8
Progr
a
9
Right
K
select
select
1
0Progr
a
1
1Up K
e
increa
long p
volum
e
1
2Progr
a
1
3Orang
enabl
e
Long
p
emer
g
1
4Spea
k
a
mmable
K
K
ey: Shor
t
a channel
a zone.
a
mmable
K
e
y: Short
p
se the vol
u
ress to in
c
e
level qui
c
a
mmable
K
e Key: S
h
e
the emer
g
p
ress to di
s
g
ency feat
u
k
er
K
ey F4
t
press to
, long pre
s
K
ey F1
p
ress to
u
me level
o
c
rease
the
c
kly.
K
ey F2
h
ort pres t
o
g
ency fea
t
s
able the
u
re.
s
s to
or
o
t
ure,

R
e
1
2
3
4
St
a
e
a
r
Pan
e
ANT: C
o
DC 13.8
V
BNC:
C
PC Jack:
a
ndard
e
l
o
nnect an
V
: Conne
C
onnect to
Connect t
o
Micro
p
external a
ct to13.8
V
GPS ante
n
o
PC
p
hone
12
ntenna or
V
DC pow
e
n
na
a dummy
e
r.
load to thi
s
s
terminal

1
2
O
p
1
2
3
4
5
6
7
PTT K
e
Microp
h
p
tional
M
Pr
o
M
i
*
Pr
o
e
y
h
one(MI
C
M
icrop
h
Left K
e
PTT
K
o
grammab
l
i
crophone
Numeri
c
*
Key: To
o
grammab
l
C
)
h
one
e
y
K
ey
l
e Key F3
(MIC)
c
key
delete
l
e Key F1
13
8
9
10
11
12
13
14
Pro
g
Pro
g
UP K
e
g
rammabl
e
OK K
e
Right
K
g
rammabl
e
DOWN
K
#Ke
y
e
y
e
Key F2
e
y
K
ey
e
Key F4
K
ey
y

B
a
L
C
a
sic
O
C
D Icon
s
H
P
D
A
A
d
D
a
P
G
A
S
R
L
K
O
perat
i
s
Signal S
t
H
igh / Mid
d
P
owe
r
D
igital Mo
d
A
nalog M
o
A
nalog co
m
d
igital mo
d
D
igital co
m
a
nalog mo
P
rivate Ca
G
roup Cal
l
A
ll Call
S
can On/
R
oam
L
ocation
O
K
eypad L
o
i
on
t
rength
d
le/ Low
d
e
o
de
m
patible
d
e
m
patible
de
ll
l
O
n
o
cked
14
Connect
t
Connect
t
Direct /T
a
Fail to se
n
Message
Read Me
s
Unread
M
Missed C
a
Mute all
Emergen
c
Recordin
g
Recordin
g
Connect
t
Enable M
t
o PC
t
o Bluetoo
t
a
lk around
n
d messa
g
send suc
c
s
sage
M
essage
a
ll
c
y
g
normally
(
g
abnorm
a
t
o App
onitoring
t
h earpho
n
Mode
g
e
c
essfully
(
Black Ico
n
a
lly(Red Ic
o
n
e
n
)
o
n)

Tu
r
Sh
o
pro
Lo
n
A
d
j
Inc
r
[D
O
Se
Pr
e
for
Se
Th
e
zo
n
req
swi
D
u
If c
u
fun
c
r
ning the
o
rt press t
h
mpts the
c
n
g press t
h
j
usting t
h
r
ease the
v
O
WN Key].
lecting a
e
ss [Left K
e
channel s
w
lecting a
e
radio su
p
n
es all sup
p
uired zon
e
tch the ch
a
u
al Mod
u
rrent cha
n
c
tion to s
w
power o
h
e power
s
c
urrent ch
a
h
e power s
w
h
e volum
e
v
olume by
Channel
e
y] or [DO
W
w
itch.
Zone
p
ports up t
o
p
ort up to
e
on the m
e
a
nnel. Or
L
es Swi
t
n
nel mod
e
w
itch the c
h
n /off
s
witch key
a
nnel num
b
w
itch key
e
pressing
[
W
N key] t
o
o
64 zone
s
160 chan
n
e
nu and t
h
L
ong pres
s
t
ching
e
is D/A co
m
h
annel mo
d
15
to tu
r
b
e
r
;
about
[
UP Key];
D
o
select a
c
s
, each wi
t
n
els via pr
o
h
ere will b
e
s
[Left Key
]
m
patible,
p
d
e. The c
u
r
n on the r
a
3 second
s
D
ecrease
t
c
hannel. T
h
t
h a maxi
m
o
grammin
g
e
voice pro
]
or [Right
p
ress side
u
rrent cha
n
a
dio, an a
u
s
to turn of
f
t
he volum
e
h
ere will b
e
m
um of 16
c
g
software.
mpt after
s
Key] to s
e
button【
A
n
nel mode
u
dio voice
f
the radio
.
e
by press
i
e
voice pr
o
c
hannels,
5
Select th
e
s
uccessful
l
e
lect a zon
e
A
D Switch】
is digital
.
i
ng
o
mpt
5
0
e
l
y
e
.

16
compatible analog , press 【AD Switch】button to switch to analog compatible
digital mode; the current channel mode is analog compatible digital, press
【AD Switch】button to switch to digital compatible analog mode.
Note: AD Switch function only switching the channel mode temporarily, while you restart
the radio or rotate channel selector knob, the current channel will resume defaulting
mode.
Call
In digital mode, you can transmit a private call, group call or all call. In dual
band mode, in analog mode, press PTT key to transmit directly; On analog
compatible digital channel press PTT key, if is not within hang time to transmit
analog call, within the hang time to call back; On digital compatible analog
channel press PTT key, if is not within hang time to initiate a digital call, within
hang time to call back. To transmit hold the radio vertically 3 to 4cm from your
mouth, speak a normal tone of voice and the LED lights up red means
transmitting.
Private Call
If the feature “private call ACK” is enabled, to transmit a private call need to
confirm whether it is power on or activate on the current channel.
(1) If a private call ID in current digital channel has been defaulted, press
PTT key to call.

17
(2) You can select the private call from address book and press PTT key to
call.
(3) Enter Contacts menu and go to manual dial menu or press programmed
“Manual Dial” key, input a private call number you want to call, then
press PTT key to transmit;
(4) You can select the private call from the missed/received/called out
records and PTT key to call.
(5) You can set the One Touch Call button as private call, then press
programmed button to transmit a private call.
Group Call
(1) If the group call ID in current digital channel has been defaulted, press
PTT key to call.
(2) You can select group call from address book and press PTT button to
call.
(3) You can select the group call from the called out records and PTT key
to call.
(4) You can set the One Touch Access button as group call, then press
programmed key to transmit a group call.
All Call
(1) If the all call ID in current digital channel has been defaulted, press PTT

18
button to call.
(2) You can select all call from address book and press PTT button to call.
Receiving and calling back
While a call is received on current channel, LED indicator glows green. While a
group or private call is received, you may press the PTT key within the preset
time period to call back. On compatible channel, while receiving, the radio
detect digital and analog signal (is must attach to CTCSS/CDCSS)
simultaneously, if detected matching signal, within the preset time period to
call back.
Button Setting
For enhanced convenience, you may program the buttons F1, F2, F3, F4,
Orange button, short and long press of a key to be defined as different
functions.
Programmable buttons include the following functions:
No Name Description
1 Undefined Not assigned with any function
2 On Touch Call 1-6 In digital mode, to make group call/ private
call/call alert or send defaulted SMS quickly,in
analog mode, to make a signaling call.
3 Manual dial Quickly to input the private call number for
calling

19
4 Emergency On To send emergency information, only set as
short press
5 Emergency Off To exit emergency mode, only set as long press
6 Monitor To enable or disable monitor function quickly
7 Backlight On/Off Quick switch backlight mode.
8 Keypad Lock To lock or unlock the keypad quickly
9 Scan On/Off To enable or disable scan function quickly
10 All Alert Tones On/Off To enable or disable all tones quickly
11 Short Message Quick access to short message
12 Zone Toggle Quick access to [Zone Toggle]
13 GPS On/Off To enable or disable GPS quickly
14 Priority Interrupt To cut the call on current channel forcibly
15 AD Switch To temporarily switch channel mode to AD or
DA
16 Address List Quick access to [Address List] menu
17 Radio Enable Quick access to [Radio Enable] menu
18 Radio Disable Quick access to [Radio Disable] menu
19 Radio Check Quick access to [Radio Check] menu
20 Remote Monitor Quick access to [Remote Monitor] menu
21 High/Middle/Low
Power
To switch High/ Middle/Low Power quickly
22 Repeater/Talkaround To enable or disable talk around quickly
23 Nuisance Delete To temporarily ignore unwanted channel activity
24 Permanent Monitor To enable or disable permanent monitor

20
function
25 Record On/Off To enable or disable record quickly
26 Site Lock on/off Quick to lock current site
27 Manual Site Roam Quick to roam to next available site
28 VFO/MR Switch
Quick to switch channel display mode
29 Bluetooth Write
On/Off
Quick to enable or disable the Bluetooth Write
feature.
30 Bluetooth Audio
On/Off
Quick to enable or disable the Bluetooth Audio
feature.
Functions and Operations
Contacts
On the contacts menu, you can view the all contacts, add new contacts or
manual dialing.
1. Group Call()
While the contacts type as group call, you can select the menu to view its ID or
send message.
2. Private Call( )
While select a contact as private call, a private call can view its detail, edit
name or ID, delete, send message, send call alert, send device check, send
remote monitor, disable or enable.
Table of contents
Other BelFone Radio manuals

