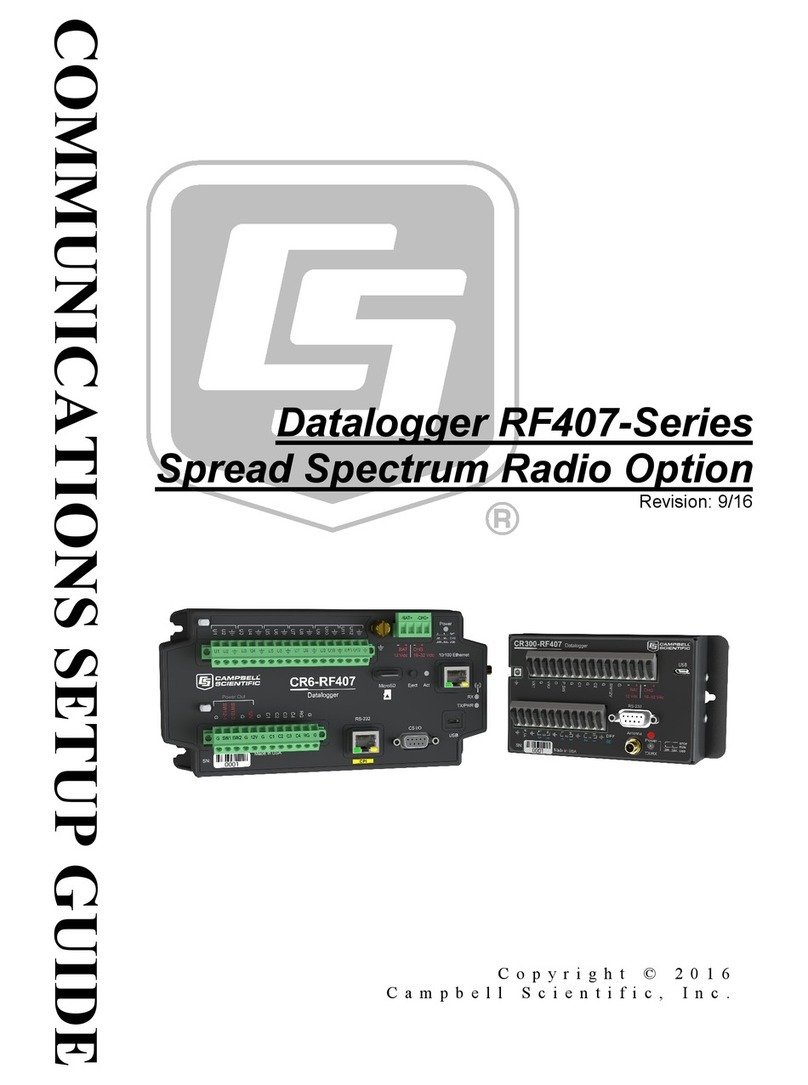
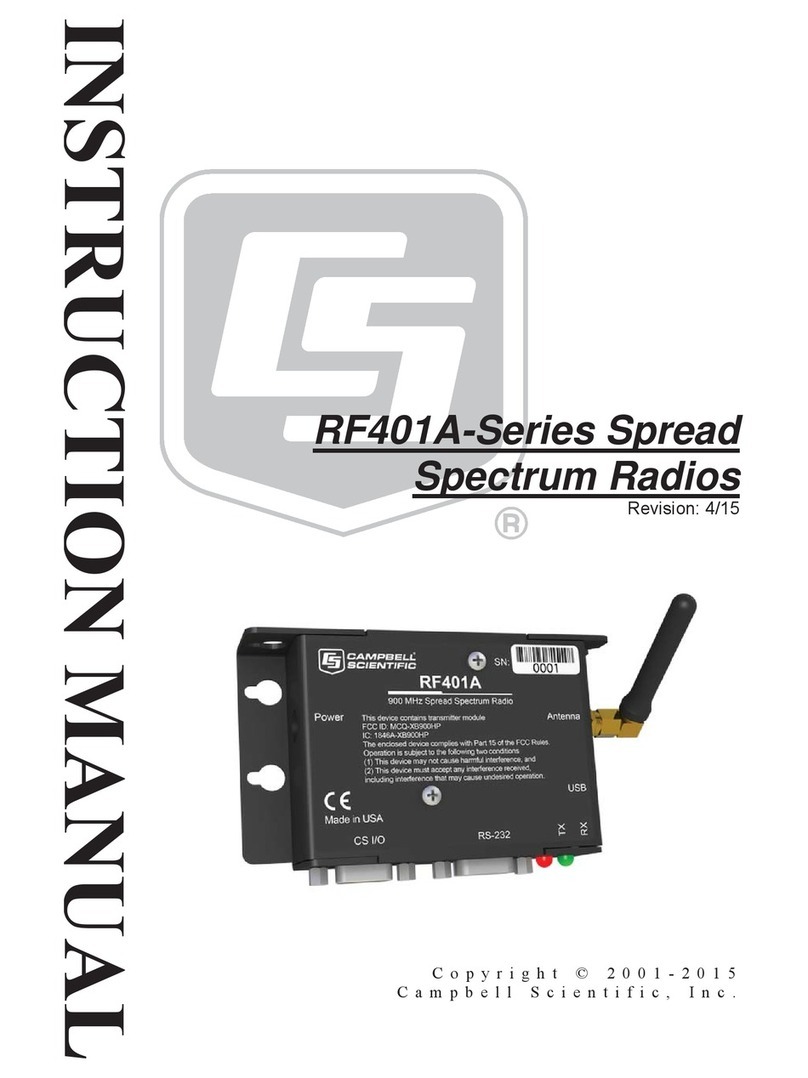
Campbell RF407 Series User manual

INSTRUCTION MANUAL
RF407-Series Spread
Spectrum Radios
Revision: 1/18
Copyright © 2001-2018
Campbell Scientific, Inc.


Assistance
Products may not be returned without prior authorization. The following
contact information is for Canadian and international clients residing in
countries served by Campbell Scientific (Canada) Corp. directly. Affiliate
companies handle repairs for clients within their territories. Please visit
www.campbellsci.ca to determine which Campbell Scientific company serves
your country.
To obtain a Returned Materials Authorization (RMA), contact CAMPBELL
SCIENTIFIC (CANADA) CORP., phone (780) 454-2505.After a
measurement consultant determines the nature of the problem, an RMA
number will be issued. Please write this number clearly on the outside of the
shipping container. Campbell Scientific’s shipping address is:
CAMPBELL SCIENTIFIC (CANADA) CORP.
RMA#_____
14532 131 Avenue NW
Edmonton, Alberta T5L 4X4
Canada
For all returns, the client must fill out a “Statement of Product Cleanliness and
Decontamination”form and comply with the requirements specified in it. The
form is available from our web site at www.campbellsci.ca/repair. A
completed form must be either emailed to repair@campbellsci.ca or faxed to
(780) 454-2655. Campbell Scientific (Canada) Corp. is unable to process any
returns until we receive this form. If the form is not received within three days
of product receipt or is incomplete, the product will be returned to the client at
the client’s expense. Campbell Scientific (Canada) Corp.f reserves the right to
refuse service on products that were exposed to contaminants that may cause
health or safety concerns for our employees.

Precautions
DANGER —MANY HAZARDS ARE ASSOCIATED WITH INSTALLING, USING, MAINTAINING, AND WORKING ON OR AROUND
TRIPODS, TOWERS, AND ANY ATTACHMENTS TO TRIPODS AND TOWERS SUCH AS SENSORS, CROSSARMS, ENCLOSURES,
ANTENNAS, ETC. FAILURE TO PROPERLY AND COMPLETELY ASSEMBLE, INSTALL, OPERATE, USE, AND MAINTAIN TRIPODS,
TOWERS, AND ATTACHMENTS, AND FAILURE TO HEED WARNINGS, INCREASES THE RISK OF DEATH, ACCIDENT, SERIOUS
INJURY, PROPERTY DAMAGE, AND PRODUCT FAILURE. TAKE ALL REASONABLE PRECAUTIONS TO AVOID THESE HAZARDS.
CHECK WITH YOUR ORGANIZATION'S SAFETY COORDINATOR (OR POLICY) FOR PROCEDURES AND REQUIRED PROTECTIVE
EQUIPMENT PRIOR TO PERFORMING ANY WORK.
Use tripods, towers, and attachments to tripods and towers only for purposes for which they are designed. Do not exceed design
limits. Be familiar and comply with all instructions provided in product manuals. Manuals are available at www.campbellsci.ca or by
telephoning (780) 454-2505 (Canada). You are responsible for conformance with governing codes and regulations, including safety
regulations, and the integrity and location of structures or land to which towers, tripods, and any attachments are attached. Installation
sites should be evaluated and approved by a qualified personnel (e.g. engineer). If questions or concerns arise regarding installation,
use, or maintenance of tripods, towers, attachments, or electrical connections, consult with a licensed and qualified engineer or
electrician.
General
Prior to performing site or installation work, obtain required approvals and permits.
Use only qualified personnel for installation, use, and maintenance of tripods and towers, and
any attachments to tripods and towers. The use of licensed and qualified contractors is
highly recommended.
Read all applicable instructions carefully and understand procedures thoroughly before
beginning work.
Wear a hardhat and eye protection, and take other appropriate safety precautions while
working on or around tripods and towers.
Do not climb tripods or towers at any time, and prohibit climbing by other persons. Take
reasonable precautions to secure tripod and tower sites from trespassers.
Use only manufacturer recommended parts, materials, and tools.
Utility and Electrical
You can be killed or sustain serious bodily injury if the tripod, tower, or attachments you are
installing, constructing, using, or maintaining, or a tool, stake, or anchor, come in contact
with overhead or underground utility lines.
Maintain a distance of at least one-and-one-half times structure height, 6 meters (20 feet), or
the distance required by applicable law, whichever is greater, between overhead utility lines
and the structure (tripod, tower, attachments, or tools).
Prior to performing site or installation work, inform all utility companies and have all
underground utilities marked.
Comply with all electrical codes. Electrical equipment and related grounding devices should
be installed by a licensed and qualified electrician.
Elevated Work and Weather
Exercise extreme caution when performing elevated work.
Use appropriate equipment and safety practices.
During installation and maintenance, keep tower and tripod sites clear of un-trained or non-
essential personnel. Take precautions to prevent elevated tools and objects from dropping.
Do not perform any work in inclement weather, including wind, rain, snow, lightning, etc.
Maintenance
Periodically (at least yearly) check for wear and damage, including corrosion, stress cracks,
frayed cables, loose cable clamps, cable tightness, etc. and take necessary corrective actions.
Periodically (at least yearly) check electrical ground connections.
WHILE EVERY ATTEMPT IS MADE TO EMBODY THE HIGHEST DEGREE OF SAFETY IN ALL CAMPBELL SCIENTIFIC PRODUCTS,
THE CLIENT ASSUMES ALL RISK FROM ANY INJURY RESULTING FROM IMPROPER INSTALLATION, USE, OR MAINTENANCE OF
TRIPODS, TOWERS, OR ATTACHMENTS TO TRIPODS AND TOWERS SUCH AS SENSORS, CROSSARMS, ENCLOSURES, ANTENNAS,
ETC.
PLEASE READ FIRST
About this manual
Please note that this manual was originally produced by Campbell Scientific Inc. (CSI) primarily
for the US market. Some spellings, weights and measures may reflect this origin.
Some useful conversion factors:
Area: 1 in2(square inch) = 645 mm2
Length: 1 in. (inch) = 25.4 mm
1 ft (foot) = 304.8 mm
1 yard = 0.914 m
1 mile = 1.609 km
Mass: 1 oz. (ounce) = 28.35 g
1 lb (pound weight) = 0.454 kg
Pressure: 1 psi (lb/in2) = 68.95 mb
Volume: 1 US gallon = 3.785 litres
In addition, part ordering numbers may vary. For example, the CABLE5CBL is a CSI part
number and known as a FIN5COND at Campbell Scientific Canada (CSC). CSC Technical
Support will be pleased to assist with any questions.
About sensor wiring
Please note that certain sensor configurations may require a user supplied jumper wire. It is
recommended to review the sensor configuration requirements for your application and supply the jumper
wire is necessary.


i
Table of Contents
PDF viewers: These page numbers refer to the printed version of this document. Use the
PDF reader bookmarks tab for links to specific sections.
1. Introduction ................................................................1
2. Precautions ................................................................1
3. Initial Inspection.........................................................1
4. QuickStart...................................................................2
4.1 Remote Station Radio ..........................................................................2
4.2 Base Station Radio ...............................................................................2
4.3 LoggerNet Setup ..................................................................................2
5. Overview .....................................................................3
6. Specifications.............................................................3
7. Product Description...................................................5
7.1 Mounting..............................................................................................5
7.2 Power ...................................................................................................5
7.3 USB......................................................................................................5
7.4 CS I/O ..................................................................................................6
7.5 RS-232 .................................................................................................7
7.6 LEDs ....................................................................................................8
7.7 Antenna ................................................................................................8
7.7.1 Compatible Antennas....................................................................8
7.7.2 Electrostatic Issues and Surge Protection .....................................9
7.7.3 Antenna Cables ...........................................................................10
8. Configuring the RF407 Series .................................10
8.1 DevConfig ..........................................................................................10
9. LoggerNet Setup ......................................................11
9.1 Basic Setup.........................................................................................11
9.2 Using a Repeater ................................................................................15
10. Installation Best Practices.......................................15
10.1 Avoiding Interference ........................................................................15
10.2 Antenna Selection, Placement, and Mounting ...................................16
10.3 Antenna Cables ..................................................................................16
11. Operation..................................................................16
11.1 Main ...................................................................................................17

Table of Contents
ii
11.1.1 Active Interface.......................................................................... 17
11.1.2 SDC Address.............................................................................. 18
11.1.3 RS-232 Baud Rate...................................................................... 18
11.1.4 Protocol ...................................................................................... 18
11.1.5 RF Hop Sequence....................................................................... 18
11.1.6 Network ID ................................................................................ 19
11.1.7 Power Mode ............................................................................... 19
11.1.8 Retry Level................................................................................. 19
11.1.9 Radio TX Power Level............................................................... 20
11.2 PakBus®............................................................................................. 20
11.2.1 PakBus Address ......................................................................... 20
11.2.2 PakBus Beacon Interval ............................................................. 21
11.2.3 PakBus Verify Interval............................................................... 21
11.2.4 Central Router ............................................................................ 21
11.2.5 Neighbors Allowed .................................................................... 21
11.3 Advanced........................................................................................... 22
11.3.1 Radio MAC Address .................................................................. 22
11.3.2 Available Frequencies................................................................ 22
11.3.3 Radio Channel Mask .................................................................. 22
11.3.4 Operating System Version ......................................................... 23
11.3.5 Radio Firmware Version ............................................................ 23
11.3.6 Received Signal Strength ........................................................... 23
11.3.7 Battery Voltage .......................................................................... 24
11.3.8 ME Baud Rate............................................................................ 24
11.3.9 RS-232 Parity............................................................................. 24
11.3.10RS-232 Stop Bits........................................................................ 24
11.3.11RS-232 Character Length........................................................... 24
11.3.12RS-232 Auto Power Down......................................................... 24
12. Attributions...............................................................25
Appendices
A. Part 15 FCC Compliance Warning......................... A-1
B. Distance vs. Antenna Gain, Terrain, and Other
Factors..................................................................B-1
B.1 Introduction ..................................................................................... B-1
B.2 How Far Can You Go?.................................................................... B-2
B.2.1Overview.................................................................................. B-2
B.2.2 Link Budget.............................................................................. B-2
B.2.3 Transmitter Power.................................................................... B-3
B.2.4 Cable Loss................................................................................ B-3
B.2.5 Antenna Gain ........................................................................... B-4
B.2.6 Receiver Sensitivity ................................................................. B-5
B.2.7 Path Loss .................................................................................. B-5
B.3 Real World Distance Estimates ....................................................... B-5
B.4 Examples ......................................................................................... B-7
Tables
7-1. USB Pinout (USB Type B Jack) ......................................................... 6
7-2. CS I/O Pinout ( 9-PIN D-SUB MALE) .............................................. 7

Table of Contents
iii
7-3. RS-232 Pinout (9-PIN D-SUB FEMALE)...........................................8
B-1. Transmitter Power............................................................................B-3
B-2. Cable Loss........................................................................................B-4
B-3. LMR-195 Cable Loss vs. Length @ 900 MHz ................................B-4
B-4. Antenna Gain of Recommended Antennas ......................................B-4
B-5. Free Space Path Loss .......................................................................B-5
B-6. 915 MHz Distance vs. Path Loss (Lpath in dB) per Two
Propagation Models*....................................................................B-6
B-7. Path Type vs. Path Characteristics Selector .....................................B-6
B-8. Lpath vs. Distance for 2-Ray Propagation Model in Example #1....B-7
B-9. Fade Margin (dB) vs. Distance for 2-Ray Propagation Model in
Example #1...................................................................................B-8
B-10. Lpath vs. Distance for 2-Ray Propagation Model in Example #2....B-8
B-11. Fade Margin (dB) vs. Distance for 2-Ray Propagation Model in
Example #2...................................................................................B-9
CRBasic Example
11-1. Retrieving RSSI Information .............................................................24

Table of Contents
iv

1
RF407-Series Spread Spectrum Radio
1. Introduction
This manual discusses the configuration, operation, and maintenance of the
Campbell Scientific RF407 series frequency-hopping spread-spectrum (FHSS)
radios. This manual will refer to these devices collectively as either “radio,”
“RF407 series,” or “RF407-series radio” unless otherwise noted.
The RF407-series radios are designed for license-free use in several countries:
•The RF407 has a 902 to 928 MHz operating-frequency range
appropriate for use in the United States and Canada. (FCC / IC / IFT
compliant)
•The RF412 has a 915 to 928 MHz operating-frequency range
appropriate for use in Australia and New Zealand. (ACMA compliant)
•The RF422 has an 863 to 870 MHz operating-frequency range
appropriate for use in most of Europe and some of Asia. (ETSI
compliant)
•The RF427 has a 902 to 907 and 916 to 928 MHz operating-frequency
range appropriate for use in Brazil. (ANATEL compliant)
2. Precautions
•This equipment generates, uses, and can radiate radio frequency energy
and, if not installed and used in accordance with the instructions, may
cause harmful interference to radio communications. See Appendix A,
Part 15 FCC Compliance Warning (p. A-1), for more information.
•It is recommended that the RF422 868 MHz radio be installed at least 200
meters from any 4G LTE cellular transmitter including towers and cellular
modems/gateways.
•Ensure maximum protection against surges. Use coaxial (antenna) surge
protection. Keep RS-232, CS I/O, and USB connections short or use
protective isolation and surge protection when appropriate.
•Where an AC adapter is used, Campbell Scientific recommends pn 15966.
Any other AC adapter used must have a DC output not exceeding 16 volts
measured without a load to avoid damage to the radio. Over-voltage
damage is not covered by factory warranty.
•Line-of-sight obstructions and RF interference will affect the transmission
distance. See Appendix B, Distance vs. Antenna Gain, Terrain, and Other
Factors (p. B-1), for a discussion of antenna gain and other factors affecting
distance.
3. Initial Inspection
•The RF407-series radios ship with an SC12 serial cable, a USB A to USB
B Cable, 2 grommets, and 2 screws.

RF407-Series Spread Spectrum Radio
2
•Upon receipt of the RF407-series radio, inspect the packaging and contents
for damage. File damage claims with the shipping company. Contact
Campbell Scientific to facilitate repair or replacement.
•Immediately check package contents against shipping documentation.
Thoroughly check all packaging material for product that may be trapped.
Contact Campbell Scientific immediately about any discrepancies. Model
numbers are found on each product. On cables, the model number is often
found at the connection end of the cable.
4. QuickStart
Out of the box, the radio is configured for use with a datalogger connecting via
CS I/O and using CS I/O SDC address 7.
4.1 Remote Station Radio
Using the supplied SC12 serial cable, connect the radio’s CS I/O port to the
CS I/O port of the datalogger.
4.2 Base Station Radio
You will need to connect the radio to your PC and use Device Configuration
Utility (DevConfig) to change the radio’s Active Interface to USB. To learn
more about connecting with DevConfig see Section 8.1, DevConfig (p. 10). Using
DevConfig, set the radio’s Active Interface setting to USB. The Power Mode
setting should match that of the device you are connecting to. Apply the
change(s), close DevConfig, and leave the radio connected to the PC via USB.
4.3 LoggerNet Setup
The next step is to run LoggerNet and configure it to connect to the datalogger
via the radio link.
1. From the EZ View of the LoggerNet Setup screen, press Add, select your
datalogger type, enter a name for your datalogger, and press Next.
2. Under Connection Type, select Direct Connect. Press Next.
3. Under COM Port Selection, select the port designated as RF407-Series.
4. Under Datalogger Settings, select a Baud Rate of 115200, enter the
PakBus Address of the datalogger, and set Extra Response Time to 1
second. Press Next.
5. Under Datalogger Settings – Security, enter any security codes that have
been previously configured in the datalogger. Press Next.
6. Review the Communication Setup Summary and verify that all settings
are correct. Press Next.
7. On the Communication Test screen, select Yes and press Next to verify
communication with the datalogger. If unable to communicate, press the
Previous button and review your settings. Once you have successfully
communicated with your datalogger, press the Finish button.
8. You are now ready to connect to your datalogger using the LoggerNet
Connect screen.

RF407-Series Spread Spectrum Radio
3
5. Overview
Spread-spectrum radios spread the normally narrowband information signal
over a relatively wide band of frequencies. This allows the communications to
be more immune to noise and interference from RF sources such as pagers,
cellular phones, and multipath. The RF407-series radios reduce susceptibility
to RF interference from other spread-spectrum devices by providing user-
selectable frequency-hopping patterns.
The RF407-series radios can provide up to three miles transmission range with
an inexpensive whip antenna. The radios can provide greater than 16 mile
transmission range when using a higher gain directional antenna at ideal
conditions. Compatible antennas are described in Section 7.7.1, Compatible
Antennas (p. 8).
6. Specifications
General
Dimensions: 11.1 x 6.9 x 2.7 cm (4.4 x 2.7 x 1.1 in)
Weight: 136 g (4.8 oz)
Two-piece aluminum case, black anodized
Radio
RF407 RF412 RF427 RF422
Radio Type Frequency Hopping Spread Spectrum (FHSS) SRD860, LBT +
AFA3
Frequency 902 to 928 MHz 915 to 928 MHz 902-907 MHz,
916-928 MHz 863 to 870 MHz
Transmit Power Output1 5 to 250 mW 2 to 25 mW
Channel Capacity Eight 25-channel
hop sequences
sharing 64
available
channels
Eight 25-channel
hop sequences
sharing 31
available
channels
Eight 25-channel
hop sequences
sharing 43
available
channels
Ten 30-channel hop
sequences2
Receiver Sensitivity –101 dBm –106 dBm
RF Data Rate 200 kbps 10 kbps
Link Throughput 105 kbps (maximum) 8 kbps (maximum)
Average Current
Consumption at 12 Vdc
Transmit
< 80 mA 20 mA
Idle On 14 mA 12 mA
Idle 0.5 sec Power Mode
4 mA 3.5 mA
Idle 1 sec Power Mode
3 mA 2.5 mA
Idle 4 sec Power Mode 1.5 mA 1.5 mA
1Software selectable
230 channels (default), software configurable to meet local regulations; 10 sequences for reducing interference through
channel hop
3See LBT + AFA Compliance and Performance below.

RF407-Series Spread Spectrum Radio
4
LBT + AFA Compliance and Performance
Complies with ETSI duty cycle requirements. Radio communication
effective duty cycle = (number of channels • 100) / 3600.
Channel Spacing: 100 kHz
Receiver Bandwidth: 150 kHz
Modulation Bandwidth: < 300 kHz
LBT Threshold: < –88 dBm
TX on Time: < 1 s
Power
Powered over CS I/O or 2.5 mm DC power jack
Input Voltage: 9 to 16 Vdc
Connections
USB:
USB Type B jack
Can draw enough power for normal operation from standard USB host
RS-232:
9-pin, Female
1200, 4800, 9600, 19200, 38400, 57600, and 115200 baud rate supported
CS I/O:
9-pin, Male
Provides power connection from datalogger for normal operation
Supports SDC (7|8|10|11) and Modem Enable (ME) Master communication
modes
Does not support ME Peripheral mode
Antenna Connector
Reverse Polarity SMA (RPSMA)
Diagnostics
LEDs: TX/PWR, RX
Received Signal Strength Indicator (RSSI) for Last Packet
Operating Temperature
Standard: –40 to 70 °C
Configuration
Device Configuration Utility via USB
Compliance
RF407: United States FCC Part 15.247: MCQ-XB900HP
Industry Canada (IC): 1846A-XB900HP
Mexico Federal Telecommunications Institute
IFT# RCPDIXB15-0672-A1
RF412: ACMA RCM
United States FCC Part 15.247: MCQ-XB900HP
Industry Canada (IC): 1846A-XB900HP
RF422: View the RF422 EU Declaration of Conformity at
www.campbellsci.com/rf422

RF407-Series Spread Spectrum Radio
5
RF427: This device complies with Brazil ANATEL standards in
Resolution No. 506. The operating frequencies are 902 MHz to
907 MHz and 915 MHz to 928 MHz
7. Product Description
7.1 Mounting
The mounting holes are designed to align with a one-inch-on-center hole
pattern and provide for ridged mounting of the radio in either a vertical or
horizontal orientation. #6-32 x 0.375-inch stainless steel Phillips head screws
(pn 505) and nylon grommets (pn 6044) are supplied for securing the radio to
the backplate of a Campbell Scientific enclosure.
7.2 Power
There are three ways the radio may be powered for operation. The radio may
be powered via CS I/O, USB, or the 2.5 mm DC power jack labeled as Power.
The power connector is most commonly used to supply power to the radio
when the radio is used as a standalone PakBus®router / RF repeater or when
the RS-232 port is used for interconnect with another device. The Field Power
Cable (pn 14291) or AC to DC power adapter (pn 15966) are used for
supplying 12 Vdc to the power connector.
The power connector of the radio uses the inner conductor for positive (+)
voltage and the outer / sleeve conductor for ground (–).
There are many AC adapters available with barrel
connectors that will fit the RF407 series. Damage that
occurs from the use of an AC adapter that is not the 15966
AC to DC power adapter will not be covered by warranty. If
using a different AC adapter, be sure that the adapter’s “no
load” voltage is below the 16 Vdc; measure the output with
a DC voltmeter while the AC adapter is plugged into the
outlet but not powering anything.
7.3 USB
The radio has a USB Type B jack that can be connected to your PC using the
supplied 17648 USB cable. The connection is used for power, configuration,
and data.
CAUTION

RF407-Series Spread Spectrum Radio
6
INSTALL the DEVICE DRIVER BEFORE connecting the radio
to your PC via USB for the first time. You will need the device
driver properly installed before you can connect to the radio via
USB. To install the device driver, download the latest version of
DevConfig from our website. Under Device Type, select Radio |
RF407 Series. Click the Install the USB device driver link and
follow the prompts.
Most host USB ports will supply a sufficient amount of voltage and current for
all normal operations. When used as a base radio, an external power supply is
generally not required. When sourcing operational power from the PC’s USB
port, connect the radio directly to the PC or to an externally powered USB hub.
When the radio is connected to the PC, a virtual COM port will be added to the
list of available ports (COM and LPT) devices. It will be descriptively labeled,
for example “RF407 Series (COM10)”, where COM10 denotes the COM port
enumerated by the Windows®operating system.
The USB port is always available for configuration purposes. Independent of
the Active Interface radio setting, USB can always be used for connecting with
DevConfig for radio configuration.
The USB interface is only available for operational, network communication
when the radio Active Interface setting is set as USB.
TABLE 7-1. USB Pinout (USB Type B Jack)
Pin Function
1 5V
2 Data–
3 Data+
4 GND
7.4 CS I/O
The CS I/O port is a 9-pin male D-Sub connector that is typically connected to
a Campbell Scientific datalogger using the supplied SC12 cable. This
connection is used for power and data.
The CS I/O port is not a typical RS-232 connection and is specific to Campbell
Scientific products. CS I/O cannot be used for radio configuration using
DevConfig.
For a typical remote radio site, the radio need only be connected to the
datalogger CS I/O port using the supplied SC12 cable. This connection will
supply operational power to the radio and serve as the data connection between
the radio the datalogger. The Active Interface setting must be set to CS I/O
SDC.
An alternative, but much less common, use of CS I/O is connection to another
communication peripheral through an A100 CS I/O null modem adapter (pn
NOTE

RF407-Series Spread Spectrum Radio
7
17366). This is typically only used when creating a “phone to RF base”
configuration. The radio’s Active Interface setting must be set to CS I/O ME
Master and the other device (for example COM220) must be capable of being
configured as a modem enabled (ME) peripheral.
TABLE 7-2. CS I/O Pinout ( 9-PIN D-SUB MALE)
Pin
Function
I/O
Description
1 5V I Sources 5 Vdc to power peripherals
2 GND GND for pin 1 and signals
3 Ring O Raised by modem to put datalogger
into telecommunications mode
4 RX O Serial data receive line
5 Modem Enable I
Raised when datalogger determines
that associated modem raised the ring
line
6 Synchronous
Device Enable I
Used by datalogger to address
synchronous devices; can be used as a
printer enable
7 CLK/Handshake I/O
Used by datalogger with SDE and TX
lines to transfer data to synchronous
devices
8 12V supplied by
datalogger PWR Sources 12 Vdc to power peripherals
9 TX I Serial data transmit line
I = Signal into the RF407 series, O = Signal out of the RF407 series
7.5 RS-232
The RS-232 port is a DCE, 9-pin female D-Sub connector used to for
connecting the radio to the RS-232 port of a datalogger, computer, or another
RS-232 device. This connection is most commonly used when connecting the
radio to a device without a CS I/O port or when linking two communication
peripherals, for example directly connecting the radio to an Ethernet serial
server.
The RS-232 port can be connected to a DTE device, like a computer or NL201,
using the pn 10873, 9-Pin female to 9-Pin male serial cable. The RS-232 port
can be connected to another DCE device, like a datalogger RS-232 or MD485
or cellular modem, using the 18663, 9-pin male-to-male null modem serial
cable.
When using RS-232, 12 Vdc power should be supplied to the power connector
using a field power connector or AC power adapter. The Active Interface
setting must be set to RS-232, and the RS-232 port configuration, like baud
rate, should match the device the radio is connected to.
RS-232 cannot be used for radio configuration using DevConfig.

RF407-Series Spread Spectrum Radio
8
TABLE 7-3. RS-232 Pinout (9-PIN D-SUB FEMALE)
Pin I/O Description
1
2 O TX
3 I RX
4
5 GND
6
7
8 O CTS
9
I = Signal into the RF407 series, O = Signal out of the RF407 series
7.6 LEDs
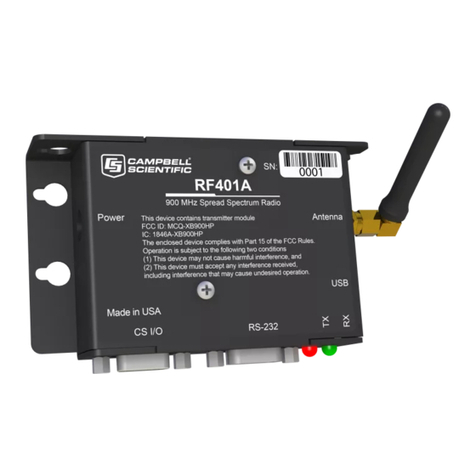
The radios have a red LED labeled TX/PWR and a green LED labeled RX.
When 12V power is applied, Both LEDs light for about one second.
The red LED lights to indicate when the receiver is actively listening. (Note
that the light will blink in correlation with the Power Mode, that is, Always
On, every 0.5 Sec, every 1 Sec, or every 4 Sec.) When the radio is transmitting,
the red LED will flicker (it will not be on solid).
Green LED activity indicates that there is an RF signal being received
7.7 Antenna
The radio has a reverse polarity SMA (RPSMA) jack antenna connection. It is
important to note the distinction between RPSMA and SMA connectors when
selecting a mating antenna or antenna cable.
7.7.1 Compatible Antennas
Campbell Scientific offers antennas to satisfy the needs for various base station
and remote station requirements. All antennas (or antenna cables) that attach
directly to the radio have an RPSMA plug connector. The use of an
unauthorized antenna could cause transmitted field strengths in excess of FCC
rules, interfere with licensed services, and result in FCC sanctions against the
user. One of the following antennas listed below must be used.
An FCC authorized antenna is a required component. You
must pick one of the antennas below.
CAUTION

RF407-Series Spread Spectrum Radio
9
In order to comply with the FCC RF exposure requirements,
the RF407 series may be used only with approved antennas
that have been tested with these radios and a minimum
separation distance of 20 cm must be maintained from the
antenna to any nearby persons.
Approved Antennas
Campbell Scientific
Part Number Description
14201 900 MHz 9 dBd Yagi Antenna with Type N Female
and Mounting Hardware
14204 900 MHz 0 dBd Omnidirectional 1/2 Wave Whip
Antenna with Right Angle and RPSMA Male
14205 900 MHz 6 dBd Yagi Antenna with Type N Female
and Mounting Hardware
14221 900 MHz 3 dBd Omnidirectional Antenna with
Type N Female and Mounting Hardware
14310 900 MHz 0 dBd Omnidirectional 1/4 Wave Whip
Antenna, Straight 3 inches Tall with RPSMA Male
15730 900 MHz 0 dBd Omnidirectional 1/4 Wave Whip
Antenna with Right Angle and RPSMA Male
15731 900 MHz 0 dBd Omnidirectional 1/4 Wave Whip
Antenna, Straight 2 inches Tall with RPSMA Male
15970 900 MHz 1 dBd Dipole Antenna with Adhesive
Mount and RPSMA Female 79 in. Cable
7.7.2 Electrostatic Issues and Surge Protection
Many radio installations are outdoors and therefore susceptible to lightning
damage, especially via the antenna system. Also, depending on climate and
location, electrostatically-charged wind can damage sensitive electronics, if
sufficient electric charge is allowed to accumulate on the antenna and cable.
To protect against electrostatic damage, the antenna connector of the radio is
connected to the radio case which can be tied to a good earth ground for
discharge of electrostatic build up.
Also to protect against electrostatic damage, Campbell Scientific offers pn
31314, Antenna Surge Protection Kit. The surge protection kit includes a
PolyPhaser®surge protector, a coax jumper for connecting the RF407-series
radio to the PolyPhaser, ground wire lead, and mounting hardware. The
PolyPhaser has Type N jack connectors on both ends; one for connection to a
COAXNTN-L cable and the other for connection to the 18-inch length of
COAXRPSMA cable included in the kit. To have the surge protection kit pre-
installed by Campbell Scientific (bulkhead-mounted through the enclosure
wall), see pn 31312.
CAUTION
Other manuals for RF407 Series
2
This manual suits for next models
4
Table of contents
Other Campbell Radio manuals

Campbell
Campbell RF401A Series User manual

Campbell
Campbell RF450 User manual

Campbell
Campbell RF401 User manual

Campbell
Campbell RF400 User manual

Campbell
Campbell RF407 Series User manual

Campbell
Campbell RF401A-Series User manual

Campbell
Campbell RF451 User manual

Campbell
Campbell RF407 Series User manual

Campbell
Campbell RF451 User manual