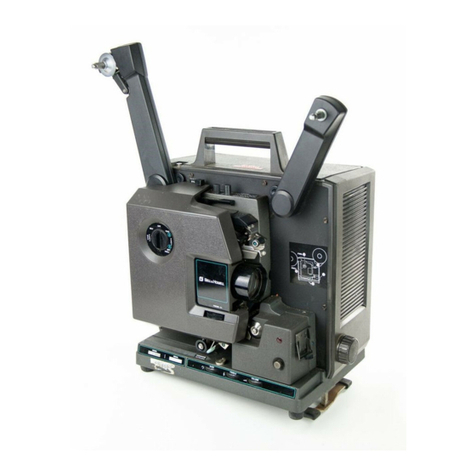
Bell and Howell TQIII User manual

Panchromatic TQIII & TQIII Specialist User Manual
Page 1
The Place to find Antique, Vintage, Retro or just plain used, 8 mm Super 8 mm 9.5 mm, 16 mm Film
Projectors, Slide Transparency Projectors in Various Formats and also a selection of Camera &
Darkroom Equipment. Serviced, Refurbished & Reconditioned
TQIII & TQIII SPECIALIST
1692 1693 1694 1695 1598
16mm Filmosound
User Manual
Bell & Howell
www.Panchromatic.co.uk

Panchromatic TQIII & TQIII Specialist User Manual
Page 2
Foreword
This is a long instruction manual but that is not because your projector is difficult to use. The
operating procedure, as you will discover, is simple. The reason the manual is a long one is that
the projector will have a long working life. From time to time, lamps will fail and sooner or later
you may encounter films which are in too poor a condition to be projected without special
techniques. We want you to know what to do when these things happen so that your
presentations are never spoiled.
As you will probably be eager to show a film as quickly as possible, we offer a "reading plan".
Stages 1 t 31 should be studied before you set up the projector for the first time, or while you are
doing it. Stage 32—concerned with difficulties - can be left until difficulties arise (although you
will be a better projectionist if you read this section before your first presentation so that you
know what to do if anything goes wrong).
Stages 33-50 have been included because there are certain teaching applications in which users
may wish to thread or unthread the projector manually. If, like the majority of users, you always
leave the projector to thread itself automatically, this section need not be read. Finally, there are
Stages 51 -69 on routine maintenance. These are important but can be ignored until you have
projected a few spools of film and become familiar with the controls.
Instructions for making recordings on Model 1694 begin at Stage 71.
WARNING THIS APPLIANCE MUST BE EARTHED
The wires in the mains lead are coloured in accordance with the following code:
Green and- Yellow Earth
Blue Neutral
Brown Live
Each numbered illustration in this manual relates to the stage with the same number. In the text, a combination of a
number & a letter refers to a detail in the similarly numbered (and usually adjoining) illustration. For example, 3d is
the voltage selector pointer d in the illustration to Stage 3. Numbers in quotation marks, e.g. “3” refer to a similarly
numbered part of the projector itself. Instructions which apply to some but not all models in the TQ and TQ Specialist
ranges are printed in italic type. References to the run/still lever apply only to the Specialist models only.

Panchromatic TQIII & TQIII Specialist User Manual
Page 3
Connections to power supply
1 Place the projector on a stand or other firm support. Undo the two clips by the carrying handle and pull the top of
the side cover towards you, subsequently lifting the cover off the projector. Unless you intend to use the loudspeaker
built into the projector, unwind all or part of the speaker cord stored alongside the auditorium loudspeaker inside the
side cover and connect the plug at the end of this cord into the socket la at the back of the projector. Stand the side
cover by the screen, facing the audience. Set the two amplifier controls lb and 1 c to their "0" positions. On Specialist
models, also set 1 d to "0'. Any permanent magnet loudspeaker or loudspeaker system with an impedance of
between 4 and 16 ohms may be connected through socket 1 a. Specialist models have a further Sound Output socket
le enabling them to be used in conjunction with a separate audio amplifier. This "line" output has an impedance 0(600
ohms, with pins 3 and 5 of the DIN socket carrying the audio signal and pin 2 as earth (ground).
2 Unwind the power lead from its bobbin at the non 'operating side of the projector. Do not connect the power lead
to the mains until you reach Stage 7. This projector is suitable only for alternating current (AC) supplies of 50Hz or
60Hz and may be seriously damaged if connected to direct current (DC) supplies. If you have any doubt about
whether your supply is AC or DC, seek the advice of a competent electrical contractor or your local electricity office
before connecting the projector to the mains.
3 Check that the setting of the voltage selector 3a corresponds to the voltage of your local supply. To change the
setting, first remove the moulded power lead connector from its socket 3b (if it has already been inserted), loosen
screw 3c and move the sliding cover to the left. Then use a small coin or screwdriver to rotate the selector until the
correct voltage setting appears against the pointer 3d. As the selector is rotated, the settings appear in the following
sequence: 100/110/130/200/220/ 240/250. If there is no setting exactly corresponding to your Supply, Set the
selector to the next higher voltage. On a 230V supply, for example, the "240" setting should be used.
4 If necessary, fit a suitable power plug to the power lead. The three coloured wires in this lead should be connected
to the plug terminals as follows
COLOUR PLUG TERMINAL
Brown Live
Blue Neutral
Green/Yellow Earth (Ground)
5 To use the projector amplifier for announcements or a commentary, connect a microphone to socket 5a. This socket
may also be used for a tape recorder or record player. Any device connected to 5a should have an impedance of
between 300 and 3,000 ohms. (2.000 ohms giving the best result.) The sound level of speech or music through 5a is
regulated by the volume control Sb. When the socket is in use, film sound tracks cannot he reproduced.
6 Check that the power switch 6a is in the "off" position ("0' side of switch depressed) and insert the power lead
connector into the projector socket. It will fit only in the correct position, with the lead extending towards the voltage
selector.
7 Connect the power plug to the mains supply. Set the main power switch to "on" by depressing the side marked with
a red dot. You will hear the cooling fan start, indicating that the projector is ready for use.

Panchromatic TQIII & TQIII Specialist User Manual
Page 4

Panchromatic TQIII & TQIII Specialist User Manual
Page 5
8 Set the speed switch Ba to"24" or" 1 8' depending upon whether the film you are going to show
is intended to be projected at 24 or 18 fps (frames per second). Almost all professionally made
sound films need the 24 fps position. Old silent films and some films with magnetic sound tracks
need 18 fps. If the action on the screen is unnaturally fast or slow, or if speech is excessively deep
or high pitched, the wrong speed has been chosen. The speed can be changed without stopping
the projector.
9 Check that the air intake on the non-operating side of the projector is not obstructed. The
projector is now ready to be threaded.
Automatic threading
10 Raise the front spool arm until, with a click; it locks in the running position.
11 Raise the rear spool arm until it locks with a click at the horizontal position.
12 Place the spool carrying your film on the front spool spindle (if necessary lifting the Spool lock
12a until it is in line with the spindle) in such a way that the film hangs down from the front of the
spool. Check that the sprocket holes are on the side of the film furthest from the projector. If they
are on the projector side when the film is hanging down from the front of the spool, rewinding is
required (as described in Stage 24). Secure the spool by pressing the spool lock until it clicks into
position at right angles to the spindle.
13 Attach to the rear spindle an empty spool of sufficient capacity for the film you are going to
show, and secure it with the lock. The projector will accept spools of up to 2,000ft (61 Om)
capacity. The spool supplied carries 1 ,600ft (490m) of film.
14 If necessary, set the run/still/ever to the forward position.
15 Place the tip of the film in the cutter numbered and, after ensuring that the two small studs 1
5a have entered two of the perforations, press the cutter handle firmly towards the projector
until, with a click, it trims the film. Make sure before operating the cutter that enough film is
trimmed away for all damage in the region of the tip to be removed.
16 Press the automatic threading lever '2" downwards and to the right so that it locks in the
threading position (16a). Rotate the function switch 16b to the arrowed position labelled "3" to
start the projector mechanism.
17 Holding the film horizontally slide the tip into the slot below the blue roller "4". When you feel
the film being drawn in by the projector mechanism, release it.
18 Watch the exit rollers at the rear of the projector and take hold of the film as soon as it
emerges. When about 20in (50cm) of film has passed the exit rollers, turn the function Switch
back to the vertical "off" position. Pull gently on the film until, with a click, the threading lever
returns to its original (running) position 1 Ba,

Panchromatic TQIII & TQIII Specialist User Manual
Page 6

Panchromatic TQIII & TQIII Specialist User Manual
Page 7

Panchromatic TQIII & TQIII Specialist User Manual
Page 8
Projecting the film
20 Advance the function switch to "3". The film will now begin to move through the projector.
When the whole of the leader section has passed the entry roller "4"—or, on a professionally
made film, a second after the last number on the printed leader has passed under this roller -
advance the switch one more click to light the projection lamp and throw the picture on the
screen.
Your projector gives you a choice of two light intensities. When the switch bar is pointing to the
first lamp symbol, the lamp receives less than the voltage for which it is designed. In this under-
run condition, the life of the average lamp will be usefully prolonged. For economy, therefore, use
the first position whenever it gives a sufficiently bright picture. For the maximum light, turn the
switch fully clockwise; the lamp will now receive the correct voltage and, in consequence, have
the normal life expectancy.
In addition to this useful "economy" setting of the lamp, the projector has an exclusive safety
device to warn you if, because of variations in the supply voltage, the lamp is being over-run. In
some localities and at certain times of day, the mains supply may rise appreciably above the
nominal value, so reducing the life expectancy of the lamp. Should this happen when you are using
a TQlll Specialist projector, you will be warned that action is required by the flashing of the red
excess voltage indicator 20a.
If this indicator flashes when the projection lamp is being run at full brightness, immediately turn
the switch back to the first, "economy", position. If the flashing persists, switch the projector off,
disconnect the power lead connector from its receptacle, and inspect the voltage selector 3a. If the
selector is not at the normal setting for your nominal supply voltage, as shown by the centre
column of the table below, correct it before resuming projection. If the setting is already "normal",
try the alternative setting if one is given in the right-hand column.
NOMINAL NORMAL ALTERNATIVE
VOLTAGE SETTING SETTING
100 100 110
110 110 130
115-130 130 -
200 200 220
208-220 220 240
225-240 240 250
250 250 -

Panchromatic TQIII & TQIII Specialist User Manual
Page 9
Try only these settings. If (here is no alternative setting for your nominal voltage or, if the warning
flashes continue, there may be a fault or a nonstandard supply voltage and your dealer should be
asked to investigate. An occasional flash - at, say, intervals of two seconds or longer - means that
the projection lamp is being only slightly over-run; in these circumstances, although its average
life may be reduced, it/s safe to continue the performance.
21 As soon as the picture is on the screen, centre it by using the tilt Control 21a. Adjust focus with
control 21b. If the line separating adjacent frames is visible at the top or bottom of the picture,
remove it by rotating the framer control 21 c.
22 On certain Specialist models, set the soundtrack selector switch 22a according to the type of
sound recording on the film, turning it to the right for optical sound and to the left for magnetic
sound. A magnetic soundtrack is easily recognised as a continuous brown band along the edge of
the film Opposite to the sprocket holes.

Panchromatic TQIII & TQIII Specialist User Manual
Page
10
Advance the volume control 22b until there is a satisfactory level of sound. If the tonal quality of
the Sound does not suit the film or the auditorium, adjust the tone control 22c. Specialist models
have separate tone controls to increase (+) or decrease (—) the proportion of treble 22c or bass
22d. In auditoria where echo is a problem, it may be helpful to decrease the bass response and,
for the maximum intelligibility of speech, increase the treble. If the 600 ohm output socket le is
being used, adjust volume and tone with the controls on the separate amplifier.

Panchromatic TQIII & TQIII Specialist User Manual
Page
11
To please your audience
Although the adjustments described in Stages 21 and 22 take only a few seconds, your
presentation will be more polished if you have aligned and threaded the projector, and set the
focus, framing and sound controls, before the audience arrives. After making these adjustments,
stop the projector by turning the switch to the vertical "off" position and then, turning it one click
anticlockwise, run the film through the projector in reverse until the first picture or title frame is
below the blue entry roller "4" ready for the performance. Return the switch to "off". Turn the
volume control back to zero and later, immediately after starting the projector to begin the
performance, advance it smoothly to the number you selected originally: with sound, a fade-in is
more agreeable than a sudden start.
Remember that people and their clothes absorb sound, so that a volume level suitable for an
empty hall may be inadequate when the audience are in their seats. Sample the sound as soon as
you can –moving some distance from the projector to do so –and make any further adjustment
that seems desirable.
The position of the loudspeaker is important. It should be as close to the screen as possible and at
about the same height as the heads of a seated audience. The best way to overcome echo from
the rear walls or ceiling is to regard the loudspeaker as a "searchlight" and aim it so that the beam
would illuminate a seat in the centre of the auditorium.
23 At the end of the spool of film, move the switch back to position "3" as soon as the last picture
frame has been projected, simultaneously turning the volume control to Q" Turn the switch to the
vertical 'off" position when the film has run out of the projector on to the rear spool. If you are
going to rewind the film immediately, proceed as in Stage 24. If the presentation is to continue
without interruption, open both spool spindle locks and remove the full and empty spools. Load
and project the next spool as in Stages 12-22. In the interest of lamp life, the cooling fan will
continue to run. After about a minute it can be stopped, if total silence is desirable, by setting the
main power switch to "off.
24 To rewind a film after projecting it, leave the spools where they are. Pressing the release
button 24a, raise the rear spool arm a few degrees and release the button. Continue moving the
arm until it locks in a vertical position. Carry the tail of the film from the underside of the rear
spool to the underside of the now-empty front spool 24b and secure it in the slot or Clip of the
spool hub. Move the switch anticlockwise to the arrowed position. As soon as the spools start to
rotate, press the rewind button 24c fully down and then release it. When all the film has returned
to the front spool, move the switch to the vertical "off" position. Remove the loaded spool and
then briefly advance the switch to "3" to disengage the rewind drive, subsequently returning the
switch to "of”.

Panchromatic TQIII & TQIII Specialist User Manual
Page
12
Special features
25 Reverse motion. At any time during a presentation the film may be reversed by turning the
switch anticlockwise to one of the two "reverse" positions. It you do not wish the audience to see
the action backwards, but just to repeat a scene, use the arrowed position of the bar; if, however,
backward action is a part of your presentation, use the position with the lamp symbol. (In reverse,
the lamp is always run at the reduced "economy" voltage and the sound is automatically cut off.)
26 Still pictures. The action of the film can be "frozen" at any time, to allow detailed study of a
single frame, by moving the run/still/lever 26a to the rear. Automatically, the light reaching the
film is reduced to prevent overheating of the stationary frame. if you have been projecting at the
"economy “setting of the lamp switch, you can increase the brightness of a still picture by
advancing the switch bar to the full brightness setting. It is advisable to readjust focus when
showing stills. To revert to normal projection, see Stage 28.
27 Animation, This Bell & Howell invention allows a succession of still pictures to be shown, and
examined frame by frame, at your own choice of speed. Set the run/still/lever 26a to the rear for
still projection as described in Stage 26. To change from one stationary frame to the next, tap the
animation lever 27a. If, however, you wish to move on for a few frames before showing another
Still picture press 27a down until the next frame to be examined/s on the screen, and then release
it.
28 After showing a still or using animation, there is no need to switch the lamp off before reverting
to normal running. Just move the run/still/ever forward to the running position and then readjust
the focus setting. Your presentation will be more polished if you turn the volume control to "0"
before normal projection is resumed and then advance it again to fade in the sound after the film
has started to move.
After the show
29 At the end of the presentation, leave the main power switch at "on" for about a minute so that
the fan has time to cool the lamp. While this is being done, fold the locks on the two spool
spindles to their angled positions. Press the release buttons of the front (29a) and rear (29b) spool
arms and lower the arms as far as they will go. Turn the tilt control fully to the left. If you have
been using an external loudspeaker or separate amplifier, disconnect the plug from the socket at
the back of the projector.
30 Press the main power switch to "off" and disconnect the power lead from the mains supply.
Coil the lead on its bobbin in such a way that the moulded power plug is not strained.
31 Lower the side cover so that the two "ears" 310 enter the recesses 31 bin the base of the
projector and then push it closed at the top until the two clips can be fastened.

Panchromatic TQIII & TQIII Specialist User Manual
Page
13

Panchromatic TQIII & TQIII Specialist User Manual
Page
14

Panchromatic TQIII & TQIII Specialist User Manual
Page
15
Film problems
32 So reliable is the Bell & Howell film transport system that with films in good condition no
problems should arise either in threading or during projection. Even with faulty films, a
satisfactory presentation will often be possible because of a device designed to reset,
automatically, "lost loops" resulting from the most common forms of film damage - broken
perforations or badly made joins. For other kinds of film fault, there are further safety devices to
reduce the risk of making existing damage worse.
Threading and projection difficulties are likely to take one or other of the following forms
Problem
Film not drawn into projector after being pushed under "4".
Cause
Run/still lever at rear (sill/picture) position, Remedy
Move lever to front position,
Cause
Tip of film bent or otherwise damaged,
Remedy
Use trimmer to remove damaged tip (Stage 15).
Problem
Tip of film enters projector after being inserted under “4” but reappears as shown.
Cause
Failure to set automatic threading lever (Stage 16). Remedy
Reverse projector to remove film and repeat from Stage 16.
Cause
Excessive inward curvature of film (probably due to long storage on a small spool).
Remedy
Remove film as above, correct excessive curvature by coiling the first ten frames of leader
in the direction opposite to the original curve. Repeat from Stage 16.

Panchromatic TQIII & TQIII Specialist User Manual
Page
16

Panchromatic TQIII & TQIII Specialist User Manual
Page
17
Problem
Film enters projector but loop then rises as shown.
Cause
Damaged leader.
Remedy
Reverse projector to remove film trim off damaged portion. Repeat from Stage-1 6.
Cause
Film gate partly open.
Remedy
Reverse projector to remove film; pull open the main access door. Open lens mount (Stage
63) and close fully, then repeat from Stage 16.
Problem
No stable picture, but only a varying pattern on screen.
Cause
Automatic threading lever still at "thread" position Remedy
Pull gently on film (Stage 18) until threading lever sets itself with a click. Alternatively,
reverse projector to remove film and start again at Stage
Problem
Intermittent jerking of picture on screen.
Cause
Broken or strained perforations are causing automatic loop reformer to operate.
Remedy
None required if, between jerks of the picture, projection is normal. If it is not, see below.

Panchromatic TQIII & TQIII Specialist User Manual
Page
18

Panchromatic TQIII & TQIII Specialist User Manual
Page
19
Problem
Picture normal, then becomes and remains unsteady; heavier than normal sound from
projector mechanism and possibly distorted sound from loudspeaker.
Cause
A bad join, or condition of perforations too poor for the automatic loop reformer to make
all necessary corrections.
Remedy
Leave projector running but press system restorer 32f fully down for a few seconds, then
release it. This action momentarily brings the whole of the automatic threading system
back into operation, thus restoring the correct relationships between the film and the
sprocket wheels, film gate and sound system. Do not use the system restorer when the
projector is running in reverse.
Problem
Scratch appearing on screen.
Cause
This is almost certainly an existing scratch. Examine film coming down from front spool. If
scratch remains on screen but is not seen entering projector, proceed to....
Remedy
Switch off immediately. Inspect and clean film path between entry roller "4" and
projection aperture in gate (Stages 63.64).
Problem
Scratch not visible on screen but visible on film at rear of projector.
Cause
Almost certainly an existing scratch but outside the projected area. Examining film as it
runs from front spool will show whether this is so. If scratch is not present at entry roller
"4" but continues to be present at exit from projector, some abrasive particle has probably
been carried by the film into the projector.
Remedy
Switch off and clean entire film path (Stages 63, 64). If scratching persists, stop the
projector and, unthreading progressively if necessary as described in Stages 45-50,
determine the exact point in the film path, and on which side of the film, the scratch
begins. Concentrate then on removing all foreign matter from this area. Films may be
encountered which have been "spliced" with wire staples or similaily abused. If you are

Panchromatic TQIII & TQIII Specialist User Manual
Page
20
unlucky enough to meet one of these, it may on its way through the projector have
roughened part of the film path sufficiently to cause scratching of subsequent films. Do not
project again until a Bell & Howell audio-visual dealer has repaired or replaced any
damaged part.
Problem
Any film transport difficulties not covered by the remedies above.
Causes and remedies
Such difficulties are very rare and will in almost all cases be due to serious imperfections in
the film. If film is not running normally after operation of the system restorer (Problem f),
switch off and remove it manually as described in Stages 45-50. Repair or remove any
damaged section if the film is your own property. Otherwise, rethread manually (Stages
33-44) at the point where the last of the damage is clear of the exit rollers of the projector.
This manual suits for next models
6
Table of contents
Other Bell and Howell Projector manuals

Bell and Howell
Bell and Howell 365 AUTOLOAD SUPER 8 Operating instructions

Bell and Howell
Bell and Howell 606 User manual

Bell and Howell
Bell and Howell Autoload 456 Operating instructions

Bell and Howell
Bell and Howell Commercial User manual
Bell and Howell
Bell and Howell 2585 User manual

Bell and Howell
Bell and Howell RC55 User manual
