manuals.online logo
Brands
  1. Home
  2. •
  3. Brands
  4. •
  5. Belling
  6. •
  7. Hob
  8. •
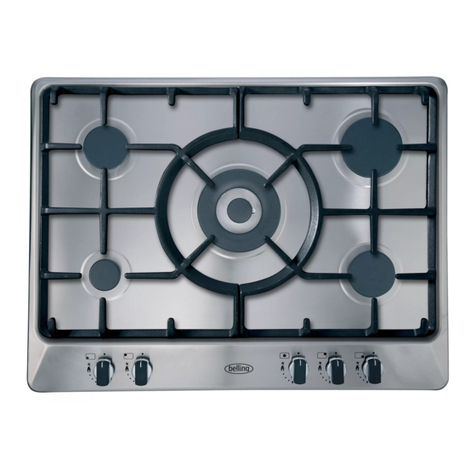
  9. Belling 60T Series Operating instructions

Belling 60T Series Operating instructions

FFrroonntt && SSiiddee CCoonnttrrooll GGaass HHoobbss
BELLING 60T/70T
For Natural Gas Mo els & LP Gas Mo els
User & Installation Instructions
Intro uction . . . . . . . . . . . . . . . . . . . . . . . . . . . . . . . . . . . . . . . . . . . . . . . 4
Safety an Ignition . . . . . . . . . . . . . . . . . . . . . . . . . . . . . . . . . . . . . . . . . . 5/6
Using your hob. . . . . . . . . . . . . . . . . . . . . . . . . . . . . . . . . . . . . . . . . . . . . . . 7
Care an Cleaning . . . . . . . . . . . . . . . . . . . . . . . . . . . . . . . . . . . . . . . . . . . 9
Installation . . . . . . . . . . . . . . . . . . . . . . . . . . . . . . . . . . . . . . . . . . . . . . . . . 11
Clearance an Dimensions . . . . . . . . . . . . . . . . . . . . . . . . . . . . . . . . . . . . . 13
Gas & Electrical Connection . . . . . . . . . . . . . . . . . . . . . . . . . . . . . . . . . . . . 18
Troubleshooting . . . . . . . . . . . . . . . . . . . . . . . . . . . . . . . . . . . . . . . . . . . . . 19
Technical Data . . . . . . . . . . . . . . . . . . . . . . . . . . . . . . . . . . . . . . . . . . . . . . 20
Customer Care . . . . . . . . . . . . . . . . . . . . . . . . . . . . . . . . . . . . . . . . . . . . . . 21
Please keep this handbook for future reference, or for anyone else
who may use the appliance.
Contents
Should you need it . . . .
Inside the pape wo k which has come with this appliance, the e is a leaflet and ca d
explaining the te ms of ou extended wa anty and gua antee.
In o de to apply fo a one yea gua antee, simply fill in the details on the ca d and post
it off, this will egiste you appliance.
Should you wish to take out extended wa anty, please fill in the details on the leaflet
and post this off.
Alte natively, you can egiste , and apply fo extended wa anty on line at:
www.belling.co.uk
If you appliance is cove ed by the wa anty and gua antee, you will not be billed fo
wo k unde taken should you appliance be faulty, te ms and conditions do apply, so
please ead th ough the lite atu e ca efully.
Ou Custome Ca e Cent e can be called on:
0844 815 3746
We aim to answe calls as quickly as possible, and in st ict otation as soon as one of ou
Custome Ca e team becomes f ee.
Please ensu e that you have available you appliance model numbe and se ial numbe ,
the e is a space at the back of this book fo eco ding that info mation.
Alte natively visit the web site.
Outside the UK and No the n I eland, please contact you local supplie .
Our Warranty
Introduction
Thank you for buying this British built
appliance from Belling, this book is
inten e to assist you with the
installing an use of your hob an we
recommen that you rea it fully
before installation an use.
We hope that the following informa-
tion will help you to quickly familiarise
yourself with the features of the follow-
ing appliance, an use it successfully
an safely.
Our policy is one of constant evelop-
ment an improvement. Strict accura-
cy of illustrations an specifications is
not guarantee . Mo ification to
esign an materials may be neces-
sary subsequent to publication.
This hob is inten e to be built into a
omestic kitchen, caravan or boat
inten e for use on inlan waterways.
This pro uct is esigne as an appli-
ance for the preparation an cooking
of omestic foo pro ucts, an shoul
not be use for any other purpose.
This appliance must be installe in
accor ance with the regulations in
force, an only in a well ventilate
space. Rea the instructions before
using or installing this appliance.
Your 1st Year Guarantee
To fulfil the con itions of your guaran-
tee, this appliance must be correctly
installe an operate , in accor ance
with these instructions, an only be
use for normal omestic purposes.
Please note that the guarantee, an
Service availability, only apply to the
UK an Republic of Irelan .
4
Gas & Electrical connection
Please refer to installation instructions
for the Gas & Electrical Safety
Regulations an the Ventilation
Requirements.
In your own interest, an that of safe-
ty, it is the law that all gas appliances
be installe by a competent person,
who will ensure that the installation is
in accor ance with “The Gas Safety
(Installation & Use) Regulations”, & the
“The Gas Safety (Installation & Use)
(Amen ment) Regulations”. Failure to
comply with these Regulations is a
criminal offence.
As with all gas appliances, it is rec-
ommen e that your hob is service
regularly.
Disconnection of gas an electric appli-
ances shoul always be carrie out by
competent persons.
Warning: This appliance must be
earthe .
Ventilation
The use of a gas cooking appliance
results in the pro uction of heat an
moisture in the room in which it is
installe . Ensure that the kitchen is
well ventilate ; keep natural ventila-
tion holes open or install a mechanical
ventilation evice (mechanical extrac-
tor hoo ).
Prolonge intensive use of the appli-
ance may call for a itional ventila-
tion, for example opening of a win-
ow, or more effective ventilation, for
example increasing the level of
mechanical ventilation where present.
Before installing and using the
hob for the first time, remove any
packaging or protective polythene
film.
Environmental Protection
We are committe to protecting the
environment an operate an
Environmental Management System
which complies with BS EN ISO
14001.
Disposal of packaging
• All our packaging materials are
recyclable an environmentally
frien ly.
• Please help us to protect our
environment by isposing of all
packaging in an environmentally
frien ly manner.
• Please contact your local authority
for the nearest recycling centre.
Caution: Packaging materials can
pose a risk of suffocation - keep away
from chil ren.
5
Be safe - not sorry
Caution: When you are cook-
ing, keep children away from the
vicinity of the hob.
• Parts of the appliance may be hot
uring or imme iately after use.
Allow sufficient time for the hob to
cool after switching off.
•Never use the appliance for
heating a room.
• Turn pan han les to a safe posi-
tion, so they are out of reach of chil-
ren, not overhanging the appli-
ance, an cannot be caught
acci entally.
• Position pans over the centre of the
burners / hotplates. If positione
off centre, smaller pans may be
unstable.
• Keep all flammable materials (such
as curtains, clothing & furnishings)
away from the hob.
• Do not let pans overhang the con-
trol knobs, as this may overheat
an amage them.
• Never leave fat or oil unatten e on
a lit hob.
Caution: Where this appliance
is installed in a boat or cara-
van, it shall not be used as a
space heater.
Check that all controls are in
the off position when you have
finished cooking.
Ignition
Auto ignition (if fitted):
Push in an hol own the control
knob, an turn to the full on position
(large flame symbol). Keep the knob
epresse after the burner has lit for
up to 15 secon s to allow the flame to
establish. Turn the control knob to the
esire setting.
Manual ignition (if fitted):
Push in & hol own the control knob
turning to the full on position (large
flame symbol) & press the ignition but-
ton until the gas lights. Keep the con-
trol knob epresse after the burner
has lit for up to 15 secon s to allow
the flame to establish. Turn the control
knob to the esire setting.
In the event of the burner flames being
acci entally extinguishe , turn off the
burner control an o not attempt to
re-ignite the burner for at least 1
minute.
Reduced rate
Turn the control knob to the small
flame symbol.
To switch off
To switch off a hob burner, turn the
control knob clockwise to the “off”
position.
If the ignition fails
1.Make sure all the controls are in the
“off” position, an check there is a
spark at the back of the burner when
you epress the control knob or press
the ignition button.
2.Gas check - check there is gas to the
appliance by lighting a burner with a
lighte match.
3.Electrical check-if no spark renew
the 3 ampfuse in the fuse spur.
4.Check burner caps are fitte cor-
rectly
6
Using the hob
A just the burner flame so that it oes
not exten over the pan base.
Pans
 Use pans with a flat base of mini-
mum 120mm / 4 ins iameter an
maximum 250mm / 10 ins iame-
ter which are stable in use.
 Do not use ouble pans, rim base
pans, ol misshapen pans or any
pan which is unstable when place
on a flat surface.
 Position pans over the centre of the
burners, resting on the pan sup-
ports. If positione off centre, small-
er pans may be unstable.
Do not let pans overhang the con-
trol knobs, as this may overheat an
amage them.
Always use pans which are large
enough to prevent spillage, espe-
cially for eep frying.
Turn pan han les to a safe position,
so they are out of reach of chil ren,
not overhanging the appliance, an
cannot be caught acci entally.
Do not use gri le plates on this
appliance, as this may be haz-
ar ous.
Material an size of pan, as well as
quantity an type of foo to be
cooke , can affect cooking times.
Commercial simmering ai s shoul
not be use as they create excessive
temperatures that can amage the
surface an may cause a hazar .
7
Pan supports
Always make sure the pan supports
are replace correctly, locate in the
hob spillage well, an that all rubber
feet are in place, to prevent instabili-
ty.
The hob must only be operate when
both pan supports are correctly posi-
tione .
To save gas
• Always position pans centrally
over the burner.
• Use the size of pan most suite to
the size of the burner - ie; larger
pans on the rear burners, smaller
pans on the front burners.
• A just the flames so that they o
not lick up the si es of the pan.
• Put li s on saucepans an only
heat the amount of liqui you
nee .
• When liqui s boil, re uce the con-
trol setting to maintain a simmer.
• Consi er the use of a pressure
cooker for the cooking of a com-
plete meal.
• Potatoes an vegetables will cook
quicker if choppe into smaller
pieces.
Note
Extra care shoul be taken when cook-
ing foo in salte water. Some foo s
are corrosive - eg; vinegar, fruit juices
an especially salt - they can mark or
amage stainless steel if they are left
on the surface. Turn off an wipe any
spillage imme iately, taking care to
avoi skin contact with any hot surface
or spillage.
8
Care & Cleaning
Caution: Any cleaning agent
used incorrectly may damage
the hob.
Always let the hob cool before
cleaning.
Some cooking operations generate a
consi erable amount of grease. This,
combine with spillage, can become a
hazar if allowe to accumulate on
the hob through lack of cleaning. In
extreme cases this may amount to mis-
use of the appliance & coul invali-
ate your guarantee.
Do not use caustic, corrosive or abra-
sive cleaning pro ucts, coarse wire
wool or any har implements, as they
will amage the surfaces.
All parts of the hob can be safely
cleane with a cloth wrung out in hot
soapy water.
Burner caps and heads
Important: Allow burners to cool
before cleaning.
Caution: Hotplate burners can be
amage by soaking, automatic ish-
washers (or ishwasher pow ers / liq-
ui s), caustic pastes, har implements,
coarse wire wool, an abrasive clean-
ing pastes.
Clean with a moist soapy pa .
For the burners to work safely, the slots
in the burner hea where the flames
burn nee to be kept clear of eposit.
Clean with a nylon brush, rinse, & ry
thoroughly.
Any brownish coloure marks on the
burners are carbon eposits or fat stains,
which can be remove by gently rub-
bing with a soapy pa .
Important: The burner caps an
hea s must be repositione correctly
so that they sit squarely onto the hob
as shown below.
This is particularly important with stain-
less steel mo els as failure to reposi-
tion the caps correctly may result in
iscolouration of the stainless steel
aroun the burners.
9
incorrect
burner cap not central
incorrect
angled
correct
parallel
burner cap
burner head
Control knobs
Only use hot soapy water.
When cleaning the fascia area, care
must be taken on symbols / markings.
Control knobs can be remove for
cleaning, but take care to ensure that
they are repositione correctly after
cleaning.
Vitreous enamel surfaces
HOB SPILLAGE WELL (enamel hobs), PAN
SUPPORTS (if fitte )
Use a mil cream cleaner .
Stainless Steel hob
Only use a clean cloth wrung out in
hot soapy water, an ry with a soft
cloth.
Stubborn marks can be remove using
“Luneta”. We recommen that you
clean the whole of the stainless steel
area to maintain a uniform finish.
Supplies can be purchase from the
Customer Care Centre.
Do not use un ilute bleach or any
pro ucts containing chlori es as they
can permanently amage the steel.
Extra care shoul be taken when cook-
ing foo in salte water. Some foo s
are corrosive - eg; vinegar, fruit juices
an especially salt - they can mark or
amage stainless steel if they are left
on the surface. Turn off an wipe any
spillage imme iately, taking care to
avoi skin contact with any hot surface
or spillage.
Sharp objects can mark the surface of
stainless steel, but marks will become
less noticeable with time.
To maintain the finish of stainless steel,
or to remove any greasy marks, wipe
the stainless steel surface sparingly
with a minimum amount of Baby Oil
an kitchen paper. Do not use cook-
ing oils, as these may contain salt,
which can amage the stainless steel
surface.
Please note: Do not steam clean any
parts of the hob.
Cast iron pansupports (if fitte )
After cooking allow the pan-
supports to cool completely
before attempting to remove or
clean.
Before cleaning, remove any excess
fat with kitchen paper.
The pan supports can be cleane with
hot soapy water an a nylon brush. If
any foo resi ue is left on them leave
them to soak for a few minutes in hot
soapy water before attempting to
clean it. Do not use caustic pastes,
abrasive cleaning pow ers, coarse
wire wool or any har implements, as
they will amage the surface.
Do not clean in a ishwasher.
10
11
Installation
This appliance must be installe in
accor ance with the regulations in
force, an only in a well ventilate
space. Rea the instructions before
using or installing this appliance.
This appliance will be factory set for
use on either natural gas only, or LPG
only. If the appliance requires conver-
sion from natural gas to LPG, then the
conversion kit, part number 0130145
00, can be or ere from the Customer
Care Centre helpline given at the back
of this book.
Regulations & Standards
Prior to installation, ensure that the local
istribution con ition (nature of the gas
an gas pressure) an a justment of
the appliance are compatible.
The a justment con itions for this
appliance are state on the ata
ba ge.
This appliance is not connecte to a
combustion pro ucts evacuation evice.
It shall be installe an connecte in
accor ance with current installation
regulations. Particular attention shall
be given to the relevant requirements
regar ing ventilation.
The appliance must be installe , con-
verte to LPG (where necessary) an
service by a competent person to
ensure that the installation is in accor-
ance with “The Gas Safety
(Installation & Use) Regulations”, & the
“The Gas Safety (Installation & Use)
(Amen ment) Regulations ”.
Failure to comply with these
Regulations is a criminal
offence.
Where regulations or stan ar s have
been revise since this han book was
printe , always use the latest e ition.
All gas installation, servicing an
repair work must be in accor ance
with local stan ar s an regulations.
In the UK the regulations and
standards are as follows (inclu-
sive of successive issues:
1. Gas Safety Regulations
(Installation an Use).
2. Buil ing Regulations - Issue by
the Department of the
Environment.
3. Buil ing Stan ar s (Scotlan )
(Consoli ate ) - Issue by the Scottish
Development Department.
4. The current I.E.E. Wiring
Regulations.
5. Electricity at Work Regulations.
6. BS6172 Installation of Domestic
Gas Cooking Appliances
Also, for LP Gas refer to BS5482
Part 1, Part 2 or Part 3 as relevant.
7. Installation & Servicing Instructions
for this appliance.
For installation in countries other than
the UK, the appliance must be con-
necte in accor ance with all local
gas an electrical regulations.
In the Republic of Irelan , installers
shoul refer to IS813 Domestic Gas
Appliances.
Ventilation Requirements
The room containing the appliance
shoul have an air supply in accor-
ance with BS5440: Part 2
• All rooms require an openable
win ow, or equivalent, an some
rooms will require a permanent
vent as well.
• For room volumes up to 5m3an air
vent of 100cm2is require .
• If the room has a oor that opens
irectly to the outsi e, or the room
excee s 10m3NO AIR VENT is
require .
• For room volumes between 5m3
an 10m3an air vent of 50cm2is
require .
• If there are other fuel burning
appliances in the same room, BS
5440: Part 2: shoul be consulte
to etermine the air vent require-
ments.
• This appliance must not be
installe in a be sitting room of
less than 20m3or in a bathroom or
shower room.
• Win ows an permanent vents
shoul therefore not be blocke or
remove without first consulting a
compenent engineer.
LP Gas only - Do not install this
appliance in a room below groun
level. This oes not preclu e instal-
lation into rooms which are basements
with respect to one si e of the buil ing
but open to groun level on the oppo-
site si e.
For installation into environments other
than omestic wellings, e.g. cara-
vans, boats an similar - refer to the
relevant stan ar s on ventilation an
gas supply.
Failure to install appliances cor-
rectly is dangerous & could
lead to prosecution.
12
Clearances & dimensions
The room shoul have goo light an
ventilation but be free from raughts.
The worktop shoul be at least
600mm eep, & 30mm thick to
enable the cutout to be ma e to the
imensions shown below.
A minimum istance of 40mm shoul
be maintaine between the hob an
rear wall / combustible surface.
A minimum istance of 78mm shoul
be maintaine between the hob an
any si e walls / combustible surface.
Surfaces which are non-combustible, or
are protecte with suitable non-com-
bustible material, may have re uce
clearances. Refer to New Worl for
gui ance.
We recommen ceramic tiling for the
rear wall irectly behin the hob.
No shelf or overhang of combustible
material shoul be closer than 650mm
above the hob.
Extractor or cooker hoo s shoul only
be fitte above the hob in accor ance
with the manufacturer’s instructions.
No combustible materials or flamma-
ble liqui s shoul be store below the
hob.
Sufficient length of cable shoul be
allowe so the hob can be remove
for servicing, but make sure it is route
away from the un ersi e of the hob &
oes not get trappe uring installa-
tion.
Important: Ensure that you route all
electrical cables an flexible tubing
well clear of any a jacent heat source
- eg; oven / grill.
13
600 hob - 600mm
700 hob - 700mm
40mm
40mm
worktop
420
mm
wall unit wall unit
This area must
be kept clear
of combustible
materials 650mm
above level of
pan supports
53mm min
side wall
rear wall
555mm
485
mm
cutout
600 - 53mm min
700 - 103mm min
Base Tray
GDHA specified dimensions with batons
Existing dimension without batons
Important Information
It is important when installing front
control gas hobs, that the work top
cut out is the same as is quote in
this installation manual. If the cut out
is too large, then batons must be fit-
te to the front, rear an si es - to
correct the iscrepancy an ensure
the correct fit. Please ensure that if
batons are fitte they are level with
the top surface of the work top
Please ensure that the seal for the
hob has full contact with the work
top surface.
There are two ways to install
the clamps, epen ing on the thick-
ness of the work top, please measure
the thickness of your work top an
ensure that the correct metho is
use . Both metho s are etaile in
the installation manual.
Failure to follow these instructions can
lea to exessive force being applie
to the basetray, which results in the
clearence between the control knob
an the hob top pressing being
re uce . This can effect the opera-
tion of the gas control, an the igni-
tion.
14
Fit the hob into the cutout &
secure to worktop
Place the hob into the cutout an
secure in place using the four brackets
an screws provi e .
The brackets shoul be orientate to
suit the worktop thickness as shown,
then inserte into the four slots (two on
the front e ge an two on the rear)
an screwe into the un ersi e of the
worktop using the woo screws provi -
e .
The screws shoul be tightene just
sufficiently to secure the hob an pull
the top pressing flush with the work-
top.
If the base of the hob is accessible
after installation then a partition must
be fitte 20mm below the base to pre-
vent access.
seal
hob
40mm
worktop
seal
hob
30mm
worktop
15
Installation advice - cabinetry
Dealing with sides, cross-rails
and back-panels in cabinetry
Depen ing on the cabinets, the work-
top thickness an the hob positioning,
it is possible for the hob base, the
clamp brackets an /or the gas con-
nection to interfere with parts of the
cabinet. These can be ealt with as
follows:
Cabinet sides
If the hob is to be installe across the
top of two cabinet housing units, then
the base of the hob may interfere with
the si es of these units. It will be nec-
essary to cut away the top of the unit
si es locally to clear the hob, clamp
brackets an /or gas connection.
Cross-Rails
1. Interference with hob base
If there are any cross-rails which
obstruct the hob base by running
across the worktop cutout, they can
simply be remove or locally cut-
away to allow the hob to be
installe , epen ing on the partic-
ular installation. Any mo ifications
must ensure that the strength of the
cabinet is maintaine .
2. Interference with clamp brackets
If there are any cross-rails which
prevent the clamps from being
positione on the front or rear
e ges of the hob, then they can be
remove or locally cut-away
aroun the brackets to allow the
brackets to be installe .
Any mo ifications must ensure that
the strength of the cabinet is main-
taine .
Back-panel
1. Interference with clamp brackets
If the cabinet has a back-panel
which prevents the clamps from
being positione on the rear e ge
of the hob, then this panel can be
completely remove or locally cut-
away to allow the brackets to be
installe .
2. Interference or restriction of gas
connection
If the cabinet has a back-panel
which interferes with the position
of the gas supply to the hob, then
the panel can be completely
remove or locally cut-away to
allow connection to the gas sup-
ply.
16
Alternative clamp positions
If the front an rear clamp positions
are problematic, alternative positions
can be use on the si es of the hob,
epen ant on the particular installa-
tion.
These positions will require clearance
from any cabinet si es an may effect
how tightly the hob will meet the work-
top.
Stone (Granite or equivalent)
worktops
Depen ing on the type of worktop
being use , there may or may not be
any backing material to screw the
clamp screws into.
1. If the worktop is a composite type
(backe with MDF or similar) there
may be enough backing to screw
irectly into. This will epen on
the worktop thickness an backing
thickness an will have to be
assesse at the installation. In this
case, install the hob as for a stan-
ar worktop.
2. If there is insufficient backing mate-
rial to screw into, or if the worktop
is completely soli in construction,
then it will be necessary to glue a
strip of woo , MDF, fibreboar or
similar to the un ersi e of the work-
top, along the front an rear e ges
of the cutout. Use a strong, propri-
etary a hesive to bon these strips
an allow to cure before attempt-
ing to clamp the hob into position.
17
Connect gas hob to gas supply
The inlet is at the rear RHS of the hob.
The hob may be connecte to the gas
supply either by rigi pipework or flex-
ible connection.
Flexible connections
Use a 900mm - 1125mm length of
flexible connector. Ensure that the
hose is installe hanging freely own-
war s, is not trappe , is not subjecte
to un ue forces an is not supporte
at the bottom by a horizontal surface.
Natural Gas - Flexible connections
shoul comply with BS669, latest e i-
tion.
LP Gas - For flexible connections use
a bayonet type hose, suitable for use
on LP gas up to 50 mbar pressure rise
an 70˚C temperature rise. The flexi-
ble hose shoul be coloure black
with a re stripe, ban or label. If in
oubt, contact your supplier.
The installation must ensure that the
flexible tube cannot come into contact
with movable parts of the housing unit
(eg; a rawer) an oes not pass
through any space susceptible to becoming
congeste .
Make sure the appliance is gas
sound & all components are
operating correctly.
Connect to the electricity supply
Unless this appliance is supplie with a
fitte plug, it must be connecte by a
competent person, using fixe wiring
via a ouble pole switche fuse spur
outlet, with a contact separation of 3mm
at all poles.
Connect the mains lea wires to the
terminals:
The blue wire must be connecte to the
terminal marke N(Neutral) LOAD or
coloure black. The brown wire must
be connecte to the terminal marke L
(Live) LOAD or coloure re .
The green/yellow coloure wire must
be connecte to the terminal marke
E(Earth) or coloure green.
Warning: this appliance must be
earthe .
The fuse spur must be accessible after
installation.
If the supply cor is amage , obtain
a special cor from the Customer Care
Helpline, which must be fitte by a
qualifie person.
18
Troubleshooting
Before you call Customer Care, please
check the following points:
Burner fails to ignite:
• Check the electricity supply is on.
• Check the fuse.
There is a spark to the burner
but it fails to ignite:
• Check that the flame holes in the
flame sprea er are clear of water
or eposits.
• Check that the gas supply is turne
on.
Smell of gas:
• Check that none of the controls
have ina vertently been turne
on. If all the controls are in the off
position, turn off the gas supply &
call Customer Care.
The burner flame appears
uneven:
• Check the burner is fitte correctly.
• Check the flame holes in the flame
sprea er are clear of water or
eposits.
19
Technical DataThis information is
for the following appliances:
Belling 60T si e control & Belling
60T/70T front control NG & LPG
Data badgeUn ersi e of the hob
base
Electrical supply
220-240V ~ 50Hz 1W
Ignition
Mains repetitive ignition.
Gas connectionThe inlet connection
is at the rear right-han si e -
ISO7 - Rp1/2” (1/2” BSP)
Appliance class
Class 3 Built-In Hotplate
Gas category
Natural Gas II2H3+
LPG only I3+
The a justment con itions for this
appliance are state on the ata
ba ge.
This appliance is factory set for either
natural gas only or LPG only. If you
wish to convert this hob from natural
gas to LPG, a conversion kit -part no
013014500 - can be or ere from the
Customer Care helpline.
Gas pressure settings
G20 Natural gas @ 20 mbar
G31 Propane gas @ 37 mbar
G30 Butane gas @ 28 - 30 mbar
Countries of destination
(GB) Great Britain, (IE) Irelan
The Gas Consumer Council (GCC) is
an in epen ent organisation which
protects the interests of gas users. If
you nee a vice, you will fin the tele-
phone number in your local telephone
irectory un er gas.
20
Burner Natural Gas LP Gas Bypass
kW Injector kW Injector Grammes per hour screw
60T side control- marking marking Butane Propane sizes
Back LH 2.0kW 104 2.0kW 70 145g/h 143g/h 32
Back RH 2.0kW 104 2.0kW 70 145g/h 143g/h 32
Front LH 3.0kW 129 3.0kW 87 218g/h 215g/h 40
Front RH 1.0kW 77 1.0kW 50 73g/h 72g/h 27
60T 70T front control-
Back LH 2.0kW 104 2.0kW 70 145g/h 143g/h 32
Back RH 3.0kW 129 3.0kW 87 218g/h 215g/h 40
Wok 3.5kW 121 & 63 3.5kW 87 & 35 254g/h 250g/h 68
Front RH 2.0kW 104 2.0kW 70 145g/h 143g/h 32
Front LH 1.0kW 77 1.0kW 50 73g/h 72g/h 27
Tota Heat Input ∑Qn
60T 8.0kW 8.0kW 582g/h 572g/h
70T 11.5kW - 11.5kW - 836g/h 822g/h -

This manual suits for next models

1

Other Belling Hob manuals

Belling Gas hobs Firmware update

Belling

Belling Gas hobs Firmware update

Belling IH613 Instruction Manual

Belling

Belling IH613 Instruction Manual

Belling IH60R Instruction Manual

Belling

Belling IH60R Instruction Manual

Belling IHF80/90 Br User manual

Belling

Belling IHF80/90 Br User manual

Belling shu60 Guide

Belling

Belling shu60 Guide

Belling IH60 UK Firmware update

Belling

Belling IH60 UK Firmware update

Belling GHU60GE W Firmware update

Belling

Belling GHU60GE W Firmware update

Belling Hob Firmware update

Belling

Belling Hob Firmware update

Belling PBi60 AU Firmware update

Belling

Belling PBi60 AU Firmware update

Belling IHL773 User manual

Belling

Belling IHL773 User manual

Belling E664 Operating instructions

Belling

Belling E664 Operating instructions

Belling IHT603 User manual

Belling

Belling IHT603 User manual

Belling CH302TX User manual

Belling

Belling CH302TX User manual

Belling Gas hobs Firmware update

Belling

Belling Gas hobs Firmware update

Belling Hob Firmware update

Belling

Belling Hob Firmware update

Belling CRS60 Instruction Manual

Belling

Belling CRS60 Instruction Manual

Belling IHL603 User manual

Belling

Belling IHL603 User manual

Belling IH60 UK Firmware update

Belling

Belling IH60 UK Firmware update

Belling GHU573 Guide

Belling

Belling GHU573 Guide

Belling GHU60-70 AU User manual

Belling

Belling GHU60-70 AU User manual

Belling IHF64T User manual

Belling

Belling IHF64T User manual

Belling IH60 UK Firmware update

Belling

Belling IH60 UK Firmware update

Belling 60cm User manual

Belling

Belling 60cm User manual

Belling IH302T User manual

Belling

Belling IH302T User manual

Popular Hob manuals by other brands

Smeg SE2631ID Instructions for fitting and use

Smeg

Smeg SE2631ID Instructions for fitting and use

Gorenje ECT680KRB Instructions for use, installation, and connection

Gorenje

Gorenje ECT680KRB Instructions for use, installation, and connection

AEG IAE64841FB user manual

AEG

AEG IAE64841FB user manual

DeLonghi DECH84SC Instructions for the use

DeLonghi

DeLonghi DECH84SC Instructions for the use

CONSTRUCTA CA323352 instruction manual

CONSTRUCTA

CONSTRUCTA CA323352 instruction manual

Matrix MHC002 Manual for installation, use and maintenance

Matrix

Matrix MHC002 Manual for installation, use and maintenance

CDA HVC 32 for Manual for installation, use and maintenance

CDA

CDA HVC 32 for Manual for installation, use and maintenance

Eurotech TRV602 NF Use, installation and maintenance instructions

Eurotech

Eurotech TRV602 NF Use, installation and maintenance instructions

Perfelli VH 3101 BL Instructions for use and maintenance

Perfelli

Perfelli VH 3101 BL Instructions for use and maintenance

Bosch PIV8 HB Series INFORMATION FOR USE

Bosch

Bosch PIV8 HB Series INFORMATION FOR USE

JUNO JKSI808F5 user manual

JUNO

JUNO JKSI808F5 user manual

Eurotech EDG-604IX Instructions for use and installation

Eurotech

Eurotech EDG-604IX Instructions for use and installation

Officine Gullo DFS4P instructions

Officine Gullo

Officine Gullo DFS4P instructions

FULGOR FSH 905 ID TS manual

FULGOR

FULGOR FSH 905 ID TS manual

Kuppersbusch EKE 854.2 Service manual

Kuppersbusch

Kuppersbusch EKE 854.2 Service manual

Bosch 940718 installation instructions

Bosch

Bosch 940718 installation instructions

Candy CTP634SC instruction manual

Candy

Candy CTP634SC instruction manual

Blaupunkt 5IX99351 Instruction on mounting and use

Blaupunkt

Blaupunkt 5IX99351 Instruction on mounting and use

manuals.online logo
manuals.online logoBrands
  • About & Mission
  • Contact us
  • Privacy Policy
  • Terms and Conditions

Copyright 2025 Manuals.Online. All Rights Reserved.