BellSouth GH9762 User manual

Multi-HANDSET, Multi-BASE UNIT 2.4GHz
Digital Spread Spectrum Technology
CORDLESS ALL DIGITAL ANSWERING SYSTEM
WITH CALLER ID/CALL WAITING
77 CHANNEL AUTOHOP
Model GH9762
OWNER’S MANUAL
INSTALLATION AND
OPERATING INSTRUCTIONS
PLEASE READ THIS
MANUAL CAREFULLY
BEFORE USE.
KEEP FOR YOUR
REFERENCE.
For installation information,
please see “Getting Started”
instructions on page 6 or your
separate Quick Start guide.
Visit Us on the Web:
www.uselectronics.info
© 2002 BellSouth Corporation
SPEAKER
PAGE
MEMO
TIME
CODE
OGM
ERASE
ON/OFF
ANSWER
RPTSKIP
STOP
VOL+
VOL-
PLAY
SPEAKER
INUSE/
ANS.ON/OFF
CHARGE
d
ss
DSST~MAN4~9762.qxd 11/12/2002 2:46 PM Page 1

Special Features
ongratulations on your selection of a quality BellSouth Product. With proper care and
adherence to the set-up and user instructions in this Owner's Manual, this unit will provide
you with years of trouble-free service.
BellSouth is committed to providing quality products that fit your needs. We would like to have
any comments or suggestions you might have on this product. You may mail your comments to:
U.S. Electronics
105 Madison Avenue
New York, NY 10016
When examining your new BellSouth cordless telephone, you will find an array of special features
including:
Digital Spread Spectrum Technology - Utilizes a “wider frequency band” for a more secure
conversation with a clarity of digital sound, extended range, and minimal interference from other
cordless telephone.
77 Channel Auto-hop - When interference is received, the telephone automatically hops to the
clearest channel.
Desk or Wall Mount - Use this equipment as a desk phone or as a wall phone.
Tone or Pulse Dialing - Use this phone for either TONE (push-button) or PULSE (rotary) dialing.
Automated Functions - Redial the last number called and automatic STANDBY mode.
Security - Ensures greater privacy because of a built-in security code with 4,000,000 possible
combinations that prevents use of your telephone line by another nearby cordless phone.
Special Services - Use the button to access special services such as Call Waiting
supplied by your telephone company or company switchboard.
STANDBY Mode -WheninSTANDBYmode(ON-HOOK), the phone is capable ofreceivinga call.
When the HANDSET is on the BASE UNIT, it is automatically in the STANDBY mode (ON-
HOOK). When the HANDSET is taken off the BASE UNIT, it remains in the STANDBY mode
until you activate the button.
Battery Power Saver - Recharge your BATTERY PACK many times with the built-in CHARGER.
Once fully charged, in STANDBY mode, the HANDSET can receive/send calls for a maximum
of five days without the need for recharging. Length of charge depends on frequency of use.
Luminous LCD Screen - The LCD Screen emits light for 5 seconds everytime you press any of
the TELEPHONE KEYPAD button.
HANDSET Ringer Level - Select the ringer sound level (HI, LOW, OFF).
HANDSET Ringer Melody - Select the desired ringer melody from the 10 available melodies.
HANDSET Volume Control -Press the /MENU button andthen select the desiredreceiver
volume setting from Low, Medium, High, or Maximum.
Alarm Clock - The telephone emits a distinctive sound when the ALARM CLOCK function is
activated (See page 27).
HEADSET JACK - Your telephone can utilize a headset for hands-free communication.
BELT CLIP - Use the BELT CLIP to hang your HANDSET on your belt.
EDIT/FLASH
TALK
C
VOL
DSST~MAN4~9762.qxd 11/12/2002 2:46 PM Page 2

Special Features Special Features
CALLER ID SYSTEM
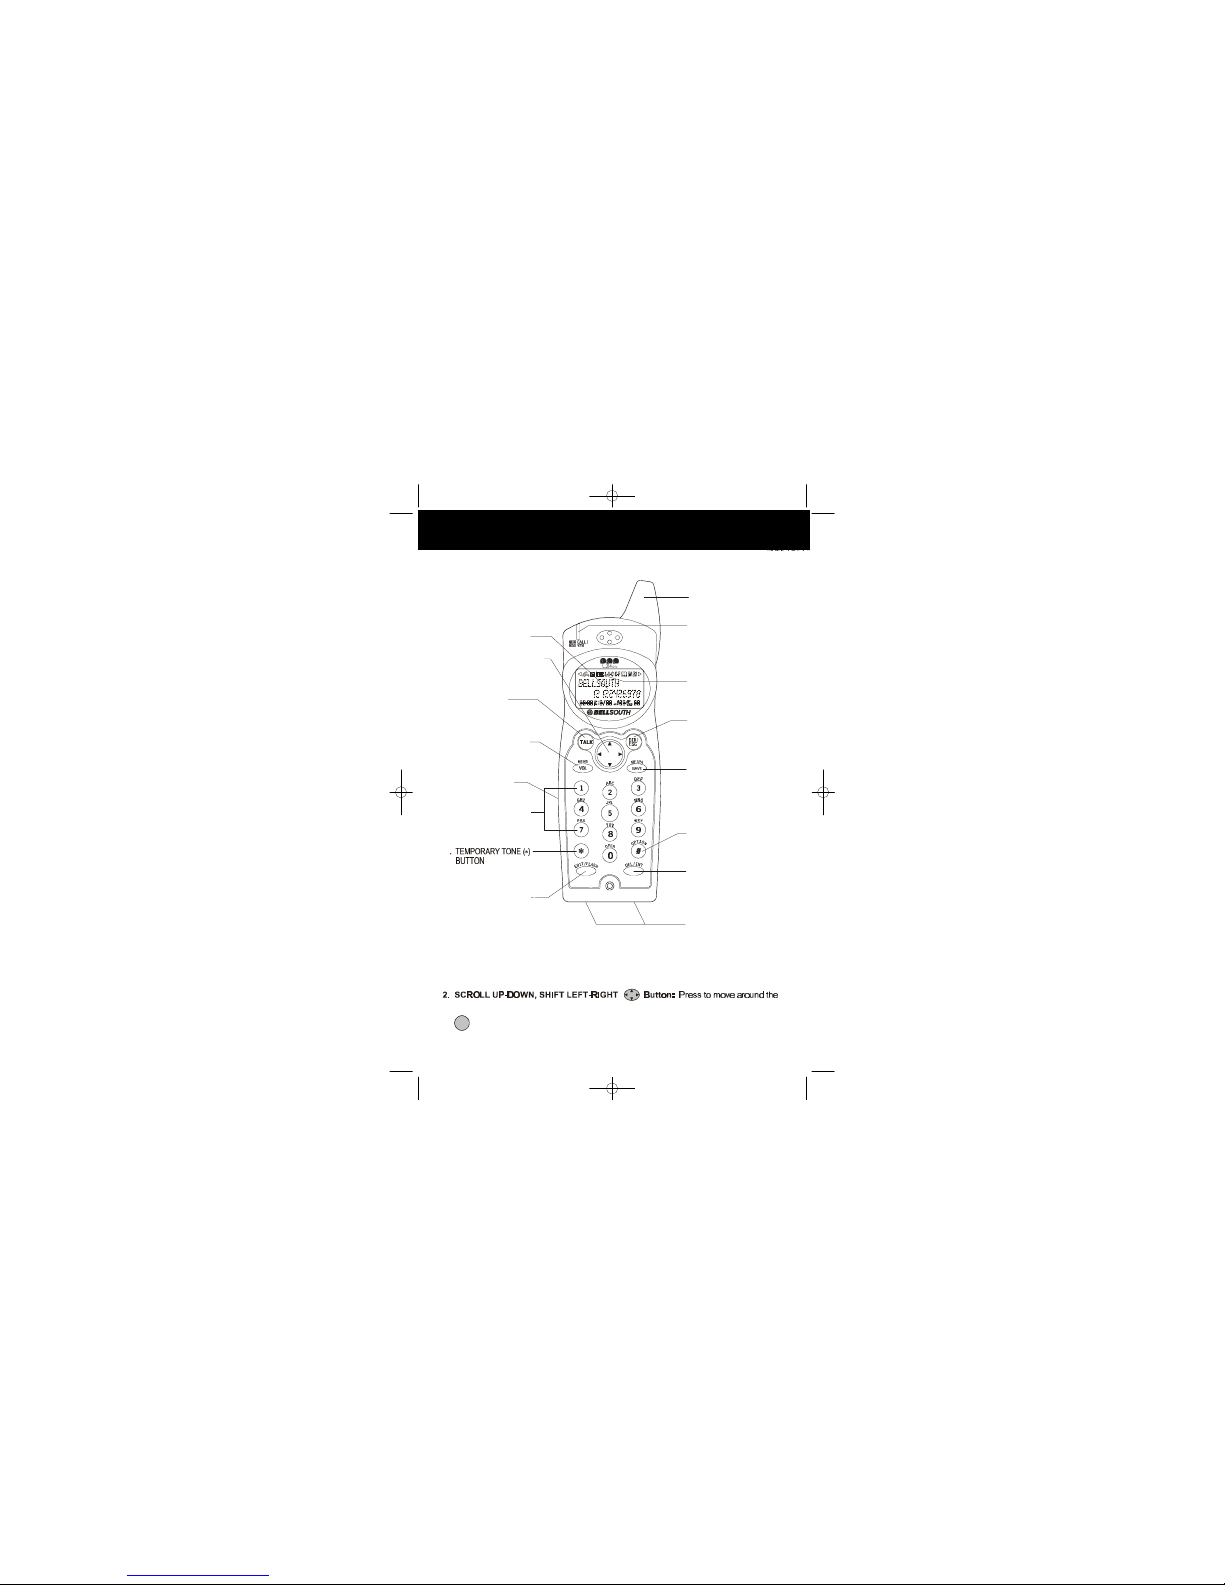
Multi-Function Large LCD Screen - Shows the number you are dialing and, with Caller ID service
available through subscription from your local telephone company, displays information about the
caller before you answer the call.
Name and Number DIRECTORY (PHONE BOOK) - Stores up to 40 names and numbers so that you
can call them with a single key stroke.
Caller List - Available withCaller ID service. Stores upto 50 calls to keeptrack of everyone who called.
The name, phone number, time and date of the call are recorded. Allows you to return their calls with
a few key strokes.
Outgoing Call Memory - The telephone stores the last 8 OUTGOING CALLS to keep track of the one
you called. The name, phone number, time, date, and the duration of the call are recorded. Allows
you to call them again with a single key stroke.
Preferred Calls -You canmark the nameand number ofa welcome caller in the DIRECTORY (PHONE
BOOK). When that number calls in, the caller’s name will appear on the LCD Screen and a special
ring sound or the selected PREFERRED RINGER MELODY will be heard.
Blocked Calls - You can mark the name and number of an unwelcome caller in the DIRECTORY
(PHONE BOOK). When that number calls in, the caller’s name will appear on the LCD Screen and
the ringer will be disabled.
Repeat Call Indicator - Shows if a new incoming call has called more than once.
Out of Area Call Indicator - Advises you that the incoming call is not in a Caller ID service area.
Unavailable Call Indicator -Advises you that theorigin of theincoming call does notsupport the Caller
ID system.
Call Waiting Service - Displays the name and number of the second caller, if you have subscribed for
Call Waiting service from your local telephone company (see page 14.)
MULTI-HANDSET, MULTI-BASE UNIT SYSTEM
Multi-HANDSET - Registers a total of 9 HANDSETS into the operating system.
Multi-BASE UNIT -The user can have the option to add another BASE UNIT. The system supports 2
BASE UNITS connected to a separate telephone line. Once registered, the HANDSETS can open
link to any of the BASE UNITS to make and/or receive a call.
Automatic Linking - All 9 HANDSETS can register to the two BASE UNITS (B1, B2). When the FIRST
BASE UNIT (B1) is already engaged, the other HANDSETS can automatically open link to the
SECOND BASE UNIT (B2) by pressing the button.
Intercom Call - A HANDSET can make an INTERCOM call to the other HANDSETS in the
system.
Call Transfer - During a telephone conversation, the call can be transferrred from one HANDSET to
another HANDSET.
Extension Phone Detection - When one HANDSET gets ON-HOOK, the LCD Screen of all the other
HANDSETS linked to the same BASE UNIT will display “Ext In Use.”
TALK
DSST~MAN4~9762.qxd 11/12/2002 2:46 PM Page 3

HANDSET Controls
Special Features
ANSWERING SYSTEM FEATURES
Fully Digital Answering System - Provides a full range of answering functions without using
cassette tapes.
Digital Memory - Allows recording of memos and messages.
Two-Digit LED Message Display - Indicates the number of messages, indicates the status of
the system.
Ring-Detection Selectable -Choosethe numberof times thetelephone rings beforethe system
answers.
Voice Day/Time Stamp - System tells the day and time of each received message or recorded
memo.
Message Alert - The ability to generate a sound signal when new messages are recorded.
Call Screening - The ability to intercept a call when the unit is recording an incoming message
(ICM).
Mailboxes - Allows four separate individuals to receive their own incoming messages.
Auto Disconnection - Will automatically stop answering when the HANDSET of any phone on
the same line goes OFF-HOOK.
Fast Message Skip Function - Skips to the next message.
SPEAKERPHONE FEATURE
Speakerphone - This telephone allows you to answer calls using the BASE UNIT through the
speakerphone function.
DSST~MAN4~9762.qxd 11/12/2002 2:46 PM Page 4

HANDSET Controls
1.
LARGE LCD SCREEN
12.
DIR (DIRECTORY)/ESC
(ESCAPE)BUTTON
Pg. 15~20
15.
DEL(DELETE)/INT
(INTERCOM)BUTTON
Pg. 16, 17, 19, 20, 28,
29
13.
RE(
REDIAL)/PA (PAUSE)
/SAVE BUTTON Pg. 11,
16~19, 21~27
10.
MESSAGE
WAITINGLED
INDICATOR Pg. 14
NEWCALL/
11.
BATTERY CHARGE
INDICATOR Pg. 39
5.
HEADSET JACK
Pg. 12
4.
MENU/VOL(VOLUME)
BUTTON
Pg.11,21~27
6.
TELEPHONE KEYPAD
Pg.17~19, 21~27
8.
FLASHBUTTON
Pg.14, 17~19, 21~27
EDIT/
16.
CHARGE CONTACTS
2.
SCROLLUP-DOWN/SHIFT
LEFT-RIGHTBUTTON
Pg.11,13, 15~25,27
3.
TALKBUTTON
Pg. 7, 8, 10, 11, 14,
15,19, 21, 28, 29, 41
Pg. 20, 22, 27
7
14.
#/OPTION BUTTON
Pg. 15, 19, 20
9.HANDSET
ANTENNA
3. Button: Press to answer an incoming call or to place a call. Press to end a call.
HANDSET Controls
1. Large LCD Screen: Shows call information, phone status, prompts, and DIRECTORY
(PHONE BOOK) items.
large LCD Screen.
TALK
DSST~MAN4~9762.qxd 11/12/2002 2:46 PM Page 5

4. /MENU Button: (VOLUME) During TALK mode, press to adjust the receiver volume
to your comfortable listening level. (MENU) Press to access the special functions operation in
STANDBY mode. (For special functions see pages 21~27.)
5. HEADSET JACK: For connecting your headset plug to enjoy hands-free communication.
(See page 12 for detail.)
6. TELEPHONE KEYPAD to Buttons: Allows you to make a call depending on
pressed button. (For TELEPHONE KEYPAD characters, see page 18.)
7. TEMPORARY TONE Button: Press to temporarily change the DIALING mode from
PULSE to TONE for Rotary Service Users. (Press once before entering numbers to access
the answering system or electronic banking services, etc.)
8. Button: (EDIT) Press to edit listed items. (FLASH) Press to answer a call if you
have Call Waiting.
9. HANDSET ANTENNA
10. NEW CALL/MSG WTG (MESSAGE WAITING) LED Indicator: (NEW CALL) Blinks in RED
color to indicate that you have a new Caller ID call stored in memory. (MESSAGE
WAITING) Blinks in GREEN color when receiving a Message Waiting signal, if you have
subscribed to a Voice Mail message service from your local telephone company.
(See page 14.)
11. BATTERY CHARGE INDICATOR: Displays the battery charge condition in three status:
- Battery Full (4 bars shown)
- Low Battery Level (2 bars blinking), See page 39 for detail.
- During Charging (4 bars growing)
12. DIRECTORY (PHONE BOOK) Button: Press to access names and numbers stored
in the DIRECTORY (PHONE BOOK). (See pages 16 to 20 for details.)
13. /RE (REDIAL)/PA (PAUSE) Button: (SAVE) Press and hold down to save the
changes on the listed items. (REDIAL) Press to redial the last number you dialed. (PAUSE)
Press to insert a pause while dialing. (You will need the /RE/PA button to dial
numbers which use an alternative Long Distance Access Code.)
14. /OPTION Button: (OPTION) Press to change the displayed telephone number to
7, 10, or 11 digit DIALING mode during Caller ID callback.
15. (DELETE/CHANNEL) Button: (DELETE) - Press and hold down to delete items
or individual characters. (INTERCOM) Press to make an INTERCOM CALL to another
HANDSET.
16. CHARGE CONTACTS: For charging the BATTERY PACK inside the HANDSET. We
recommend cleaning the CHARGE CONTACTS periodically with a damp cloth.
1 0
*
EDIT/FLASH
DIR
SAVE
#
DEL/INT
VOL
SAVE
HANDSET Controls
DSST~MAN4~9762.qxd 11/12/2002 2:46 PM Page 6

BASE UNIT Controls
7. IN USE/CHARGE
LED INDICATOR
8. ANSWER
FUNCTION ON/OFF
LED INDICATOR
PG. 32, 42
6. SPEAKERPHONE
LED INDICATOR
3. OGM BUTTON
Pg. 31, 32
1. MEMO BUTTON
Pg. 33
4. ERASE BUTTON
Pg. 35
2. TIME BUTTON
Pg. 30
5. CHARGE TERMINALS
9. MICROPHONE
10.
ANSWER FUNCTION
ON/OFF BUTTON Pg. 32
12. CODE BUTTON
Pg. 36 30. SPEAKERPHONE
BUTTON
Pg. 38
28. LED MESSAGE
DISPLAY
Pg. 32, 34, 35
29.
REPEAT BUTTON
Pg. 30, 34, 36
26. PLAY BUTTON
Pg. 34
27. SKIP BUTTON
Pg. 30, 34, 36
24. VOLUME + (UP)
BUTTON Pg. 38
22. MAILBOX LED
INDICATORS
Pg. 31~34
21. BASE UNIT
ANTENNA
18. MAILBOX 2 BUTTON
19. MAILBOX 3 BUTTON
20. MAILBOX 4 BUTTON
17.
MAILBOX 1 BUTTON
23. STOPBUTTON
Pg. 32, 34
14. ANNOUNCE ONLY/
INCOMING MESSAGE
SWITCH Pg. 32, 42
13. MESSAGE ALERT
SWITCH Pg. 33
15. RINGER ON/OFF
SWITCH
16. RING SELECT
SWITCH Pg. 33
USEONLYWITHCLASS2POWERSOURCE
TELLINE
RESETTONE PULSEON OFF
MSGALERT
ICM ANNC
SELECT
ON OFF
RINGER
TS 5R 3R
RINGSELECT
33. POWER-IN
CONNECTION JACK
Pg. 6, 7
34. TELEPHONE LINE
CONNECTION JACK
Pg. 6, 7, 9, 41
32. RESET BUTTON
Pg. 30, 42
31.
TONE-PULSE SELECT
SWITCH Pg. 7, 41
ds s
BUTTON Pg. 38
DSST~MAN4~9762.qxd 11/12/2002 2:46 PM Page 7

1. Button: Press and hold down to record memo messages.
2. Button: Press to set/check the day and time.
3. (OUTGOING MESSAGE) Button: Press and hold down to record OGM messages.
4. Button: Press to erase messages.
5. CHARGE TERMINALS: For charging the HANDSET BATTERY PACK. For best
performance, clean the CHARGE TERMINALS periodically with a damp cloth.
6. SPEAKERPHONE LED Indicator: Lights up when the BASE UNIT speakerphone function
is activated.
7. IN USE/CHARGE LED Indicator: (IN USE) Lights up to indicate that the HANDSET is in
TALK mode. (CHARGE) Lights up when the HANDSET is placed on the BASE UNIT for
charging.
8. ANSWER FUNCTION ON/OFF (ANS. ON/OFF) LED Indicator: Lights when the answer
function is turned ON.
9. MICROPHONE
10. (ANSWER FUNCTION ON/OFF) Button: Press to activate or deactivate the answer
function.
11. Button: Press to PAGE the HANDSET. Press again to stop.
12. Button: Press and hold to set the 3-digit Remote Access Code for remote operation.
13. MESSAGE ALERT: Set switch to ON to generate a “beep” sound every 12 seconds when a
new message has been received.
14. ANNOUNCE ONLY/INCOMING MESSAGE Switch:
ICM - System records the incoming messages.
ANNC - System plays your announcement and then hangs up without recording messages.
15. RINGER ON/OFF Switch: Set switch to OFF position to disengage the ringer on the BASE
UNIT.
16. RING SELECT Switch: To select the number of rings before the Answering System answers
a call.
3R - System answers a call after the third ring.
5R - System answers a call after the fifth ring.
TS (TOLL SAVER) - System answers after the third ring only if you have new
messages. Otherwise, the system will answer after the fifth ring.
17. (MAILBOX 1) Button: Press to activate functions for MAILBOX 1.
MEMO
BASE UNIT Controls
TIME
OGM
ERASE
ANS
ON/OFF
PAGE
CODE
MAIL
1
DSST~MAN4~9762.qxd 11/12/2002 2:46 PM Page 8

BASE UNIT Controls
18. (MAILBOX 2) Button: Press to activate functions for MAILBOX 2.
19. (MAILBOX 3) Button: Press to activate functions for MAILBOX 3.
20. (MAILBOX 4) Button: Press to activate functions for MAILBOX 4.
21. BASE UNIT ANTENNA
22. MAILBOX LED Indicators: Lights to indicate the presence of message(s) and blinks to
indicate that the corresponding MAILBOX is active and ready to operate.
23. Button: Press to stop playing a message.
24. (VOLUME UP) Button: Press repeatedly to increase the speaker volume level of the
BASE UNIT.
25. (VOLUME DOWN) Button: Press repeatedly to decrease the speaker volume level of
the BASE UNIT.
26. Button: Press to play messages.
27. Button: Press to skip messages.
28. LED MESSAGE DISPLAY: Indicatesthenumber of memos/messages received,status of the
system.
EA - Erasing 01~63 - No. of memos/messages OP - OGM is playing
Ao - Announce Only FU - Memory is full PA - Pause
29. Button: Press to repeat messages.
30. Button: Press to PAGE all the HANDSETS enrolled in the system. Press again to
stop.
31. TONE-PULSE SELECT SWITCH
32. RESET Button: Press and hold down for 2 seconds to reset the system and clear all
recordings.
33. POWER-IN CONNECTION JACK
34. TELEPHONE LINE CONNECTION JACK
MAIL
1
MAIL
3
MAIL
4
STOP
VOL+
VOL-
PLAY
SKIP
RPT
PAGE
DSST~MAN4~9762.qxd 11/12/2002 2:46 PM Page 9

Contents Contents
Safety Instructions ..........................................................................................................4
Getting Started.................................................................................................................6
Desk Mounting ................................................................................................................9
Wall Mounting..................................................................................................................9
Cordless Telephone Operation........................................................................................10
Message Waiting...................................................................................................14
Caller ID System Operation.............................................................................................13
Name and Telephone number DIRECTORY (PHONE BOOK)..................................17
Redial Feature............................................................................................................11
Deleting a Single Record...................................................................................... 16
Receiving Calls...........................................................................................................10
Placing a Call from the Caller List ........................................................................15
Caller List ...................................................................................................................14
Viewing Caller Information During Incoming Calls...............................................13
Caller ID with Call Waiting.....................................................................................14
Preparing for Use....................................................................................................... 10
Placing Calls...............................................................................................................11
Viewing the Caller List ..........................................................................................15
Storing Caller ID Records into the DIRECTORY (PHONE BOOK).....................16
Deleting all Records..............................................................................................16
Using the Headset Feature.........................................................................................12
Viewing the DIRECTORY (PHONE BOOK).........................................................17
Telephone Keypad Characters..............................................................................18
Caller ID System.........................................................................................................13
Storing Phone Numbers........................................................................................17
Placing Calls from the DIRECTORY (PHONE BOOK)......................................... 19
Editing a Stored Number in the DIRECTORY (PHONE BOOK)...........................19
Deleting a Stored Record in the DIRECTORY (PHONE BOOK)..........................20
Preferred Calls ..................................................................................................... 20
HANDSET Volume Control.........................................................................................11
Extension In Use Indicator..........................................................................................12
Blocked Calls ........................................................................................................20
DSST~MAN4~9762.qxd 11/12/2002 2:46 PM Page 10

Forwarded Calls....................................................................................................20
Function Settings...................................................................................................21
A. Setting the Ringer Level............................................................................. 22
K. Registering the HANDSET/S......................................................................27
G. Changing the Language.............................................................................25
E. Adjusting the Contrast................................................................................ 24
C. Turning the First Ring ON or OFF.............................................................. 23
I. Deleting Message Waiting Indication...........................................................26
J. Setting the Area Code.................................................................................26
B. Setting the Ringer Melody...........................................................................23
D. Setting the Time and Date..........................................................................23
F. Setting the PBX Number.............................................................................24
H. Changing the User Name...........................................................................25
Long Distance Calls..............................................................................................20
Outgoing Calls.......................................................................................................21
L. Setting the Alarm Clock.............................................................................. 27
Muti-HANDSET, Multi-BASE UNIT System Operation...................................................28
Intercom Call.............................................................................................................28
Answering System Operation......................................................................................... 30
Contents Contents
Setting the Day/Time Stamp.....................................................................................30
Recording your Outgoing Messages........................................................................30
Turning the Answering System ON/OFF...................................................................32
Setting to Answer Calls............................................................................................32
Setting to Announce Only.........................................................................................32
Message Alert...........................................................................................................33
Setting Ring Select...................................................................................................33
Recording a Memo...................................................................................................33
Playing of Messages/Memos....................................................................................34
Saving Mesages.......................................................................................................34
Erasing Messages....................................................................................................35
Receiving a Call while in Intercom Call.................................................................28
Transfer Call............................................................................................................. 29
DSST~MAN4~9762.qxd 11/12/2002 2:46 PM Page 11

Contents
FCC Requirements..........................................................................................................44
Problem Solving...............................................................................................................41
Recharging the BATTERY PACK.....................................................................................39
Changing the BATTERY PACK........................................................................................40
Technical Information............... .......................................................................................43
Warranty Information............... ....................................................................................... 46
Security............................................................................................................................ 38
Wall Mount Template.......................................................................................................50
Two-Way Recording..................................................................................................35
Remote Operation through a Tone Telephone......................................................... 36
Remote Access Codes.............................................................................................36
Changing of the Remote Access Codes.................................................................. 36
Using the Remote Instruction Code..........................................................................37
When the Memory is Full..........................................................................................35
Speakerphone Operation.................................................................................................38
DSST~MAN4~9762.qxd 11/12/2002 2:46 PM Page 12

Safety Instructions
IMPORTANT SAFETY INSTRUCTIONS
To reduce the risk of fire, electric shock and/or injury, always follow these
basic safety precautions when using your cordless telephone equipment.
1. Read and understand all instructions.
2. Follow all warnings and instructions marked on the telephone.
3. Do not use this telephone near a bathtub, wash bowl, kitchen sink, or laundry tub, in a wet
basement, near a swimming pool, or anywhere else where there is water.
4. Avoid using a telephone (other than a cordless type) during an electrical storm. There may be
a remote risk of electric shock from lightning.
5. Do not use the telephone to report a gas leak in the vicinity of the leak.
6. Use only the power cord and BATTERY PACK indicated in the Owner’s Manual. Do not dispose
of the BATTERY PACK in a fire. The BATTERY PACK may explode. Check with local codes for
possible special disposal instructions.
7. Operate this telephone using the electrical voltage as stated on the BASE UNIT or in the
Owner’s Manual. If you are not sure of the voltage in your home, consult your dealer or local
power company.
8. Unplugthis telephone from the walloutlet before cleaning or replacingthe BATTERY PACK. Do
not use liquid cleaners or aerosol cleaners on the telephone. Use a damp cloth for cleaning.
9. Place this telephone on a stable surface. Serious damage and/or injury may result if the
telephone falls.
10. Do not cover the slots and openings on this telephone. This telephone should never be placed
near or over a radiator or heat register. This telephone should not be placed in a built-in
installation unless proper ventilation is provided.
11. Do not place anything on the power cord. Install the telephone where no one will step or trip on
the cord.
12. Do not overload wall outlets or extension cords as this can increase the risk of fire or electric
shock.
13. Never push any objects through the slots in the telephone. They could touch dangerous voltage
points or short out parts that could result in a risk of fire or electric shock. Never spill liquid of
any kind on the telephone.
14. To reduce the risk of electric shock, do not take this telephone apart. If service or repair work is
required on this telephone, take it to a qualified service representative. Opening or removing
covers may expose you to dangerous voltage or other risks. Incorrect reassembly can cause
electric shock when the appliance is subsequently used.
15. Unplug this telephone from the wall outlet and consult a qualified service representative in any
of the following situations.
A. When the power supply cord is frayed or damaged.
B. If liquid has been spilled into the telephone.
C. If the telephone has been exposed to rain or water.
D. If the telephone does not operate normally by following the operating instructions. Adjust
onlythose controls that are coveredby the operating instructions. Improperadjustment may
require extensive work by a qualified technician to restore the telephone to normal
operation.
DSST~MAN4~9762.qxd 11/12/2002 2:46 PM Page 13

Safety Instructions
E. If the telephone has been dropped or the case has been damaged.
F. If the telephone exhibits a distinct change in performance.
16. Never install telephone wiring during a lightning storm.
17. Never install telephone jacks in wet locations unless the jack is specifically designed for wet
locations.
18. Never touch uninsulated telephone wires or terminals unless the telephone line has been
disconnected at the network interface.
19. Use caution when installing or modifying telephone lines.
Battery Safety
CAUTION:
Danger of explosion if BATTERY PACK is incorrectly replaced. Replace
only with the same or equivalent type. To reduce the risk of fire or
personal injury, read and follow these instructions:
1. Use only the following type and size of BATTERY PACK:
Cordless Telephone BATTERY PACK
3.6V, 800mAh
U.S. Electronics Inc.
Ni-Cd BATTERY PACK: model BXXX
(See page 39 for ordering information.)
2. Do not dispose of the BATTERY PACK in a fire. It may explode. Check with local codes for
possible special disposal instructions.
3. Do not open or mutilate the BATTERY PACK. Released electrolyte from a BATTERY PACK
is corrosive and may cause damage to the eyes or skin. Electrolyte may be toxic if
swallowed.
4. Exercise care in handling the BATTERY PACK to prevent shorting the BATTERY PACK with
conductive materials such as rings, bracelets, and keys. The BATTERY PACK or conductor
may overheat and cause burns.
5. Charge the BATTERY PACK provided with (or identified for use with) this telephone only in
accordance with the instructions and limitations specified in this manual.
6. Observe proper polarity orientation between the BATTERY PACK and BATTERY
CHARGER.
SAVE THESE INSTRUCTIONS
ATTENTION:
The telephone that you have purchased contains a rechargeable BATTERY PACK. The
BATTERY PACK is recyclable. At the end of its useful life, under various state and local laws, it
may be illegal to dispose of this BATTERY PACK into the municipal waste stream. Check with
your local solid waste officials for details in your area for recycling options or proper disposal.
DSST~MAN4~9762.qxd 11/12/2002 2:46 PM Page 14

FCC Requirements
Federal Communications Commission Requirements
This equipment complies with Part 68 of the FCC Rules. A label on theBASE UNIT of
this equipment contains, among other information, the ACTA Product Number and the
Ringer Equivalence Number (REN) for this equipment. You must, upon request,
provide this information to your telephone company.
The REN is also useful in determining the quantity of devices that you mayconnect
toyour telephone line andstillallowthesedevices to ring when yourtelephonenumber
iscalled.Inmostareas, butnotall,thesumoftheRENsforalldevicesconnectedtoone
line should not exceed five (5.0). To be certain of the number of devices that you may
connect to your line, you should contact your local telephone company.
Ifyourequipmentshouldcauseharmtothe telephonenetwork,thetelephonecompany
may temporarily disconnect your service. If possible, they will notify you in advance that
temporarydiscontinuance ofservicemay berequired.However, whenadvancedwritten
notice is not possible, the telephone company may temporarily discontinue service
without notice if such action is necessary under the circumstances. The telephone
companymay makechangesin itscommunicationfacilities, equipment,operations,or
procedures where such action is reasonably required in the operation of its business
and is not inconsistent with the rules and regulations of the Federal Communications
Commission. Do not attempt to repair or modify this equipment.
WARNING: Changes or modifications not expressly approved by the party responsible
for its compliance could void the user’s authority to operate the equipment.
Somecordlesstelephonesoperateatfrequenciesthatmaycauseinterferencetonearby
TVsand VCRs. To minimizeor prevent such interference,theBASEUNIT of thecordless
telephone should not be placed on or near a TV or VCR. If interference is experienced,
moving the cordless telephone farther away from the TV or VCR will often reduce or
eliminate the interference.
IMPORTANT
Placing your BASE UNIT near appliances
such as televisions, refrigerators, radios, or
microwave ovens may cause interference.

Federal Communications Commission Requirements (continued)
This equipment should not be used on coin telephone lines. Connection to party line
service is subject to state tariffs. If trouble is experienced, disconnect this equipment
from the telephone line to determine if it is causing the malfunction. If the equipment is
determinedto be malfunctioning, itsuse should be discontinueduntil the problem has
been corrected.
NOTE:Thisequipmenthasbeentested and found to comply with thelimitsforaclassB
digital device, pursuant to Part 15 of the FCC Rules. These limits are designed to
providereasonableprotectionagainst harmful interference in a residential installation.
This equipment generates, uses, and can radiate radio frequency energy and, if not
installedandusedin accordancewiththeinstructions,maycauseharmfulinterference
to radio communications.
However, there is no guarantee that interference will occur in a particular installation. If
this equipment does cause harmful interference to radio or television reception, which
can be determined by turning the equipment off and on, the user is encouraged to try to
correct the interference by one or more of the following measures.
1. Reorient or relocate the receiving ANTENNA.
2. Increase the distance between the equipment and the receiver.
3. Connect the equipment into an outlet on a circuit different from that to which the
receiver is connected.
4. Consult the dealer or an experienced radio/TV technician for help.
This device complies with Part 15 of the FCC Rules. Operation is subject to the
following two conditions: (1) this device may not cause harmful interference, and
(2) this device must accept any interference received, including interference that
may cause undesired operation.
EXPOSURE TO RADIO FREQUENCY ENERGY.
The design of your BELLSOUTH Cordless Phone, which generates Radio Frequency
(RF) Electromagnetic Energy (EME), complies with the following national and
international standards and guidelines.
The Relevant Guidelines and Standards are:
•FCC Report and Order FCC 96-326 (August, 1996)
•American National Standards Institute (C95-1-1992)
•National Council Radiation Protection and Measuremants (NCRP-1986)
•International Commision on Non-Ionizing Radiation Protection (ICNIRP-1998)
FCC Requirements
Table of contents
Other BellSouth Answering Machine manuals
Popular Answering Machine manuals by other brands

Panasonic
Panasonic KX-TCD775E operating instructions

Auerswald
Auerswald VOICEMAIL CENTER 461.2 Operation manual

Panasonic
Panasonic KX-TG6461NZ operating instructions

Southwestern Bell
Southwestern Bell FA970 owner's manual

Panasonic
Panasonic KX-TG8563AZ operating instructions

Panasonic
Panasonic KX-TC1867B user guide