Benchmark 5140-010 User manual

1
5150-004
13 AMP ELECTRIC DETHATCHER
OWNER'S
MANUAL
READ ALL INSTRUCTIONS BEFORE FIRST USE.
KEEP THIS MANUAL FOR FUTURE REFERENCE.
KEEP AWAY FROM CHILDREN.
WEAR CSA APPROVED
EYE PROTECTION
WEAR EAR
PROTECTION
WEAR A
FACE MASK
5
5 Year Limited Warranty
13 AMP
ELECTRIC DETHATCHER
US

1
PRODUCT SPECIFICATIONS
13 AMP ELECTRIC DETHATCHER
Rating voltage 120 V~60 Hz
Rating current 13 A
No load speed 3500 RPM
Deck width 19" (47.5 cm)
Cutting width 15" (38 cm)
Dethatching depth -12 / -9 / -6 / -3 / +6 mm, 5 positions
Dethatcher blade diameter 5.2" (13.2 cm)
Weight 32 lb (14.5 kg)
Grass bag 45 L
Protection degree
NEED ASSISTANCE?
Call us on our toll free customer support line:
1-833-818-4111 (Monday through Friday, 9am – 5pm, Eastern Standard Time)
∫ Technical questions
∫ Replacement parts
∫ Parts missing from package

2
5150-004
13 AMP ELECTRIC DETHATCHER
TABLE OF CONTENTS
Product Specifications .................................................................................. 1
Table of Contents .......................................................................................... 2
Safety Instructions ........................................................................................ 3
Symbols ........................................................................................................ 3
General Safety Warnings ................................................................................ 6
Know Your Dethatcher ................................................................................... 9
Operation Instructions ................................................................................. 10
Maintenance ............................................................................................... 16
Troubleshooting........................................................................................... 18
Exploded View ............................................................................................ 19
Parts ........................................................................................................... 20
Warranty ..................................................................................................... 24
3
SAFETY INSTRUCTIONS
IMPORTANT
Please read these instructions fully before assembling and operating.
DESCRIPTION OF SYMBOLS
Symbols are used in this manual to attract your attention to possible risks. The
safety symbols and the explanations which accompany them must be perfectly
understood. The warnings themselves do not prevent the risks and cannot be a
substitute for proper methods of avoiding accidents.
SAFETY ALERT SYMBOLS
The following symbols are used on the product and in this manual to alert the
operator of potential safety hazards. Read them carefully, and understand their
meaning.
SYMBOL MEANING
DANGER
Indicates an imminently hazardous situation which, if not avoided,
will result in death or serious injury.
WARNING!
Indicates a potentially hazardous situation which, if not avoided,
could result in death or serious injury.
CAUTION
Indicates a potentially hazardous situation which, if not avoided,
may result in minor/moderate injury.
NOTICE
Indicates a practice not related to personal injury which, if not
avoided, may result in property damage.
The following symbols may be found on your dethatcher. Carefully read and
understand their meaning.
4
5150-004
13 AMP ELECTRIC DETHATCHER
SYMBOLS
Some of the following symbols may be used on this product. Please study them and
learn their meaning. Proper interpretation of these symbols will allow you to operate
the product eectively and safely.
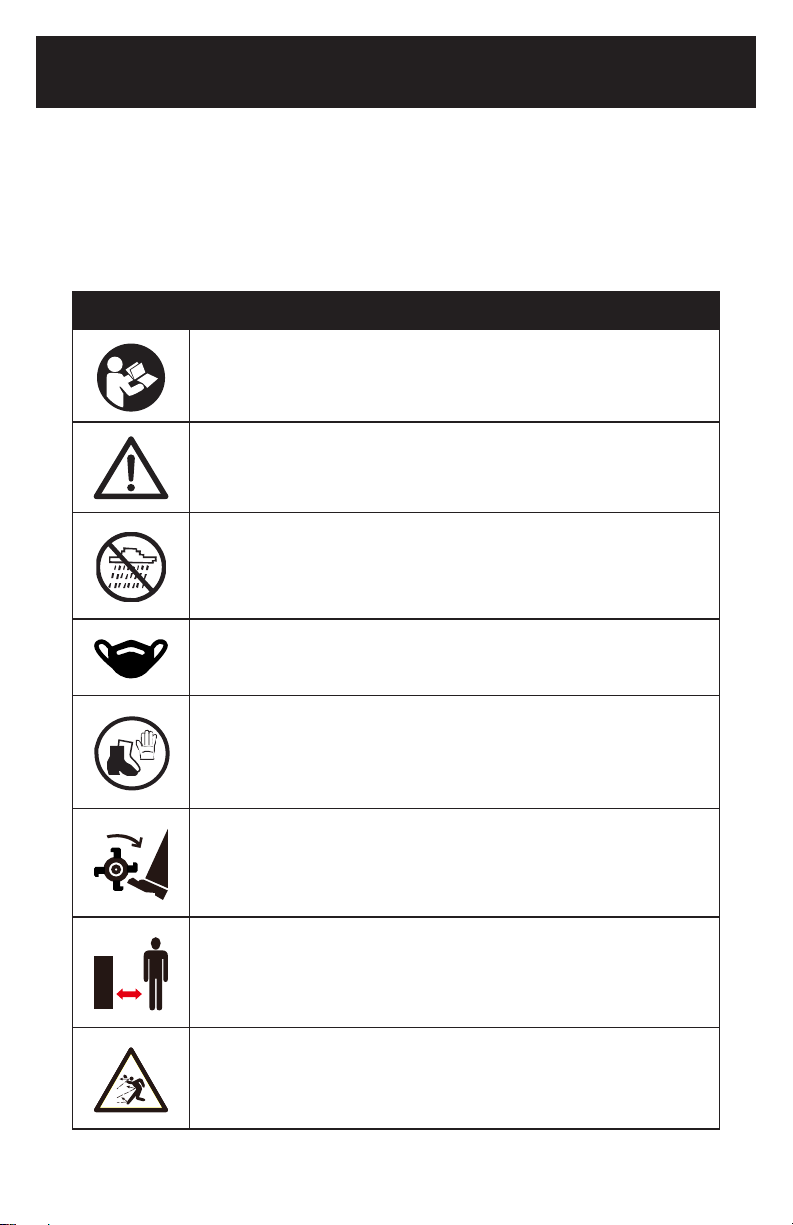
SYMBOL MEANING
READ THE OPERATOR'S MANUAL(S) – Read, understand, and
follow all instructions in the user manual(s) before attempting to
assemble and operate.
SAFETY ALERT – Indicates a precaution, a warning, or a danger.
WARNING! Do not expose the unit to rain or wet conditions.
WEAR EYE AND HEARING PROTECTION – For protection against
injury, wear ear defenders and safety goggles.
Wear protective gloves and non-slip footwear when using the
machine and handling debris
DANGER! Rotating blades –Keep hands and feet away from
moving parts.
Keep bystanders a safe distance away from the work area.
Thrown objects picked up by the rotating tines can cause severe
injury.

5
Inspect the work area prior to use and remove all objects that could
be thrown by the appliance. If a hidden object is discovered while
working, stop the engine and remove the object.
Use extreme CAUTION when reversing or pulling the machine
towards you.
SWITCH OFF! Remove plug from outlet before cleaning or
conducting maintenance checks.
SWITCH OFF! Remove plug from outlet immediately if the cord is
damaged or cut.
Do not push down stairs
DOUBLE INSULATION.
6
5150-004
13 AMP ELECTRIC DETHATCHER
GENERAL SAFETY WARNINGS
WARNING: When using electric garden products, basic safety precautions
should always be followed to reduce the risk of fire, electric shock and
personal injury, including the following:
WARNING: Read all instructions.
WARNING: This product can expose you to chemicals including lead,
phthalate or bisphenol A which are known to cause cancer, birth defects or
other reproductive harm. Wash your hands after use.
FOR ALL DETHATCHERS
1. Avoid Dangerous Environments - Do not use appliances in damp or wet
locations.
2. Do not Use In Rain.
3. Keep Children Away - All visitors should be kept at a distance from work area.
4. Dress Properly - Do not wear loose clothing or jewellery. They can be caught in
moving parts. Use of rubber gloves and substantial footwear is recommended
when working outdoors. Wear protective hair covering to contain long hair.
5. Use Safety Glasses - Always use face or dust mask if operation is dusty.
6. Use the Right Dethatcher - Do not use dethatcher for any job except that for
which it is intended.
7. Ground Fault Circuit Interrupter (GFCI) protection should be provided on the
circuit(s) or outlet(s) to be used for the gardening appliance. Receptacles are
available having built-in GFCI protection and may be used for this measure of
safety.
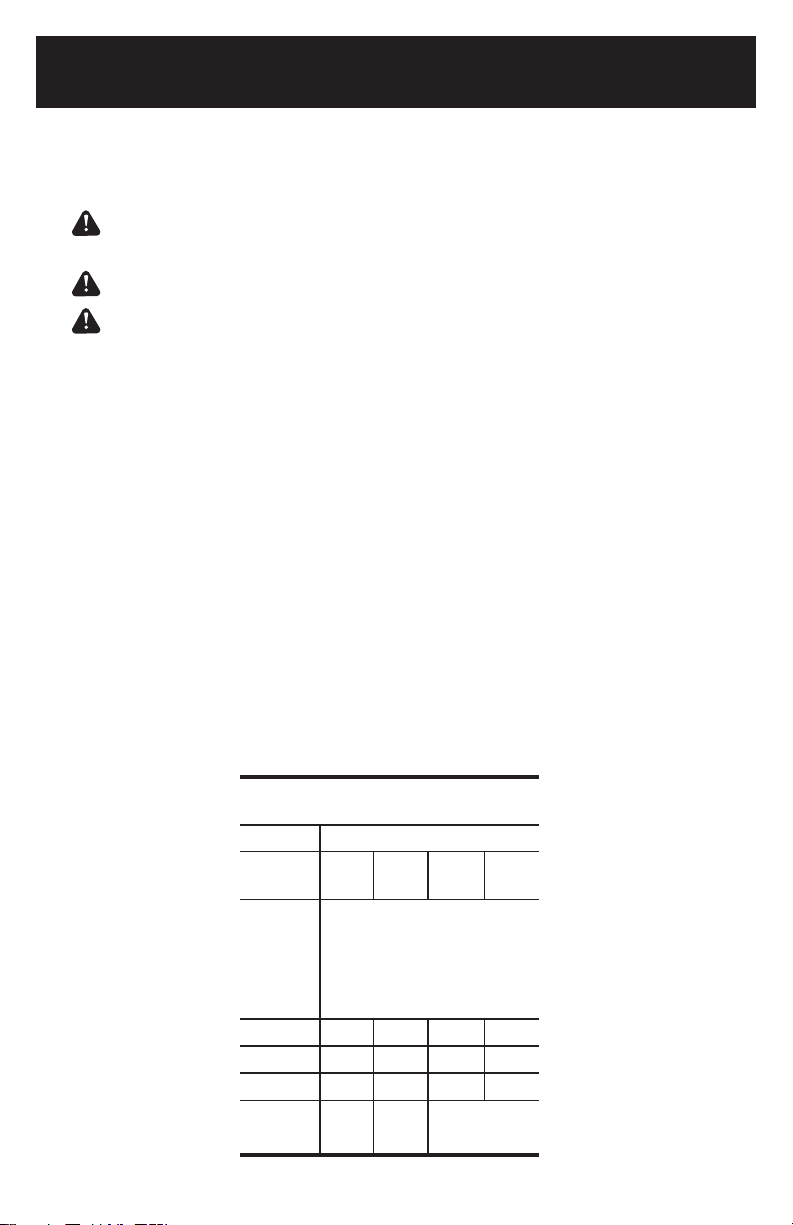
Table 1
Minimum gauge for extension cords
Volts
120 V
Ampere
rating
more
than not
more
than
AWG
Not
recommended
0-6
6-10
10-12
12-16
N/A
N/A
16
14
16
16
16
16
14
14
14
12
12
12
25’
7.2 m
50’
15.2 m
100’
30.4 m
150’
45.7 m
Total length of cord

7
8. Warning - To reduce the risk of electric shock, use only with an extension cord
intended for outdoor use, such as an extension cord of cord type SW-A SOW-A,
STW-A, STOW-A, SJW-A, SJOW-A, SJTW-A, or SJTOW-A.
9. Extension Cord - Make sure your extension cord is in good condition. When
using an extension cord, be sure to use one heavy enough to carry the current
your product will draw. An undersized extension cord will cause a drop in line
voltage resulting in loss of power and overheating. Table 1 shows the correct
size to use depending on cord length and nameplate ampere rating. If in doubt,
use the next heavier gauge. The smaller the gauge number, the heavier the cord.
To reduce the risk of disconnection of appliance cord from the extension cord
during operating: i) Make a knot as shown in Figure 1.
SAVE THESE INSTRUCTIONS FOR REFERENCE
ii) Use one of the plug-receptacle retaining straps or connectors described in this
manual.
10. Avoid Unintentional Starting - Do not carry plugged-in dethatcher with finger on
switch. Be sure switch is o when plugging in.
11. Do not Abuse Cord - Never carry dethatcher by cord or yank it to disconnect
from receptacle. Keep cord from heat, oil, and sharp edges.
12. Do not grasp the exposed cutting blades or cutting edges when picking up or
holding the dethatcher.
13. It should work in constant speed - It will do the job properly and safer at the rate
for which it was designed.
14. Do not Overreach - Keep proper footing and balance at all times.
15. Stay Alert - Watch what you are doing. Use common sense. Do not operate
dethatcher when you are tired.
16. Disconnect Dethatcher - Disconnect the dethatcher from the power supply
when not in use, before servicing, when changing accessories such as blades,
and the like.
17. Store Idle Dethatcher Indoors - When not in use, dethatcher should be stored
indoors in dry, and high or locked-up place - out of reach of children.
18. Maintain Dethatcher With Care - Keep cutting edge sharp and clean for best
performance and to reduce the risk of injury. Follow instructions for lubricating
and changing accessories. Inspect appliance cord periodically, and if damaged,
have it repaired by an authorized service facility. Inspect extension cords
periodically and replace if damaged. Keep handles dry, clean, and free from oil
and grease.
19. Check Damaged Parts - Before further use of the dethatcher, a guard or
other part that is damaged should be carefully checked to determine that it
will operate properly and perform its intended function. Check for alignment
of moving parts, binding of moving parts, breakage of parts, mounting, and
any other condition that may aect its operation. A guard or other part that
is damaged should be properly repaired or replaced by an authorized service
center unless indicated elsewhere in this manual.

8
5150-004
13 AMP ELECTRIC DETHATCHER
WARNING: Read all safety warnings and instructions. Failure to follow the
warnings and instructions may result in electric shock, fire and/or serious
injury.
FOR ALL DOUBLE-INSULATED DETHATCHERS
1) Replacement Parts - When servicing use only identical replacement parts.
2) Polarized Connections - To reduce the risk of electric shock, this dethatcher has
a polarized plug (one blade is wider than the other) and will require the use of a
polarized extension cord. The plug will fit into a polarized extension cord only
one way. If the plug does not fit fully into the extension cord, reverse the plug. If
the plug still does not fit, obtain a correct polarized extension cord. A polarized
extension cord will require the use of a polarized wall outlet. This plug will fit
into the polarized wall outlet only one way. If the plug does not fit fully into the
wall outlet, reverse the plug. If the plug still does not fit, contact a qualified
electrician to install the proper wall outlet. Do not change the equipment plug,
extension cord receptacle, or extension cord plug in any way.
Figure 1. Method of Securing Extension Cord Cord set
Cord set Appliance cord
(A) Tie cord as shown
(B) Connect plug and receptacle

9
KNOW YOUR ELECTRIC DETHATCHER
Read the owner’s manual and safety instructions carefully before operating the
electric dethatcher. Compare the illustration below to the electric dethatcher
in order to familiarize yourself with the location of the various controls and
adjustments. Save this manual for future reference.
1. Upper handle 11. Thatch bag rack
2. Switch lever 12. Thatch bag
3. Safety lock button 13. Angle knob
4. Middle handle 14. Fixed knob
5. Knob x 4 15. Thatch bag cover
6. Bolt 16. Raking depth adjustment lever
7. Extension cord restraint holder 17. Cover
8. Cable clip 18. Decorative plates
9. Plug 19. Base
10. Lower handle
Not all the accessories illustrated or described are included in standard delivery.
10
5150-004
13 AMP ELECTRIC DETHATCHER
OPERATING INSTRUCTIONS
NOTE: Read operator’s manual
INTENDED USE
This product is intended for domestic, dethatching of lawn. This appliance is not
intended for dethatching on hard materials such steel rod, stones and other hard
materials which exceeds its cutting capacity and will damage the tines.
WARNING
To avoid injury from unexpected starting or electrical shock, during assembly or
adjustment, do not plug the power cord into a source of power.
ASSEMBLY
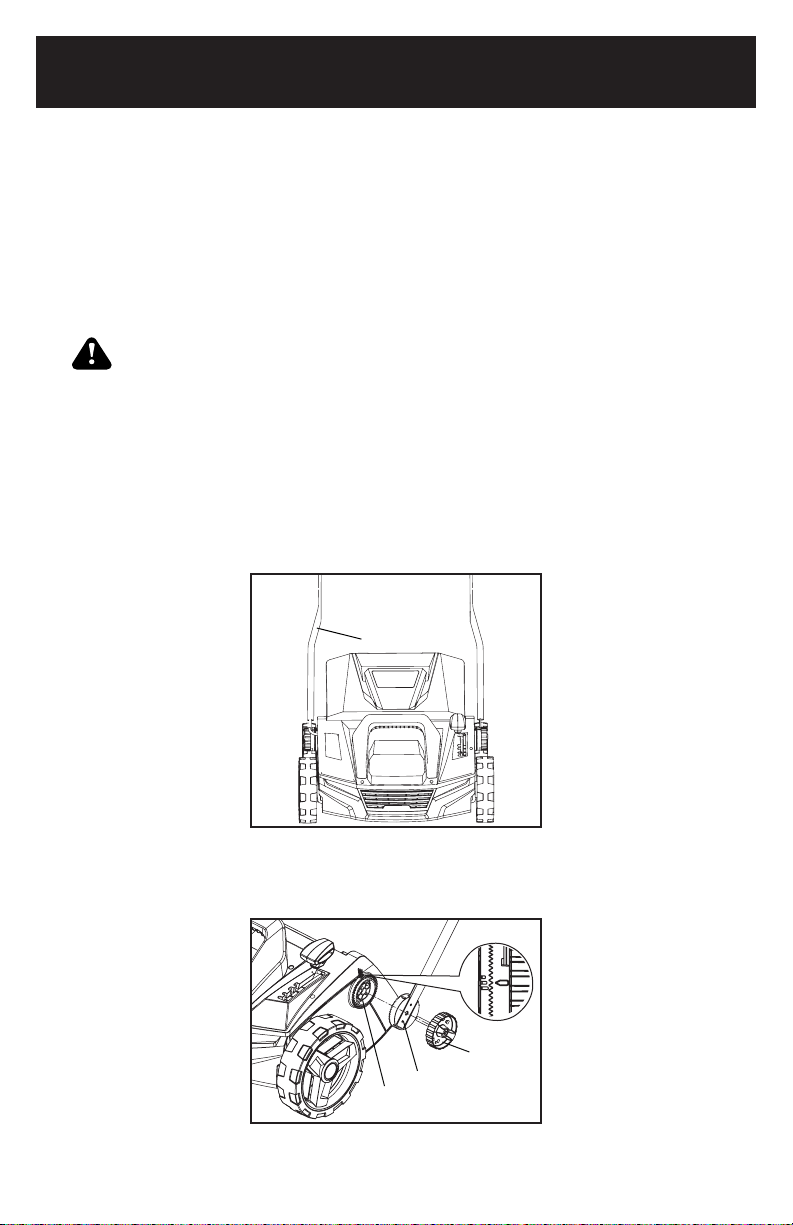
Assemble the lower handle
1. Install the lower handle positioning seat on the base, Note: There are 3 gears at
the base installation position, which represent 3 dierent installation heights.
No. 1 handle
2. Tighten the angle knob clockwise to fix it on the base.
Note: The rotation direction of loosening and locking is marked on the angle
knob.
Angle knob
Lower handle
Base
Lower handle

11
Assemble the middle handle
1. Install the middle handle onto the lower handle by tightening the knob and the
bolt.
NO.2 handle
NO.1 handle
2. Knob installation: Disassemble the knob assembly, pass the bolt through the
inside of the middle, and then turn the knob clockwise to the screw to fix the
second handle. Same installation on the other side.
Knob
NO.2 handle
Bolt
Assemble upper handle and cable clip
1. Install the upper handle on the outside of the middle handle. Install the extension
cord restraint holder on the same side as the switch.
Extension cord
restraint holder
NO.3 handle
NO.2 handle
Middle handle
Middle handle
Upper handle
Upper handle
Extension cord
restraint holder
Lower handle

12
5150-004
13 AMP ELECTRIC DETHATCHER
2. Pass the power cord through the cable clip, then clamp the cable clip on the left
side of the middle handle.
Extension cord
restraint holder
Cable clip
Installing the thatch collection bag
WARNING
The product must be switched o and the cutting device must have stopped rotating
before you attach or empty the thatch collection bag.
NOTE: A full thatch collection bag will reduce the perfomance of this product.
NOTE: You have the option of operating the thatcher with or without the collection
bag.
Thatcher bag rack
Thatcher bag cover
Collection bag
NOTE: Install the extension cord retainer to upper handle with wire side before
assembling the upper handle with lower handle.

13
Attach the thatch collection bag to the dethatcher before operation.
Lift the thatch
collection bag cover, and hang the thatch collection bag on the
mounting hooks.
Empty the thatch collection bag frequently during use. Do not wait
until it is
completely full. We recommend emptying it when it is half full.
Lift the thatch collection bag cover and pull the thatch collection bag o the
mounting hooks to remove it.
Empty the bag's contents into a suitable waste receptacle. Mount the bag back into
position before resuming work.
Adjusting the gears
WARNING
The
unit
must
be
switched
o
and
disconnected
from
the
power
supply
before
adjusting the tine settings.
Adjust the depth according to the needs of your lawn. The most suitable depth
depends on the kind of lawn and the actual height of the grass.
Scale/
Position Setting
Depth
Application
Raking
1
2
3
4
5
high
minimal
middle
deep
deep
6 mm
-3 mm
-6 mm
-9 mm
-12 mm
raking healthy lawn
storage and raking
storage and raking
deep layers of thatch
storage and raking
transport, removing
thin layers of thatch

14
5150-004
13 AMP ELECTRIC DETHATCHER
Starting + Stopping
WARNING
Before switching on the lawn dethatcher, make sure that it is not in contact with any
foreign objects. Keep your feet and hands a safe distance away from the rotating
tines and the ejector opening. Failure to comply with these warnings can result in
severe personal injury.
To start
1. Keep pressing safety lock button.
2. With the safety lock button pressed, simultaneously pull the switch lever back
with the other hand on the upper handle. Hold the switch lever and upper handle
together to operate.
To stop
1. Release the switch lever to stop and make sure the tines come to a complete
stop.
WARNING
The tine cylinder continues to run for a brief period after the unit has been switched
o. Do not tilt or carry the unit while the motor is still running and do not touch the
cylinder while it is still rotating. Failure to comply could result in severe personal
injury.
Overload Protection
The overload protection will be activated in the following circumstances:
1. A buildup of scarified material around the cutting device.
2. If the material scarified is larger than the motor capacity.
3. Where there is too much resistance against the cutting device.
When the circuit breaker has been activated switch o the product and disconnect
from the power supply.
Let the product cool down and eliminate the cause before using the product again.
General Operation
WARNING
If the product strikes a foreign object stop the motor. Switch the product o,
disconnect it from the power supply and let it cool down. Inspect the product
thoroughly for damage. Have any damage repaired before restarting.
WARNING
Extensive vibration of the product during operation is an indication of damage. The
product should be promptly inspected and repaired.
∫Check the machine, its power cord and plug as well as accessories for damage
before each use. Do not use the machine if it is damaged or shows wear.
∫Double check that accessories are properly fixed.
15
∫Push the machine forward by its handle. Keep the handle dry to ensure safe
support.
Ensure that the air vents are always unobstructed and clear. Clean them if
necessary with a soft brush. Blocked air vents may lead to overheating and
damage the product.
∫Switch the machine o immediately if you are disturbed while working by other
people entering the working area. Always let the machine come to complete stop
before putting it down.
∫Do not overwork yourself. Take regular breaks to ensure you can concentrate on
the work and have full control over the machine.
∫Mow the lawn before working and fertilize afterwards.
∫Make sure that the lawn is clear of stones, sticks, wire, or other objects that could
damage the machine or its motor.
∫Select the suitable cutting depth for the actual grass height.
∫Do not work with this machine on a wet lawn because it tends to stick to the
underbody of the machine, preventing the proper discharge of collected material,
and it could also cause you to slip and fall.
∫Slowly push the machine forward. Move the machine at appropriate speed. Do
not move it too fast to prevent the discharge from getting blocked and engine
from useless overloading.
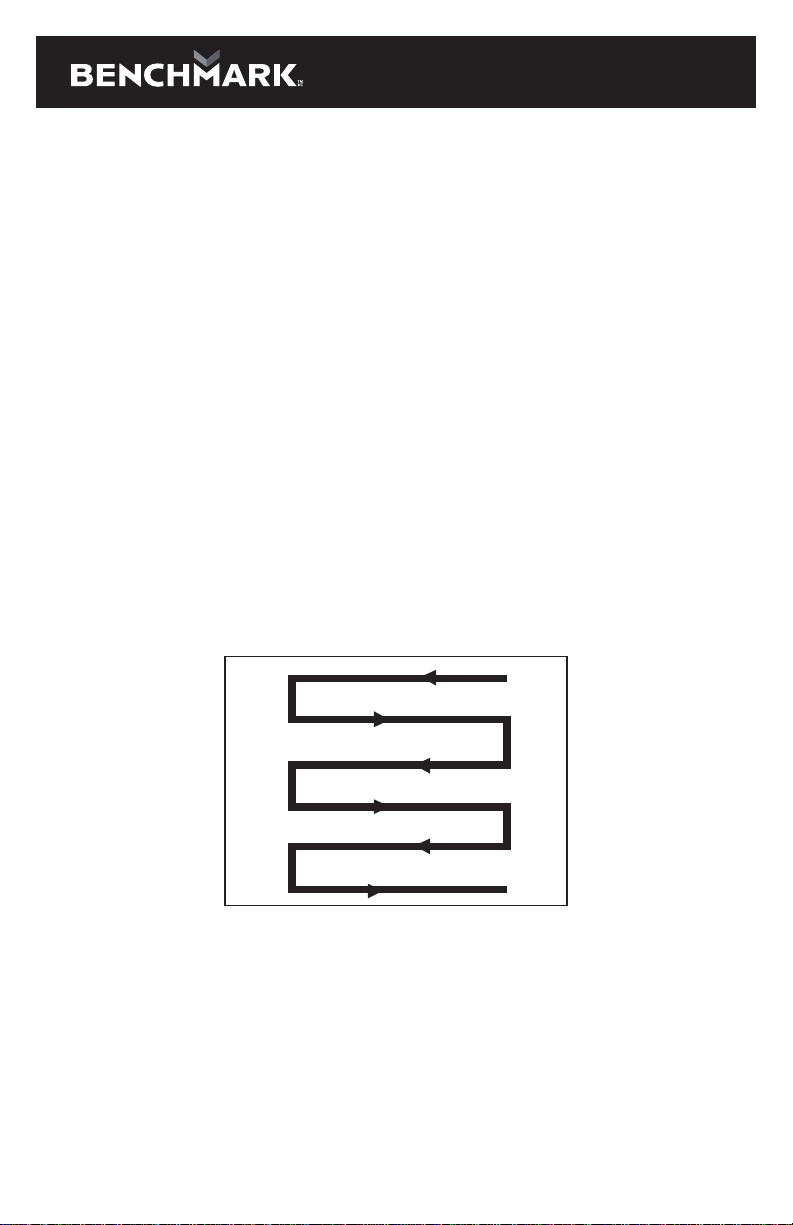
∫Work in slight overlapping rows. The most eective pattern for raking lawns is
straight lines along one of the sides. This will keep the rows even and
ensures that all the lawn is raked without missing any spots.
∫Circle around flower beds. When reaching a flower bed in the middle of the lawn,
make a row or two around the circumference of the bed.
∫Pay special attention when changing direction.

16
5150-004
13 AMP ELECTRIC DETHATCHER
MAINTENANCE
WARNING
Before carrying out any repairs or servicing work, you must ensure that the machine
has been disconnected from the power supply. Repairs and maintenance work other
than described within this instruction manual may be performed only by qualified
specialist!
Service + Storage
To ensure long and reliable service, carry out the following maintenance
regularly. Servicing and cleaning work on the machine and the removal of the
guards may only be carried out after the motor has been switched o and the plug
disconnected from the power supply.
∫Keep all nuts, bolts and screws tight to be sure the product is in a safe working
condition.
∫Allow the product to cool before storing in any enclosure.
∫Check the thatch collection bag frequently for wear or deterioration.
∫Examine the product regularly and replace worn or damaged parts for safety.
∫Check that covers and guards are undamaged and correctly fitted. Carry out
necessary maintenance or repairs before using the machine.
∫If the cutting device should happen to fail despite the care taken in manufacturing
and testing, repair should be carried out by an authorized repair facility.
∫Do not clean the machine while it is running.
∫Ensure that all the fastening elements (screws, nuts, etc.) are tight at all times so
that you can safely work with the machine.
∫Check the machine frequently for signs of wear. Replace worn or damaged parts.
∫Store your machine in a dry place. To ensure a long service life all screws and
bolts should be cleaned and then oiled.
∫Clean the machine with a brush or cloth. Do not use any solvents or water to
remove dirt.
∫The component that is subject to most wear is the cutting device. You should
therefore check the condition of the cutting device and its mounting at regular
intervals.
∫If the cutting device is worn or blunt it must be replaced immediately.
∫If the machine starts to suer from excessive vibrations, this means that the
cutting device has not been balanced correctly or has suered deformation due
to impacts. In this case it must be repaired or replaced.
Replacing/Changing Cutting Device
WARNING
Always switch the machine o, disconnect it from power supply and let it cool down
before changing / replacing the cutting device.
WARNING
Cutting devices are very sharp and become hot during use. Handle them carefully.
17
WARNING
Wear safety gloves when handling cutting devices in order to avoid injuries like burns
and cuts.
WARNING
Make sure all bolts are completely tightened before operating the machine. Don't
operate the machine if any bolts are missing, loose, or damaged.
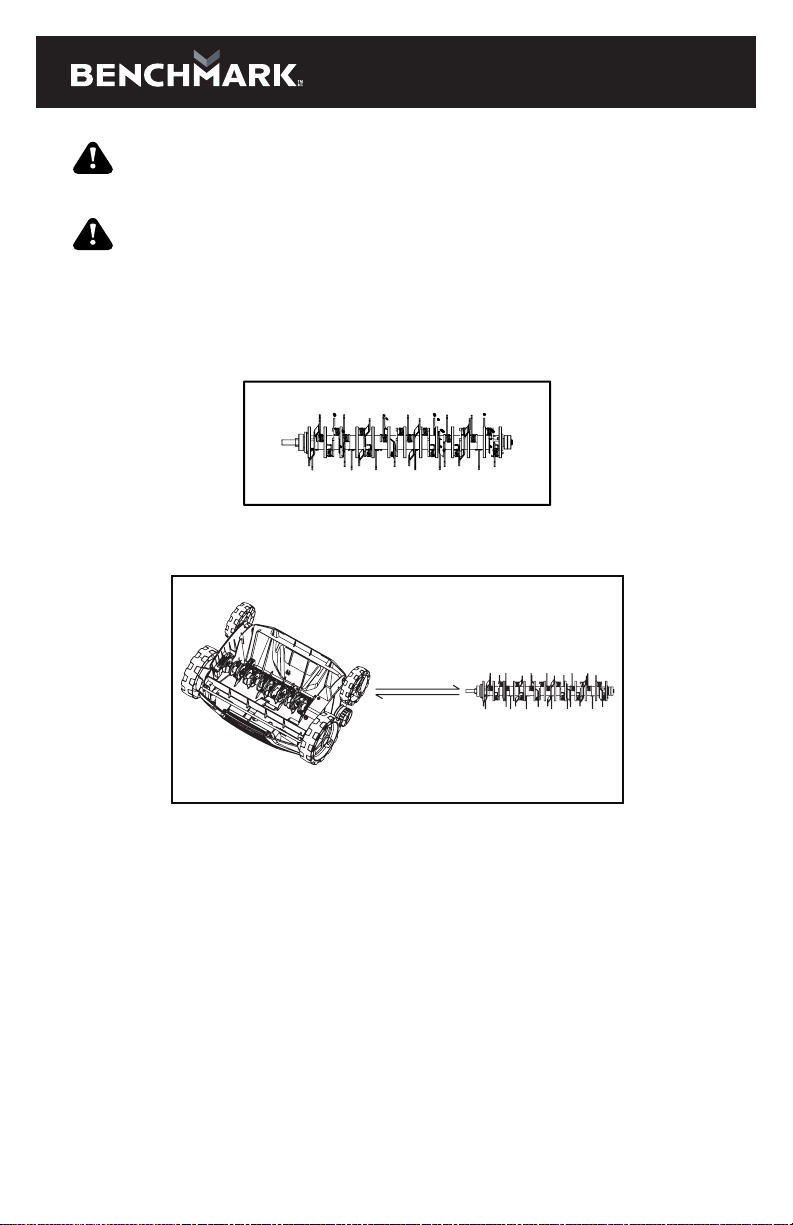
The product is designed for raking and the raking cylinder is preassembled on the
machine. The cylinder can be changed according to the application.
Replace the raking cylinder
1. Loosen the inner hexagon on the bearing seat and unscrew it counterclockwise.
2. Then take out the raking cylinder.
3. Align the rectangular hole at one end of the comb blade with the square output
shaft on the base.
4. Press the bearing on the grooming blade into the bearing seat, and then tighten
the hexagon socket screw clockwise.

18
5150-004
13 AMP ELECTRIC DETHATCHER
TROUBLESHOOTING
Fault/Malfunction Cause(s) Solution(s)
Motor does not start a) Not connected to
power supply
b) Power cord or plug is
defective
c) Other electrical defect
to the product
d) Safety lock button not
pressed
a) Connect to power
supply
b) Contact an authorized
service agent
c) Press safety lock
button first, then the
start/stop lever
Product does not reach
full power
a) Extension cord not
suitable for operation
with this product
b) Power source (e.g.
generator) has too low
voltage
c) Air vents are blocked
a) Use a proper
extension cord
b) Connect to another
power source
c) Clean the air vents
Unsatisfying result a) Raking tines worn
b) Raking material
exceeds capacity
c) Lawn has grown too
tall
a) Replace the tine
cylinder
b) Only raking materials
according to capacity
of the product
c) Adjust the depth
or mower the lawn
before using the
dethatcher

19
EXPLODED VIEW
Table of contents


