Bendcart BC-100 User manual

Bendcart BC-100 assembly instructions
Remove all Cardboard
Review drawing on page 3 and 4 of instruction pack.
Pump Tray
Mount the pump tray by lowering the long bar down into the pump tray support tube on
the back of the Bendcart
Mount Bender Supports (2)
-remove the 3/8” bolts and spacers
-slide the bender supports over the frame top and cross member with the
support pins pointing away from the saddle and shoe storage posts
-reinstall spacers and bolts
-tighten bolts
Install conduit holddown roller
-remove the snap ring from the roller pin
-slide pin into one of the tubes on the back of the conduit leveler assembly (pg 4)
-the roller is built slightly off center. The center needs to be closer to the frame for
the 885 bender and further from the frame for the 881 bender.
--use lower tube when bending smaller size conduits
--use upper tube when bending larger conduits
-reinstall snap ring
Mount Adjustable follow bar supports
(2)
- clip the support over the edge of the follow bar storage pan, one in front of the
bender and one behind.
-screw the 3/4" x 10" bolt into one of the tapped holes that is slightly below the
level of the bender roller. The purpose of these supports is to keep the follow
bar from sagging to the floor when pressure is released upon completion of the
bend.

Bendcart
model
# BC 100
Instruction manual and parts list
(rev 9/07)
The Bendcart is designed for use with the Greenlee #881CT and the #885T Hydraulic
2-21/2” to 4” EMT benders.
SAFETY
Safety is an important part of the workplace. In addition to the normal workplace safety
measures there are specific precautions that should be taken when using the Bendcart:
-Be sure all pins are installed in the proper locations
-Visually inspect the bender to see that it is properly mounted and that there are no
parts missing or binding.
-Use proper lifting techniques when loading bender and changing parts
-Use only on a level surface
-The Bendcart is heavy, especially with extra shoes. Be very careful if moving over
uneven or sloping ground.
-The brakes are designed only to prevent the bender from moving when loading
conduit. They should not be relied upon when transferring or storing this unit.
LUBRICATION
The swivel wheels have grease fittings and should be greased every 6-12 months.
A light lubrication oil should be sprayed on the conduit leveler adjustment screw
and slide plate monthly.
MOUNTING THE BENDER
A. 881 Bender (current model for EMT and GRC - cylinder is moved up or
down when changing shoe sizes) - go to page 5
B. 885T bender ( old style for EMT only - roller adjusts up or down when
changing shoe sizes)
-Slide one of the bender side bars onto the bender support pins (see page 3)
-Slide the hydraulic cylinder onto the bender support pins
-Slide the second side bar onto the bender support pins
-Install the 2 hairpins into the proper holes to secure the bender to the Bendcart.
(NOTE: the 881 bender w/881A adapter uses the outer holes, the 885T uses the
inner set of holes)
-Install the follow bar roller (part of bender)
-Turn the conduit leveler adjustment handle to raise or lower the conduit leveler
until the lower tube of the leveler assembly is approximately level with the top of
the follow bar roller
-If necessary, relocate the 3/4"x10" bolts in the follow bar support pegs so that
they are slightly below the top level of the roller
pg 1

BENDING CONDUIT
-Adjust the conduit holddown roller for the size conduit being bent. Remove the
hairpin and install the roller rod into the upper or lower sleeves . The roller can be
left in the upper sleeve, if so desired, but it may require more adjustment to level
the conduit.
-The appropriate follow bar should be installed so that one end is resting on the
roller(bender) and the other end is resting on the conduit leveler or the rear follow
bar support peg with the follow bar ears outward. The bender supports are designed
so that the bender can be slid either forward or back, as necessary. The middle
is best for most situations.
-Set the pump in the pump tray and connect the hose to the ram. You may find
it useful to purchase 90 deg hydraulic fittings for the pump and cylinder.
(NOTE: the pump should be secured to the pump tray with bolts, wire or other
means.)
-Set the appropriate shoe onto the follow bar and connect it to the ram yoke
(NOTE: this may be made easier by pumping the ram down several inches.)
-Install the saddle and the operation is complete.
-Slide conduit onto follow bar and under the conduit holddown roller
-Install the saddle (NOTE: for a one man operation you may find it easier to pull
the shoe back and up with a wire, bungee cord , or some other means so that the
saddle is touching the front of the follow bar. Don’t forget to remove the wire
or cord before bending!!!!!)
-Start bend
-turn the conduit leveler adjustment handle until the conduit behind the shoe is
level.
-Finish bend For accurate bends using a protractor, readjust the back of the
conduit to level when you are within a few degrees of the desired bend.
WARNING:
If the conduit is not properly aligned there is a possibility of the
saddle pin getting caught under the Bendcart crossbar when making 90 deg
bends. This is more of a problem on smaller conduits as the pin can extend thru
the saddle several inches. Be sure that the conduit is centered in the bender and is
parallel to the Bendcart when starting the bend.
MISCELLANEOUS
-See page 3 for the pump tray storage and "in use" positions.
-The unit can be made reasonably secure by threading a heavy chain through
the saddles, through the holes of the shoe, through the pump handle and around
the bender.
TIPS
-Use a large C-clamp or welders vise grip to clamp the saddle to the conduit to
prevent the shoe from sliding down the bend when pressure is released to
check spring back.
-To eliminate dogleg on segment bends make a line lengthwise on the conduit (or
use the seam mark) Make a mark on the face of the shoe. Be sure that the
lengthwise line matches the mark on the shoe for each bend.
pg. 2
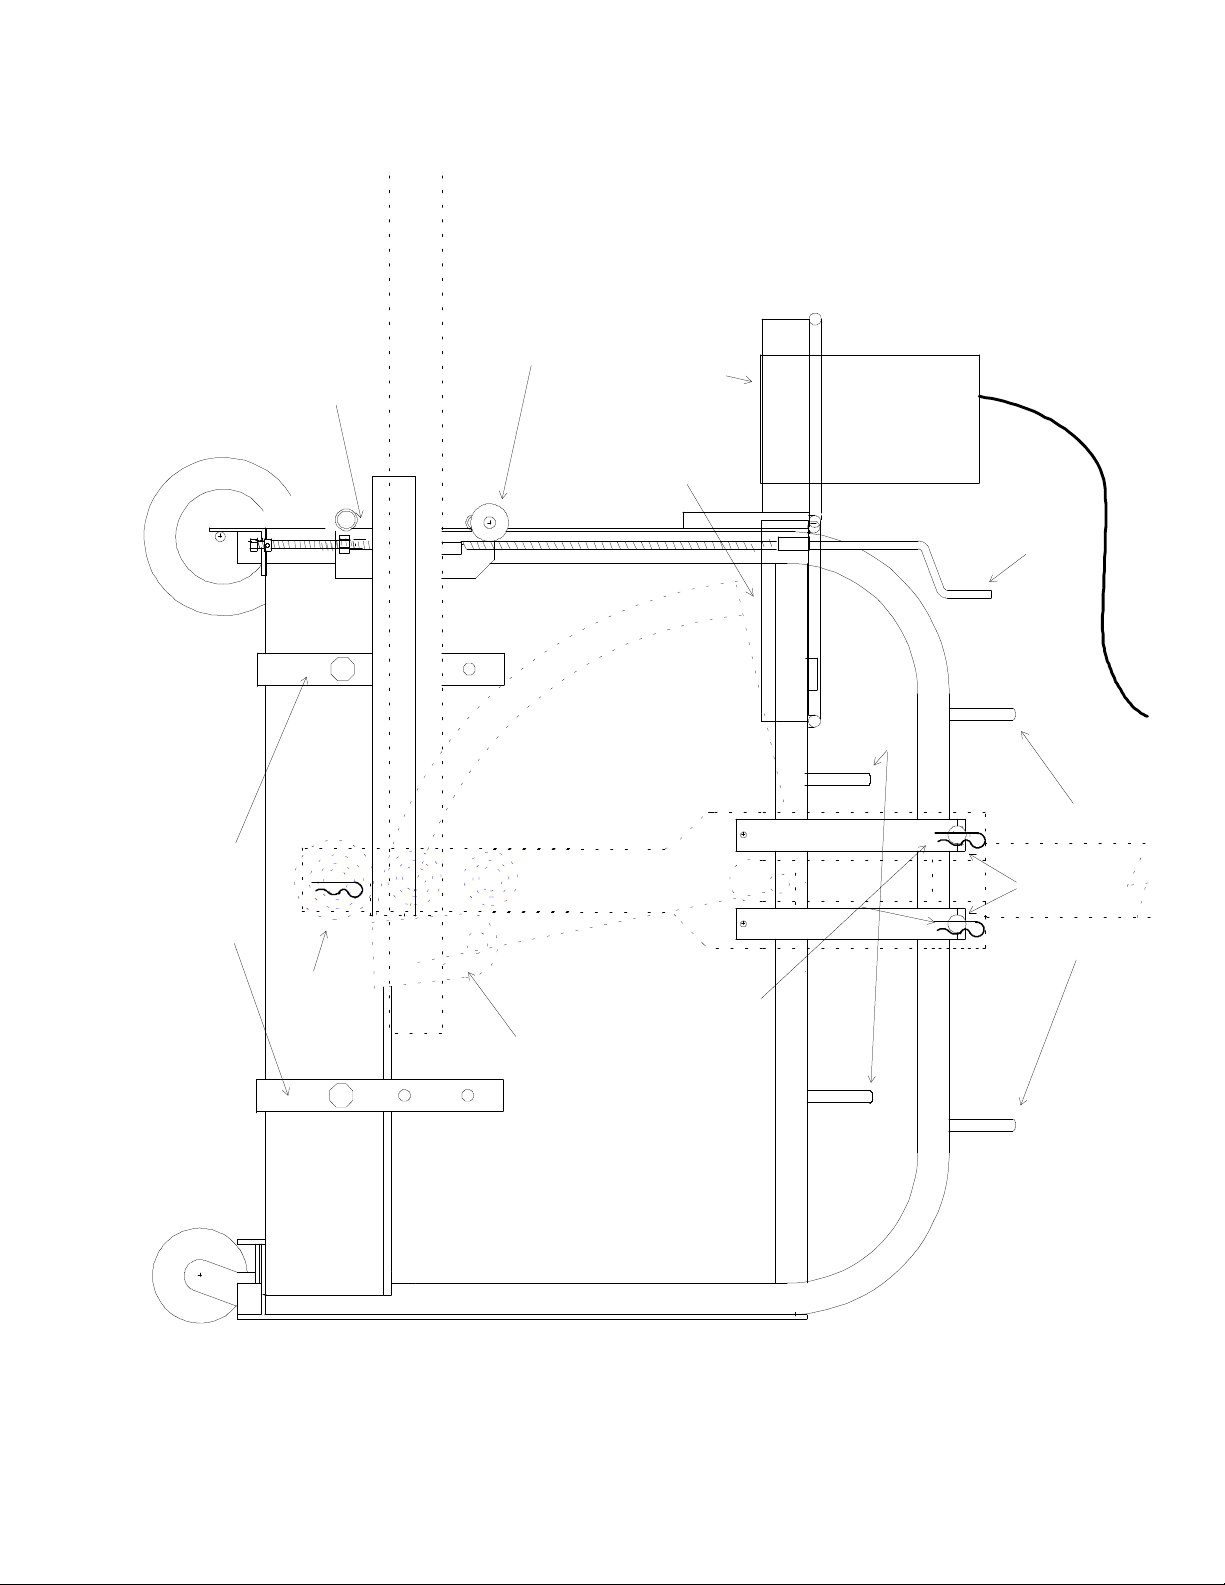
bender
side
bars
shoe
saddle
conduit
pump
CAUTION:
Hairpins must be installed
in bender supports before using.
--inner holes for 885T
--outer holes for 881A adapter
bender support pins
saddle storage
shoe storage
follow bar storage
conduit leveler
adjustment handle
follow bar
support pegs
Bendcart BC100
w/885T bender
pump tray
(storage position)
conduit holddown
roller
conduit leveler
assembly roller
follow bar
pg 3
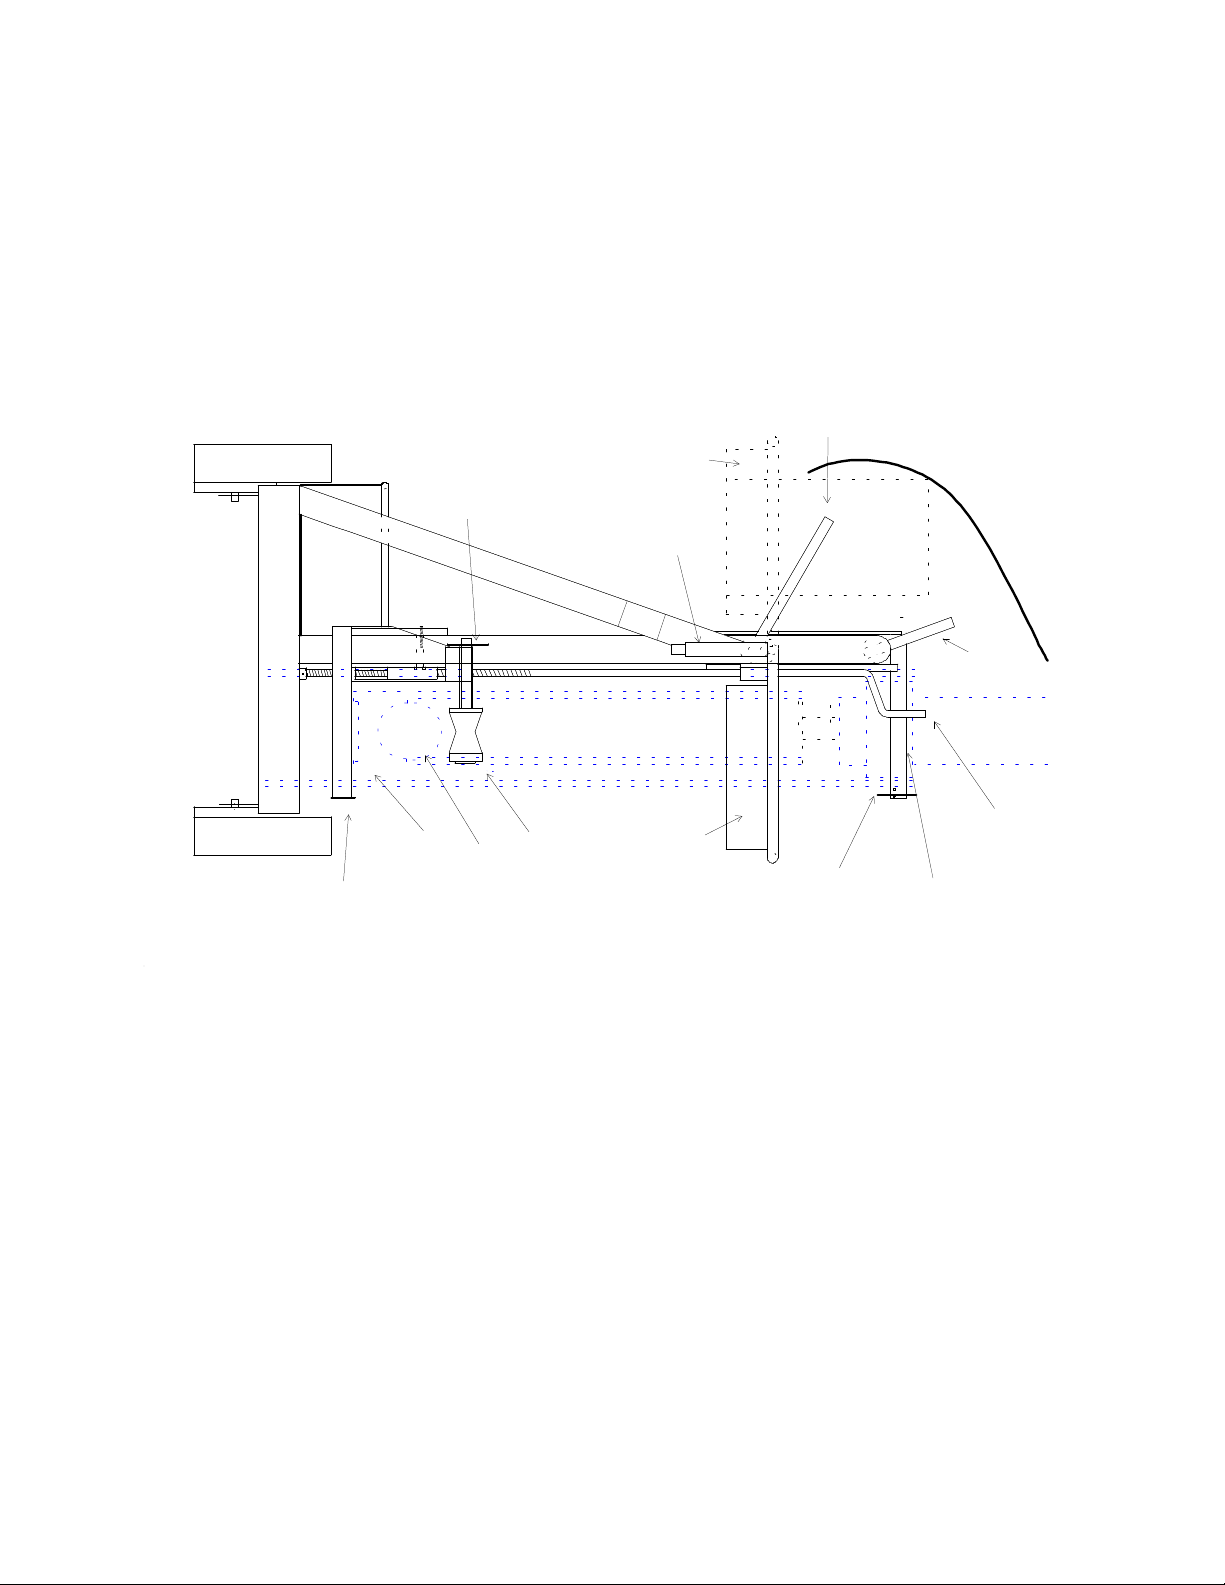
conduit holddown
roller
conduit
follow bar
(w/ ears out)
pump
pump tray
(in use) pump tray
(stored)
shoe
pump tray
support tube
Bender support pins(2)
CAUTION:
Be sure that the hairpins are installed in
the bender support pins before operating.
--inner holes for 885T
--outer holes for 881A Adapter
shoe storage posts
saddle storage posts
follow bar
storage
back viewback view
conduit leveler
assembly
snap ring
Bendcart BC100
End view
conduit leveler
adjustment handle
pg 4
Table of contents


