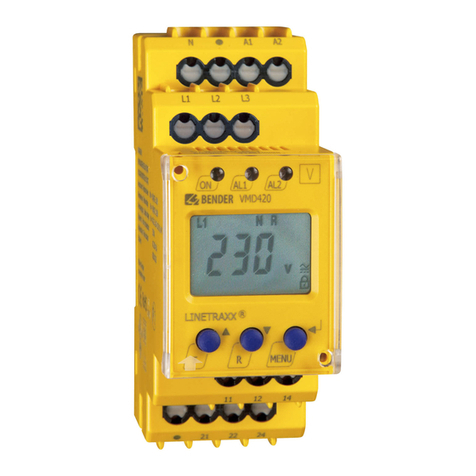
Bender VMD421H User manual

Manual
EN
VMD421H
Voltage and frequency monitor for undervoltage, overvoltage,
underfrequency and overfrequency monitoring
in 3(N)AC systems of 70...500 V
Software version D239 V2.3x
VMD421H_D00138_02_M_XXEN.pdf/06.2021 Manual EN

Bender GmbH & Co. KG
Postfach 1161 • 35301 Grünberg • Germany
Londorfer Str. 65 • 35305 Grünberg • Germany
Tel.: +49 6401 807-0 • Fax: +49 6401 807-259
E-Mail: info@bender.de • www.bender.de
©Bender GmbH & Co. KG
All rights reserved.
Reprinting only with permission
of the publisher.
Subject to change!
Photos: Bender archive and Bendersystembau archive

3
Table of content
VMD421H_D00138_02_M_XXEN.pdf/06.2021
1. Important information ................................................................................................ 5
1.1 How to use this manual ................................................................................................. 5
1.2 Technical support: service and support .................................................................. 5
1.2.1 First level support .................................................................................................... 5
1.2.2 Repair service ............................................................................................................ 6
1.2.3 Field service ............................................................................................................... 6
1.3 Training courses ............................................................................................................... 6
1.4 Delivery conditions ......................................................................................................... 7
1.5 Inspection, transport and storage ............................................................................. 7
1.6 Warranty and liability ..................................................................................................... 7
1.7 Disposal ............................................................................................................................... 8
2. Safety instructions ....................................................................................................... 9
2.1 General safety instructions .......................................................................................... 9
2.2 Work activities on electrical installations ................................................................ 9
2.3 Intended use ..................................................................................................................... 9
3. Function ...................................................................................................................... 11
3.1 Device features ............................................................................................................... 11
3.2 Functional description ................................................................................................. 11
3.3 Fast commissioning for Un = 400 V, 50 Hz ........................................................... 12
3.4 Preset function ............................................................................................................... 13
3.5 Automatic self test ........................................................................................................ 13
3.6 Manual self test .............................................................................................................. 14
3.7 Malfunction ..................................................................................................................... 14
3.8 Fault memory .................................................................................................................. 14
3.9 Assigning alarms to alarm relays K1/K2 ................................................................ 14
3.10 Delay times t, ton and toff .......................................................................................... 14
3.11 Password protection (on, OFF) ................................................................................. 15
3.12 Factory settings FAC ..................................................................................................... 15
3.13 Erasable history memory ............................................................................................ 15
3.14 Alarm LEDs show which relay is in the alarm state ........................................... 15
3.15 Starting the device with a simulated alarm S.AL ............................................... 15
3.16 Frequency alarm in case of measuring voltage failure .................................... 16
4. Installation and connection .................................................................................... 17

Inhaltsverzeichnis
4VMD421H_D00138_02_M_XXEN.pdf/06.2021
5. Wiring .......................................................................................................................... 19
6. Operation and settings ............................................................................................ 21
6.1 Display elements in use .............................................................................................. 21
6.2 Function of the operating elements ...................................................................... 22
6.3 Menu structure .............................................................................................................. 23
6.4 Display in standard mode .......................................................................................... 24
6.5 Display in menu mode ................................................................................................ 25
6.5.1 Parameter query and setting: overview ....................................................... 25
6.5.2 Setting the response values for undervoltage and overvoltage ......... 27
6.5.3 Setting the response values for underfrequency, overfrequency and
hysteresis ................................................................................................................. 28
6.5.4 Setting the fault memory and operating mode of the alarm relays .. 29
6.5.5 Assigning alarm categories to the alarm relays ......................................... 30
6.5.6 Setting delay times ............................................................................................... 33
6.5.7 Select measurement method ........................................................................... 34
6.5.8 Factory setting and password protection .................................................... 34
6.5.9 Restoring factory settings .................................................................................. 35
6.5.10 Manual activation of the preset function ..................................................... 35
6.5.11 Querying device information ........................................................................... 36
6.5.12 Querying the history memory .......................................................................... 36
6.6 Commissioning ............................................................................................................. 36
6.7 Preset function/Factory settings ............................................................................. 37
7. Technical data VMD421H ......................................................................................... 39
7.1 Tabular data .................................................................................................................... 39
7.2 Standards, approvals and certifications ............................................................... 42
7.3 Ordering information .................................................................................................. 42
7.4 Change log ...................................................................................................................... 42
INDEX ................................................................................................................................ 43

5
VMD421H_D00138_02_M_XXEN.pdf/06.2021
1. Important information
1.1 How to use this manual
Always keep this manual within easy reach for future reference.
To make it easier for you to understand and revisit certain sections in this manual, we
have used symbols to identify important instructions and information. The meaning of
these symbols is explained below:
1.2 Technical support: service and support
For commissioning and troubleshooting Bender offers:
1.2.1 First level support
Technical support by phone or e-mail for all Bender products
•Questions about specific customer applications
•Commissioning
•Troubleshooting
Telephone: +49 6401 807-760*
Fax: +49 6401 807-259
In Germany only: 0700BenderHelp (Tel. and Fax)
E-mail: [email protected]
This manual is intended for qualified personnel working in electrical
engineering and electronics!
This signal word indicates that there is a high risk of danger that will
result in death or serious injury if not avoided.
This signal word indicates a medium risk of danger that can lead to
death or serious injury, if not avoided.
This signal word indicates a low-level risk that can result in minor or
moderate injury or damage to property if not avoided.
This symbol denotes information intended to assist the user in making
optimum use of the product.
DANGER
WARNING
CAUTION

Important information
6VMD421H_D00138_02_M_XXEN.pdf/06.2021
1.2.2 Repair service
Repair, calibration, update and replacement service for Bender products
•Repair, calibration, testing and analysis of Bender products
•Hardware and software update for Bender devices
•Delivery of replacement devices for faulty or incorrectly delivered Bender devices
•Extended warranty for Bender devices with in-house repair service or replacement
devices at no extra cost
Telephone: +49 6401 807-780** (technical issues)
+49 6401 807-784**, -785** (commercial issues)
Fax: +49 6401 807-789
E-mail: [email protected]
Please send the devices for repair to the following address:
Bender GmbH, Repair-Service,
Londorfer Straße 65,
35305 Grünberg
1.2.3 Field service
On-site service for all Bender products
•Commissioning, parameter setting, maintenance, troubleshooting for Bender products
•Analysis of the electrical installation in the building (power quality test, EMC test, ther-
mography)
•Practical training courses for customers
Telephone: +49 6401 807-752**, -762 **(technical issues)
+49 6401 807-753** (commercial issues)
Fax: +49 6401 807-759
E-mail: [email protected]
Internet: www.bender.de/en
*Available from 7.00 am to 8.00 pm on 365 days of the year (CET/UTC+1)
**Mo-Thu 7.00 am - 8.00 pm, Fr 7.00 am - 13.00 pm
1.3 Training courses
Bender is happy to provide training regarding the use of test equipment.
The dates of training courses and workshops can be found on the Internet at www.ben-
der.de/en -> Know-how -> Seminars.

Important information
7
VMD421H_D00138_02_M_XXEN.pdf/06.2021
1.4 Delivery conditions
The conditions of sale and delivery set out by Bender apply.
For software products, the "Softwareklausel zur Überlassung von Standard- Software
als Teil von Lieferungen, Ergänzung und Änderung der Allgemeinen Lieferbedingun-
gen für Erzeugnisse und Leistungen der Elektroindustrie" (software clause in respect of
the licensing of standard software as part of deliveries, modifications and changes to
general delivery conditions for products and services in the electrical industry) set out
by the ZVEI (Zentralverband Elektrotechnik- und Elektronikindustrie e.V., (German Elec-
trical and Electronic Manufacturers' Association) also applies.
Conditions of sale and delivery can be obtained from Bender in printed or electronic for-
mat.
1.5 Inspection, transport and storage
Inspect the dispatch and equipment packaging for damage, and compare the contents
of the package with the delivery documents. In the event of damage in transit, please
contact Bender immediately.
The devices must only be stored in areas where it is protected from dust, humidity and
spray or dripping water, and in which the specified storage temperatures can be assu-
red.
1.6 Warranty and liability
Warranty and liability claims in the event of injury to persons or damage to property are
excluded if they can be attributed to one or more of the following causes:
•Improper use of the device.
•Incorrect mounting, commissioning, operation and maintenance of the device.
•Failure to observe the instructions in this operating manual regarding transport, com-
missioning, operation and maintenance of the device.
•Unauthorised changes to the device made by parties other than the manufacturer.
•Non-observance of technical data.
•Repairs carried out incorrectly and the use of replacement parts or accessories not
approved by the manufacturer.
•Catastrophes caused by external influences and force majeure.
•Mounting and installation with device combinations not recommended by the manu-
facturer.
This operating manual, especially the safety instructions, ust be observed by all persons
working with the device. Furthermore, the rules and regulations that apply for accident
prevention at the place of use must be observed.

Important information
8VMD421H_D00138_02_M_XXEN.pdf/06.2021
1.7 Disposal
Abide by the national regulations and laws governing the disposal of this device. Ask
your supplier if you are not sure how to dispose of the old equipment.
The directive on waste electrical and electronic equipment (WEEE directive) and the di-
rective on the restriction of certain hazardous substances in electrical and electronic
equipment (RoHS directive) apply in the European Community. In Germany, these poli-
cies are implemented through the "Electrical and Electronic Equipment Act" (ElektroG).
According to this, the following applies:
•Electric and electronic equipment are not to be included in household waste.
•Batteries and accumulators are not to be included in household waste but must be dis-
posed of in accordance with the regulations.
•Old electrical and electronic equipment from users other than private households
which was introduced to the market after 13th August 2005 must be taken back by the
manufacturer and disposed of properly.
For more information on the disposal of Bender devices, refer to our homepage at
www.bender.de/en -> Service & support.

9
VMD421H_D00138_02_M_XXEN.pdf/06.2021
2. Safety instructions
2.1 General safety instructions
Part of the device documentation in addition to this manual is the enclosed "Safety in-
structions for Bender products".
2.2 Work activities on electrical installations
If the device is used outside the Federal Republic of Germany, the applicable local stan-
dards and regulations must be complied with. The European standard EN 50110 can be
used as a guide.
2.3 Intended use
The voltage monitor VMD421H monitors 3(N)AC systems in the frequency range of
15…460 Hz for undervoltage, overvoltage, underfrequency and overfrequency.
The devices are designed for the nominal voltage range Un = 70…500 V. The device is
internally supplied by the nominal voltage Unto be monitored.
In order to meet the requirements of the applicable standards, customised parameter
settings must be made on the equipment in order to adapt it to local equipment and
operating conditions. Please heed the limits of the area of application indicated in the
technical specifications.
Any other use than that described in this document is regarded as improper.
Only qualified personnel are permitted to carry out the
work necessary to install, commission and run a device or
system.
Risk of fatal injury due to electric shock!
Touching live parts of the system carries the risk of:
•An electric shock
•Damage to the electrical installation
•Destruction of the device
Before installing the device and before working on the
connections of the device, make sure that the system is de-
energised. The rules for working on electrical systems must
be observed.
DANGER

11
VMD421H_D00138_02_M_XXEN.pdf/06.2021
3. Function
3.1 Device features
•Undervoltage and overvoltage monitoring in 3(N)AC systems
•Preset function: Automatic response value setting for undervoltage and overvoltage, <
U and > U as well as for underfrequency and overfrequency < f and > f
•Voltage and frequency monitoring with window discriminator function, < U and > U as
well as < f and > f
•Monitoring of asymmetry, phase failure and phase sequence
•Indication of the system frequency f
•Start-up delay, response delay, delay on release
•Adjustable switching hysteresis for U and f
•Frequency alarm behaviour in case of measuring voltage failure can be parameterised
•r.m.s. value measurement AC + DC
•Digital measured value display via multi-functional LC display
•Alarm indication via LEDs (AL1, AL2) and changeover contacts (K1, K2)
•N/C operation or N/O operation selectable
•Password protection to prevent unauthorised parameter changes
•Selectable fault memory behaviour. In "con“ mode, all alarm parameters remain stored
in case of failure of the nominal voltage (Un= Us)
•Start-up of the device optionally with or without simulated alarm message
3.2 Functional description
Once the nominal voltage is applied, the start-up delay "t" begins. Measured values
changing during this time do not influence the switching state of the alarm relays.
The devices provide two separately adjustable measuring channels (overvoltage/un-
dervoltage). If the measured value exceeds the response value (alarm 1) or falls below
the response value (alarm 2), the set response delays "ton1/2" start. Once the response
delay has elapsed, the alarm relays switch and the alarm LEDs light up. If the measured
value falls below or exceeds the release value (response value plus hysteresis) after the
alarm relays have switched, the pre-defined delay on release "toff" starts. Once "toff" has
elapsed, the alarm relays switch back to their initial position. If the fault memory is ena-
bled, the alarm relays remain in alarm state until the reset button R is pressed. Even in
case of complete power failure of the system being monitored, the delay times are ef-
fective during the energy backup discharging time.

Function
12 VMD421H_D00138_02_M_XXEN.pdf/06.2021
3.3 Fast commissioning for Un= 400 V, 50 Hz
If you are already familiar with voltage monitors, you can reduce the time for commis-
sioning and connection using this brief description.
1. Check that the three-phase system being monitored is operated with a nominal voltage of Un=
400 V and 50 Hz. This is the precondition for an automatic setting of the response values (preset)
after the first connection to the nominal voltage.
2. Make sure that the voltage monitor is in the delivery state (factory settings have not been chan-
ged).
3. When conditions 1 and 2 are fulfilled, connect the voltage monitor to the three-phase system to
be monitored according to the wiring diagram (page 19). The following pre-defined response
values will be set automatically:
The currently measured phase voltage between L1 and L2 appears on the display. Use the Up
and Down buttons to query other parameters:
– Phase-to-phase voltage L2, L3
– Phase-to-phase voltage L1, L3
– Asymmetry
– System frequency
– Phase sequence
For detailed information about the preset function and other voltage ranges, refer to
page 13, page 37 provides a summary of all factory settings.
To reset the voltage monitor to the factory settings, if necessary, refer to the instruc-
tions on page 35.
VMD421H
Un, fnPreset operating
range
Response value
< U, < f
Response value
> U, > f
400 V (L1, L2, L3) 340 V…440 V 340 V 440 V
50 Hz 47…53 Hz 49 Hz 51 Hz

Function
13
VMD421H_D00138_02_M_XXEN.pdf/06.2021
3.4 Preset function
After connecting the system to be monitored for the first time, the response values for
overvoltage and undervoltage (alarm 1/2) are automatically set once to the following
values:
Response value overvoltage ( > U): 1.1 Un
Response value undervoltage ( < U): 0.85 Un
Response value overfrequency ( > f) at 16.7 Hz, 50 Hz, 60 Hz: fn+ 1 Hz
Response value overfrequency ( > f) at 400 Hz: fn+ 1 Hz
Response value underfrequency ( < f) at 16.7 Hz, 50 Hz, 60 Hz: fn- 1 Hz
Response value underfrequency ( < f) at 400 Hz: fn- 1 Hz
If the measured voltage is not within the preset operating range listed in the table, the
message "AL not Set“ appears on the display. Therefore it is necessary to set the respon-
se values for alarm 1 (AL1) and alarm 2 (AL2) manually. A detailed description of the pro-
cess is given in the chapter "Parameter setting".
After restoring the factory settings, the preset function is automatically active again.
During operation, the preset function can be started manually via the SEt menu.
3.5 Automatic self test
The device automatically carries out a self test after connection to the system to be mo-
nitored and later every hour. During the self test internal malfunctions are detected and
shown as an error code on the display. The alarm relays are not switched during this
test.
Preset VMD421H
Measuring principle Un
Preset
operating
range
Response
value
< U
Response
value
> U
Three-phase measure-
ment: 3Ph
400 V (L1, L2, L3) 340…440 V 340 V 440 V
208 V (L1, L2, L3) 177…229 V 177 V 229 V
The following response values are only set by manually starting the preset function (Menu/SEt/PrE)
Three-phase-N
measurement: 3n
230 V (L1, L2, L3, N) 196…253 V 196 V 253 V
120 V (L1, L2, L3, N) 102…132 V 102 V 132 V

Function
14 VMD421H_D00138_02_M_XXEN.pdf/06.2021
3.6 Manual self test
The device runs a self test after the test button is pressed for > 1.5 s. Any internal mal-
functions detected during this test are shown as an error code on the display. The alarm
relays are not switched during this test.
While pressing and holding the test button T, all device-relevant display elements ap-
pear on the display.
3.7 Malfunction
In the event of an internal malfunction, all three LEDs flash. The display shows an error
code (E01…E32). In such a case please contact the Bender Service.
3.8 Fault memory
The fault memory can be enabled, disabled or set to continuous mode (con). If the fault
memory is set to "con" mode, a stored alarm remains stored even after failure of the no-
minal voltage (Un= Us), also after the energy backup discharging time has elapsed.
3.9 Assigning alarms to alarm relays K1/K2
Different alarm categories can be assigned to the alarm relays K1/K2 via the "out" menu.
3.10 Delay times t, ton and toff
The times t, ton and toff described below delay the output of alarms via LEDs and relays.
Start-up delay t
Once the voltage Unto be monitored has been connected, the alarm indication is de-
layed by the preset time t(0…300 s).
Response delay ton
When the value falls below or exceeds the response value, the voltage monitor requires
the response time tan until the alarm is activated.
A preset response delay ton (0…300 s) adds up to the device-related operating time tae
and delays alarm signalling (total delay time tan = tae + ton).
Should the fault no longer persist during the response delay, the alarm signal drops out.
Delay on release toff
If the alarm no longer exists during the response delay and the fault memory is disabled,
the alarm LEDs goes out and the alarm relays switch back to their initial position. The
alarm state is continuously maintained for the selected period by activating the delay
on release (0...99 s).

Function
15
VMD421H_D00138_02_M_XXEN.pdf/06.2021
3.11 Password protection (on, OFF)
If password protection has been enabled (on), settings can only be made subject to the
correct password being entered (0...999). If you cannot operate your device because
you cannot remember your password, please contact info@bender-service.com.
3.12 Factory settings FAC
After restoring the factory settings, all settings previously changed are reset to the state
upon delivery. In addition, the preset function allows automatic adaptation of the res-
ponse values in relation to the nominal voltage Un.
3.13 Erasable history memory
The first alarm value that occurs is stored in this memory. Subsequent alarms do not
overwrite this "old" value. The memory can be cleared using the Clr button in the HiS
menu.
3.14 Alarm LEDs show which relay is in the alarm state
When the menu item LEd is activated, the alarm LED AL1 indicates that K1 is in the
alarm state. When AL2 lights up, K2 is in the alarm state. An alarm relay can only switch
to the alarm state if an alarm category has been assigned to it.
When the menu item LEd is deactivated, AL1 signals overvoltage, AL2 signals un-
dervoltage, both LEDs AL1 and AL2 light up in case of frequency alarm.
For details about alarm category assignment to the respective relays, refer to the sub-
menu "out" description on page 23.
3.15 Starting the device with a simulated alarm S.AL
If the menu item S.AL has been activated in the out menu, K1 or K2 switches back to the
alarm state once the nominal voltage is applied. This state is maintained for the delay
time t + ton1. Once this time has elapsed, K1 or K2 switches back to the initial position
provided that no fault is detected at the measuring input.
The following diagrams show the effect of a fault during a simulated alarm.
Faults at the measuring input and the resulting condition of the alarm relay K1 (K2) are
shown as a hatched area.

Function
16 VMD421H_D00138_02_M_XXEN.pdf/06.2021
The fault shown below as an example for K1 starts during the S.AL phase:
The fault shown below as an example for K1 starts after the S.AL phase:
3.16 Frequency alarm in case of measuring voltage failure
(Menu -> AL -> <U Hz)
If the voltage of the monitored system falls to the point where the frequency can no lon-
ger be determined, this parameter is used to set how the frequency alarm should be-
have.
On: The device sets the underfrequency/and overfrequency alarm (factory setting).
Off: The device does not set a frequency alarm.
Note for <U Hz = Off:
If there are transients (depending on circuit breakers and system
parameters) when the voltage of the monitored system fails or returns,
the device may still briefly output a frequency alarm. To avoid this
behaviour, the relay to which frequency alarms are assigned must be
delayed by means of ton1 or ton2 and toff.
If the frequency of the monitored system slowly returns (e.g. due to a
starting generator), the frequency monitoring only becomes active again
when the frequency is within specified limits (≥ 10 Hz).
t
on1
t
t
on1
S.AL
U
F
U
N
K1
t
on1
t
t
on1
S.AL
U
F
U
N
K1

17
VMD421H_D00138_02_M_XXEN.pdf/06.2021
4. Installation and connection
General dimension diagram and drawing for screw fixing
Mount the device vertically to allow sufficient air flow through the ventilation slots at
top and bottom!
The front plate cover can be opened at the lower part marked with an arrow.
DIN rail mounting: Snap the rear mounting clip of the device into place in such a way
that a safe and tight fit is ensured.
Screw mounting: Use a tool to position the rear mounting clips (a second mounting
clip is required, see ordering information) so that they project beyond the enclosure.
Then fix the device using two M4 screws.
Only qualified personnel are permitted to carry out the work necessary
to install, commission and run a device or system.
Risk of fatal injury due to electric shock!
Touching live parts of the system carries the risk of:
•An electric shock
•Damage to the electrical installation
•Destruction of the device
Before installing the device and before working on the connections of
the device, make sure that the system is de-energised. The rules for
working on electrical systems must be observed.
DANGER
2
2
Zubehör/
Accessory
100 mm
116 mm

19
VMD421H_D00138_02_M_XXEN.pdf/06.2021
5. Wiring
Connect the device according to the wiring diagram.
Terminal Connections
L1, L2, L3, (N) Connection to the system to be monitored
11, 12, 14 Alarm relay K1
21, 22, 24 Alarm relay K2
L1 L3L2
N
11 1412
21 2422
1
2
3
Other manuals for VMD421H
2
Table of contents
Other Bender Control System manuals


