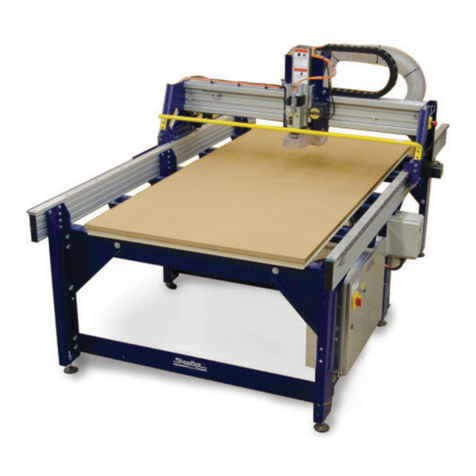
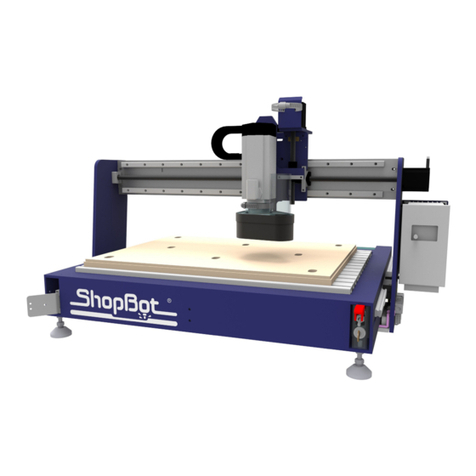
ShopBot PRSalpha User manual

ShopBot PRS Assembly Manual Page -1
ShopBot PRS: Assembly Manual
These assembly instructions apply to both PRSalpha and PRSstandard models of ShopBot
CNC’s. Note that there are different sections for connecting each type of tool to the control
box. Make sure that you are using the correct connection section for your ‘alpha’ or
‘standard’ PRS model.
The boxes are very heavy! Several components are heavy! Make sure you have
help or proper handling equipment when moving or positioning boxes or parts.
PRSAssembly080922.doc Copyright 2007,2008 ShopBot Tools, Inc

ShopBot PRS Assembly Manual Page -2
PRSAssembly080922.doc Copyright 2007,2008 ShopBot Tools, Inc
Contents
Assembly Manual .................................................................................................... 1
Table Surface Considerations..........................................................................................................................3
Electrical Precautions ......................................................................................................................................4
Overview of Your ShopBot PRS CNC Tool......................................................................................................5
Assembling Your ShopBot...............................................................................................................................7
Tools You Will Need..........................................................................................................................7
Unpacking and Getting Your Work Area Organized: .........................................................................8
Connection to Electrical Service......................................................................................................................9
Overview of the Assembly Process ...............................................................................................................10
Off and Running….........................................................................................................................................10
Assembling the Table ............................................................................................. 11
Table Parts............................................................................................................ 12
Assembly Steps ..................................................................................................... 14
Step1.1: Attach a Machine Glide to the Bottom of Each of the Table Legs....................................................14
Step 1.2: Attach the Table Legs to the Table Sides.......................................................................................14
Step 1.3: Attach the First Upper Table Support .............................................................................................16
Step 1.4: Slide the Cross Supports into Position ...........................................................................................18
Step 1.5: Working on the other End of the Table where the Legs are still temporarily attached to the Outside
of the Table Sides..........................................................................................................................................19
Step 1.6 Square and Level Table .............................................................................. 20
Table Surface (probably attach later?) ...................................................................... 21
Suggested Materials......................................................................................................................................21
Attaching the Table Surface...........................................................................................................................21
Installing the Gantry .............................................................................................. 23
Installing the X-Rails and Getting One Rail Straight..................................................... 23
Slide the X-Rails onto the Table ....................................................................................................................23
Set the Front Side X-Rail and Check for Straightness...................................................................................23
Adjust the Position of the Rear X-Rail............................................................................................................24
Putting the X-Car on the Rails and Using it to Align the Rear X-Rail ............................... 25
Lower the X-Car onto the X-Rails..................................................................................................................25
Use the X-Car as a Guide to Align the Rear X-Rail .......................................................................................26
Mounting the YZ-Car and adjusting its lower wheel bearings ........................................ 27
Place YZ-Car on the X-Car............................................................................................................................27
Attach the Lower Wheel Bearings on the YZ-Car ..........................................................................................28
Adjust the Lower Wheel Bearings on the YZ-Car ..........................................................................................29
Attaching the Motors .............................................................................................. 30
Put the Pinion Gears on the Motors...............................................................................................................30
Mount the Motors...........................................................................................................................................31
Set the Mechanical End Stops for the X Axis.................................................................................................33
Run the X-2 Motor Cable through the Aluminum Beam.................................................................................34
Mounting the Router or Spindle................................................................................ 35
If You Have a Porter Cable Router ................................................................................................................35
If You Have a High Frequency Spindle:.........................................................................................................36
After Mounting the Router/Spindle............................................................................ 37
Wheel Guards........................................................................................................ 37
Proximity Switches................................................................................................. 38
Install the Proximity Switches ........................................................................................................................38
Y-axis Targets................................................................................................................................................39
X-Axis Targets. ..............................................................................................................................................40
Z-Zero Plate Holster ............................................................................................... 40
PRS Y-axis EChain Installation ................................................................................. 41
Secure cables and wiring......................................................................................... 46
Run the YZ Wiring .........................................................................................................................................49
Neaten up the Wiring at the Back Side of the X Car......................................................................................49
Create a Cable Loop on the way to the Control Box......................................................................................49
Hooking Up to the Control Box ................................................................................. 50
Do’s and Don’ts ..................................................................................................... 50

ShopBot PRS Assembly Manual Page -3
PRSAssembly080922.doc Copyright 2007,2008 ShopBot Tools, Inc
Hooking Up Your PRSalpha ...................................................................................... 51
Powering the PRSalpha Control Box.............................................................................................................51
ShopBot Configuration PRSalpha: US Standard, 60Hz..................................................................51
ShopBot Configuration PRSalpha: European Standard, 50Hz.......................................................51
Mount the PRSalpha Control Box..................................................................................................................52
Explore the PRSalpha Control Box................................................................................................................53
Inside the PRSalpha Control Box....................................................................................................54
Open the Roxtec Fixture................................................................................................................................55
Plug the Motor Cables into Drivers................................................................................................................55
Connect the Emergency Stop Switch and the 3-Button Pendant...................................................................56
Installation .......................................................................................................................................57
Connect Cables from the Proximity Switch and Z-zero Plate.........................................................................58
Seal the Cable Entry......................................................................................................................................59
Ground the ShopBot PRSalpha.....................................................................................................................59
Connect the USB cable from PRSalpha Control Box to computer.................................................................60
Hooking Up Your PRSstandard ................................................................................. 61
Plug the Motor Cables into your PRS Standard Control Box.........................................................................61
Connect the Cable from the Remote-Stop Switch .........................................................................................61
Connect the Cables from the Proximity Switch and Z-zero Plate...................................................................62
Ground the ShopBot PRSstandard................................................................................................................62
Connect the USB cable from PRS Standard Control Box to the computer....................................................63
The Remote Stop Switch...............................................................................................................................63
Mounting the Switch ........................................................................................................................63
If you use screws to mount the Remote Stop Switch:......................................................................63
Mission Accomplished! ............................................................................................ 64
Table Surface Considerations
You will need to supply sheet material for the deck of your table. We recommend 3 sheets
of material to give the table good rigidity. See discussion of the options at the end of the
Table Assembly section. As a start you will need one layer of cabinet grade ¾” plywood for
the bottom support layer – it will take several sheets to cover the work area if your tool is
larger than 4x8.
if you are installing a vacuum hold-down system, you will need to decide on specific
materials for your plenum and bleeder board.

ShopBot PRS Assembly Manual Page -4
Electrical Precautions
MOTOR CONNECTIONS - DO NOT CONNECT OR DISCONECT ANY MOTOR WIRE
CONECTORS WHILE YOUR CONTROL BOX IS TURNED ON !! During the process of a
‘hot’ connect or disconnect there is a high load put on the motor driver circuitry which is
very likely to damage the motor driver. A damaged driver means that motor does not run
correctly. Also, do not unwrap the heat-shrink surround that keeps your motor cables
connected to the motors. It is intended to help keep all connections permanently secure.
STATIC DISCHARGES – Electronic circuits are very sensitive to static and power surges, and
your Control Box is no exception. Please have your electrician follow the wiring and
grounding instructions in the wiring section to help prevent static from damaging
components of your tool. In particular, avoid doing any vacuuming around your tool before
you have grounded both the tool and your vacuum system. Large static build-ups can occur
inside a vacuum collection system and discharge accidentally through the wiring of your
ShopBot.
INDUCED CURRENTS - The stepper motors on your tool become significant little generators
if they are manually turned. They can generate sizable voltages in your control box if you
push the X or Y-axis of your tool around physically. Occasionally it may be necessary to
move the tool by hand, but try to minimize such movement and when you must do it, make
the move slowly. If you need to do a lot of manual movement, unplug the motors on the
axis you are moving - having shut down the power first as noted above.
PRSAssembly080922.doc Copyright 2007,2008 ShopBot Tools, Inc

ShopBot PRS Assembly Manual Page -5
Overview of Your ShopBot PRS CNC Tool
Note that the diagrams in this manual depict a generic ShopBot. Depending on the size and
shape of your tool, the table layout may look a little different (fewer or more legs, different
shape, etc.).
Before you unpack and start to assemble your ShopBot PRS tool, let's go over the some of
the major components and get familiar with the terminology and directions we'll be using:
THE TABLE To get us located, refer to the orientation diagram above and imagine looking
at the tool from the position of the little man in the drawing. From this position, we'll call
the lower left hand corner of the work area the tool's 0,0 (or home) location. The X-axis is
the long length of the table and values increase going to the right from where you are
standing. The Y-axis is the narrow width of the table (or front to back from your position on
the long side) and values increase as you move away towards the back. The Z-axis is the
vertical movement or the plunging and withdrawal movement of your tool. Decreases in Z
values are plunges down by your cutting tool. Increases are movements of the cutting tool
up.
Still looking from the position of the little man, consider the furthest away X-axis track that
the bearings ride on to be at the back of the tool, the track nearest the little man to be at
the front, the left side the left, and so on. As you're positioning your tool in your shop, keep
in mind that you will typically be loading sheet material from the left or right side so you
should be sure to leave yourself some room to move around at one or both ends of the tool.
We'll use the words or 'car' to refer to the entire moving unit of a particular axis. The big
gantry is thus the X Car, and the one that rides on it, the YZ Car.
PRSAssembly080922.doc Copyright 2007,2008 ShopBot Tools, Inc

ShopBot PRS Assembly Manual Page -6
The electrical cabling will be arranged along the back of the tool, so this is the part of the
tool that can be placed nearer a wall, obstruction, or where there will generally be less
action. Note, however, that it is best if you are able to walk around and access your tool
from all sides. The wiring for the Y and Z axes will be attached to a clear plastic Wire Guide.
The Wire Guide arches out from the back right hand corner of the X-Car to the front right of
the YZ-Car, as seen from the little man. Note that the X-Car mounts with the sloped side
(front of car) to the left.
THE X-AXIS. The X-axis is the basis for your tool's right and left moves (as seen by you as
the little man in the front of the diagram) -- it's the long axis on a standard ShopBot. Note
that the distance between the tracks on the X-axis is wide. Because of this span, we power
the X-Car movement with 2 motors, one on each side. The X-Car is driven by a rack and
pinion power transmission system. The gear rack is mounted on the bottom of the long X
rails and engaged by the pinion gear on the motor shaft.
THE Y-AXIS. The Y-axis provides the front to back movement of your ShopBot (the short
axis for a standard ShopBot). Note that the Y-axis rides on the X-axis. The gear rack for the
Y axis is mounted in the face of the X-Car beam.
THE Z-AXIS. The Z-axis is vertical, rides the face of the YZ-Car, and moves the cutting tool
up and down. The drive system for the Z-axis is also rack and pinion. The Z axis is spring-
loaded to counterbalance the weight of your router or spindle.
THE ROLLING GEAR. Throughout your PRS ShopBot, precision motion bearings roll on
hardened stainless steel rails to provide your tool with smooth travel.
THE CONTROLS. Your ShopBot is moved and controlled by a personal computer (running
Windows XP or Vista) that you provide. In the ShopBot Control software, signals are
streamed from the PC's USB port through a USB cable to the ShopBot Control Box. The
Control Box is placed near the tool and provides the driving power to the motors. The
Control Box also receives incoming information from other devices such as your Z-Zero
Plate and Proximity Switches.
PRSAssembly080922.doc Copyright 2007,2008 ShopBot Tools, Inc

ShopBot PRS Assembly Manual Page -7
Assembling Your ShopBot
Tools You Will Need
•a wrench set with TWO wrenches of the following sizes 7/16”, 1/2”, 9/16”, and
3/4”(the type with box end on one side and open end on the other works well).
•a socket wrench set with a 6” extension
•an Allen wrench set
•a drill for a couple of holes in the sheets of material you will use for your table
surface (say 1/4” and 7/16”)
•a good tape measure, a carpenter's square, and a level (a six foot one that you can
use for a straight edge would be good)
•several Quick Clamps or large C-clamps to temporarily hold things and act as STOPS
•Misc: the odd screwdriver, adjustable wrench and pliers, utility knife, electrical tape
(in a color that you can mark on) or masking tape, marking pen, your wits, etc.
PRSAssembly080922.doc Copyright 2007,2008 ShopBot Tools, Inc

ShopBot PRS Assembly Manual Page -8
Unpacking and Getting Your Work Area Organized:
You will receive a large shipping crate with the already-assembled X-Car and YZ-
Car. One of the large cartons inside the crate holds the ShopBot Control Box. The motors
and motor cables are packaged together. The long package with the rails and table sides
will usually be strapped to the top of the shipping crate.
You can unpack the rails and cars so that you can identify them and have them ready. Be
careful not to damage the gear rack on the bottom of the rails. Unpack and lay out the parts
bags on your work surface.
Don't worry about the Control Box for the moment; you can set it aside until we're ready to
connect your ShopBot.
We've pre-assembled most components of your tool to make things go a little more
smoothly. In many places, bolts or hardware are loosely fit in place to show you their
intended location; you may have to remove them to attach the part.
PRSAssembly080922.doc Copyright 2007,2008 ShopBot Tools, Inc

ShopBot PRS Assembly Manual Page -9
PRSAssembly080922.doc Copyright 2007,2008 ShopBot Tools, Inc
By way of giving you a little guidance: It takes one of us about 6 hours to assemble a
ShopBot, so we think you should be able to put your ShopBot together over a pleasant
weekend if you've already read through this Assembly Manual. Of course, the IRS thinks
that preparing your 1040 should take 2 hours and 43 minutes, with a further 23 minutes for
copying, assembling, and mailing the form!!
There are several stages in the assembly process where having a helper or two will be
useful to you. In particular, you will want help unloading and unpacking, getting the table
assembly started, and putting the X-Car on the rails.
Please remember that several of the components are very heavy!
Connection to Electrical Service
The Control Box for a PRS alpha tool needs to be connected to your electrical service by a
licensed electrician. This connection can be made at any convenient time, before or after
you complete assembly of the tool. The electrician does not need to be present when you
plug the wiring from the tool into the Control Box. However, it may be best to wait until the
tool is assembled and in its final position before having the electrical service hooked up.
Waiting will allow you to make sure you have the Control Box positioned in the best location
for your tool. The complete wiring diagrams for connecting the Control Box can be found
inside the door of the Control Box and will be needed by the electrician to correctly wire the
box into the electrical service.
If you have purchased a high frequency spindle and/or a vacuum blower, these will also
need to be wired by a licensed electrician. The electrician will wire the spindle into the
Control Box and connect the appropriate electrical service. The electrician will also wire your
blower to the correct electrical service.
The Control Box for a PRSstandard tool plugs into a standard 110v/15A (or 220v
international) circuit. However, if you have spindle or blower, you should have an electrician
do the wiring for these accessories.

ShopBot PRS Assembly Manual Page -10
Overview of the Assembly Process
Assembling the Table.
This has the most parts, the most steps, and will probably take the most time. A helper is
useful at the start, but not essential for this project. A couple of saw horses or other
supports will help you out. See the section of MEASURED ASSEMBLY DRAWINGS for your
specific size PRS (fixed table) for dimensions.
Installing the X-Rails and Gantry
Take your time to align the parts correctly. This is critical in terms of getting your tool
running true. You will need help to lift and position the X Car on the rails.
Attaching the Motors
Mounting Your Router or Spindle
Your cutting tool needs to be attached to the front of the Z axis beam. A helper is useful,
but not essential for this project.
Wheel Guards, Proximity Switches, Z-zero, and Echain
More to install, then tidy up all the wiring and make sure you are ready to roll.
Connecting Your Tool to the Control Box
Note there are different sections for the PRSstandard and the PRSalpha.
Off and Running…
Stopping the ShopBot
How to stop the ShopBot with the E-Stop, 3-Button Pendant, Remote Stop Switch and the
“S” key.
Taking a Test Drive
Ok, let’s go for a little spin, then we’ll review a couple of other things you will need to
attend to before you get into production.
Surfacing the Table Deck–
Here’s a first CNC project: Surfacing your table.
Squaring and Adjusting the X-Car
You shouldn’t need to adjust, but you will want to read about setting your End Stops
square.
Table Drawings with Measurements
Use the one for the size of the table you have.
PRSAssembly080922.doc Copyright 2007,2008 ShopBot Tools, Inc

ShopBot PRS Assembly Manual Page -11
Assembling the Table
These are general assembly instructions for our steel and aluminum extrusion tables. For
specific dimensions and part identification, refer to the included Measured Drawing (located
at the back of this section) specific for the size ShopBot you are assembling. The Measured
Drawing plans show the dimensions of the tools, the spacing of the cross supports, and the
correct position for the table surface. NOTE that the number of legs on each side of the
table differs according to the size ShopBot you are assembling.
Take a look at Step 1.6 before you start. The goal of this assembly process is to have a
square and correctly dimensioned table at the end point. In the final step you will be
attending to getting the table square and the table sides exactly dimensioned for your tool.
PRSAssembly080922.doc Copyright 2007,2008 ShopBot Tools, Inc

ShopBot PRS Assembly Manual Page -12
Table Parts
Upper Support (note beveled ends in upper support)
Lower Support
Cross Support
PRSAssembly080922.doc Copyright 2007,2008 ShopBot Tools, Inc

ShopBot PRS Assembly Manual Page -13
Table Gusset
Table Leg
1/2Bolt
1/2Flat washer
1/2Hex nut
1/2Lock Washer
5/16 Bolt 5/16 Flat washer Tee nut Machine Glide
(in several sizes) (w 5/8 nut and
lockwasher)
PRSAssembly080922.doc Copyright 2007,2008 ShopBot Tools, Inc

ShopBot PRS Assembly Manual Page -14
Assembly Steps
Step1.1: Attach a Machine Glide to the Bottom of Each of the Table
Legs
Screw a Machine Glide through the 5/8” nut in the bottom of each Table Leg. Place a 5/8”
lock washer and hand tighten a 5/8” hex nut on the Machine Glide. Do not tighten at this
time (see Step 5). Repeat for all legs.
Bottom of Table Leg showing Machine Glide assembly
Step 1.2: Attach the Table Legs to the Table Sides
Place 5/16” bolts, flat washers and T-nuts at the eight holes on each of the Table Legs.
Looking down on table leg
Attach the first leg to the inside of the Table Side by sliding the T-nuts into the side
channels on the Table Side. Square the Table Leg to Table Side and tighten just enough to
PRSAssembly080922.doc Copyright 2007,2008 ShopBot Tools, Inc

ShopBot PRS Assembly Manual Page -15
hold the pieces securely in place. Keep in mind that you will want to tighten all nuts
securely at the end of the table assembly when you square the table. If you tighten all
fasteners too much now, you won’t be able to square the table later.
Temporarily attach the other Table Leg to the outside of the Table Side. This leg will be
moved to the inside of the table in Step 1.4.
Repeat for the other Table Side. Use saw horses to temporarily support the side assemblies
as you continue.
Table Sides with legs attached
PRSAssembly080922.doc Copyright 2007,2008 ShopBot Tools, Inc

ShopBot PRS Assembly Manual Page -16
Step 1.3: Attach the First Upper Table Support
Attach the first Upper Table Support to the end of the table. Start it on from the side with
the temporary outside leg. Slide the T-nuts for the Upper Table Support into the bottom
channel of each Table Side on the far end. Then slide the Support all the way down and
close to the Table Leg, leaving approximately 3/16” between the leg and the upper support
for the Gussets.
Insert the Gussets between the Table Legs and the Upper Table Support and attach using
½” Hardware Assemblies.
PRSAssembly080922.doc Copyright 2007,2008 ShopBot Tools, Inc

ShopBot PRS Assembly Manual Page -17
Attach the Lower Table Support to the bottom holes in the Table Legs using ½” Hardware
Assemblies.
Lower Table Support showing attachment to Table Leg.
.
Your table should now look like this:
PRSAssembly080922.doc Copyright 2007,2008 ShopBot Tools, Inc

ShopBot PRS Assembly Manual Page -18
Step 1.4: Slide the Cross Supports into Position
Attach two 5/16” Hardware Assemblies to each end of the Cross Supports. Then slide the T-
nuts into the bottom channels of the Table Sides and slide the Cross Supports into position.
Refer to the Measured Drawing for your table size for proper spacing of the Cross Supports.
Cross Supports in position
PRSAssembly080922.doc Copyright 2007,2008 ShopBot Tools, Inc

ShopBot PRS Assembly Manual Page -19
Step 1.5: Working on the other End of the Table where the Legs are
still temporarily attached to the Outside of the Table Sides
Install 5/16” Hardware Assemblies on the Upper Table Support and slide it into position.
Notice that the lead edge of the support inserts first, this time
Attach the Gussets on this end to the Upper Table Support . Use ½” Hardware Assemblies.
Your table should look like this.
Move these Table Legs to the inside.
Attach the Lower Table Supports to the bottom holes in the Table Legs using ½” Hardware
Assemblies. Attach remaining bolts on gussets.
Your table should now look like this:
PRSAssembly080922.doc Copyright 2007,2008 ShopBot Tools, Inc

ShopBot PRS Assembly Manual Page -20
Step 1.6 Square and Level Table
Set the table where it will be used. Plan to spend a little time getting it square and adjusted
to the exact correct width measurement. [SEE DRAWING & TABLE BELOW]
Set the legs perpendicular to the Table Sides with a square and tighten.
Level the tops of the Table Sides across and diagonally using the Machine Glides. Then
tighten the 5/8” nuts on the Machine Glides.
Measure the table across both diagonals. If the measurements are not the same, the table
is not square. You will need to shorten the longer diagonal by one-half the difference of the
two diagonal measurements. With a mallet or hammer & protective block of wood, gently
tap the end of the table side at one end of the longer diagonal to shorten as needed. Adjust
the table until the measurements across the diagonals match.
Then, work to adjust the distance between the rails to the exact spacing indicated in the
table below. It can be helpful to cut a measurement gauge from a 2x4 to use to set the
distance between the table sides. Make sure the gauge distance is right and giving you the
correct outside to outside measurements.
Tighten all hardware once the table is measured and square. Check the diagonals and the
distances frequently as you move around the table tightening the bolts.
PRSAssembly080922.doc Copyright 2007,2008 ShopBot Tools, Inc
Other manuals for PRSalpha
3
This manual suits for next models
1
Table of contents
Other ShopBot Control System manuals
Popular Control System manuals by other brands

Trumpf
Trumpf TruConvert DC 1008 Operator's manual
CAME
CAME GARD 8 SERIES Installation and operation manual

Cardin Elettronica
Cardin Elettronica PL Series manual
Miranda
Miranda NV8256-Plus user guide
Compool
Compool CP3000 Installation & operating instructions

Siemens
Siemens SINUMERIK 840D sl Programming manual

Crosswater
Crosswater Elite Operation and care guide

Proteco
Proteco Park Plus Series Installation and use instructions

ADVANTAGE AIR
ADVANTAGE AIR MyAir5 Series user guide

Uponor
Uponor Climate Control-Multifunction installation guide

Airzone
Airzone iQ Zone installation manual

Valeo
Valeo SC600 Indien operating instructions
