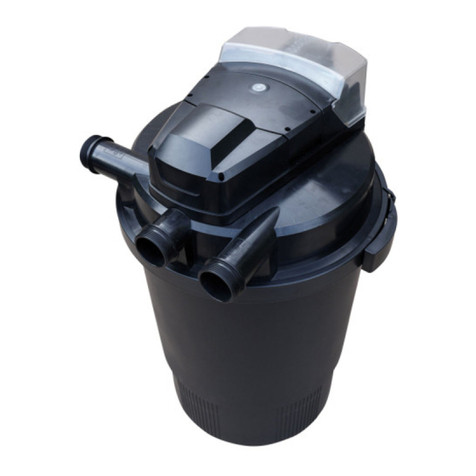
Bermuda BER4001 User manual

Instruction Manual
Pond filter
and UVC
IMPORTANT: Please read this instruction manual carefully before
using this product. Keep the manual safe for future reference.
Manual version - 29.05.2018
Pressure
Wi-Fi Controlled
Filter

2
Thank you for purchasing a Bermuda Wi-Fi Controlled Pressure Filter
with Pondlink technology. The Bermuda Wi-Fi Controlled Pressure Filter
combines mechanical and biological filtration with a powerful UV clarifier,
to create clear, healthy pond water.
Being pressurised, the Bermuda Wi-Fi Controlled Pressure filter is easy to
hide in ground with only the top 20 cm visible. Even a long distance away
from the pond, hidden away from view - like at the top of a stream.
Cleaning the Bermuda Wi-Fi Controlled Pressure filter is easy
- in fact fully automatic once set up with the Pondlink App.
Just lean back and enjoy your pond.
As we continually improve and develop our products and mobile App.
descriptions, functions, products and accessories etc. may differ from
images on the packaging, instructions, user’s guide, etc.
We recommend that you check our websites for the most
up-to-date manuals and information:
www.bermudawatergardens.com and
www.pondlink.com
Table of contents:
3. Features, usage and automation
4. Safety instructions
5. Specifications
6. Description
7. How the filtration works
8. Installation
9. Control panel / manual operation
10-11. First time app installation
12-13. Setting timers and options
14. Sockets A (pump) and B (other)
15. Other functions
16-17. Maintenance (sponges)
18. Replacement of UV lamp
19. Seasonal care - Winter etc.
20. Troubleshooting
21. FAQ
22-23. Exploded view
24. Guarantee
25. Privacy and data protection
26. Storage page
27. Notes
28. Waste, legal and contact

3
Filtration Features
• Mechanical and biological filtration combined.
• Powerful UV clarifier to tackle green water.
• Can be buried in the ground up to its lid.
• Wide inner diameter capable of high flow-through of water.
• Ideal for use with Bermuda Filter Force pumps.
Usage
Only suitable for outside in garden ponds - not swimming ponds.
UV can be run continuously, 24 hours per day.
• If using 1¼” or 1½” hose, cut off the smaller diameter step(s)
on each of the three supplied hosetails.
• Make sure the clamp ring is secured while the filter is running.
• Always unplug UV before viewing or handling.
• Do not look at UV bulb when lit and plugged in.
• Spend 30 minutes checking for leaks after installing.
How the automation works
The filter can easily be set to an automatic self-cleaning cycle.
Via the Pondlink App you will be able to set:
• Timer for cleaning from once a day to once a week.
• The use of water during the cleaning cycle.
• Program timer for SOCKET B to use with feeder, dosing or other pond
equipment.
• We advise ALWAYS TO USE SOCKET A FOR THE PUMP IN PUMP MODE.
• UV timer.
You will be able to receive reminders and warnings from your filter by e-mail.
Everything is easy to set up in the Pondlink App. Please see the SETUP pages.

4
Safety instructions
1. Electrical installation must be in accordance with local regulation.
They should not be placed near the pond - but at least 2 metres away.
Make sure that plugs and sockets are always dry.
2. Equipment can only be worked with the socket which has safety
earthing protection. The socket must conform to the related national
regulations (VDE, ENC....,IEC...).
3. Make sure the voltage in the name plate is the same as the actual
power supply.
4. Ensure that an RCD (of which the rated working current is not over
30mA) is installed when using the filter and connected devices, and the
power sockets must be connected to an earth.
5. For your own safety, please contact an electrical professional in case of
questions and problems.
6. Do not connect the power supply when parts are not installed.
7. Only operate the equipment if no people in the water.
8. If cable or shell is damaged, please do not use. Place the cable so it is
not in the way and not in danger of being damaged. Never lift or carry
the pressure filter in the cable and protect the cable against heat,
oil and sharp edges.
9. Before any maintenance you should disconnect the power supply and
pull out the plug.
10. Before use please ensure that the equipment and connection plugs
have not been affected by damp - and are completely dry.
11. Ultraviolet light can cause damage to the eyes and skin.
Only switch it on when installed inside filter.
12. Do not insert the plug into the socket until all parts are assembled
and mounted.
13. Do not immerse the pressure filter in water.

5
14. For safety reasons, this equipment should not be used by children
and young people under the age of 16, as well as persons who cannot
understand the potential danger posed by this equipment. Persons
who have not fully understood the following instructions may not use
the equipment.
15. Advanced replacement of parts and repairs. This manual contains the
regular maintenance instructions. Replacement of valve components
and O-rings, and sealing the wet and dry section of the filter must
be done by a qualified professional. Only qualified professionals are
allowed to replace electric parts.
Any attempt to tamper with or access electrical components inside the
filter body is dangerous and will invalidate the warranty.
Specifications
What is included:
1 x Bermuda Wi-Fi Controlled Pressure Filter
3 x Hose connectors (for 32/40/50 mm hose)
3 x Locking nuts
3 x Gasket washers
1 x User manual
If, after unpacking the pressure filter, anything is missing or damaged,
this should be notified to the dealer immediately.
Max combined load socket A+B = 800 watt
Max working pressure for filter is 0,3 bar = 3 m.
Technical data 20000 30000
Product nr.: BER4001 BER4002
Filter volume: ca. 60 l. 75 l.
Max pond size without fish: 20000 l. 30000 l.
Max pond size with goldfish: 10000 l. 15000 l.
Max pond size with Koi: 5000 l. 7500 l.
In/Out (Thread/hose) : 2"/32/40/50 mm 2"/32/40/50 mm
Recommended flow: 13000 lph 16000 lph
UV-C PL: 36 watt 55 watt
Voltage: 230V 50 Hz 230V 50 Hz
Size (mm): 450 x 450 x 550mm 450 x 450 x 715mm

6
Description
The Bermuda Wi-Fi Controlled Pressure Filter is a unique
automatic pressure filter, which can be connected to Wi-Fi and
controlled via an app. It is a pressure filter with built-in UV-C device
for biological and mechanical filtration of normal pond water with
a temperature between +4ºC and + 35ºC. This pressure filter is intended for
private use only, for cleaning of ponds with or without fish. Be sure that the
equipment will only be used in accordance with the technical data. Do not use
the filter in liquids other than water. The filter may not be activated if there is
no water running through the System.
The filter has several features that makes it easier to get an advanced and
clear pond. The Pondlink-system is connected with your broadband via Wi-Fi
at the 2.4 Ghz band. you can download the app for iPhone or Android.
(Search for Pondlink).
Using the app, you can easily monitor and automate your pond:
1. Set to Automatic backwash.
The pressure filter will do a backwash with pre-determined time intervals
or you can start a backwash when you want to, directly from the phone.
2. Monitor that the UV-C lamp works and how long burning time it has had.
Can also be set by a timer.
3. There are two power contacts with a timer function on the filter. The pump
must be connected to Contact A, so the pump can be monitored and an
automatic water saving program can be used during the backwash.
4. You can receive an alert by email if an error occurs, or confirmation when
the filter has finished the backwash.
5. There will be new features through software updates.
6. The filter can of course also do backwash manually by pressing the touch
button on the filter.
The function of the filter gives you one of the most efficient filter systems
available, and it has several different filter systems built in.
The Bermuda Wi-Fi Controlled Pressure Filter does not need a prefilter.
1. Filter sponges with different pore sizes for both oxygen-consuming and
non-oxygen-consuming bacteria. Both nitrites and nitrates are degraded.
2. Bioballs at the bottom with large surface for useful bacteria to purify the
water biological.
3. Comes with a powerful UV-C unit with a stainless-steel UV-housing,
which increases the radiation up to 30%. No more green water.

7
How the filtration works
A: Inlet
Dirty water from the pond pump
(not included) passes via a hose through
the inlet into filter.
B: Vortex system
Under the action of gravity, suspended
solids and mud are separated.
C: Mechanical filter
When the water passes through the filter
sponges into the internal chamber,
dirt particles will be caught on the first
part of the surface of the sponges.
D: Biological filtration
The pores of the filter sponge creates a large inner surface which
microorganisms can colonize .The yellow and blue filter sponges differ
in size and density. This creates zones in which the water can flow at
different speeds. Zones with a high flow speed (blue filter sponges) allow
the colonization of microorganisms which convert ammonium to nitrate via
nitrite (nitrification) . Zones with a low flow speed (yellow sponges) support
the colonization of anaerobic micro-organisms which reduce nitrate to
nitrogen (denitrification) .
E: UV-C radiation for clear water
Water is finally passing by a special UV-C lamp, covered by a quartz-sleeve in
a stainless tube, exposing the water to UV-C radiation and sterilising algae.
F: Water outlet
At the water outlet, the clarified water is fed back into the garden pond via a
hose, watercourse or stream.
G: Waste water outlet
During the cleaning process the dirty water is separated and passes through
the drain outlet. This can be used to fertilize your garden plants.
H: Rotating cleaning shaft for automatic cleaning
The filter sponges are compressed and scratched on the surface removing
dirt and old bacteria. At the same time waterflow is reversed by the cleaning
valve (behind A+F) removing the dirt via the outlet G.
I : Control panel
Led indicators and touch buttons for manual operation and Wi-Fi setup.

8
Installation
1. Filter should be installed with a min. distance to the pond of 2 m. on a
stable base or in ground with the top 20 cm. above - to allow access to
open the lid clamp. Make sure that the filter and sockets cannot be flooded
in case of heavy rain or low placement.
2. When installing, please make sure the filter is placed where Wi-Fi
signal can be received well. Avoid covering or shielding filter with metal
objects as this will affect Wi-Fi signals.
TIP. If Wi-Fi signal is to week a simple mobile hotspot
can be placed in your garden shed.
3. Avoid direct sunlight.
4. The operation of this filter requires a pump (to be purchased separately).
Use hose with as large diameter as possible and never use a smaller hose
for the outlet than the inlet. Do not block outlet (F) or waste water outlet
(G) with valves - working pressure inside the filter should not exceed
0.3 bar.
5. The pump must be connected to the filter via socket A.
The maximum combined power consumption of both socket A and B
should not exceed 800 watt, and only pond related equipment should be
connected.
6. The pressure of the hose (to be purchased separately) connecting the filter
with the pump should not be less than 0.3bar .
7. This filter can be connected to the hose with inner diameter of 11/4", 1
1/2" or 2 ".
8. Please choose large diameter hose to reduce the loss of the flow of the
pump.
9. This device is equipped with 2 intelligent sockets, in which the A socket is
a special outlet for the supporting pump. B socket can be connected to any
other pond related equipment.
10. Before putting the system into operation, first connect the pump and
check whether there is water leakage in the connection between the hose
and inlet/outlet . Then check the functions and monitor the filter for
30 min.

9
Control panel and manual operation
5. Touch Button "Wi-Fi / UV - Double Function.
This button is used to set Wi-Fi connection / Enable use
with mobile app at long press. See fig. 6.
At short press, it turns on and off for the filter's UV-C light.
The light can be seen through the small transparent glass
on top of the UV-C unit.
Socket A Socket BWi-Fi Clean
Wi-Fi
UV
Socket
A
Socket
B
Clean
PONDLINK™
8. Touch Button "Clean".
Pressing starts cleaning cycle
Duration can be set in App.
LED Indicator 3. ashes during
the cleaning process.
2. Wi-Fi LED indicator.
Flashes slowly without connection,
quickly upon activation (Button 5 Wi-Fi
/ UV) - and steady light when the lter
is connected to the Wi-Fi network.
1. Socket A LED indicator.
Lights up when socket
A (pump) is switched on
which is one by pressing
"6. Socket A "- or via App.
4. Socket B LED
indicator.
Lights up when socket
B is activated, which is
done by pressing "7.
Socket B "- or via App.
3. Clean LED indicator.
Flashing during the cleaning
process that is activated by pressing
"Button 8.Clean" - or via App.
6. Touch Button "Socket
A" Switch on / off socket A
(Pump Controller).
LED Indicator 1. lights up
when it is on.
7. Touch Button "Socket
B" Switch on / off socket
B. LED Indicator 4. lights
up when it is on.
Timer set in App.
By installing our App according to the following pages,
you agree to our terms of use.
you can read more about our terms and conditions
and protection of your personal information on our websites
www.bermudawatergardens.com and www.evolutionaqua.com

10
1. Search and download the
App “Pondlink” from App store
/ Google play and install.
3. Fill in your e-mail and
password (optional other
details) and press “Get code”.
First time installation of App
6. Power on your lter if not
already done.
Wi-Fi LED indicator
(2 from left) should ash slow.
Press and hold Wi-Fi button
for 5 sec. until LED is ashing
fast.
5. Back in the login screen.
Fill in your e-mail and
pass-word (will be stored
on your mobile) and press
”Login”.
2. First time you open the App
you will have to register as
a minimum your email and a
password. Press ”Register”.
4. After a few minutes the
code should appear in your
mailbox. Type this and
password and press ”Submit”.
Socket A Socket BWi-Fi Clean
Wi-Fi
UV
Socket
A
Socket
B
Clean
PONDLINK™
mypassword

11
7. Locate the serial no. on the
label over the cable on your
lter and Press ”+” to connect
to lter.
8. Fill in your serial no. and
press ”Link”.
9. Select network (2.4G).
10. Fill in the password for
your Wi-Fi network (selected
by your Wi-Fi setting in your
mobile phone). Press
”Search”.
12. Your lter will now appear
in the list with serial no. and
hardware password.
Press to see lter details.
11. If your network signal is ok
and 2.4 Ghz., Wi-Fi LED will
change to steady light. After
connecting ok - Press ”Next”.
Enter your serialno.
My-Wi-Fi-network

12
16. Time. We recommend that
you set a time, when you are
normally at home if you want
to verify and adjust settings.
17. Use only 30% or 50%
water for cleaning by turning
the pump in Socket A off and
on during the process.
18. Alerts
We have built in extra smart
functions in your Pondlink
lter.
If a serious malfunction is
detected there will be an
acoustic alarm sounding from
the lter.
Email alerts and notications
By enabling the email alerts
you will receive a mail if the
lter detect a malfunction.
Enabling notications will keep
you informed when the
cleaning process starts, if
network connection is lost
and other useful information.
13. You see temperature and
manage settings here.
First option is setting for the
automatic cleaning function.
14. Here it is counting down
to next cleaning and options
to set timer, watersaving,
and e-mail alerts.
15. Timer can be set from
once a week to once a day.
A good option if you need to
combine with waterchange.
Setting timers and options

13
19. You can also activate an
extra manual cleaning process
at any time to check function
or for extra maintenance.
20. Press ”>”to start the clean-
ing process. Further you can
set the time for the process
from 60-300 seconds.
21. The time adjustment gives
you the option to adjust to the
best cleaning process depending
on your pond conditions.
22. The UV menu also gives
you a lot of options and
information.
23. Accumulated time indicate
time for change, Timer, Reset
time when replacing bulb and
get alerts and notications.
24. UV settings and alerts
Mode selection for on/off
Timer:
During pond season the UV
should run 24/7.
But to adapt to your pond size
and seasonal changes, you
can set the timer.
Reset time when replacing
UV-C bulb. Recommended
every spring for best effect.
Enabling notications will keep
you informed about required
change.
If a serious malfunction is
detected an email alert will be
sent if enabled.
1
1

14
27. Other options can be enabled,
but we do not recommend that this
socket is used for anything else
than the pump.
26. Keep In Pump mode
where other functions are
locked preventing mistakes....
25. Socket A is reserved for
the pump supplying the lter !
Assuring safety and functions.
Max. 800W total on both A+B
30. Further to timer setting
remote on/off function
supported.
29. Precise timer-setting for
feeders and dosage pumps.
28. Socket B can be used for
all pond-equipment like feeder,
dosage pump, light etc.
Max. 800W total on both A+B
Sockets A for pump and B for other pond-equipment

15
35. Press to installl a lter al-
ready connected to the local
Wi-Fi network (Wi-Fi LED on
xed green light - g. 6)
Installing remote lter.
31. Enable extra functions in
upper right corner.
32. Check and install rmware
updates for Wi-Fi connection.
Delete present Pondlink
device from App.
A reinstallation will reset all
functions if system should
ever lock up.
Change lter password for
security and privacy:
A. Delete lter (as g.31)
(or swipe left as g.33)
B. Power off at least 15 sec.
and perform a new rst time
installation as per g. 6.
The new password will appear
under the serial no. as g. 12.
33. Installed Pondlink devices
can also be deleted by swiping
left and pressing ”Delete”
34. You have 2 other options
to add allready installed lters
to your App.
36. Press to install remote
lter. Allow installers and
others to operate your lter.
Filter-name can be specied.
Other functions / change serialno. / install options

16
Check/Cleaning/Replacing the filter sponges
Step 1 - Remove the protective cap
and then open the large clamp on the
cannister.
Step 3 - The base plate can now be
gently released from the centre column
(UV part) by turning the UV-bottom
shield.
Step 2 - Slowly lift up the filter cover with
the filter sponges, and leave it on the
cannister until the water is completely
drained away from the sponges. Place
It horizontal on its side – do not place it
upside down with the lid at the bottom.
Step 4 - Using a screwdriver (not
supplied) - unscrew and remove the
washer and screw.
After 1-2 seasons or when the water flow is reduced - and it does
not help to clean using the automatic cleaning function. The sponges
should be checked/manually washed or replaced. Do not use any
kind of detergent as this will kill the microorganisms in the sponges.
Over winter the filter should also be cleaned and have a service check
before storing indoor for winter - please see seasonal care
Turn off the filter and disconnect the power cord from the switch.

17
Filter maintenance (continued)
Step 9 - Now refit all the hoses again –
remember to insert the flat gaskets and
tighten the locking nuts.
After turning your filter on again, you
should observe it for 30 min. to ensure
everything is working fine.
Step 5 - Please take care not to loose the
plastic bearing on the foam side of the
plate when removing the base plate.
Step 6 - Now the filter sponges can be
removed. The plastic holders in the middle
of the sponges are easy to remove.
Carefully dismount the small connections
that hold the parts together.
Step 8 - Fit the O-ring in place on the
top of the cannister (to facilitate the
placement of the lid, you can use silicone
grease (preferred) or make the O-ring wet.
The lid can then be pressed in place and
the large clamp be mounted from the
hinge side and locked.
Step 7 - The filter sponges are best rinsed in a bucket of pond water or luke warm tap
water.
Squeeze the sponge firmly together several times until the water that is pressed out is
clean. Clean the container, filter holders, O-ring and the edge of the container by sprinkling
them with a hose.
The plastic holders are then refitted to the sponges and mounted in the same order as
before the cleaning. Fit the filter sponges so that they fill the entire space between the top
and lower base plate.
The base plate can then be remounted into place with UV-bottom shield, bearing, washer
and screw

18
Replacement of UV lamp
ENSURE POWER IS SWITCHED OFF AND POWER CORD OF FILTER UNPLUGGED
Step 5 - Pull out the quartz glass tube -
then you can pull out and replace the UV
lamp.
Step 3 - Clean the quartz glass tube with
a wet cloth and dry.
Step 4 - Remove the fixing-nut on the
quartz glass tube .
Step 2 - Pull up the UV-unit by pressing
with your thumbs on the lid and lifting
with all other fingers below the unit.
Step 6 - Check the quartz glass tube and
change it if broken.
Ensure all o-rings are in place and
greased with silicone grease.
Step 1 - Unscrew the four screws under
the rubber plugs on the lid of the UV-
unit.
Assemble all part of the filter as before and start up the filter again.

19
Seasonal care - required precautions
Take care of - and prevent the following conditions:
Frost.
The filter must be dismantled when frost is foreseen at the latest at +4ºC.
Clean the filter and take the opportunity to grease and replace O-rings and
UV-bulb - this will keep your filter in good condition for many years.
Service kit is available from your vendor, and most can also perform the
service for you against a fee.
In winter, store the filter in a well ventilated and frost free location and leave
an airpump running for your fish in the pond if deep enough.
Please note that any damage relating to improper overwintering of the filter
will void the warranty.
For complete separation of the
lid - the Rotating wing shaft can
be dismounted by unscrewing it
from the top after the sponges
are removed (steps 5 and 6 on
page 17). This is also useful
when delivering the top
to a retailer for service /
maintenance.
Very high humidity.
Make sure that the filter is always placed in well ventilated places regardless
in use or not.
In rare occasions high humidity in combination with shifting temperatures
may result in damp damaging sockets and electronics.
This is not covered by the warranty.
Extensive sunlight
High temperatures may damage your filter - so make sure that it is not
exposed to direct sunlight.

20
Trouble shooting
1. If water is leaking around the hosetails, check that the supplied rubber
washers have been fitted. Check that the hose is the right size for the
hosetail and that the hoseclip has been properly tightened.
2. If water is leaking from the clamp, check that it is done up properly and
tight, and that the O-ring is present inside the filter casing.
3. If the water turns green, check that the UV is running 24 hours per day.
If more than six months old the lamp will need replacing. Check that the
quartz sleeve is clean and clear, to allow the UV light to penetrate the
water. Check that the pump and filter have been properly matched for the
pond size.
4. If filter sponges are difficult to clean or worn out, replace old sponges
for new.
5. Water is slowly dripping from the waste outlet during normal operation ?
Try to run a cleaning cycle a couple of times. If this does not solve the
problem the rubber seals in the valve should be replaced.
This should be done by a qualified professional, as this requires the o-rings
between the wet and dry section of the filter to be opened.
6. Wi-Fi installation
I see 2 equal names for my Wi-Fi connections ?
If you have a Wi-Fi router supporting more than one frequency with the
same name.
Tip is to name multiband network including
the Frequency – like “Mynetwork-2.4” and
Mynetwork-5”
I can install but not connect to the filter ?
Tip. If you have previous connected to the
5 Ghz network, your mobile might automatic
switch to this during setup.
So the best thing to do is to delete (forget)
this network-connection in your mobile before
making a new installation via the 2,4 Ghz
connection.
After making sure that you can only connect
to the 2,4 Ghz network. POWER OFF your filter
FOR ATLEAST 15 SECONDS before restarting
installation. You will find more information at
www.bermudawatergardens.com
This manual suits for next models
1
Table of contents
Other Bermuda Water Filtration System manuals
Popular Water Filtration System manuals by other brands

Anchor
Anchor DigiPure AF-9000 Series user guide

Streamline
Streamline FILTERPLUS 600GPD-F-CLK instruction manual

Watts
Watts OneFlow OF220-2 Installation, operation and maintenance manual

MTE
MTE Matrix E-Series Technical reference manual

AquaScape
AquaScape 77011 installation instructions

Santevia
Santevia Gravity Water System Assembly, and care manual