9
ACTIVATED CARBON FILTER
1
ACTIVATED CARBON FILTER
How to install a new activated carbon
filter
The activated carbon filter is made of
high specification activated carbon, which
reduces a broad spectrum of chemical
residues including pesticides, endocrine
disrupting compounds, medical residues
and heavy metals.
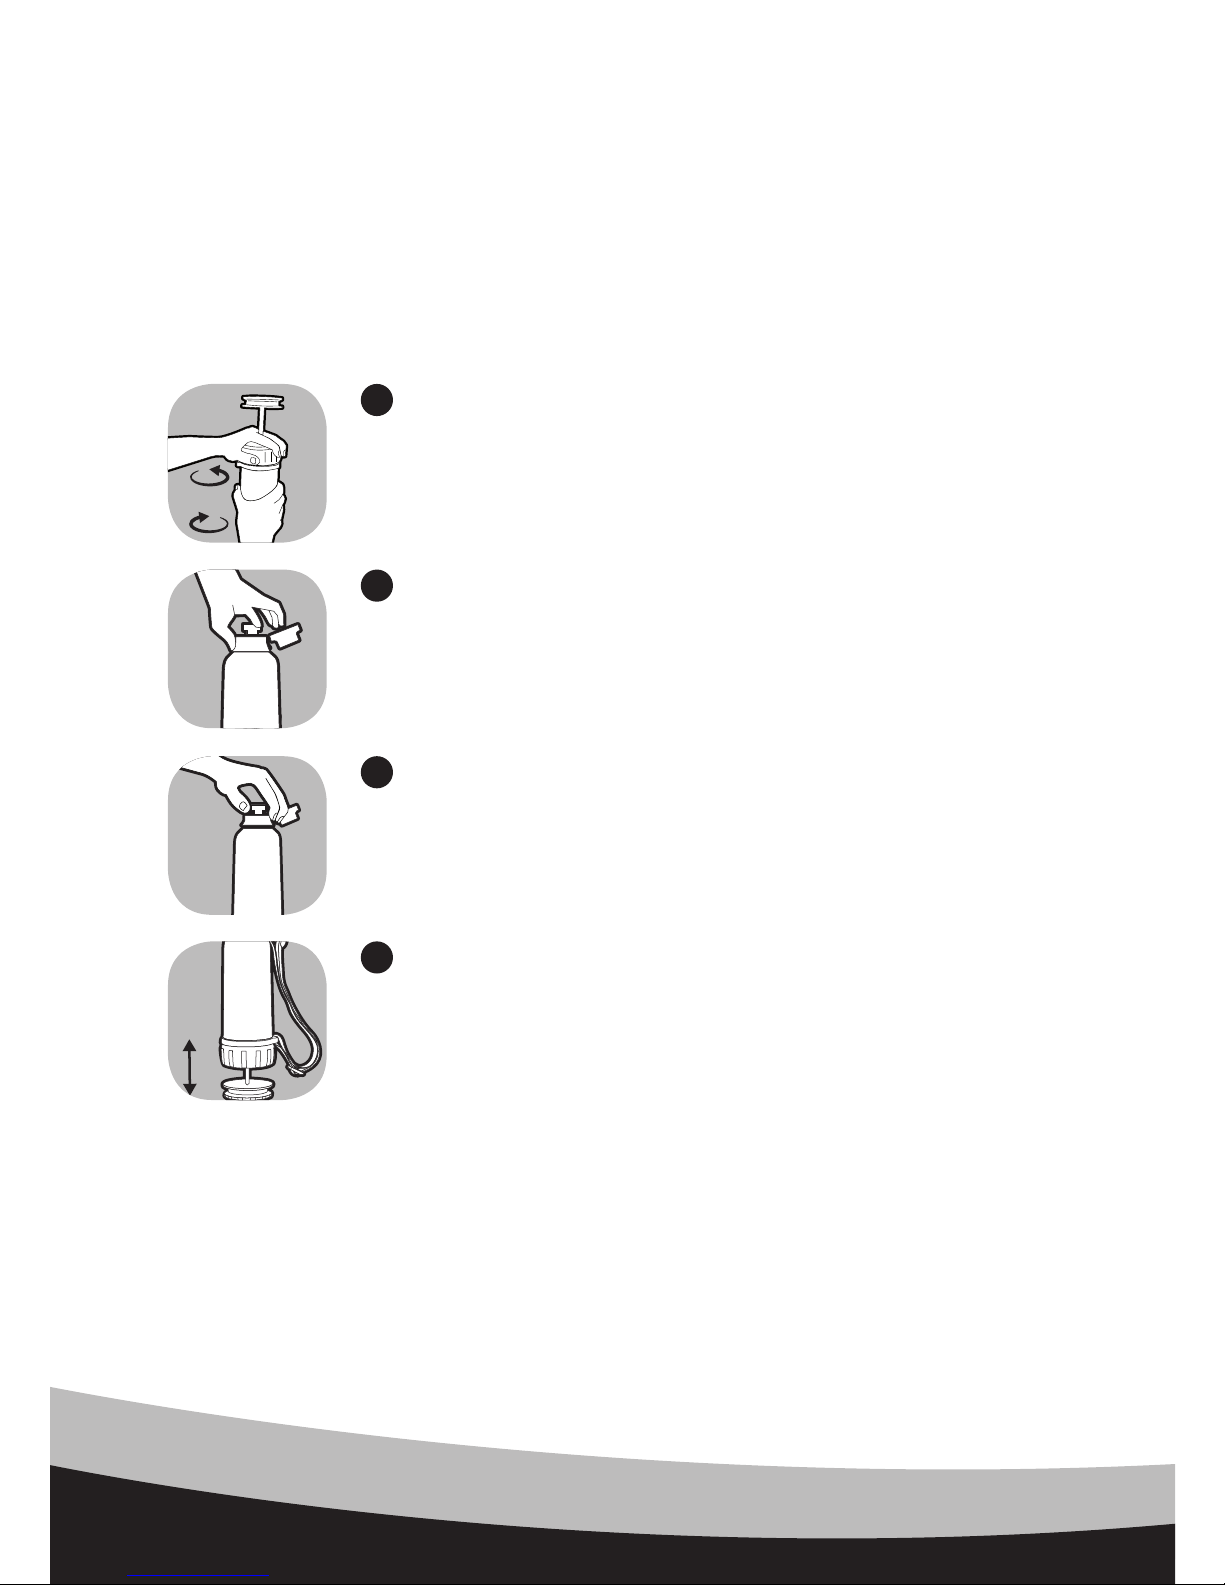
• Unscrew and remove the pump base
from the bottle. Empty the bottle of any
water.
• Place your hand over the base of the
bottle and turn the bottle to the vertical,
upright position with the screw top
facing upwards.
• Unscrew and remove the screw top
from the bottle shell, at the same time
this will cause the cartridge to drop into
your hand. Carefully place the bottle
shell and cartridge on a flat surface.
• On the underside of the screw top,
screw into place the new activated
carbon. If there is an old activated
carbon filter already installed, remove
and discard this first. 1
• Now reassemble the bottle. Turn the bottle
shell to the vertical down, position with the
screw top facing downwards and insert
the bottle cartridge. Twist the cartridge
until you feel the cartridge engage in the
4 locators in the neck of the bottle shell.
Hold the cartridge in place with one hand
and screw the screw top into place. Close
the snap-fit lid.
• Re-screw the pump base into the bottle.
When fitted, you may notice that the water
flowing out of the bottle contains grey/black
particles. This is harmless carbon dust and
once the activated carbon filter has been
used 2 – 3 times, this will disappear.
CAUTION
DO NOT over tighten the activated
carbon filter as this risks damage.
CAUTION
Leaving the activated carbon filter
inside the bottle whilst in long term
storage may cause microbiological
growth to occur. This will not have
come from the bottle but may come
from the user’s saliva. Always remove
and discard the activated carbon filter
when storing the LIFESAVER®bottle
long term.