manuals.online logo
Brands
  1. Home
  2. •
  3. Brands
  4. •
  5. Bertolini
  6. •
  7. Indoor Furnishing
  8. •
  9. Bertolini 6156EX User manual

Bertolini 6156EX User manual

Ref.:6156EX - 6168EX
MANUAL DE MONTAJE BALCON – 2 PUERTAS 1 CAJÓN
ASSEMBLY HANDBOOK BASE GABINET – 2DOORS 1 DRAWER
Ø 8
2
SAFETY INFORMATION
Always unload unit prior to moving the unit. The weight of
personal belongings can cause the unit to become unstable and
either tip or collapse. Serious bodily injury and/or damage to
personal belongings may occur.
Lea y comprenda completamente este manual antes de intentar
ensamblar, usar o instalar el producto. Ensamble el producto
cerca de la ubicación deseada
Do not overload unit. If any shelf, top, or bottom of unit bows or
bends greater, it is overloaded. The shelf, top, or bottom could
collapse and cause serious bodily injury and/or damage to
personal belongings.
PREPARATION
Before installing, make sure all parts are present. Compare parts
with package contents list and hardware content list. If any part is
missing or damage, do not attempt to install the product
CAUTION
INFORMACIÓN DE SEGURIDAD
Se recomienda que dos personas realicen el ensamblaje. Se
recomienda que dos personas ensamblen este gabinete para
evitar dañar o romper el producto.
WARNING
This unit contains small parts which could be a choking hazard for
small children. Children should be under adult supervision at all
times or serious injury could occur.
Please read and understand this entire manual before attempting
to assemble, operate or install the product. Assemble near the
desired location
Two-person assembly is recommended. It is recommended that
two people assemble this cabinet to avoid damaging or breaking
the product
PREPARACIÓN
Antes de instalar, asegúrese de tener todas las piezas. Compare
las piezas con la lista del contenido del paquete y la lista de
aditamentos. No intente instalar si falta alguna pieza o si están
dañadas.
SAFETY PRECAUTIONS
ADVERTENCIA
PRECAUCIONES DE SEGURIDAD
Este producto contiene piezas pequeñas que pueden causar
peligro de asfixia a niños pequeños. Los niños deben estar bajo la
supervisión de un adulto en todo momento, de lo contrario
pueden ocurrir lesiones graves.
PRECAUCIÓN
WARNING
Vacíe siempre la unidad antes de moverla de lugar. El peso de los
objetos personales puede resultar en que la unidad quede
inestable, se vuelque o colapse pudiendo causar lesiones
personales graves y / o daños a los objetos personales.
ADVERTENCIA
WARNING
ADVERTENCIA
No sobrecargue la unidad. Si cualquier repisa o la parte superior o
inferior de la unidad se arquea o se dobla, está sobrecargada. La
repisa o la parte superior o inferior puede colapsarse, causando
lesiones corporales graves y/o daños a objetos personales.
Este mueble se debe fijar en la pared, para evitar posibles caídas.
Herraje para fijar el mueble a la pared de drywall está incluido en
el kit.
CONSEJOS PRÁCTICOS
CARE AND MAINTENANCE
CUIDADO Y MANTENIMIENTO
Para evitar lesiones graves o incluso mortales, siga las
instrucciones cuidadosamente.
This furniture should be fixed onto the wall, so to avoid possible
drops.
Hardware to fix the furniture to the drywall is included in the kit.
We recommend you protect your work surface during assembly to
prevent scratching or damage to table tops, wood floors, etc.
Should your wall be different, please, ask for advice at the
hardware store.
hints when prompted to do so in an assembly step.
Use a water-dampened cloth to clean the storage cabinet. Avoid
using abrasive cleaners.
HELPFUL HINTS
Caso su pared sea diferente, por favor, pide consejo en la tienda
de herrajes.
Use estos consejos prácticos para asegurarse de una instalación
apropiada. Lea y revise de nuevo estos consejos cuando se le
indique en los pasos de instalación.
Recomendamos que proteja su área de trabajo durante el
ensamblaje para no rayar las superficies de las mesas, pisos de
madera, etc.
Diferentes tipos de paredes exigen diferentes tipos de herrajes.
Different types of walls demand different types of hardware.
IMPORTANTE
Use un paño humedecido con agua para limpiar el gabinete para
almacenaje. Evite usar limpiadores abrasivos.
Use these helpful hints to ensure proper assembly. Review and
refer back to these
Do not mount or attach anything to the sides, rear or front of the
unit as this
can create a force which can cause the unit to tip. Serious bodily
injury and/or damage to personal belongings may occur.
No escale o suba a la unidad. La unidad puede resultar inestable
y puede volcarse o colapsar pudiendo causar lesiones graves
personales y daños a los objetos personales.
No instale o fije nada a los laterales de la unidad o partes
delantera o trasera ya que puede crear peso y resultar en que la
misma se vuelque pudiendo causar lesiones graves personales y
daños a los objetos personales.
IMPORTANT
In order to avoid severe or even fatal injuries, follow the
instructions carefully.
WARNING
ADVERTENCIA
Do not climb or step on the unit. The unit may become unstable
and either tip or collapse. Serious bodily injury and/or damage to
personal belongings may occur.
WARNING
ADVERTENCIA
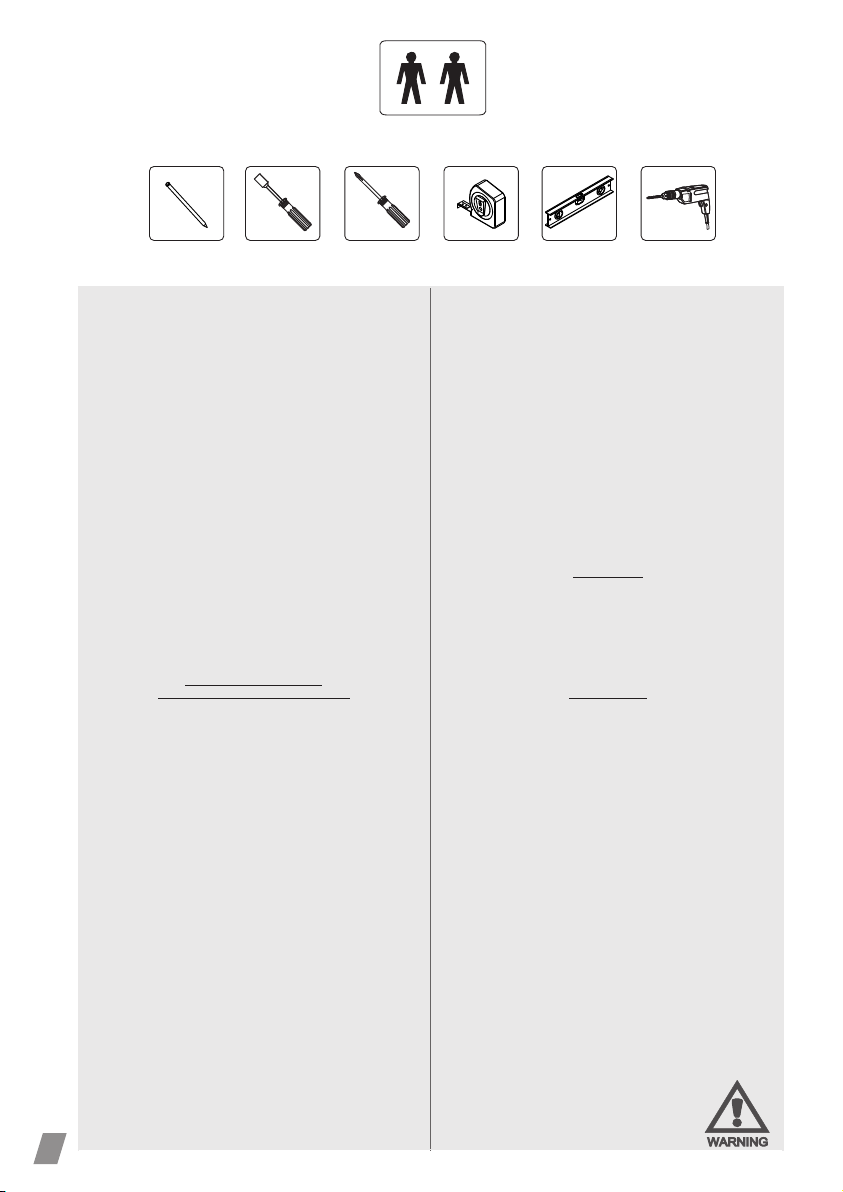
Elementos que necesitará para el montaje (no incluido)
Items you will need to provide for assembly (not included)
INFORMATION/INFORMACIÓN
F06
13005
34x
Screw/Tornillo
MP 3,5x12mm C.Flangeada
F08 Nut/Tuerca
Sextavada Normal
3/16"- CH.5/16" 08x
13100
F07 Screw/Tornillo
PFS CAB LE Phillips
3/16"x5/16" 08x
13000
F12 Screw/Tornillo
AA 4,2x9,5mm F.C.C.Panela 17x
12841
F13
Bushing/Taco
9,7x11,5x18,5mm Porta MB 06x
135760
F22
Hole cap/Tapa del agujero
PP Ø6mm 04x
13650
F23
Hole cap/Tapa del agujero
PP Ø10mm 04x
13653
F25
Shok-absorber/
Amortiguador
08x
135812
F26
Handle/Tirador
192mm 03x
F27
Hinge/Bisagra
Baixa Caneco 26mm 04x
12593
Included Hardware/Accesorios Inclusos
3
F16
Wedge/Calce
PP Ø26 Simetrico 04x
11402
F01
Screw/Tornillo
AA 4,8x45mm
F.C.C.FlangeadaZNBR 06x
130073
F15
Cantoneira/Corner/Corner 02x
11406
F20
Protractor/Prolongador
PP Prolongador Corredica 02x
11410
11414
F29 04x
Click
F31 Bucha/Bushing/Taco
S8mm Plastica 02x
135500
F05
Parafuso/Screw/Tornillo
MF 4,5x14mm F.C.C.Panela 04x
130368
F10 Parafuso/Screw/Tornillo
MP 3,5x10mm F.C.C.Chata 14x
130068
F11 Parafuso/Screw/Tornillo
RI 3,5x25mm Plastc. Pan. 06x
130190
1
2
3
4
5
6
7
8
9
10
11
12
13
Description
Descripción
Nº
Parts / Piezas
4
Quantity
Cantidad
¡Precaución! No supere el limite de peso máximo. Si lo hace podría sufrir
Caution! Do not exceed the maximum weight limitations. Doing so can result in damage, series injury, or
death. All weights based on an equally distributed load.
daños, lesiones graves o causar la muerte. Todo el peso está calculado conforme a una carga
distribuida uniformemente.
Maximum weight supported distributed
Peso máximo admitido distribuido
22Lbs
Side Panel/Lateral 02
Upper panel/Base 02
Bottom/Fondo 01
Crosspiace/Travesano 02
Right Door/Puerta Derecha 01
Left Door/Puerta Izquierda 01
Espelho de Gaveta /Drawer Front/Espejo del Cajón 01
Drawer/Espacio interno del Cajón 01
Drawer Bottom/ Fondo de lo espacio interno del Cajón 01
Slide/Deslizador 02
Top/Tabla 01
Legs support/Soporte para patas 04
Legs/Patas 04
5
1
1
2
2
3
22Lbs
22Lbs
22Lbs
22Lbs
4
5
6
8
7
9
12
4
10
11
12
13
Parts / Piezas
Step 01/ Paso 01
08x 04x
F06 F16
4.1
2
6
7
Step 02/ Paso 02
2º
1º
1
1
2
3
1
1
2
3
1
Step 03/ Paso 03
2
1
1
2 1
1
2
8
02x
F06
2x
2x
2
2
9
Step 04/ Paso 04
1
1
3
F07
07x
F08
07x
7x
10
Step 05/ Paso 05
1º
11
2
2
2
4º
3º
2
2º
12
2
2
2
Step 06/ Paso 06
04x
F06
2x
13
4.1
Step 07/ Paso 07
4
4
1
02x
F15
F10
06x
4
14
2x
2x
Step 09/ Paso 09
14
12x
F06
4X
15
4X
4X
15
Step 08/ Paso 08
04x
F01
12x
F06
4x
8
9
Step 09/ Paso 09
12
12.1
12.2
2x
2x
16
12.2
F10
04x
17
2x
2x
04x
F06
18
2x
2x
Expand the slide to locate
the side panel hole.
Expandir lo deslizador para localizar
el agujero del lateral
F12
02x
19
levantar el producto.
CAUTION: Two-Person Lift!
El gabinete DEBE estar montado firmemente a la pared a través
de los rieles para colgar superior e inferior para su seguridad y
para cumplir con los requisitos de la garantía.
The cabinet MUST be securely attached to the wall through both
top and bottom hang rails for safety and be eligible for warranty.
ADVERTENCIA: Dos personas deben
2x
* Make the marking on the wall to
fix the furniture.
* Hacer la marcación en la pared
para fijación del mueble.
* Level all furniture before setting.
* Nivelar todos los muebles antes
de instalar.
Step 10 - Wall mounting / Paso 10 - Fijacíon en la pared
2x
20
F31
02x
"16
3
1º
2º
F01
02x
Wall Stud
4º
4º
3º
2x
-Si la posición del agujero
está en el montante de la
pared, arregle los muebles
solo con el tornillo. F01.
-If the position of the hole is
in the Stud of the wall,
fix the furniture only with
the screw. F01.
-Use WALL ANCHOR F31 only if you can not locat a stud in the wall.
-Utilice el ANCLA DE PARED F31
solo si no puede ubicar un montante en la pared.

This manual suits for next models

1

Other Bertolini Indoor Furnishing manuals

Bertolini 6146- 6147 User manual

Bertolini

Bertolini 6146- 6147 User manual

Bertolini E-959 BE User manual

Bertolini

Bertolini E-959 BE User manual

Bertolini DM-120 BE User manual

Bertolini

Bertolini DM-120 BE User manual

Bertolini R-618 BE User manual

Bertolini

Bertolini R-618 BE User manual

Bertolini 6155EX User manual

Bertolini

Bertolini 6155EX User manual

Bertolini R-619 BE User manual

Bertolini

Bertolini R-619 BE User manual

Bertolini R-620 BE User manual

Bertolini

Bertolini R-620 BE User manual

Bertolini 6053EX User manual

Bertolini

Bertolini 6053EX User manual

Bertolini 8005EX User manual

Bertolini

Bertolini 8005EX User manual

Bertolini DM-236 BE User manual

Bertolini

Bertolini DM-236 BE User manual

Bertolini 8003EX User manual

Bertolini

Bertolini 8003EX User manual

Popular Indoor Furnishing manuals by other brands

Hodedah HI5009-Z Assembly instructions

Hodedah

Hodedah HI5009-Z Assembly instructions

Homelegance 1525T-1 Assembly instruction

Homelegance

Homelegance 1525T-1 Assembly instruction

Eagle Group Q-LEVER unit with all-wire shelving Assembly instructions

Eagle Group

Eagle Group Q-LEVER unit with all-wire shelving Assembly instructions

Homelegance 5573 manual

Homelegance

Homelegance 5573 manual

FMD Furniture 939-001 Assembly instructions

FMD Furniture

FMD Furniture 939-001 Assembly instructions

Hodedah HI80DR Assembly instructions

Hodedah

Hodedah HI80DR Assembly instructions

Bestar PA-3000 Assembly instructions

Bestar

Bestar PA-3000 Assembly instructions

Wine racks America Baker Style Kit Assembly guide

Wine racks America

Wine racks America Baker Style Kit Assembly guide

Rauch M2625 Assembly instructions

Rauch

Rauch M2625 Assembly instructions

JeWe Nathalie instructions

JeWe

JeWe Nathalie instructions

Furniture of America Petersburg CM3185PC-2PK Assembly instructions

Furniture of America

Furniture of America Petersburg CM3185PC-2PK Assembly instructions

VAS RTG40A1 Instruction booklet

VAS

VAS RTG40A1 Instruction booklet

Dwell Stella Curved Pine Panel Daybed Assembly instructions

Dwell

Dwell Stella Curved Pine Panel Daybed Assembly instructions

Nexel 245644 user manual

Nexel

Nexel 245644 user manual

Keter 454L/120 US GAL Assembly instructions

Keter

Keter 454L/120 US GAL Assembly instructions

Hornbach T4302WG Installation

Hornbach

Hornbach T4302WG Installation

BIG FURNITURE WAREHOUSE BED IN A BOX Assembly instructions

BIG FURNITURE WAREHOUSE

BIG FURNITURE WAREHOUSE BED IN A BOX Assembly instructions

Winners Only DRT23060 Assembly instructions

Winners Only

Winners Only DRT23060 Assembly instructions

manuals.online logo
manuals.online logoBrands
  • About & Mission
  • Contact us
  • Privacy Policy
  • Terms and Conditions

Copyright 2025 Manuals.Online. All Rights Reserved.