Bertoni PILOT User manual
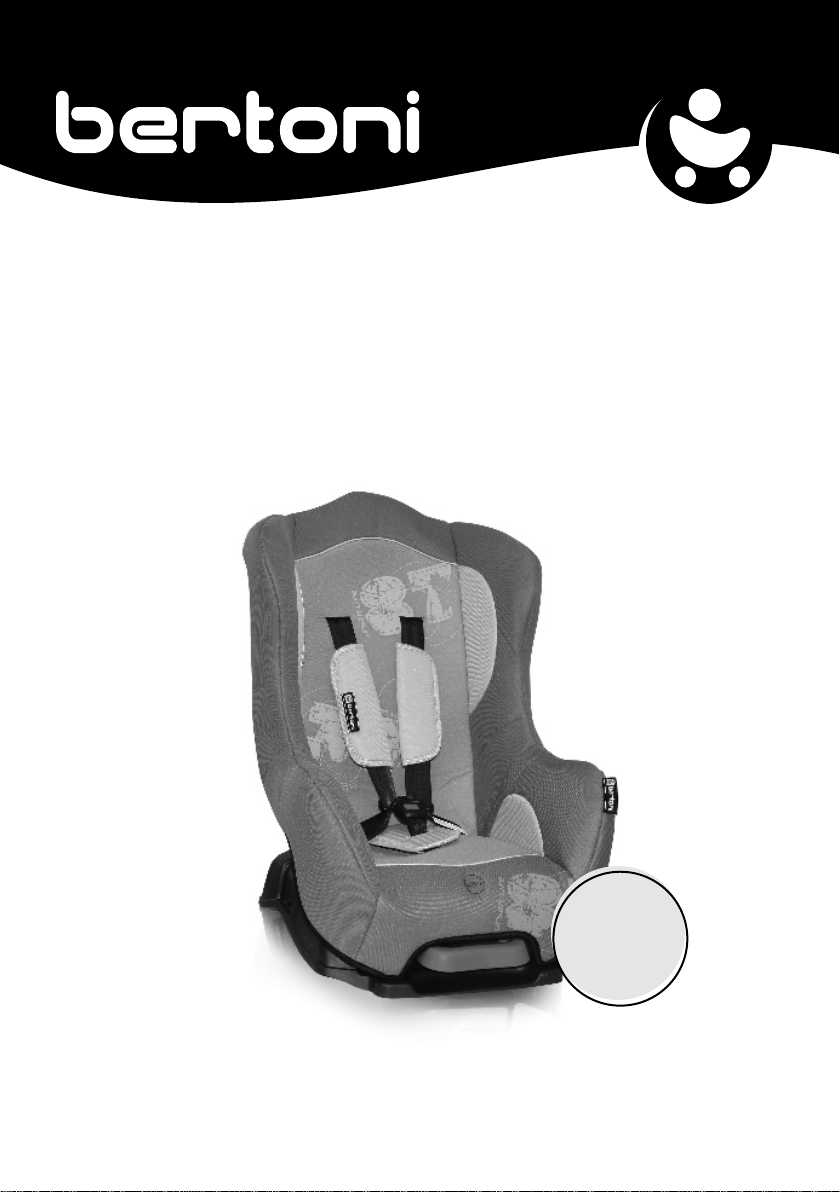
GROUP 1
(9-18 kg)
MANUAL INSTRUCTION
PILOT
CAR SEAT
EN IMPORTANT! KEEP FOR FURTHER REFERENCES.
READ CAREFULLY!

Note: The child restraint is only suitable for
use with lap/3-point safety belts, approved
to ECE R16 or equivalent standards.
INSTALLATION OF THE SEAT IN A CAR
RECLINE POSITION ADJUSTMENT
Note There are three feasible positions
when using the car seat in a vehicle:
upright, middle and inclined. See
To achieve that use the lever located in
front of the child restraint. Pull the lever out
and hold it at the same time pull back or
forward the sitting part of the child restraint.
When the sitting part is in desired position
release the lever. The “click” sound means
that the seat is well fixed. See / Fig.II /
:
/ Fig.I /
INSTALLATION IN THE CAR
Note:Child’s weight between 9 to 18 kg,
please make sure to use in forward facing
position.
Warning: For maximum protection install the
car seat onto the center rear seat of the vehicle.
( II )
( I )
For group I / 9 - 18 kg /
Place the car seat in forward facing position on
the seat of the car. See / Fig.III /
lPlace the child seat in upright position.
lPlace the child seat in forward-facing
position.
lPull the vehicle seatbelt tight and pass
through the openings of the child seat.
lFasten the seatbelt and pull it tight.Ensure
that the seatbelt is not twisted.
( III )
Forward - facing position
Note: Be sure to check whether the seatbelts
are snug and flat, not broken and tighten
properly.These must be taken on each time
when a child is fixed in the child restraint.
Note: Do not place your child in a sleeping
bag, blanket or other bulky wrapping before
putting a child in the car seat. To ensure child’s
back is evenly supported do not put more than
one nappy on the child and make sure the
nappy is not likely folded at the back.
1. Press the red button on the buckle of the
safety belt and release shoulder belts.
2. Put shoulder belts aside and place your child
into the seat.
3. Put the shoulder belts on the child’s
shoulders and insert both metal elements into
the buckle until “click” sound is heard.
4. The space between child’s body and
shoulders must be two-fingers width.
5. Pull the shoulder belts to check that the
buckle is well locked.
6. To unfasten the belts press the lever on the
front part of the seat and pull the shoulder belts
out. See / Fig. IV /
PLACING YOUR CHILD INTO A CAR SEAT

LOCKING & UNLOCKING THE HARNESSES
1. Join the both parts of the harness to each
other and insert them into the buckle. The
buckle is locked when “click” sound is heard.
See / Fig. VI /
Note: When a child is in the child restraint you
must check whether the buckle is still secured.
2. To release the buckle press the red button
on it and pull the both parts out.
To take your child out of the car seat repeat the
operations above in the reverse order:
- Press the red button on the buckle of the
safety belt and release the shoulder belts.
- Put shoulder belts aside and take your child
out of the seat.
TAKING YOUR CHILD OUT OF THE SEAT
ADJUST THE LENGTH OF HARNESSES
In order to protect you child much better, after
fix him/her in the child restraint and lock the
buckle, you should tighten the harnesses so
they are snug and flat against the child’s body.
They should never be twisted or loose.
1.To tighten the harnesses press the button
located on front side of the seat (7a) and pull
the adjustable strap (located on front side of
the seat too) out from the lock (7b).
See / Fig.VII /
2.To lengthen the harnesses press the button
located between child’s legs (7a) and pull both
harnesses to your direction with your other
hand (7c).
Please, note while you are doing this, hold the
harnesses, not the seat cover.
See / Fig.VII /
Shoulder belts
Lap belt
Buckle
Buckle tongue
Crotch belt
SAFETY HARNESS SYSTEM
ADJUST THE HEIGHT OF HARNESSES
There are 3 harness positions available,
you can select according to child’s height.
For group 1 (from 9 to 13 kg) the mounting
height of the harnesses should be adjusted
to the child’s height, so that child’s shoulder
would be at the same level as the harness
coming out from the back. See / Fig. VIII /
( VII )

( VIII )
REMOVAL OF CAR SEAT FABRIC
1.To remove the child restraint cover please,
do the same operations as described in
“CHANGING THE HEIGH OF
HARNESSES”.
2.Release the crotch harness and slide it
through the strap slot in the fabric. Remove
the cover.
To remove the seat from the vehicle follow
the steps below:
- unbutton the belt of the vehicle.
- pull the safety belt of the vehicle through
the openings on the car seat.
- remove the car seat from the vehicle.
CHANGING THE HEIGHT OF
HARNESSES
To change the position of the shoulder belts
follow the steps below:
- release the shoulder belts from the metal
clip located on the bottom side of the base
of the seat.
- pull the shoulder belts through the pair of
openings on the backrest of the seat.
- pass the shoulder belts through the
openings with the same height as a height
of child’s shoulders.
- attach them to the metal clip.
See / Fig. IX /
REMOVING THE SEAT
FROM THE VEHICLE
metal clip

www.bertoni-eu.com
Дидис ООД - България
Шумен 9700, “Правда” 1
Тел.: 054/850 830
Факс: 054/850 839
e-mail: [email protected]
Didis Ltd. - Bulgaria
Shumen 9700, “Pravda” 1 Str.
Tel.: +359 54 850 830
Fax: +359 54 850 839
e-mail: [email protected]
Table of contents
Other Bertoni Car Seat manuals


