manuals.online logo
Brands
  1. Home
  2. •
  3. Brands
  4. •
  5. Bestar
  6. •
  7. Indoor Furnishing
  8. •
  9. Bestar 69430-510017-520017 User manual

Bestar 69430-510017-520017 User manual

Certified/Certié/Certificado
ISO 9001
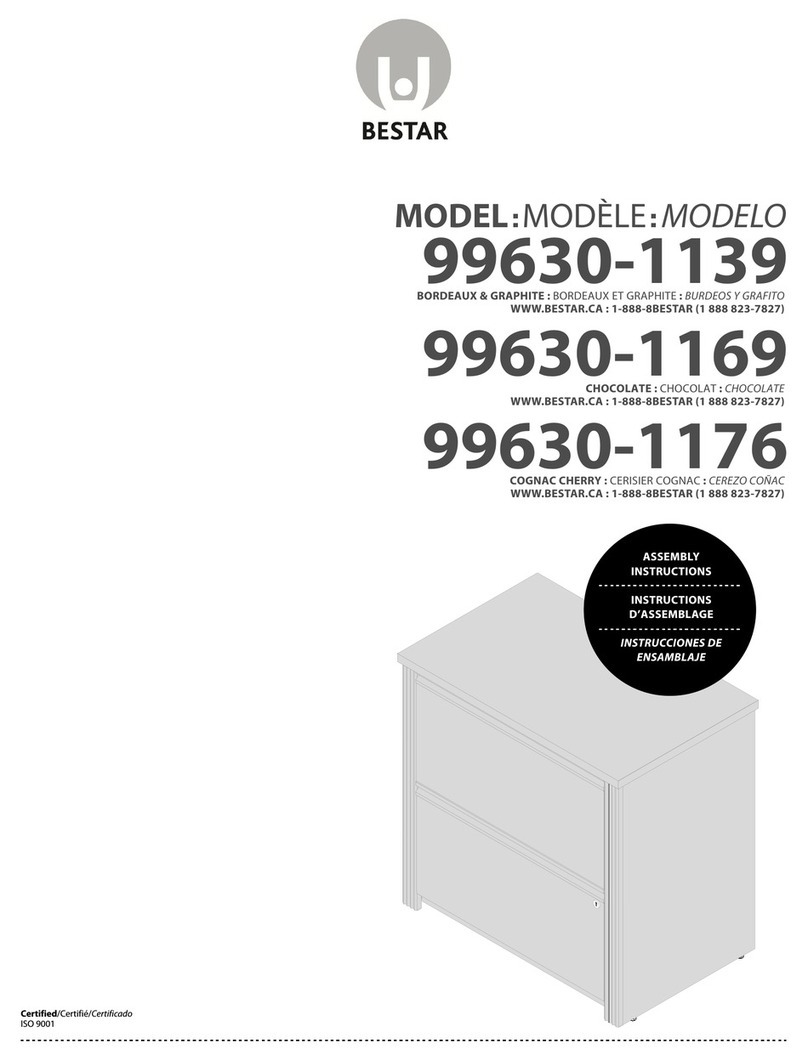
MODEL MODÈLE MODELO
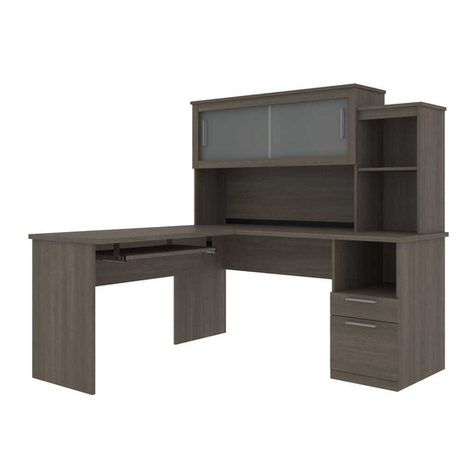
69430-510017-520017
69430-510018-520018
69430-510063-520063
WWW.BESTAR.CA : 1-888-8BESTAR (1 888 823-7827)
ASSEMBLY
INSTRUCTIONS
INSTRUCTIONS
D’ASSEMBLAGE
INSTRUCCIONES DE
ENSAMBLAJE
www.bestar.ca
1 888 823-7827
HEAD OFFICE AND FACTORY / SIÈGE SOCIAL ET USINE / CASA CENTRAL Y FÁBRICA
4220, RUE VILLENEUVE, LAC-MÉGANTIC, QC. CANADA G6B 2C3 TÉL. : (819) 583-1017
WWW.BESTAR.CA : 1-888-8BESTAR (1 888 823-7827)
Thank you for choosing a BESTAR product.
Your total satisfaction is our #1 priority.
Customer Service and warranty information
Should you have a problem or need more information concerning the warranty, do not call to the place of purchase.
Please call our customer service department for immediate assistance using the following toll free
number:
Monday to Thursday: 8 a.m. to 8 p.m. E.S.T. / Friday: 8 a.m. to 4 p.m. E.S.T. / Saturday and Sunday: 9 a.m. to 4 p.m. E.S.T.
Please have your assembly instruction manual on hand when you call. BESTAR products are warranted to the original purchaser against defects in material or
workmanship in the furniture. Defects as mentioned in this warranty refer to any imperfections which may impair the use of the product. Our warranty is expressly
limited to the replacement of furniture parts and components for ten years following the date of purchase. BESTAR will replace any part that is defective. This warranty
applies under conditions of normal use. Our furniture products are not intended for outdoor use. The warranty does not cover defects caused by improper assembly or
disassembly, defects occurring after purchase due to product modications, intentional damage, accident, misuse, exposure to the elements and labor or assembly
costs. Bestar reserves the right to request proof of purchase to document a warranty claim. In no event shall BESTAR be liable for incidental or consequent damages
resulting from the misuse of the product.
This warranty is not transferable and is valid only in Canada and the United States excluding Alaska, Hawaii and Puerto Rico.
MERCI D’AVOIR CHOISI LES PRODUITS BESTAR.
VOUS SATISFAIRE EST NOTRE PRIORITÉ.
Service à la clientèle et informations relatives à la garantie
Si vous rencontrez un problème ou si vous souhaitez de plus amples informations concernant votre garantie, ne vous adressez pas au magasin où vous avez
eectué votre achat. Pour obtenir une aide immédiate, veuillez appeler notre service après-vente au numéro sans frais :
Lundi au jeudi : 8 h à 20 h HNE / Vendredi : 8 h à 16 h HNE / Samedi et dimanche : 9 h à 16 h HNE
Veuillez avoir en main le manuel d’instructions lors de votre appel. La garantie des produits BESTAR est valide, pour l’acheteur original, en cas de défaut de matériel
ou de fabrication. Les défauts couverts par cette garantie incluent toutes les imperfections qui ont pour conséquence une utilisation non appropriée du produit.
Notre garantie est expressément limitée au remplacement des composants et des éléments de meubles pour une durée de dix ans suivant la date de l’achat. BESTAR
s’engage à remplacer tout élément défectueux. Cette garantie s’inscrit dans le cadre d’une utilisation du produit dans des conditions normales. Nos meubles ne sont
pas destinés à être utilisés à l’extérieur. La garantie ne couvre pas les défauts générés par un assemblage ou un démontage non conforme, les défauts apparus suite à
des modications apportées au produit, à des dommages intentionnels, à un accident, une mauvaise utilisation, l’utilisation à l’extérieur, ni les coûts de main d’œuvre
ou d’assemblage. Bestar se réserve le droit d’exiger une preuve d’achat an de documenter la réclamation. La société BESTAR ne pourra être tenue, en aucun cas,
responsable de dommages indirects ou consécutifs, suite à une mauvaise utilisation du produit. Cette garantie ne peut être transférée et est valide au Canada
et aux États-Unis sauf Hawaï, Puerto Rico et Alaska.
Gracias por elegir un producto BESTAR.
Su entera satisfacción es nuestra prioridad N°1.
Servicio de atención al cliente e información sobre la garantía
Si tiene algún problema y necesita más información sobre la garantía, no vaya al lugar donde realizó la compra.
Llame a nuestro
departamento de atención al cliente para recibir ayuda inmediata utilizando nuestro servicio de llamada gratuita :
De lunes a jueves : de 8H00 AM a 8H00 PM EST / Viernes : de 8h00 AM a 4H00 PM EST / Sábado y domingo : de 9h00 AM a 4H00 PM EST
Cuando llame, tenga a mano su manual de instrucciones de montaje. Los productos BESTAR están garantizados por el comprador original contra defectos en el material o en
la confección del mueble. Los defectos, tal como se describen en esta garantía incluyen toda imperfección que pueda impedir el uso del producto. Nuestra garantía se limita
expresamente al reemplazo de las partes y componentes del mueble defectuosos por diez años a partir de la fecha de compra. BESTAR remplazará cualquier pieza defectuosa.
Esta garantía se aplica según las condiciones de uso normal. Nuestros productos no están diseñados para ser utilizados al aire libre. La garantía no cubre defectos causados
por ensamblaje o desensamblaje incorrectos, defectos ocurridos luego de la compra por la modicación del mueble, daños intencionales, accidentes, uso incorrecto, exposición
a los agentes naturales ni costos derivados de la fabricación o ensamblaje. Bestar se reserva el derecho de solicitar una factura de compra para poder extender un reclamo de
garantía. Bajo ninguna circunstancia BESTAR será responsable de los daños accidentales o consecuentes que pudieran resultar del uso incorrecto del producto. Esta garantía
es intransferible y se aplica solamente a Canadá y los Estados Unidos.
PROBLEMS
OR INFORMATION
POUR TOUT PROBLÈME
OU INFORMATION
PROBLEMA O
INFORMACION
REAL SIZE / GRANDEUR RÉELLE / TAMAÑO REAL
CODE / CÓDIGO QTY / QTÉ / CANT.CODE / CÓDIGOQTY / QTÉ / CANT.
VC-204 10
VF-231 2
VR-207 7
VR-210 16
2 in/po (50 mm)
75
43
31
TC40D
60
30
41
40
42
71
70
32
33 34
36
46
35 37 38
73
73
74
44
80
PARTS / PIÈCES / PIEZAS
CODE / CÓDIGO QTY / QTÉ / CANT. CODE / CÓDIGO QTY / QTÉ / CANT. CODE / CÓDIGO QTY / QTÉ / CANT. CODE / CÓDIGO QTY / QTÉ / CANT.
30 1
31 1
32 1
33 1
34 1
35 1
36 1
37 1
38 1
40 1
41 1
42 1
43 1
44 1
46 1
60 1
70 1
71 1
73 2
74 1
75 1
80 1
TC40D 1
back panel / dos / panel trasero
14 5/8“ x 23 5/16“ (372 mm x 592 mm)
1
3
SERVICE/SERVICIO: 1-888 8BESTAR (1-888 823-7827)
69430
1/16” (2 mm)
5/8 in/po (16 mm)
1/2 in/po (13 mm)
3/4 in/po (19 mm)
EQ-314 2
H-03 39
H-36 39
PA-844 10
PO-831 1
AM-182 1
CA-99 12
CH-838 2
CL-140 -
CO-843 1
EQ-143 4
CODE / CÓDIGO QTY / QTÉ / CANT. CODE / CÓDIGO QTY / QTÉ / CANT. CODE / CÓDIGO QTY / QTÉ / CANT. CODE / CÓDIGO QTY / QTÉ / CANT.
HARDWARE / QUINCAILLERIES / QUINCALLA
Group together all the hardware required for
each step as the construction of your piece
of furniture is progressing.
Regroupez toutes les quincailleries requises
pour chaque étape de façon à vous assurer
de tout installer au bon moment.
Reúna todas las quincallas necésarias
para cada una de las etapas de
montaje, para asegurar una
correcta instalación en el
momento adecuado.
IMPORTANT NOTICE / NOTE IMPORTANTE / NOTA IMPORTANTE
4SERVICE/SERVICIO: 1-888 8BESTAR (1-888 823-7827)
69430
two people are required to
assemble and move this model.
deux personnes sont requises pour
assembler et déplacer ce modèle.
se necesitan dos personas para
ensamblar y desplazar este mueble.
the use of electric tools must
be made with vigilance.
l’utilisation d’outils électriques
doit être faite avec vigilance.
las herramientas eléctricas deben
utilizarse con sumo cuidado.1/4” (7 mm)
tools required
outils requis
herramientas necesarias
#3
push down
enfoncez
presione
hacia
abajo
arrow
flèche
flecha
H-03
2
Insert the cam with the arrow pointing
towards the hole in the edge.
Insérez la rondelle en pointant la flèche
vers le trou de la bordure.
Inserte la arandela apuntando la flecha
hacia el orificio cercano el borde.
proper position
bonne position
buena posición
1
H-36
IMPORTANT NOTICE / NOTE IMPORTANTE / NOTA IMPORTANTE
Main hardware system / Système de quincaillerie principal / Sistema principal de quincalla If needed / En cas de nécessité
En caso de necesidad
pull out
retirez
retire
B
turn
tournez
haga
girar
A
How to remove a misplaced assembly bolt (H-36).
Comment retirer un boulon (H-36) mal situé.
Cómo retirar un perno (H-36) mal ubicado.
SERVICE/SERVICIO: 1-888 8BESTAR (1-888 823-7827)
IMPORTANT NOTICE / NOTE IMPORTANTE / NOTA IMPORTANTE
Duly complete the self-adhesive sticker. / Assurez-vous de bien remplir l’autocollant. / Asegúrese de completar correctamente la etiqueta.
MODEL MODÈLE MODELO
COLOR : COULEUR : COLOR
WWW.BESTAR.CA : 1-888-8BESTAR (1 888 823-7827)
00000-0000
Model / Modèle:
Production Number
Numéro de production:
Customer Service
Service à la clientèle
To better serve you!
Pour mieux vous servir!
1-888-823-7827
Important/Importante
Please retain the self-adhesive sticker which you will
find at step 14 of the instruction manual.
Conservez l’autocollant qui sera collé seulement
à l’étape 14 du feuillet d’instructions.
Conserve la etiqueta que será pegada sólo en la
etapa 14 de la hoja de instrucciones.
PRODUCTION 0000
PRODUCTION 0000
LEFT ASSEMBLY
INSTRUCTIONS
INSTRUCTIONS
D’ASSEMBLAGE GAUCHE
INSTRUCCIONES DE
ENSAMBLAJE IZQUIERDO
69430
PA-844
x 4
H-36
x 2
H-03
x 9
31
34
71
H-36
H-03
PA-844
1
5
HARDWARE INSTALLATION & ASSEMBLY / INSTALLATION DES QUINCAILLERIES ET ASSEMBLAGE / INSTALACIÓN DE LAS QUINCALLAS Y ENSAMBLAJE
Desk / Bureau / Escritorio
1
S
ERVICE
/S
ERVICIO
: 1-888 8BESTAR (1-888 823-7827)
69430
Code / Código
Qty / Qté / Cant.
2
Code / Código
Qty / Qté / Cant.
VC-204
x 2
2” (50 mm)
Assembling sequence
Séquence d’assemblage
Secuencia de ensamblaje
Parts / Pièces / Piezas:
Assemble upside down
Assemblez en position renversée
Realice el ensamblaje en posición invertida
317134
31
71
34
Remember to tighten the H-03
located on the back panel.
N’oubliez pas de serrer les H-03
qui sont situées au dos.
No se olvide de apretar las H-03
que se encuentran en el panel
trasero.
Important/Importante
H-03
VC-204
2
Make sure to properly tighten each cam to ensure furniture
solidity. Otherwise, parts could be damaged or the user
could be injured.
Assurez-vous de bien resserrer chaque rondelle pour assurer
la solidité du meuble. Dans le cas contraire, des pièces
pourraient être endommagées ou l’utilisateur pourrait se
blesser.
Asegúrese de apretar bien cada arandela para garantizar
la solidez del mueble.De lo contrario, podría provocarse
daño a las piezas o las personas.
Main hardware system / Système de quincaillerie principal / Sistema principal de quincalla
1
IMPORTANT NOTICE / NOTE IMPORTANTE / NOTA IMPORTANTE
insert
insérez
insertar
2
tools required
outils requis
herramientas necesarias important
importante
tighten
serrez
apretar
3
AB
S
ERVICE
/S
ERVICIO
: 1-888 8BESTAR (1-888 823-7827)
6
PRE-ASSEMBLY / PRÉ-ASSEMBLAGE / PREENSAMBLAJE
Desk / Bureau / Escritorio
69430
PA-844
x 6
43
30
VR-207
x 2
1/2” (13 mm)
H-36
x 11
H-03
x 14
33
H-36
EQ-314
x 2
EQ-600
VR-207
Do not drive the screw all the
way in to allow adjustment of
the moulding (step 4).
Ne vissez pas à fond pour
permettre l’ajustement de la
moulure (étape 4).
No atornille a fondo para realizar
el ajuste de la
moldura (etapa 4).
important
importante
4
VR-207
EQ-314
H-03
44
32
70
75
PA-844
3
7
HARDWARE INSTALLATION & ASSEMBLY / INSTALLATION DES QUINCAILLERIES ET ASSEMBLAGE / INSTALACIÓN DE LAS QUINCALLAS Y ENSAMBLAJE
Desk / Bureau / Escritorio
3
S
ERVICE
/S
ERVICIO
: 1-888 8BESTAR (1-888 823-7827)
69430
Code / Código
Qty / Qté / Cant.
30
44
43
32
80
Assembling sequence
Séquence d’assemblage
Secuencia de ensamblaje
Parts / Pièces / Piezas:
Assemble on the side
Assemblez sur le côté
Realice el ensamblaje sobre la parte lateral
803243
Remember to tighten the H-03
located on the back panel.
N’oubliez pas de serrer les H-03
qui sont situées au dos.
No se olvide de apretar las H-03
que se encuentran en el panel
trasero.
Important/Importante
H-03
4430
VR-207
x 2
1/2” (13 mm)
ajust the mouldings
and tight the
screws VR-207
ajuster la moulure et
visser les vis VR-207
ajustar la moldura y
apretar los tornillos
VR-207
important / importante
80
43
VR-207
4
8
PRE-ASSEMBLY / PRÉ-ASSEMBLAGE / PREENSAMBLAJE
Desk / Bureau / Escritorio
4
S
ERVICE
/S
ERVICIO
: 1-888 8BESTAR (1-888 823-7827)
69430
Code / Código
Qty / Qté / Cant.
Assembling sequence
Séquence d’assemblage
Secuencia de ensamblaje
Parts / Pièces / Piezas:
Assemble upside down
Assemblez en position renversée
Realice el ensamblaje en posición invertida
+
4432
VC-204
7570 33
44
75
32
70
33
2 in/po (50 mm)
5
9
HARDWARE INSTALLATION & ASSEMBLY / INSTALLATION DES QUINCAILLERIES ET ASSEMBLAGE / INSTALACIÓN DE LAS QUINCALLAS Y ENSAMBLAJE
Desk / Bureau / Escritorio
5
S
ERVICE
/S
ERVICIO
: 1-888 8BESTAR (1-888 823-7827)
69430
Code / Código
Qty / Qté / Cant.
VC-204
x 6
H-36
x 10
40
42
41
H-36
4
VR-210
EQ-143
5/8” (16 mm)
VR-210
x 8
EQ-143
x 4
6
10
HARDWARE INSTALLATION & ASSEMBLY / INSTALLATION DES QUINCAILLERIES ET ASSEMBLAGE / INSTALACIÓN DE LAS QUINCALLAS Y ENSAMBLAJE
Desk / Bureau / Escritorio
6
S
ERVICE
/S
ERVICIO
: 1-888 8BESTAR (1-888 823-7827)
69430
Code / Código
Qty / Qté / Cant.
6
Assembling sequence
Séquence d’assemblage
Secuencia de ensamblaje
Parts / Pièces / Piezas:
+
333230 +42413134
32
4
30
33 34
42
41
31
11
PRE-ASSEMBLY / PRÉ-ASSEMBLAGE / PREENSAMBLAJE
Desk / Bureau / Escritorio
7
S
ERVICE
/S
ERVICIO
: 1-888 8BESTAR (1-888 823-7827)
69430
insert
insérez
insertar
A
tighten
serrez
apretar
B
important / importante
Assembling sequence
Séquence d’assemblage
Secuencia de ensamblaje
Parts / Pièces / Piezas:
+404241
Underneath View
Vue de dessous
Visión de debajo
5/8” (16 mm)
VR-210
x 8
8
12
HARDWARE INSTALLATION & ASSEMBLY / INSTALLATION DES QUINCAILLERIES ET ASSEMBLAGE / INSTALACIÓN DE LAS QUINCALLAS Y ENSAMBLAJE
Desk / Bureau / Escritorio
8
S
ERVICE
/S
ERVICIO
: 1-888 8BESTAR (1-888 823-7827)
69430
Code / Código
Qty / Qté / Cant.
insert
insérez
insertar
A
tighten
serrez
apretar
B
important / importante
4
40
41 42
VR-210
H-36
x 4
H-03
x 16
36
35
38
37
73
74
H-03
H-36
9
13
HARDWARE INSTALLATION / INSTALLATION DES QUINCAILLERIES / INSTALACIÓN DE LAS QUINCALLAS
Hutch / Étagère / Estantería
9
S
ERVICE
/S
ERVICIO
: 1-888 8BESTAR (1-888 823-7827)
69430
Code / Código
Qty / Qté / Cant.
x2
CO-843
x 1
TC40D
finished edge / bordure finie
borde acabado
unfinished surface
surface non-finie
superficie sin acabado
TC40
Drive the screw all the way
in to install CO-843.
Vissez à fond avant d’installer
la CO-843.
Atornille a fondo
antes de instalar
el CO-843.
TC40D
CO-843
important / importante
60
46
H-36
6
VF-231
PO-831
3/4” (19 mm)
VF-231
x 2
PO-831
x 1
H-36
x 12
CH-838
x 2
Loosen
Desserrer
Aflojar
CH-838
10
14
HARDWARE INSTALLATION / INSTALLATION DES QUINCAILLERIES / INSTALACIÓN DE LAS QUINCALLAS
Hutch / Étagère / Estantería
10
S
ERVICE
/S
ERVICIO
: 1-888 8BESTAR (1-888 823-7827)
69430
Code / Código
Qty / Qté / Cant.
74
38 37
73
35
36
73
46
Assembling sequence
Séquence d’assemblage
Secuencia de ensamblaje
Parts / Pièces / Piezas:
Assemble upside down
Assemblez en position renversée
Realice el ensamblaje en posición invertida
+
36463738 7374 73 35
+ +
15
ASSEMBLY / ASSEMBLAGE / ENSAMBLAJE
Hutch / Étagère / Estantería
11
S
ERVICE
/S
ERVICIO
: 1-888 8BESTAR (1-888 823-7827)
69430
insert
insérez
insertar
A
tighten
serrez
apretar
B
important / importante
4
VC-204
x 2
2” (50 mm)
Assembling sequence
Séquence d’assemblage
Secuencia de ensamblaje
Parts / Pièces / Piezas:
+TC40D4241
Underneath View
Vue de dessous
Visión de debajo
+
363540
12
16
NSTALLATION / INSTALLATION / INSTALACIÓN
12
S
ERVICE
/S
ERVICIO
: 1-888 8BESTAR (1-888 823-7827)
69430
Code / Código
Qty / Qté / Cant.
insert
insérez
insertar
A
tighten
serrez
apretar
B
important / importante
4
35 36
41 42
40
TC40D
VC-204
4
TC40
important / importante
Drive the screw all
the way in to install
TC40D
Vissez à fond avant
d’installer la TC40D
Atornille a fondo
antes de instalar
el TC40D
B
Use screw A for horizontal adjustment, screw B for depth adjustment and screws C for vertical adjustment.
Utilisez la vis A pour l’ajustement horizontal, les vis B pour l’ajustement en profondeur et les vis C pour
l’ajustement vertical.
Utilice el tornillo A para realizar el ajuste horizontal, los tornillos B para el ajuste de profundidad y los tornillos C
spara el ajuste vertical.
To remove hinges, start by loosening these two screws to free the locking system.
Pour enlever les pentures, desserrez ces deux vis d’abord pour libérer le système de verrouillage.
Para retirar las bisagras, afloje primero estos dos tornillos para liberar el sistema de fijación.
C
A
C
60
30
B
A
C
CL-140
-
AM-182
x 1
1/16” (2 mm)
43
32
AM-182
60
32
30
rear view / vue arrière / vista trasera
CL-140
back panel / Dos
Panel trasero
14 5/8“ x 23 5/16”
(372 mm x 592 mm)
unfinished surface
surface non-finie
superficie sin acabado
75
VR-207
without
pre-drilled hole
sans pré-perçage
sin perforación previa
VR-207
x 3
1/2” (13 mm)
Important / Importante
If you are using the closed storage portion of your unit for your
CPU, do not install back panel.
Ne pas faire l'installation du dos si vous utilisez l'armoire pour le
rangement de l'unité centrale.
No hagan la instalacion de la espalda si van a utilisar el armario
para la ordenacion de la unidad central
13
17
INSTALLATION / INSTALLATION / INSTALACIÓN
13
S
ERVICE
/S
ERVICIO
: 1-888 8BESTAR (1-888 823-7827)
69430
Code / Código
Qty / Qté / Cant.
Important/Importante
41
To level your furniture,
use leg levelers.
Pour niveler votre meuble
utilisez les pattes ajustables.
Para nivelar su mueble
utilice las patas ajustables.
PA-844
For future reference and to allow us to
serve you better, please complete the
self-adhesive sticker and apply it in an
accessible space such as under shelf.
Pour que nous puissions mieux vous servir en
cas de besoin, veuillez compléter l’autocollant
et l’apposer dans un endroit facilement
accessible tel que le dessous d’une tablette.
Para futuras referencias y un mejor servicio,
por favor pegue la etiqueta adhesiva en un
espacio accesible. Por ejemplo, la parte
interior del estante
INSTALLATION / INSTALLATION / INSTALACIÓN
14
SERVICE/SERVICIO: 1-888 8BESTAR (1-888 823-7827)
69430
18
PRODUCT CARE / ENTRETIEN DU PRODUIT / MANTENIMIENTO DEL PRODUCTO
Avoid placing the furniture in the sunlight or near a source of heat. Use a soft dry cloth for dusting.
To clean heavy dirt, use a cloth dipped in a solution of mild detergent and water.
Avoid leaving wet objects on the surface or using commercial chemical cleaning products.
Évitez d'exposer le meuble au soleil ou près de toute source de chaleur. Pour le nettoyage, utilisez un chiffon doux et sec.
Pour la grosse saleté, utilisez un chiffon humidifié avec un peu de détergent dilué dans l'eau.
Évitez de laisser des objets mouillés sur la surface de votre meuble ou d'utiliser des nettoyants chimiques.
Evite exponer el mueble al sol o las fuentes de calor. Para limpiarlo, utilice un paño suave y seco.
Para limpiar las manchas rebeldes, utilice un trapo húmedo con un poco de detergente diluido en agua.
No deje objetos mojados encima del mueble ni utilice limpiadores que contengan productos químicos.
CONGRATULATIONS! YOU ARE NOW THE OWNER OF A QUALITY PRODUCT
FÉLICITATIONS! VOUS AVEZ MAINTENANT EN VOTRE POSSESSION UN PRODUIT DE QUALITÉ
FELICITACIONES! AHORA ES USTED DUEÑO DE UN PRODUCTO DE CALIDAD.
When you have completed
the assembly of your new
furniture, install plastic caps
Lorsque vous avez complété
l’assemblage de votre meuble,
installez les capuchons de plastique
Una vez que haya completado
el ensamblaje del mueble, coloque
los capuchones de plástico
H-03
CA-99
23/32 in/po
18 mm
Model / Modèle:
Production Number
Numéro de production:
Customer Service
Service à la clientèle
To better serve you!
Pour mieux vous servir!
1-888-823-7827
The doors on your furniture are crooked or the space between the doors is uneven:
It is very important to install the hinges and hinge plates on the correct parts while respecting the instruction manual.
For the installation and adjustment of the doors, please refer to your instruction manual or log on to the BESTAR internet
site (www.bestar.ca).
Les portes de votre meuble sont croches ou l’espace qui les sépare est inégal :
Il est important d’installer les pentures et les plaques sur les bonnes pièces en respectant le feuillet d’instructions. Pour
l’installation des portes et leur ajustement, référez-vous à l’étape d’installation des portes dans le feuillet d’instructions ou sur le
site internet de BESTAR (www.bestar.ca).
Las puertas de su mueble están chuecas o el espacio que las separa es desigual :
Es importante instalar las bisagras y las placas sobre las piezas adecuadas respetando el folleto de instrucciones. Para la instalación de
las puertas y su ajuste, consulte la etapa de instalación de las puertas en el folleto de instrucciones o en el sitio Internet de BESTAR
(www.bestar.ca).
You are at a step of hardware installation and some H-36 are missing:
Before calling to order your missing bolts (H-36), please make sure you have not installed any bolts (H-36) in the wrong
place. To remove a bolt (H-36) which is not in the correct place, please refer to your instruction manual.
Vous êtes à une étape d’installation de quincaillerie et il vous manque des H-36 :
Avant d’appeler pour commander des boulons (H-36), assurez-vous de ne pas avoir installé des boulons (H-36) au mauvais
endroit. Pour enlever un boulon (H-36) mal situé, consultez le feuillet d’instructions.
Usted está en alguna etapa de la instalación de quincallas y le faltan las H-36 :
Antes de llamar para pedir los pernos (H-36), asegúrese de que no los haya instalado en el lugar equivocado.
Para retirar un perno (H-36) mal puesto, consulte el folleto de instrucciones.
How to separate and install your CO-249 and CO-684 slides:
The CO-249 & CO-684 slides consist of two sections which you must separate. To separate the slides, please refer to your
instruction manual. The slides are installed on distinct parts which will be re-grouped only when the drawers are
installed on the furniture.
Comment séparer et installer les coulisseaux CO-249 et CO-684 :
Les coulisseaux CO-249 et CO-684 sont constitués d’une partie que vous devez séparer en deux sections. Pour séparer le
coulisseau, référez-vous au feuillet d’instructions. Les coulisseaux sont installés sur deux pièces distinctes et seront regroupés
seulement lors de l’installation des tiroirs dans le meuble.
Cómo separar y instalar las guías correderas CO-249 y CO-684 :
Las guías correderas CO-249 y CO-684 están constituidas por una parte que usted debe separar en dos secciones. Para separar las guías
correderas, consulte el folleto de instrucciones. Las guías correderas se instalan en dos piezas distintas y sólo serán reagrupadas una vez
que se instalen los cajones en el mueble.
Problems and Solutions / Problèmes et solutions / Problemas y Soluciones
The drawers on your furniture are crooked or the space between the drawers is uneven:
While referring to the section indicating the actual sizes of the screws in your instruction manual , please insure that you
are using the correct size screws needed when installing your drawer slides and drawer fronts. They must be installed
straight. While installing the drawer front, make sure that the correct side is facing up. For the adjustment of the drawer
fronts, please refer to your instruction manual or log on to the BESTAR internet site (www.bestar.ca).
Les tiroirs de votre meuble sont croches ou l’espace qui les sépare est inégal :
En vous référant au tableau de vis grandeur réelle du feuillet d’instructions, assurez-vous que vous avez utilisé les bonnes vis lors
de l’installation des coulisseaux ainsi que du devant de tiroir et qu’elles sont posées bien droites. Assurez-vous également que le
devant du tiroir n’est pas assemblé à l’envers. Référez-vous à l’étape d’ajustement des tiroirs dans le feuillet d’instructions ou sur
le site internet de BESTAR (www.bestar.ca).
Los cajones de su mueble están chuecos o el espacio que los separa es desigual :
Consulte la tabla de tornillos en tamaño real del folleto de instrucciones y asegúrese de que haya utilizado los tornillos adecuados
durante la instalación de las guías correderas así como también la parte delantera del cajón y que éstos estén puestos bien derechos.
Asegúrese también de que la parte delantera del cajón no esté ensamblada al revés. Consulte la etapa del ajuste de cajones en el folleto
de instrucciones o en el sitio Internet de BESTAR (www.bestar.ca).
DR
Part B / Partie B / Parte BPart A / Partie A / Parte A
031019 V3
YOU
andUS
For more information or to discover our new products
Pour toute information ou pour découvrir nos nouveaux produits
Para obtener más información o para obtener nuevos productos
www.bestar.ca
VOUS
etNOUS
FOR LONG TIME
POUR LONGTEMPS
POR MUCHO TIEMPO
The new logo shows an open and radiant person. It also evokes the past of BESTAR, the fact that we were the rst manufacturer of ready-to-assemble
furniture to design U-Shape furniture. Finally, if you take the logo in its simplest form, it shows that BESTAR is there for its employees, for its
customers and for its consumers,“BESTAR is there for you (U)”.
Le nouveau logo illustre un personnage ouvert et rayonnant. Il évoque également le passé de BESTAR qui fut le premier manufacturier de meubles prêt-à-assembler
à concevoir des bureaux en forme de «U». Finalement, si on prend le logo sous sa forme la plus simple, il rappelle que BESTAR est présent pour ses employés,
ses clients et ses consommateurs.
El logotipo ilustra un personaje radiante y con los brazos abiertos. También evoca el pasado ya que Bestar fué el primer fabricante de muebles listos para ensamblar
con sus escritorios en forma de “U”. Finalmente en su forma màs simple, nos recuerda que Bestar está siempre ahí para sus empleados, sus clientes y sus consumidores.
“Bestar está ahí por USTED (U)”.
OUR FURNITURE IS GARANTEED FOR 10 YEARS. NO MATTER THE PROBLEM,
OUR CUSTOMER SERVICE IS THERE FOR YOU.
NOS MEUBLES SONT GARANTIS POUR 10 ANS. PEU IMPORTE LE PROBLÈME,
N’HÉSITEZ PAS À COMMUNIQUER AVEC NOTRE SERVICE À LA CLIENTÈLE.
NUESTROS MUEBLES TIENEN UNA GARANTIA DE 10 AÑOS. NO IMPORTA EL PROBLEMA,
COMUNIQUE CON NUESTRO SERVICIO À CLIENTE.
WWW.BESTAR.CA
USTEDESy
NOSOTROS

This manual suits for next models

2

Other Bestar Indoor Furnishing manuals

Bestar 40160-2163 User manual

Bestar

Bestar 40160-2163 User manual

Bestar 99820-1 User manual

Bestar

Bestar 99820-1 User manual

Bestar PA-2000-18 User manual

Bestar

Bestar PA-2000-18 User manual

Bestar 99420-1139 User manual

Bestar

Bestar 99420-1139 User manual

Bestar 182421 User manual

Bestar

Bestar 182421 User manual

Bestar 175800-110017 User manual

Bestar

Bestar 175800-110017 User manual

Bestar 93510-1139 User manual

Bestar

Bestar 93510-1139 User manual

Bestar 110810-1117 User manual

Bestar

Bestar 110810-1117 User manual

Bestar 45450-1118 User manual

Bestar

Bestar 45450-1118 User manual

Bestar 110620-1198 User manual

Bestar

Bestar 110620-1198 User manual

Bestar 44700-1152-1252 User manual

Bestar

Bestar 44700-1152-1252 User manual

Bestar 46410-1131-1231 User manual

Bestar

Bestar 46410-1131-1231 User manual

Bestar 17164-1117 User manual

Bestar

Bestar 17164-1117 User manual

Bestar 26160-2117-2217 User manual

Bestar

Bestar 26160-2117-2217 User manual

Bestar 60830-2163 User manual

Bestar

Bestar 60830-2163 User manual

Bestar 93626-1139 User manual

Bestar

Bestar 93626-1139 User manual

Bestar 26169-1 User manual

Bestar

Bestar 26169-1 User manual

Bestar 25184-1117-1217-1317 User manual

Bestar

Bestar 25184-1117-1217-1317 User manual

Bestar 65802-1117 User manual

Bestar

Bestar 65802-1117 User manual

Bestar 92700-2163 User manual

Bestar

Bestar 92700-2163 User manual

Bestar AC-1069-24 User manual

Bestar

Bestar AC-1069-24 User manual

Bestar 65722 User manual

Bestar

Bestar 65722 User manual

Bestar 85182-2 User manual

Bestar

Bestar 85182-2 User manual

Bestar T67610-1139 User manual

Bestar

Bestar T67610-1139 User manual

Popular Indoor Furnishing manuals by other brands

Style selections 143654W-DS user manual

Style selections

Style selections 143654W-DS user manual

hawa HAWA-Frontslide 60/matic-Telescopic 4 Planning and installation instructions

hawa

hawa HAWA-Frontslide 60/matic-Telescopic 4 Planning and installation instructions

Meble Furniture BROK104 manual

Meble Furniture

Meble Furniture BROK104 manual

Songmics VASAGLE RCR16/016 manual

Songmics

Songmics VASAGLE RCR16/016 manual

IKEA FORSKAFFA manual

IKEA

IKEA FORSKAFFA manual

Accentrics Home DS-2515-900-1 Assembly manual

Accentrics Home

Accentrics Home DS-2515-900-1 Assembly manual

Rauch M2593 Assembly instructions

Rauch

Rauch M2593 Assembly instructions

2K Furniture Designs CR2777 Assembly instructions

2K Furniture Designs

2K Furniture Designs CR2777 Assembly instructions

Monarch I 3525 Assembly instructions

Monarch

Monarch I 3525 Assembly instructions

Biohort Shelves Assembly manual

Biohort

Biohort Shelves Assembly manual

Safavieh Furniture Anisa BCH4600 quick start guide

Safavieh Furniture

Safavieh Furniture Anisa BCH4600 quick start guide

Next BRONX T55759 Assembly instructions

Next

Next BRONX T55759 Assembly instructions

Relita MAXI manual

Relita

Relita MAXI manual

LDI SAFCO Vue 3395 Assembly instructions

LDI

LDI SAFCO Vue 3395 Assembly instructions

Kis UP cabinet 009852 Assembly instruction

Kis

Kis UP cabinet 009852 Assembly instruction

Coalesse Archipelago Replacement

Coalesse

Coalesse Archipelago Replacement

Baumax DROP 1701 Assembling Instruction

Baumax

Baumax DROP 1701 Assembling Instruction

Mocka Oslo Buffet Assembly instructions

Mocka

Mocka Oslo Buffet Assembly instructions

manuals.online logo
manuals.online logoBrands
  • About & Mission
  • Contact us
  • Privacy Policy
  • Terms and Conditions

Copyright 2025 Manuals.Online. All Rights Reserved.