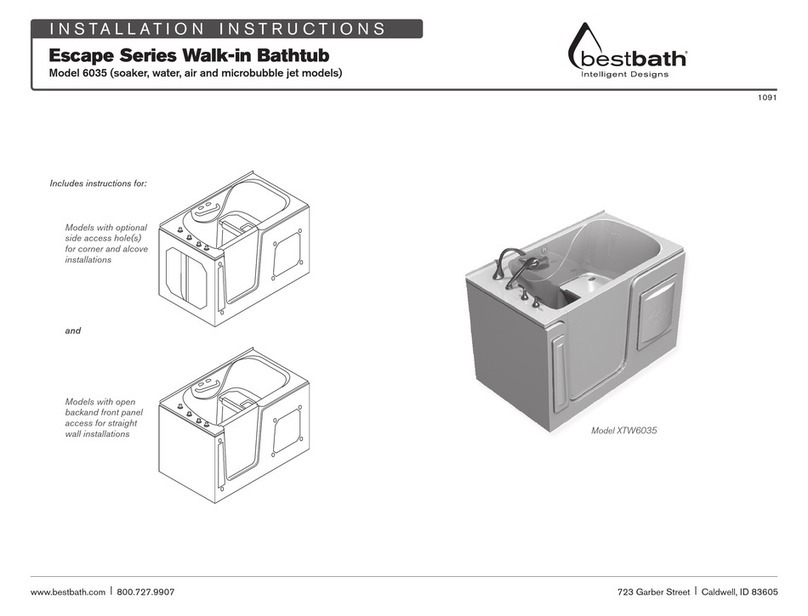
Bestbath BigE XTWJ6035 User manual

www.best-bath.com
INSTALLATION INSTRUCTIONS TO BE
REMOVED FOR USE BY THE OCCUPANT
To be provided to the Best Bath Systems Walk-In Tub owner/user.
FOR INDOOR USE ONLY
UTILISER A L'INTERIEUR SEULEMENT
The BigE model XTWJ6035
Walk-In Tub Installation and Operating Instructions
IMPORTANT
INSTALLATION and OPERATING
INSTRUCTIONS
BigE Walk-In Tub USA/CANADA 2010 Page 1 of 14

BigE Walk-In Tub USA/CANADA 2010 Page 2 of 14
The BigE model XTWJ6035
Walk-In Tub Installation and Operating Instructions
INSTRUCTIONS PERTAINING TO A RISK OF FIRE, ELECTRIC SHOCK OR INJURY TO PERSONS
IMPORTANT SAFETY INSTRUCTIONS
READ AND FOLLOW ALL INSTRUCTIONS
INSTRUCTIONS IMPORTANTES RELATIVES A LA SECURITE
LIRE ET SUIVRE TOUTES LES INSTRUCTIONS
WARNING: RISK OF ACCIDENTAL INJURY OR DROWNING; CHILDREN SHOULD NOT USE HYDROMASSAGE
BATHTUB WITHOUT ADULT SUPERVISION.
WARNING: RISK OF ACCIDENTAL INJURY OR DROWNING; DO NOT USE HYDROMASSAGE BATHTUB UNLESS
ALL SUCTION GUARDS ARE INSTALLED TO PREVENT BODY AND HAIR ENTRAPMENT.
WARNING: TO AVOID INJURY, EXERCISE CARE WHEN ENTERING OR EXITING HYDROMASSAGE BATHTUB.
WARNING: RISK OF ACCIDENTAL INJURY OR DROWNING; DO NOT USE DRUGS OR ALCOHOL BEFORE OR
DURING THE USE OF A HYDROMASSAGE BATHTUB EQUIPPED WITH HEATER TO AVOID UNCONSCIOUSNESS
AND POSSIBLE DROWNING.
WARNING: RISK OF FETAL INJURY; PREGNANT OR POSSIBLY PREGNANT WOMEN SHOULD CONSULT A PHYSICIAN
BEFORE USING A HYDROMASSAGE BATHTUB EQUIPPED WITH HEATER.
WARNING: RISK OF HYPERTHERMIA AND POSSIBLE DROWNING; DO NOT USE A HYDROMASSAGE BATHTUB
EQUIPPED WITH HEATER IMMEDIATELY FOLLOWING STRENUOUS EXERCISE.
WARNING: RISK OF ELECTRIC SHOCK; DO NOT PERMIT ELECTRIC APPLIANCES (SUCH AS A HAIR DRYER, LAMP,
TELEPHONE, RADIO, OR TELEVISION) WITHIN 1.5 M OF THIS HYDROMASSAGE BATHTUB.
CAUTION: TEST THE GROUND FAULT CIRCUIT INTERRUPTER PROTECTING THIS APPLIANCE PERIODICALLY IN
ACCORDANCE WITH THE MANUFACTURER'S INSTRUCTIONS.
WARNING: RISK OF HYPERTHERMIA AND POSSIBLE DROWNING;' WATER TEMPERATURE IN EXCESS OF 38°C MAY
BE INJURIOUS TO YOUR HEALTH. CHECK AND ADJUST WATER TEMPERATURE BEFORE USE.
WARNING: RISK OF HYPERTHERMIA; PEOPLE USING MEDICATIONS AND/OR HAVING AN ADVERSE MEDICAL HISTORY
SHOULD CONSULT A PHYSICIAN BEFORE USING A HYDROMASSAGE BATHTUB EQUIPPED WITH HEATER.
NOTE: NEVER DROP OR INSERT ANY OBJECT INTO ANY OPENING. DO NOT OPERATE THIS UNIT WITHOUT THE GUARD
OVER THE SUCTION FITTING
AVERTISSEMENT: RISQUE DE BLESSURE ET DE NOYADE. NE PAS LAISSER UN ENFANT UTILISER LA CUVE A REMOUS
EN L'ABSENCE D'UN ADULTE.
AVERTISSEMENT: RISQUE DE BLESSURE ET DE NOYADE. POUR EVITER LE HAPPEMENT DE MEMBRES OU DE CHEVEX,
NE PAS UTILISER LA CUVE A REMOUS SI LES PRISES D'ASPIRATION NE SONT PAS TOUTES MUNIES D'UNE GRILLE.
AVERTISSEMENT: POUR EVITER LES BLESSURES, USER DE PRUDENCE EN ENTRANT DANS LA CUVE A REMOUS
ET EN LA QUITTANT.
AVERTISSEMENT: RISQUE DE BLESSURE ET DE NOYADE. NE PAS PRENDRE DE MEDICAMENT NI CONSOMMER
D'ALCOOL LORSQU'ON UTILISE UNE CUVE A REMOUS CHAUFFEE OU AVANT D'Y ENTRER AFIN D'EVITER
L'EVANOUISSEMENT ET LE RISQUE DE NOYADE.
AVERTISSEMENT: DANGER POUR LE FOETUS. LES FEMMES ENCEINTES, QUE LEUR GROSSESSE SOIT CONFIRMEE
OU NON, DEVRAIENT CONSULTER UN MEDECIN AVANT D'UTILISER UNE CUVE A REMOUS CHAUFFEE.
AVERTISSEMENT: RISQUE D'HYPERTHERMIE ET DE NOYADE. NE PAS UTILISER UNE CUVE A REMOUS CHAUFFEE
APRES UN EXERCICE INTENSE.
AVERTISSEMENT: RISQUE DE CHOC ELECTRIQUE. NE PAS PLACER D'APPAREILS ELECTRIQUES (LUMINAIRE,
TÉLÉPHONE, RADIO, TELEVISEUR, ETC.) A MOINS DE 1,5 M DE CETTE CUVE A REMOUS.
ATTENTION: VERIFIER REGULIEREMENT LE FONCTIONNEMENT DU DISJONCTEUR DE FUITE A LA TERRE CONFORMENT
AUX INSTRUCTIONS DU FABRICANT.
AVERTISSEMENT: RISQUE D'HYPERTHERMIE ET DE NOYADE. UNE TEMPERATURE D'EAU SUPERIEURE A 38°C
PEUT PRESENTER UN RISQUE POUR LA SANTE. VERIFIER ET REGLER LA TEMPERATURE DE L'EAU AVANT
D'UTILITISER LA CAVE.
AVERTISSEMENT: RISQUE D'HYPERTHERMIE. LES PERSONNES QUI PRENNENT DES MEDICAMENTS OU QUI ONT DES
PROBLEMES DE SANTE DEVRAIENT CONSULTER UN MEDECIN AVANT D'UTILISER UNE CUVE A REMOUS CHAUFFEE.

This hydro massage bathtub may be equipped with a water mixing valve on which
THE DESIRED SETTINGS ARE TO BE COMPLETED BY THE INSTALLER.
Resetting or tampering with the valve mechanism may lead to serious injury.
See Temperature Setting Instructions supplied with the valves.
INSTALLATION INSTRUCTIONS
Please refer to pages 12 - 14 of this manual for installation schematics.
WARNING: When using electrical products, basic precautions should always be followed,
including the following:
1. DANGER: RISK OF ELECTRIC SHOCK. The unit MUST be connected only to a supply circuit that is
protected by a ground-fault circuit-interrupter (GFCI). Such a GFCI should be provided by the installer
and should be tested on a routine basis. To test the GFCI, push the test button. The GFCI should
interrupt power. Push the reset button. Power should be restored. If the GFCI fails to operate in this
manner, the GFCI is defective. If the GFCI interrupts power to the bathtub without the test button
being pushed, a ground current is flowing, indicating the possibility of an electric shock. Do not use
this hydromassage bathtub. Disconnect the hydromassage bathtub and have the problem corrected
by a qualified service representative before using.
2. Grounding is required. The unit should be installed by a qualified service representative and
grounded.
3. (For built-in and custom units) Install to permit access for servicing.
4. You must have at least one 15 amp, 120 volt circuit available.
If you have the optional secondary air or water jet system, you must have two 15 amp 120 volt circuits.
5. The power cord MUST be plugged into the appropriate receptacle behind the unit skirting/access
panels.
6. A qualified service technician must perform all electrical wiring, service and repair in accordance
with all applicable local and national codes. Failure to do so may pose an electrical hazard.
7. Before making any electrical connections, make certain that the electrical power is turned OFF at
the breaker, and take measures to ensure that it CANNOT accidentally be turned on again.
8. Building materials and wiring should be routed away from the blower or heat producing components
of the system to prevent the risk of heat damage or fire.
9. For rough dimensions, see Installation Schematics on pages 12-14.
10. Make certain you have a flat surface that can support the combined weight of the tub, the water and
the user on the leveling feet.
11. The plumbing connections, hot, cold and the drain should be installed to local codes.
NOTE: The door drain assembly is attached at one end at the factory. Depending on the type of
waste/overflow the tub came with: either a brass saddle Tee at the other end of the tubing or a piece
of PVC pipe. The saddle Tee is to be installed between the drain shoe and the Tee so that the hole
in the short brass tubing and the saddle Tee are aligned. Do not over tighten the screws.
The BigE model XTWJ6035
Walk-In Tub Installation and Operating Instructions
BigE Walk-In Tub USA/CANADA 2010 Page 3 of 14
See illustration sheet on page 11 for a schematic of these instructions.
SAVE THESE INSTRUCTIONS. CONSERVER CES INSTRUCTIONS.
RECEIVING AND UNCRATING
1. Inspect the packaging for damage that looks like it may affect the contents before accepting it from
the carrier and note the damage on the freight bill.
2. Uncrate the tub, inspect it for damage. If damage is found, file a claim with the carrier immediately.
3. Remove the screws that hold the tub to the pallet.
4. The access panels are held on by magnets. Remove these by pulling at the finger cut-out at the
bottom of the panel and put them in a safe place until the installation is complete.

b. Follow all safety requirements as referenced under IMPORTANT SAFETY INSTRUCTIONS
on Page 2.
3. After the area is prepared and the floor is clean and level, the tub can be moved into place.
PREPARING THE AREA
1. Remove the existing tub and the wall and floor materials as required.
2. Have a licensed electrician install the power supply per the requirements of the National Electrical
Code and the local authority having jurisdiction as shown on pages 12 & 13.
USA - a. If the unit is equipped with only one pump or blower, it requires one circuit rated
15Amp/120Volt which is properly grounded and protected by a suitable
“Ground-Fault Circuit-Interrupter” (GFCI) and a circuit breaker.
b. If the unit is equipped with both a pump and a blower, each of these requires a circuit
rated 15Amp/120Volt or one 30Amp/120Volt,properly grounded and protected by a
suitable “Ground-Fault Circuit-Interrupter” (GFCI) and a circuit breaker.
CANADA - a. If the unit is equipped with only one pump or blower, it requires one circuit rated not
more than 15Amp/125Volt which is properly grounded and protected by a suitable
Ground Fault Circuit Interruptor (GFCI) and a circuit breaker.
CONNECT ONLY TO A CIRCUIT PROTECTED BY A CLASS A GROUND FAULT CIRCUIT INTERRUPTER;
CONNECT ONLY TO A BRANCH CIRCUIT PROTECTED BY AN OVERCURRENT PROTECTION DEVICE
RATED NOT MORE THAN 15 A.
BRANCHER SEULEMENT À UNE DÉRIVATION PROTÉGÉE PAR UN DISJONCTEUR DE FUITE À LA
TERRE DE CLASSE A; BRANCHER À UNE DÉRIVATION PROTÉGÉE PAR UN DISPOSITIF DE
PROTECTION CONTRE LES SURINTENSITÉS D'AU PLUS 15 A.
b. If the unit is equipped with both a pump and a blower, a 30Amp/125Volt properly
grounded and circuit breaker-protected line must be hard-wired into the factory
installed junction box.
CONNECT ONLY TO A CIRCUIT PROTECTED BY A CLASS A GROUND FAULT CIRCUIT INTERRUPTER;
CONNECT ONLY TO A BRANCH CIRCUIT PROTECTED BY AN OVERCURRENT PROTECTION DEVICE
RATED NOT MORE THAN 30 A.
BRANCHER SEULEMENT À UNE DÉRIVATION PROTÉGÉE PAR UN DISJONCTEUR DE FUITE À LA
TERRE DE CLASSE A; BRANCHER À UNE DÉRIVATION PROTÉGÉE PAR UN DISPOSITIF DE
PROTECTION CONTRE LES SURINTENSITÉS D'AU PLUS 30 A.
INSTALL THIS UNIT IN ACCORDANCE WITH THE CANADIAN ELECTRICAL CODE, PART 1
INSTALLER CONFORMEMENT AU CODE CANADIEN DE L'ELECTRICITE, PREMIERE PARTIE
PREPARING THE TUB
1. Install the plumbing rough-in on the deck (unless factory installed). For easier access to plumbing,
an additional access hole may be cut out of the side in an ALCOVE or CORNER installation:
- See pages 12-13 for cutting dimension limitations. Use a skillsaw to make the cut. Adjust
the foot of the saw to the thickness of the material (approx. 5/8" to 1") to ensure that you
don't harm any existing plumbing (if factory/already installed).
2. For ALCOVE and CORNER installations, you must attach the flange(s) to the side(s) of the tub on
any side that will be against framing.
a. Lay a bead of silicone on either the flange or on the tub where the flange will be attached.
b. Next, screw the nailing flange(s) to the tub.
c. Place the foil tape on the outside corner to continue the back nailing flange.
d. Lay one final bead of silicone to the joint of the tub and nailing flange.
3. Install the waste/overflow assembly and connect the door drain fitting to the drain.
The BigE model XTWJ6035
Walk-In Tub Installation and Operating Instructions
BigE Walk-In Tub USA/CANADA 2010 Page 4 of 14

4. Have a licensed plumber prepare the hot and cold water supply and the connection to the drain
plumbing so that the final connections can be made through an access opening with the tub in its
final location.
5. For “reverse” plumbing, where the tub is flipped to the opposite hand to enable use where a toilet
will be in the way of the tub door, the drain plumbing may be run under the tub if necessary.
6. Fill the tub and after 5 minutes, check for leaks at all fittings, connections, door hinge and door seal.
7. Turn the pump and/or blower on with the keypads inside the tub and let it run for at least 5 minutes.
Check for leaks while the pump/blower is running and again after it has been turned off. Check by
hand where a visual check is not possible.
8. Adjust the temperature of the fill water to a level safe for any physical limitations of the end user.
9. Attach the cable/lanyard to the magnet's screw and nut on the inside of access hole to meet code.
10. Install the access panels by guiding the black plastic boss on the panel to the center of the magnet.
Regular care of the tub will keep it clean and working at its best. This care should include the tub, the trim
and fittings.
No maintenance is required for the optional air blower and/or water pump.
CARE OF YOUR WALK-IN TUB
POST-INSTALLATION CLEANING
WARNING:
1. Do not, under any circumstances use wire brushes, metal sponges, knives, steel wool or
scouring pads on any part of the tub.
2. Do not, under any circumstances use powerful solvent such as acetone, lacquer, paint thinner,
benzene or abrasive cleanser on any part of the tub.
3. Do not use ammonia or chlorine-based agents on any plated surface as they will deplate the
surface and void the warranty on the plated finish.
For a one time cleaning of the tub after installation, proceed as follows:
1. Remove any plaster and/or dabs of paint that have adhered to the surface by gently scraping them off
with the sharpened edge of a suitable tool that made of a material that won't scratch the surface such
as wood or plastic.
2. Oil or grease spots can be lifted with denatured alcohol.
3. Use liquid, non-bleach dishwashing detergent to remove any construction residue.
4. Lightly rubbing with a liquid cleaning compound (such as polishing compound used for cars),
followed by a light application of liquid or paste wax, will restore luster to any dulled surface.
5. Clean plated surfaces with warm water only.
The BigE model XTWJ6035
Walk-In Tub Installation and Operating Instructions
BigE Walk-In Tub USA/CANADA 2010 Page 5 of 14
REGULAR CLEANING
Because of the detrimental effects that mineral deposits, soap scum and bacteria have on finished
surfaces, it is important to keep your bathtub and the fixtures clean on a regular basis. The best way to
counteract the soiling and often time corrosive action of these residues is to prevent water from remaining
on any finished surface.

USER MAINTENANCE INSTRUCTIONS
There are serviceable parts in this system. All service, repairs and electrical wiring must be performed by a
qualified service technician in accordance with all applicable local and national codes.
OPERATING INSTRUCTIONS FOR YOUR WALK-IN TUB
Your Walk-In Tub was specifically designed to deliver dependable operation. All Walk-In Tub
hydro massage system fittings are manufactured of strong, highly inert brass and PVC materials to prevent
water discoloration and ensure long life. The electrical components also conform to all of the applicable
safety standards. Each Walk-In Tub system is thoroughly tested and inspected before leaving the
factory to ensure your continued enjoyment and peace of mind.
An automatic drying cycle that lasts one minute will start 20 minutes after the blower is turned off.
There is a spring check valve at each air jet, but should water somehow still get in the lines, particularly
when showering in the tub, this drying cycle will blow it out.
Do not add any liquids or powders to the water, especially foamy, bubbly or oily types. Do not
use the tub with the hydro massage system activated if you have taken alcohol, drugs or medication,
which can greatly increase the risk of fatal hyperthermia.
Limit your first session to no more than 10 minutes. Use of the tub too long at an excessively
warm temperature for your body may induce hyperthermia.
Hyperthermia occurs when the internal temperature of the body reaches a level above the normal
body temperature of 37°C (98.6°F). This level may vary by individuals and conditions. Consult your doctor
regarding a safe temperature for your use of the tub. The symptoms of hyperthermia include in the internal
temperature of the body, dizziness, lethargy, drowsiness and fainting. The effects of hyperthermia are as follows:
1. Failure to perceive heat
2. Failure to recognize the need to exit the hydro massage
3. Unawareness of impending hazard
4. Fetal damage in pregnant women
5. Physical inability to exit the Walk-In tub
6. Unconsciousness resulting in the danger of drowning
For regular maintenance-type cleaning, proceed as follows once a week:
1. Check for stubborn spots. Oily or greasy spots can be lifted with denatured alcohol.
2. In order to keep the seal and the door jamb clean and free of dirt or debris of any kind, it is very
important that the door jamb and the seal to be cleaned with a mild dishwashing detergent and
warm water using a soft cloth.
3. Wash all exposed surfaces of the bathtub.
4. Rinse and wipe dry.
If your tub is equipped with the water jet system, then:
1. Once a month, clean the entire system using liquid automatic dishwashing detergent, which will
remove body and bath oils, soap residue and other sources that can contribute to bacterial
growth in the hydro massage system.
2. Fill the tub to one inch above the highest jet and add one spoonful of liquid automatic
dishwashing detergent, turn on the water jet system for 15 minutes, and then drain the tub.
3. Now refill the tub with just fresh water and run the system for another 15 minutes to rinse out the
system, again drain the tub and wipe dry.
The BigE model XTWJ6035
Walk-In Tub Installation and Operating Instructions
BigE Walk-In Tub USA/CANADA 2010 Page 6 of 14
If you are pregnant, or you think you may be pregnant, or if you are under a doctor’s care, consult your
physician for guidelines as to the appropriate water temperature and the duration of each use.

IMPORTANT INSTRUCTIONS
CAUTION: DO NOT OPERATE THE HYDRO MASSAGE SYSTEM WITH ANY PARTS OR FITTINGS REMOVED.
1. Use this unit only for its intended use as described in the manual. Do not use attachments not
recommended by the manufacturer. Any improper installation or misuse of the equipment may
result in injury to user and will void the warranty.
2. To avoid injury, exercise care when entering or exiting the hydro massage bathtub as the floor
may be slippery.
3. Do not use the door as support while entering or exiting the hydro massage bathtub, as the door
may swing suddenly with applied weight.
4. Because of the risk of hyperthermia and drowning, do not use the hydro massage bathtub after
strenuous exercise.
5. Because of the risk of electric shock, no appliances should be within 1.5 meters (5 feet) of
the bathtub, i.e., hair dryer, lamp, TV, radio, etc.
6. Do not open door until all water has been drained from the tub.
OPERATING YOUR WALK-IN BATH TUB
1. If the seat is not already out of the way, fold it in the up position before you enter the tub.
2. Enter the tub, turn around and latch the door securely. The downward motion of the door lever
locks and seals the door.
3. Fold down the seat and sit down.
4. Turn the drain valve handle (the cover of the overflow) all the way to the left (counter clock wise)
to close the drain.
5. Fill to the water level that is comfortable for you, but at least one inch above the highest water jet.
6. Read and follow the information regarding hyperthermia. However, under no circumstances use a
bathtub with water above 40°C (104°F).
7. To operate the water jets, press the on buttons on the key pad on the side of the tub with the on
and off buttons.
8. To increase or decrease the pressure from all the jets, turn the air volume control knob to the
open or closed position to allow more or less air to be drawn in to the jets.
9. To increase the pressure from an individual jet, turn the face of the jet counter-clock wise to allow
more water to the jet.
10. To operate the (optional) air jets, press the buttons on the three button key pad on the side of the
tub in the following ways:
on/off Button: The blower turns on and off.
+/- Up/down Button: The speed of the blower increases/decreases until the button is released.
+-Pulsation button:
a. The speed of the blower varies gradually from low to high and back to low.
b. The blower turns off and on, then off again.
11. The blower returns to maximum speed.
12. Unless the tub is in use, always leave the door open to maintain the integrity of the door seal.
The BigE model XTWJ6035
Walk-In Tub Installation and Operating Instructions
BigE Walk-In Tub USA/CANADA 2010 Page 7 of 14

DOOR SEAL AND DOOR LEAKS
If a small leak has been detected around the Walk-In Tub door, check closely for any accumulation of dirt
or debris. Any small collection of either on the door seal or where the seal comes in contact with the door
jamb could result in a minor leak through the door seal:
1. Before filling the tub with water, be sure to wipe down the door seal using a damp soft cloth, as well
as the surface on the door jamb that will come in contact with the seal.
2. Once the above surfaces have been wiped clean, be sure that when closing the door, the latch is
completely locked down.
NOTE: When draining the water from the tub, be sure that the door latch is in the locked position
(forward). If the latch is not secure when draining the tub, as the water level lowers, the pressure
on the door will be reduced, thus increasing the possibility of a leak around the door.
3. It is especially IMPORTANT to wipe down the door seal and door jamb after each use in order to
maintain the integrity of the seal.
NOTE: If there are any contaminates, i.e. dirt, dust, sand, etc. or the buildup of soap scum, calcium,
etc. on the seal and/or the door jamb it will have an effect on the integrity of the water seal.
4. If the above steps fail to stop any minor leaks, you may adjust the door latch by using the supplied
1/8” hex key. Please refer to page 10 of this manual for a schematic of the door latch adjustment
procedure.
The BigE model XTWJ6035
Walk-In Tub Installation and Operating Instructions
BigE Walk-In Tub USA/CANADA 2010 Page 8 of 14

The BigE model XTWJ6035
Walk-In Tub Installation and Operating Instructions
BigE Walk-In Tub USA/CANADA 2010 Page 9 of 14
LIMITEDLIFETIMEWARRANTY
Best Bath Systems, Inc. warrants to the original consumer that Best Bath’s Walk-In Bath
Tub fiberglass reinforced products will be free from manufacturing defects for as long as
the original consumer occupies the residence in which the bathing unit is installed.
If a manufacturing defect should become apparent, Best Bath Systems, Inc. following
investigation and verification of claim, will either repair or replace the item at our
discretion. The Best Bath warranty obligation in regard to equipment and accessories is
limited to any warranty extended to Best Bath Systems, Inc. by the manufacturer of the
equipment or accessories.
Limits to Coverage
When products are shipped by common carrier, the responsibility for the unit’s
safe delivery is assumed by the carrier. It is the responsibility of the consignee to
inspect the container and report any damage to the freight company within their
allotted time and to Best Bath Systems Customer Service within five (5) business
days of delivery.
Abusive treatment, misuse, normal wear and tear, accidents, fire, repairs or
alterations not authorized in writing by Best Bath Systems, theft, lost materials,
improper installation, damage to product due to shipping, storage or handling,
reactions caused by accessories or cleaning materials, mis-drilled holes, negligence,
construction damage, punctures from dropped items into the tub and other
non-manufacturer issues are not covered by this warranty.
The use of permanent non –slip type appliqués or rubber bath mats that are left
in place after use for over 24 hours may result in blistering of the surface which is
not covered under our warranty.
If a replacement of the warranted item is determined to be necessary, this
warranty does not cover labor costs involved in demolition and removal of item or
installation of the replacement.
Safe bathing for people of all abilities
www.best-bath.com
Best Bath Systems will under no circumstances be liable for water damage to the
house and furnishings in connection with any bathing unit. It is the responsibility
of the purchaser/installer to inspect and test the unit upon receipt and installation.

The BigE model XTWJ6035
Walk-In Tub Installation and Operating Instructions
BigE Walk-In Tub USA/CANADA 2010 Page 10 of 14
Filing a Claim
To file a claim, contact Best Bath Systems Customer Service/Warranty Department by
phone, email, or mail.
Please contact:
1. Name, address, email and phone number
2. Sales Order number, Invoice number, Purchase Order from the original
customer, or some documentation that reflects original date of purchase
3. Description of damage and repair requested
State laws relating to this warranty
Some states laws prohibit limitations on warranties. In any case where a portion of this
warranty is found to be not legal or conflicting with any state law, that portion of this
warranty is voided but all other portions remain valid.
Modifications to this Warranty
This document supersedes all previous warranties written, verbal, or implied issued by
Best Bath Systems, Inc., Best Bath Systems, Inc. reserves the right to modify or change
this warranty in its entirety at any time without prior notification. Effective date of this
warranty is 06/01/2009.
The following information is necessary to process your claim:
Phone: (208) 433-6650 Toll free: (866) 433-6650
Fax: (208) 333-8657 Toll free: (866) 333-8657
National Customer Service Supervisor
Best Bath Systems, Inc.
723 Garber St.
Caldwell, ID 83605

The BigE model XTWJ6035
Walk-In Tub Installation and Operating Instructions
BigE Walk-In Tub USA/CANADA 2010 Page 11 of 14
FLOW
TUB DRAIN DOOR DRAIN
Door Drain Venturi Instructions
Door Latch Adjustment
Set screw (1/8" Allen wrench)
To adjust pressure of door on door seal:
-Loosen set screw with 1/8" Allen wrench
-Rotate lever as required for more or less pressure
-Tighten set screw
CHECK VALVE

ALCOVE
ONLY
BigE Walk-In Tub USA/CANADA 2010 Page 12 of 14
PREPARING
THE AREA
PREPARE THE DRAIN.
MIN. 5" x 5" HOLE FOR
DRAIN PIPE
PREPARE THE HOT AND
COLD WATER SUPPLY
FINAL DRAIN-
AND HOT/COLD
CONNECTION
MAGNET
CHECK THAT
THE TUB IS LEVEL
FINAL
INSTALLATION LEVEL THE FLOOR TO ENSURE THAT
ALL FIVE LEVELING FEET WILL TOUCH
PREPARING
THE TUB
Installation schematic for BigE walk-in tub
for ALCOVE installation (with add-on flanges)
INSTALL THE VALVE ROUGH-IN
(UNLESS FACTORY INSTALLED)
15"
ATTACH THE FLANGES BY FIRST LAYING A BEAD OF SILICONE ON THE
FLANGE OR ON THE TUB WHERE THE FLANGE WILL GO. NEXT, SCREW
THE NAILING FLANGES TO TUB. PLACE THE FOIL TAPE ON THE OUTSIDE
CORNER TO CONTINUE THE BACK NAILING FLANGE AND LAY ONE FINAL
BEAD OF SILICONE TO JOINT OF THE TUB AND NAILING FLANGE.
ACCESS PANELS MAY BE REMOVED TO PREVENT DAMAGE AND MAKE HANDLING DURING INSTALLATION MORE CONVENIENT.
MAKE SURE TO KEEP THEM IN A SAFE PLACE TO AVOID DAMAGE, AS THEY WILL NEED TO BE REATTACHED AFTER FINAL INSTALLATION.
1
ATTACH THE CABLE/LANYARD
TO MAGNET SCREW AND NUT
TO MEET CODE
4
FOIL TAPE
SCREW BACK NAILING
FLANGE TO THE STUDS
2
10"
10"
3
1
4
3
2
1
3
2
INSTALL THE
WASTE/OVERFLOW
AND DOOR DRAIN
FITTING
USA - 120V/15A GFCI
OUTLETS REQUIRED IN
THIS AREA
CANADA - 120V/15A GFCI
OUTLET OR JUNCTION
BOX IN THIS AREA PER
CSA CODE C22.2 No. 218.2
14"
18"

6"
BigE Walk-In Tub USA/CANADA 2010 Page 13 of 14
Installation schematic for BigE walk-in tub
for CORNER installation (with add-on flange)
PREPARE THE DRAIN.
MIN. 5" x 5" HOLE FOR
DRAIN PIPE PREPARE THE HOT AND
COLD WATER SUPPLY
FINAL DRAIN-
AND HOT/COLD
CONNECTION
MAGNET
CHECK THAT
THE TUB IS LEVEL
FINAL
INSTALLATION LEVEL THE FLOOR TO ENSURE THAT
ALL FIVE LEVELING FEET WILL TOUCH
PREPARING
THE TUB
INSTALL THE VALVE ROUGH-IN
(UNLESS FACTORY INSTALLED)
INSTALL THE
WASTE/OVERFLOW
AND DOOR DRAIN
FITTING
15"
ATTACH THE FLANGE BY FIRST LAYING A BEAD OF SILICONE ON THE
FLANGE OR ON THE TUB WHERE THE FLANGE WILL GO. NEXT, SCREW
THE NAILING FLANGE TO TUB. PLACE THE FOIL TAPE ON THE OUTSIDE
CORNER TO CONTINUE THE BACK NAILING FLANGE AND LAY ONE FINAL
BEAD OF SILICONE TO THE JOINT OF THE TUB AND NAILING FLANGE.
ACCESS PANELS MAY BE REMOVED TO PREVENT DAMAGE AND MAKE HANDLING DURING INSTALLATION MORE CONVENIENT.
MAKE SURE TO KEEP THEM IN A SAFE PLACE TO AVOID DAMAGE, AS THEY WILL NEED TO BE REATTACHED AFTER FINAL INSTALLATION.
1
2
3
1
2
3
4
1
3
ATTACH THE CABLE/LANYARD
TO MAGNET SCREW AND NUT
TO MEET CODE
4
FOIL TAPE
SCREW BACK NAILING
FLANGE TO THE STUDS
2CORNER
ONLY
42"
12"
PREPARING
THE AREA
FRONT VIEW DETAIL
TOP VIEW DETAIL
10"
5-1/2"
MUST ELEVATE
1-1/2" OFF OF
FINISHED FLOOR
12" TO BACK WALL
42"
TO END WALL
POWER SUPPLY
PLACEMENT DETAILS
USA - 120V/15A GFCI
OUTLETS REQUIRED IN
THIS AREA
CANADA - 120V/15A GFCI
OUTLET OR JUNCTION
BOX IN THIS AREA PER
CSA CODE C22.2 No. 218.2

STRAIGHT
WALL
ONLY
BigE Walk-In Tub USA/CANADA 2010 Page 14 of 14
Installation schematic for BigE walk-in tub
for STRAIGHT WALL installation
PREPARE THE DRAIN.
MIN. 5" x 5" HOLE FOR
DRAIN PIPE
FINAL DRAIN-
AND HOT/COLD
CONNECTION
MAGNET
CHECK THAT
THE TUB IS LEVEL
FINAL
INSTALLATION
PREPARING
THE TUB
INSTALL THE VALVE ROUGH-IN
(UNLESS FACTORY INSTALLED)
INSTALL THE WASTE/OVERFLOW
AND DOOR DRAIN FITTING THROUGH
THE PLUMBING ACCESS PANEL IN THE
FRONT OR THROUGH THE OPEN BACK
15"
ACCESS PANELS MAY BE REMOVED TO PREVENT DAMAGE AND MAKE HANDLING DURING INSTALLATION MORE CONVENIENT.
MAKE SURE TO KEEP THEM IN A SAFE PLACE TO AVOID DAMAGE, AS THEY WILL NEED TO BE REATTACHED AFTER FINAL INSTALLATION.
1
2
2
1
3
ATTACH THE CABLE/LANYARD
TO MAGNET SCREW AND NUT
TO MEET CODE
4
SCREW BACK NAILING
FLANGE TO THE STUDS
2
6"
PREPARE THE HOT AND
COLD WATER SUPPLY
LEVEL THE FLOOR TO ENSURE THAT
ALL FIVE LEVELING FEET WILL TOUCH
1
3
4
42"
12"
PREPARING
THE AREA
FRONT VIEW DETAIL
TOP VIEW DETAIL
10"
5-1/2"
MUST ELEVATE
1-1/2" OFF OF
FINISHED FLOOR
12" TO BACK WALL
42"
TO PLBG END
POWER SUPPLY
PLACEMENT DETAILS
USA - 120V/15A GFCI
OUTLETS REQUIRED IN
THIS AREA
CANADA - 120V/15A GFCI
OUTLET OR JUNCTION
BOX IN THIS AREA PER
CSA CODE C22.2 No. 218.2
Table of contents
Other Bestbath Bathtub manuals
Popular Bathtub manuals by other brands
Kohler
Kohler STERLING 71100120-96 Installation and care guide

Aquatica Digital
Aquatica Digital Aquastone Purescape 748 Installation & Care Manual
ABACUS
ABACUS Pisces Information Packet
Universal Tubs
Universal Tubs 3060SI operating instructions
KARAG
KARAG K1213 Manual Installation
Jacuzzi
Jacuzzi J.Touch Use & maintenance
