BETEX iDuctor 1 User manual
© BEGA International BV - 20.11.R01
USER MANUAL
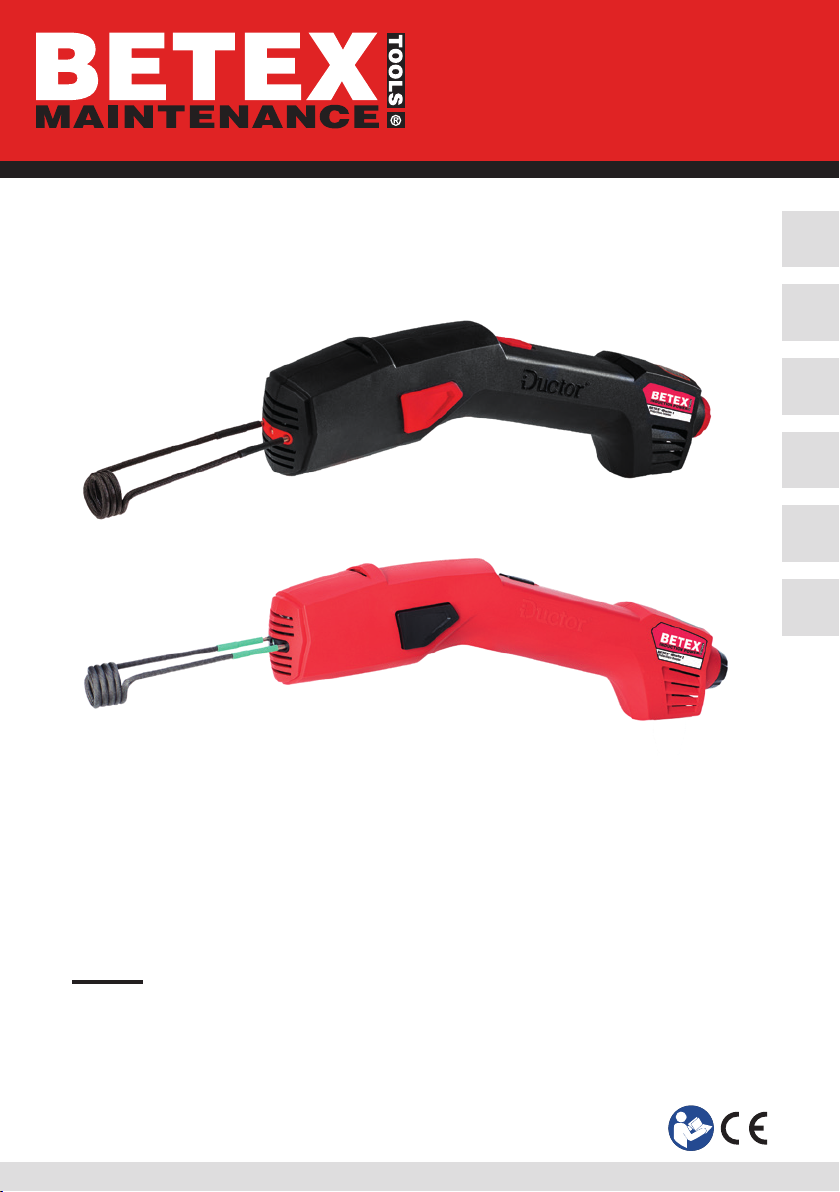
Hand-held induction heater
BETEX® iDuctor 1, 1200W
BETEX® iDuctor 2, 2300W
ES
NL
FR
DE
EN
IT

2© BETEX Tools
Special Awards

© BETEX Tools 3
Read the manual and safety instructions before operating the device
Check all parts for possible damage during transportation. In case of damage, please contact
the carrier immediately. Because our products are continuously subject to improvements, we
reserve the right to make changes.
Vor inbetriebnahme die betriebsanleitung und die sicherheitsvorschriften
aufmerksam lesen
Alle teile auf möglichen transportschaden kontrollieren. Eventuelle schäden umgehend
der spedition melden. Da unsere produkte ständig verbessert werden, behalten wir uns
änderungen vor.
Antes de la primera puesta en marcha, lea atentamente el manual de uso y las
instrucciones de seguridad
Revise todos los elementos para detectar posibles daños sufridos durante el transporte.
En caso de observar algún daño, avise inmediatamente a la empresa de transporte. Debido a
que nuestros productos están continuamente sujetos a mejoras, nos reservamos el derecho
de realizar cambios.
Lisez le mode d’emploi et les consignes de sécurité avant la mise en service
Vériez pour l’ensemble des pièces que celles-ci n’ont pas été endommagées pendant le
transport. En cas de dommages, avertissez immédiatement le transporteur. Nos produits
étant constamment améliorés, nous nous réservons le droit d’apporter des modications.
Lees voor ingebruikname eerst de gebruiksaanwijzing en de veiligheidsvoorschriften
Controleer alle onderdelen op mogelijke transportschade. Waarschuw bij schade
onmiddellijk het transportbedrijf. Omdat onze producten voortdurend worden verbeterd,
behouden wij ons het recht voor om wijzigingen aan te brengen.
Address Bega International BV
Schorsweg 15
8171 ME Vaassen
The Netherlands
Tel +31 (0) 578 668000
Web www.begaspecialtools.com
Mail [email protected]
ISO ISO 9001: 2015
Contact
Warning!

4© BETEX Tools
Contents
1. Introduction ���������������������������������������������������������������������������������������������������������������������������������������� 5
1.1 Items supplied ........................................................................................................................................... 5
1.2 Optional inductors .................................................................................................................................... 5
2. Product specications BETEX iDuctor 1 and iDuctor 2 ��������������������������������������������������������������� 6
2.1 Power supply ............................................................................................................................................. 6
2.2 Working environment .............................................................................................................................. 6
3. Instructions ����������������������������������������������������������������������������������������������������������������������������������������� 6
3.1 Pictograms ................................................................................................................................................. 6
3.2 Users ............................................................................................................................................................ 7
3.4 Rotary switch and push button ............................................................................................................. 8
3.5 LED lighting and fan ................................................................................................................................. 8
3.6 Error messages ......................................................................................................................................... 9
3.7 Overheating protection ........................................................................................................................... 9
3.8 Connection safety feature ....................................................................................................................... 9
3.9 Mains current protection ........................................................................................................................ 9
3.10 Voltage and current protection ........................................................................................................... 9
3.11 Maintenance ............................................................................................................................................ 9
4. Certicate of conformity ���������������������������������������������������������������������������������������������������������������� 10
5. Patents and registration ���������������������������������������������������������������������������������������������������������������� 11
6. Accessories ���������������������������������������������������������������������������������������������������������������������������������������� 12
7. Guarantee and repairs ������������������������������������������������������������������������������������������������������������������� 13
ENGLISH

© BETEX Tools 5
EN
NL
FR
ES
DE
IT
1. Introduction
The BETEX iDuctor 1 and iDuctor 2 uses the phenomenon of induction to heat magnetisable
metal components such as nuts. Whether a particular material can be heated can be
determined by experimentation. A set of eight dierent induction spirals, one U-coil and a
exible induction coil are available to allow heating of a wide range of components: small
drive components, bearings, rings, housings, pipes, nuts, bolts, small surfaces.
Read this user manual rst before you use the BETEX iDuctor!
1�1 Items supplied
The BETEX iDuctor is supplied as a complete set in a robust box with the following contents:
• iDuctor
• 1 exible inductor, 2 mtr
• heat resistant gloves (150°C)
• a mains cable with IEC Lock
• user manual
• safety data sheet
1�2 Optional inductors
• set of 9 inductors: 8 spirals, 1 U-coil
• exible inductor: 1,1 mtr
• ID-pad at surface inductor
• heat resistant gloves 300°C
6© BETEX Tools
2. Product specications BETEX iDuctor 1 and iDuctor 2
2�1 Power supply
• voltage: 230VAC +/- 10%
• frequency: 50 – 60 Hz
• output: Betex iDuctor 1, 1200W / iDuctor 2, 2300W
• the use of a generator is permissible if it is able to deliver adequate power and the
output delivers clean sinus form voltage in the correct frequency range (50 - 60 Hz).
• safety class: Class I
WARNING!
The unit must always be connected to a supply network with a fuse rated
at at least 10A and at most 16A. The unit does not have an internal fuse. An
earth bonded wall socket should always be used on safety grounds (Class I).
WARNING!
The unit does not feature an on/o switch, as soon as the plug is inserted in
the socket the unit will be powered up.
2�2 Working environment
• temperature: -5°C to +40°C
• humidity: 0 – 90%, non-condensing
• IP 20
• no higher than 2,000 metres above sea level
3. Instructions
3�1 Pictograms
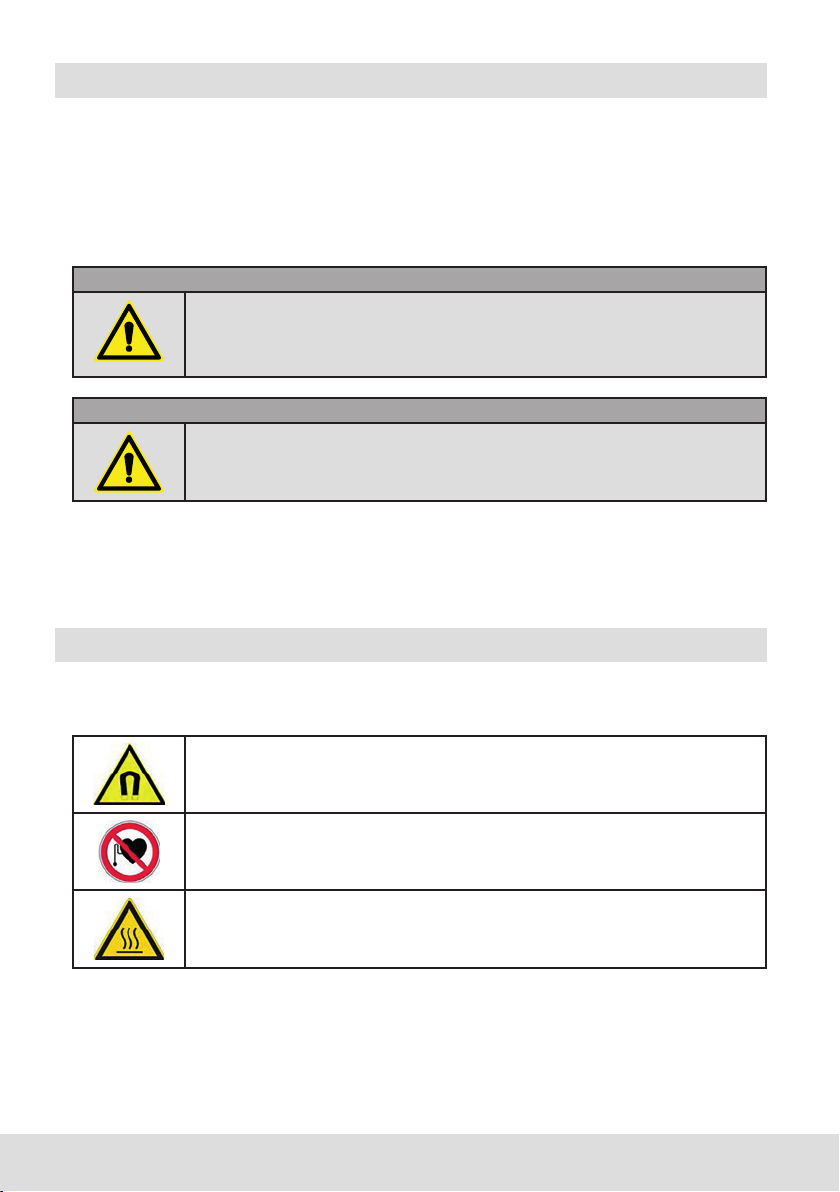
The pictograms appearing on the iDuctor have the following meanings:
Caution! This equipment generates a magnetic eld which can erase
magnetic data from credit cards and the like.
Caution!
Not to be used by persons with a pacemaker.
Caution!
This equipment includes components which may reach high temperatures.
© BETEX Tools 7
EN
NL
FR
ES
DE
IT
3�2 Users
CAUTION!
The iDuctor must not be used by persons in the following groups:
• users with a pacemaker;
• users with psychiatric or physical impairments whose use of the
equipment would present a hazard to the user or their environment;
• users below 16 years of age without the supervision of an adult.
3�3 Instructions for use
The following must be checked before the equipment is connected to the mains supply:
• the original mains lead with its IEC Lock is connected (in case of doubt, contact the
supplier)
• the iDuctor is undamaged (no cracks or holes in the housing);
• only original iDuctor coils are used, manufactured in accordance
• with the manufacturer’s specications.
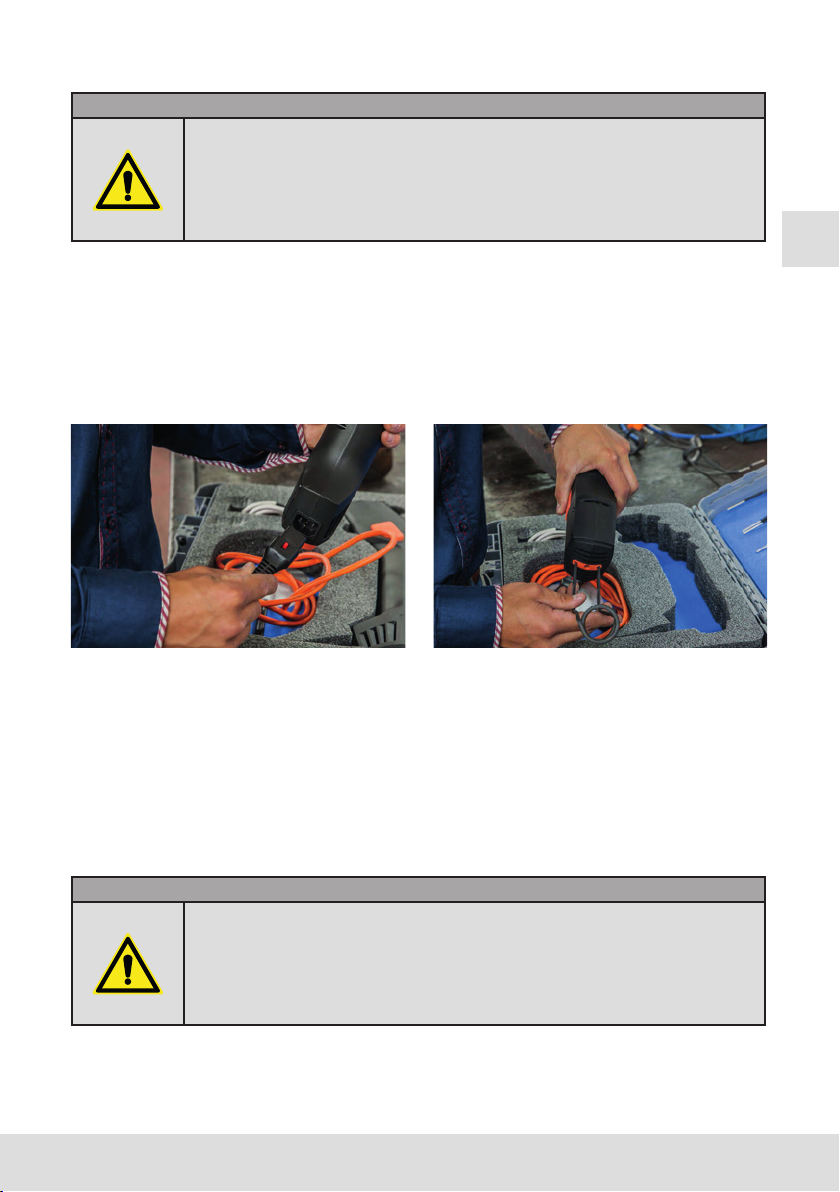
A coil or exible coil must be connected to the unit. This connection is extremely robust
thanks to the patented clamping mechanism. Coils and exible coils are connected or
removed by simultaneously depressing both buttons on the side of the unit. It is also
possible to lie the unit down at so that both buttons can be depressed with a single
motion. An alternative method is to place the unit between the legs and depress the
buttons with the knees, keeping both hands free.
The coil’s contact points are then fully inserted in the holes at the front of the iDuctor.
The buttons should then be released. The patented clamping mechanism will ensure that
the spiral is held very rmly in place. Before using the unit check that the contacts have
been fully inserted and that the connection is tight.
CAUTION!
Select a coil which will t closely around the object to be heated without
touching it. This allows the optimal transfer of magnetic energy so that
the object heats up as fast as possible, as well as preventing the coil’s
protective sleeve from being damaged by contact or wearing faster due
to overheating.

8© BETEX Tools
CAUTION!
When using the exible induction coil it is important to wind as few turns
around the object as possible. Where excessive turns are wound the
current amperage will rise too high and the safety cut-out will trip. The
optimal number of turns will vary between objects. Start with a single
turn and gradually increase the number of turns as necessary.
CAUTION!
If the iDuctor is used in one of the lower power settings it may produce a
ticking sound: this is normal and not a fault.
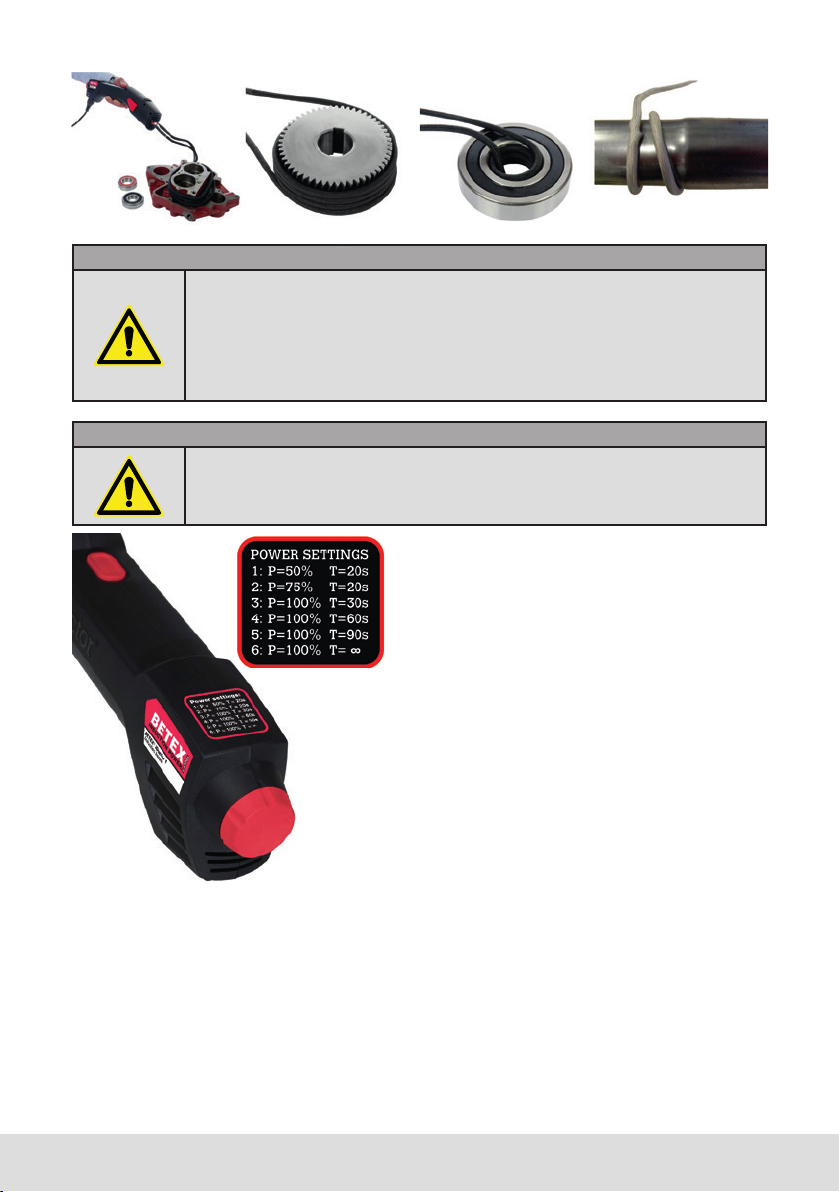
3�4 Rotary switch and push button
The patented rotary switch at the rear of the
iDuctor is used to adjust the heating time and
power. These adjustments should be made
before you press the push button on top of the
unit to activate heating. The settings can not
be adjusted during heating. Once adjustment
is complete the coil is held around the object
to be heated and the button on top of the unit
is depressed. In positions 1 to 5 the unit will
switch o automatically after the specied time.
In position 6 the unit will continue to heat until
the button is released or the iDuctor is switched
o by the internal temperature safety cut-out.
Once the iDuctor has cooled suciently the
heating process will start up again automatically
when you press the button. The iDuctor is active
when the LED on the front is illuminated.
3.5 LED lighting and fan
The LED on the front of the unit will light up to illuminate the object when you press the
button. The fan will then run to cool the system. The fan will remain active throughout the
heating process and also thereafter if the measured internal temperature is high. Once the
temperature has returned to a normal level the fan will switch o automatically. For this
reason the 230 Volt mains connection should be maintained until the fan stops running. The
iDuctor will switch o (or fail to switch on) if a fault is detected. In that case the LED light will
ash when the button is depressed. (See: “Error messages”.)

© BETEX Tools 9
EN
NL
FR
ES
DE
IT
In order to prevent damage the iDuctor and the coil must be allowed to
cool thoroughly after use before they are returned to their storage box.
Both the unit and the coils can become hot in use.
3.6 Error messages
The iDuctor has a number of (patented) internal safety features. If one of these trips
the unit will switch o and the LED will ash when the on/o button is depressed. The
iDuctor is equipped with a patented microprocessor induction generator. In the event
of overloading or overheating of the generator the processor automatically reduces the
power to prevent damage to the induction generator.
3�7 Overheating protection
The unit will stop heating whenever its internal temperature rises too high.
Check: 1) that the fan is still operating
2) that the ventilation holes are unblocked
3) that power is connected, to ensure cooling
4) that only coils approved by the manufacturer are being used.
Solution: Delay heating until the unit has cooled suciently. The unit monitors the
temperature itself, and it will not be usable until the internal temperature has fallen
suciently. This will be detectable as you will hear the fan switch o.
3�8 Connection safety feature
Check: 1) that the coil is correctly connected
2) that the coils are not damaged
3) that the coils are not causing a short-circuit to earth or between the coils
3�9 Mains current protection
Check: If a generator is being used, check whether the iDuctor operates correctly
when connected to the mains. It is possible that the power, voltage or frequency
provided by the generator is not correct.
3�10 Voltage and current protection
Check: 1) that the mains voltage is not too high
2) that the coil is not causing a short-circuit to earth, or internally
3) where the exible coil is being used, that not too many turns have been wound
around the object to be heated. Solution: Remove some turns from the object to be
heated and retry.
3�11 Maintenance
The iDuctor is maintenance-free. The housing can be cleaned with a dry cloth.
CAUTION!
Do not use a wet cloth or solvents: these can damage the unit or its
operation. Do not use an induction coil if the insulating protective sleeve
is damaged or worn.

10 © BETEX Tools
4. Certicate of conformity

© BETEX Tools 11
EN
NL
FR
ES
DE
IT
5. Patents and registration
All patented items are registered under number: EP 131665946.2
Unique clamping mechanism to allow
easy exchange of coils and maintenance
of a robust connection
Microprocessor controlled induction
cycle
Single-control settings for operating
power and switch-o time
Unique application of IEC Lock plug
with electrical hand tool
12 © BETEX Tools
6. Accessories
Article Article
number
Conductor
thickness mm
Internal
diameter mm
Windings Lenght
mm
Temperature
isolation Celsuius
Inductor set 1 - BETEX 1 W1200 - Art� nr� 231204
1 52M30-240 3,5 52 2,5 240 325
1 47M24-240 3,5 47 2,5 240 325
1 40M20-200 3,5 40 3,5 200 325
1 32M16-200 3,5 32 3,5 200 325
1 26M12-200 3,5 26 3,5 200 325
1 23M10-250 3,5 23 3,5 250 325
1 23M10-150 3,5 23 3,5 150 325
1 18M08-150 3,5 18 3,5 150 325
1U coil 160-600 231214 3,5 - 0,5 600 325
Inductor set 2 - BETEX 2 W2300 - Art� nr� 231304
1 52M30-240P+ 3,5 52 5,5 240 325
1 47M24-240P+ 3,5 47 5,5 240 325
1 40M20-200P+ 3,5 40 5,5 200 325
1 32M16-200P+ 3,5 32 5,5 200 325
1 26M12-200P+ 3,5 26 5,5 200 325
1 23M10-250P+ 3,5 23 5,5 250 325
1 23M10-150 3,5 23 3,5 150 325
1 18M08-150 3,5 18 3,5 150 325
1U coil 160-600 231214 3,5 - 0,5 600 325
BETEX 1+2 W1200+2300
1FL1100 231202 3,5 - - 1100 650
1FL2000 231203 3,5 - - 2000 650
1FL2500 231217 3,5 - - 2500 650
1FL3000 231218 3,5 - - 3000 650
1FL3500 231219 3,5 - - 3500 650
1 iDpad1010 231205 3,5 - - - 150
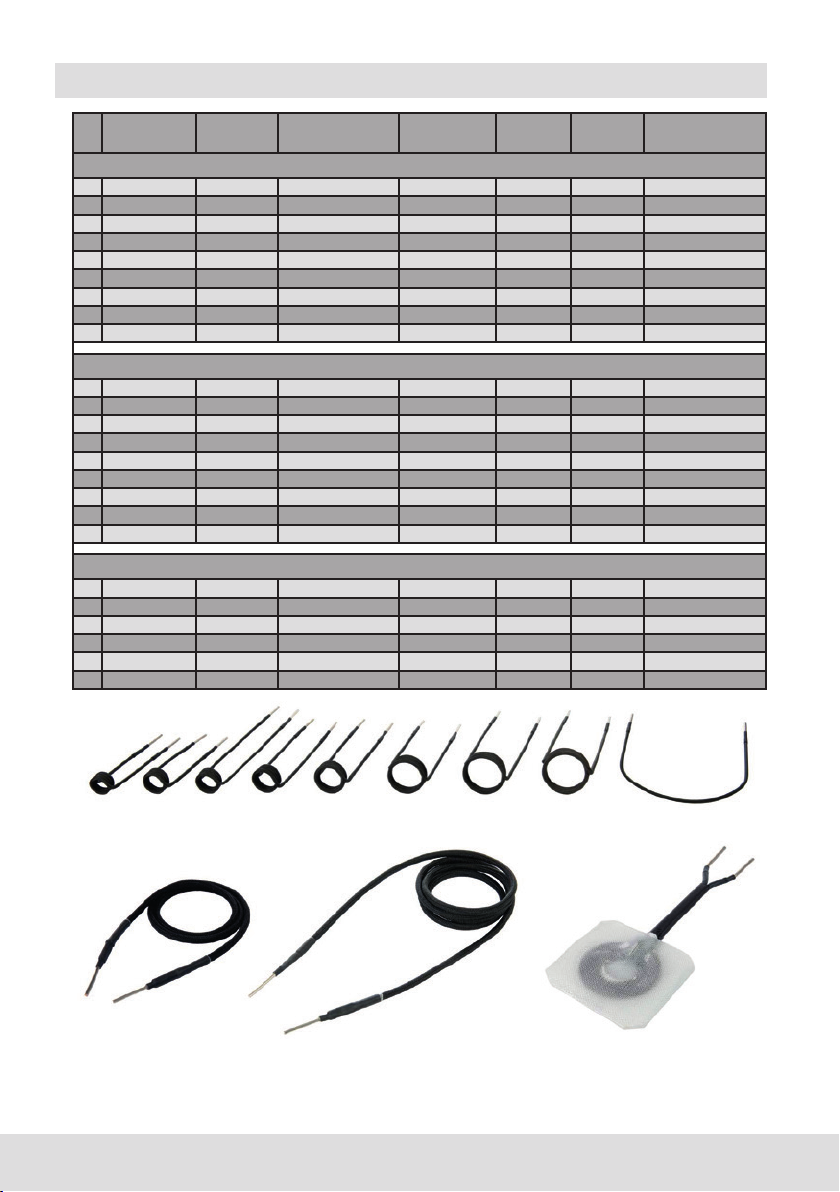
Set of 9 inductors
Flexible inductor 1,1 mtr Flexible inductor 2,0 mtr ID-pad at surface inductor
(for removing striping,
bumper stickers, glue, paint
residu etc.)

© BETEX Tools 13
EN
NL
FR
ES
DE
IT
7. Guarantee and repairs
BEGA SPECIAL TOOLS and their sales agents oer a 1 year guarantee on all BETEX iDuctor
components and materials from the date of purchase. The induction coils and the exible
induction coil are excluded from this guarantee. Users are assumed to have read through
the user manual and safety instructions and to have acted accordingly.
This guarantee is not transferable. To make a claim you must present a sales receipt
bearing the name of the owner of the iDuctor. This guarantee covers only the costs of
components and labour used in repairing or replacing the iDuctor. Any other resultant
costs do not fall within the provisions of the guarantee and are not covered.
The guarantee will lapse in the event of misuse, negligence, improper use, normal wear,
modication or other unauthorised actions. The guarantee will also lapse if the iDuctor
is improperly opened by a third party not authorised in writing to do so by BEGA SPECIAL
TOOLS.
BEGA SPECIAL TOOLS shall not be liable in any circumstances for direct, indirect or
contingent damage arising from the incorrect operation of an iDuctor.
The cost of sending the item to the local sales agent, distributor or reseller will be borne
by the end user. The costs of returning the item to the user will be borne by the local sales
agent, distributor or reseller. The same principles will apply when the unit is returned to the
manufacturer. BEGA SPECIAL TOOLS shall in no circumstances be liable for transport,
damage, theft or loss of the iDuctor.
Before returning a defective item you must rst contact the local sales agent, distributor
or reseller.

14 © BETEX Tools
DEUTSCH
Inhalt
1. Einleitung ������������������������������������������������������������������������������������������������������������������������������������������� 15
1.1 Lieferumfang ........................................................................................................................................... 15
1.2 Optionale Induktoren ............................................................................................................................ 15
2. Produktdaten BETEX iDuctor 1 und iDuctor 2 ��������������������������������������������������������������������������� 16
2.1 Technische Daten ................................................................................................................................... 16
2.2 Umgebungsbedingungen ..................................................................................................................... 16
3. Bedienung ����������������������������������������������������������������������������������������������������������������������������������������� 16
3.1 Piktogramme ........................................................................................................................................... 16
3.2 Von der Bedienung auszuschließende Personen ............................................................................ 17
3.4 Drehschalter und Betriebstaste .......................................................................................................... 18
3.5 LED-Beleuchtung und Ventilator ......................................................................................................... 18
3.6 Fehlermeldungen ................................................................................................................................... 19
3.7 Überhitzungsschutz ............................................................................................................................... 19
3.8 Anschlussschutz ...................................................................................................................................... 19
3.9 Netzschutz ................................................................................................................................................ 19
3.10 Überspannungsschutz und Überstromschutz .............................................................................. 19
3.11 Wartung und Pege ............................................................................................................................. 19
4. Konfomitätszerikat ����������������������������������������������������������������������������������������������������������������������� 20
5. Patente und Patenteintragung ����������������������������������������������������������������������������������������������������� 21
6. Standardausrüstung ����������������������������������������������������������������������������������������������������������������������� 22
7. Garantie und Reparatur ����������������������������������������������������������������������������������������������������������������� 23

DE
© BETEX Tools 15
NL
FR
ES
EN
IT
1. Einleitung
Der BETEX iDuctor 1 und iDuctor 2 sind Elektrowerkzeug, das mit Hilfe von Induktionstechnik
magnetisierbares Metall erwärmen kann, zum Beispiel eine Schraube oder einen anderen
Gegenstand. Welche anderen Materialien erwärmt werden können, probieren Sie am
besten aus. Für die Erwärmung der verschiedensten Gegenstände sind acht verschiedenen
induktionsspulen, 1 U-coil, und ein induktionsschlauch verfügbar.
Kleine Antriebskomponenten, Lager, Ringe, Gehäuse, Rohre, Muttern, Bolzen, kleine Flächen.
Lesen Sie bitte vor der Inbetriebnahme des BETEX iDuctor die Bedienungsanleitung
sorgfältig durch!
1�1 Lieferumfang
Der BETEX iDuctor wird als komplettes Set in einem koer mit folgendem Inhalt geliefert:
• iDuctor
• 1 St. exiblem Induktor, 2,0 Metern
• hitzebeständigen Handschuhen (150° C)
• Netzkabel mit IEC Lock
• Bedienungsanleitung
• Sicherheitsdatenblatt
1�2 Optionale Induktoren
• Induktor set: 8 Spiralen, 1 U-Induktor
• Flexibler Induktor, 1,1 m
• iD-Pad ebene Fläche Induktor
• Hitzebeständige Handschuhe bis 300°C

16 © BETEX Tools
2. Produktdaten BETEX iDuctor 1 und iDuctor 2
2�1 Technische Daten
• Netzspannung: 230 V Wechselspannung +/- 10 %
• Frequenz: 50 – 60 Hz
• Leistung: Betex iDuctor 1, 1200W / iDuctor 2, 2300W
• Die Verwendung eines Stromaggregats ist zulässig, sofern es über eine ausreichende
Leistung verfügt und die Ausgangsspannung eine reine Sinusspannung im richtigen
Frequenzbereich (50 – 60 Hz) ist.
• Schutzklasse: I
SICHERHEITSHINWEIS!
Schließen Sie das Gerät immer an einen Stromkreis mit einer Sicherung
von mindestens 10 A und höchstens 16 A an (das Gerät hat keine interne
Sicherung). Verwenden Sie sicherheitshalber immer eine Wandsteckdose
mit Randerde (Klasse I).
SICHERHEITSHINWEIS!
Das Gerät hat keinen Hauptschalter zum Ein und Ausschalten.
Sobald das Netzkabel angeschlossen ist, steht das Gerät unter Spannung.
2�2 Umgebungsbedingungen
• Temperaturbereich: -5 °C bis +40 °C
• Luftfeuchtigkeit: 0 – 90 %, keine Kondensation
• IP 20
• nicht über 2.000 Meter über dem Meeresspiegel verwenden
3. Bedienung
3�1 Piktogramme
Piktogramme auf dem iDuctor haben folgende Bedeutung:
Achtung! Es wird ein Magnetfeld erzeugt. Dadurch können magnetische
Datenträger auf Bankkarten etc. gelöscht werden.
Achtung! Das Gerät darf nicht von Personen bedient werden,
die einen Herzschrittmacher tragen.
Achtung!
Einzelne Teile des Geräts können heiß werden.

DE
© BETEX Tools 17
NL
FR
ES
EN
IT
3�2 Von der Bedienung auszuschließende Personen
ACHTUNG!
Der iDuctor darf nicht von folgenden Personen bedient werden:
• Personen mit einem Herzschrittmacher;
• Personen mit einer geistigen oder körperlichen Einschränkung, die
bei der Bedienung des Geräts zu einer Gefahr für die betreende
Person und/oder deren Umgebung führen könnte;
• Personen unter 16 Jahren, sofern die Arbeit mit dem Gerät nicht von
einem Erwachsenen überwacht wird.
3�3 Inbetriebnahme
Vor der Inbetriebnahme des Geräts vergewissern Sie sich bitte:
• dass das Original-Netzkabel mit IEC Lock am Gerät angeschlossen ist
• (nehmen Sie im Zweifelsfall bitte Kontakt mit dem Lieferanten auf);
• dass der iDuctor unbeschädigt ist (keine Risse oder Löcher im Gehäuse aufweist);
• dass ausschließlich iDuctor Induktionsspulen verwendet werden, die gemäß den
Spezikationen des Herstellers hergestellt wurden.
Bevor mit dem Erwärmen begonnen werden kann, muss eine Induktionsspule oder
der Induktionsschlauch an dem Gerät befestigt werden. Dank des patentierten
Klemmmechanismus ist diese Verbindung sehr fest. Zum Befestigen am Gerät oder Lösen
vom Gerät müssen die beiden Tasten an den Seiten gleichzeitig gedrückt werden. Es ist auch
möglich, das Gerät auf die Seite zu legen, sodass durch Drücken einer Taste beide Tasten
gleichzeitig betätigt werden. Sie können das Gerät auch zwischen die Knie klemmen und die
Tasten auf diese Weise betätigen; dann haben Sie beide Hände frei.
Drücken Sie die beiden seitlichen Tasten und stecken Sie die Enden der Induktionsspule oder
des Induktionsschlauchs bis zum Anschlag in die Önungen an der Vorderseite des iDuctor.
Lassen Sie dann die Tasten wieder los. Der patentierte Klemmmechanismus sorgt dafür,
dass die Induktionsspule sehr fest sitzt. Überprüfen Sie vor der Inbetriebnahme des Geräts
noch einmal, ob Sie die Enden der Induktionsspule bzw. des Induktions schlauchs tief genug
eingeschoben haben und ob die Verbindung fest ist.
ACHTUNG!
Verwenden Sie bitte eine Induktionsspule, die den zu erwärmenden
Gegenstand in einem möglichst geringen Abstand umschließt, ihn aber
nicht berührt. Dann funktioniert die magnetische Energieübertragung
am besten und der Gegenstand wird am schnellsten erwärmt. Damit
verhindern Sie auch, dass der Schutzmantel der Spule beschädigt wird
oder durch Überhitzung vorzeitig verschleißt.
18 © BETEX Tools
ACHTUNG!
Bei Verwendung des Induktionsschlauchs ist es wichtig, den zu
erwärmenden Gegenstand mit möglichst wenigen Wicklungen zu versehen.
Bei zu vielen Wicklungen wird die Stromstärke zu hoch, sodass die Sicherung
angesprochen wird. Die optimale Anzahl der Wicklungen ist von dem zu
erwärmenden Gegenstand abhängig. Beginnen Sie mit einer Wicklung und
erhöhen Sie – falls erforderlich – die Anzahl der Wicklungen schrittweise.
ACHTUNG!
Wenn der iDuctor mit reduzierter Leistung betrieben wird, kann das Gerät
ein tickendes Geräusch verursachen. Dies ist normal, also kein Defekt.
3�4 Drehschalter und Betriebstaste
Der patentierte Drehschalter am hinteren Ende
des iDuctor dient dazu, die Dauer der Erwärmung
und die Leistung einzustellen. Die Einstellung
muss erfolgen, bevor Sie auf die oben an dem
Gerät bendliche Betriebs taste drücken, um
mit der Erwärmung zu beginnen. Während der
Erwärmung können die Einstellungen nicht
geändert werden. Nach dem Sie Erwärmdauer
und Leistung eingestellt haben, halten Sie die
Spule um den zu erwärmenden Gegenstand und
drücken die Betriebstaste oben auf dem Gerät.
Bei Stand 1 bis 5 schaltet sich das Gerät nach der
eingestellten Erwärmdauer automatisch aus. Bei
Stand 6 erwärmt das Gerät so lange, bis Sie die
Betriebstaste loslassen oder der iDuctor durch
den internen Überhitzungsschutz automatisch
ausgeschaltet wird. Sobald der iDuctor
ausreichend abgekühlt ist, kann das Erwärmen fortgesetzt werden. Drücken Sie dann erneut
die Betriebstaste. Der iDuctor ist aktiv, wenn die vorn integrierte LED leuchtet.
3.5 LED-Beleuchtung und Ventilator
Sobald Sie die Betriebstaste drücken, leuchtet die LED, sodass der zu erwärmende
Gegenstand angeleuchtet wird. Außerdem schaltet sich der Ventilator ein, der das System
kühlt. Der Ventilator bleibt während der gesamten Erwärmdauer in Betrieb und arbeitet
auch danach noch weiter, falls die intern gemessene Temperatur zu hoch ist. Sobald die
Temperatur wieder ein normales Niveau erreicht hat, schaltet sich der Ventilator automatisch
aus. Lassen Sie das Gerät deshalb bitte am Stromnetz angeschlossen (230 Volt), bis sich der
Ventilator nicht mehr dreht. Wenn eine Störung auftritt, schaltet sich der iDuctor aus bzw.
nicht ein. Beim Drücken der Betriebstaste blinkt dann die LED (siehe: „Fehlermeldungen“.)

DE
© BETEX Tools 19
NL
FR
ES
EN
IT
Zur Vorbeugung von Schäden müssen iDuctor und Induktionsspule
nach dem Betrieb gut abkühlen, bevor sie wieder in den Koer gelegt
werden. Sowohl das Gerät als auch die Induktionsspulen und der
Induktionsschlauch können während des Betriebs heiß werden.
3.6 Fehlermeldungen
Der iDuctor hat mehrere interne (patentierte) Schutzeinrichtungen. Sobald eine
Schutzeinrichtung anspricht, schaltet sich das Gerät aus und die LED blinkt, wenn die
Betriebstaste gedrückt wird. Der iDuctor ist mit einem patentierten mikroprozessor-
gesteuerten Induktionsgenerator ausgerüstet. Bei Überlastung oder Überhitzung des
Generators regelt der Prozessor die Leistung automatisch herunter, um einen Schaden am
Induktionsgenerator zu verhindern.
3�7 Überhitzungsschutz
Sobald die interne Temperatur zu hoch wird, bricht der iDuctor die Erwärmung ab.
Prüfen Sie, 1) ob der Ventilator noch funktioniert;
2) ob die Luftönungen des Geräts frei sind;
3) ob der iDuctor an den Strom angeschlossen ist,
damit die Kühlung gewährleistet ist;
4) ob ausschließlich Spulen von autorisierten Händlern verwendet werden.
Maßnahme: Warten Sie, bis das Gerät vollständig abgekühlt ist. Das Gerät prüft die
Temperatur selbstständig. Es kann nicht weitergearbeitet werden, bevor
die Temperatur im Gerät wieder ausreichend gesunken ist (dann ist kein
Ventilatorgeräusch mehr zu hören).
3�8 Anschlussschutz
Prüfen Sie, 1) ob die Induktionsspule bzw. der -schlauch korrekt im Gerät steckt;
2) ob eine Induktionsspule bzw. der Induktionsschlauch beschädigt ist;
3) ob durch Induktionsspulen ein Kurzschluss verursacht wurde
(durch Masseschluss oder durch die Spulen untereinander).
3�9 Netzschutz
Prüfen Sie, in dem Falle, dass ein Generator verwendet wird, ob der iDuctor an
einem Standard-Netzanschluss arbeitet. Möglicherweise sind Leistung,
Frequenz oder Stromstärke des Generators nicht korrekt.
3�10 Überspannungsschutz und Überstromschutz
Prüfen Sie, 1) ob die Netzspannung zu hoch ist;
2) ob durch Induktionsspulen ein Kurzschluss verursacht wird
(durch Masseschluss oder durch die Spulen untereinander);
3) ob bei Verwendung des Induktionsschlauchs zu viele Wicklungen
um den zu erwärmenden Gegenstand gelegt worden sind.
Maßnahme: Vermindern Sie die Anzahl der Wicklungen und versuchen Sie es erneut.
3.11 Wartung und Pege
Der iDuctor ist wartungsfrei. Das Gehäuse wird mit einem trockenen Tuch gereinigt.
ACHTUNG!
Verwenden Sie niemals ein feuchtes oder nasses Tuch und verwenden Sie
keine Lösungsmittel: Diese können das Gerät beschädigen und/oder dessen
Funktion beeinträchtigen. Verwenden Sie niemals eine Induktionsspule,
deren isolierender Schutzmantel beschädigt oder verschlissen ist.
20 © BETEX Tools
4. Konfomitätszerikat
This manual suits for next models
1
Table of contents
Languages:
Other BETEX Heater manuals


