manuals.online logo
Brands
  1. Home
  2. •
  3. Brands
  4. •
  5. Mars
  6. •
  7. Heater
  8. •
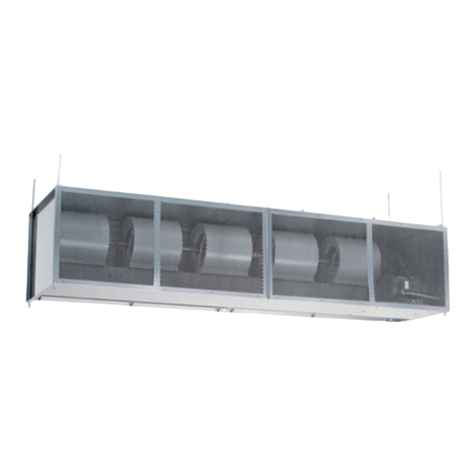
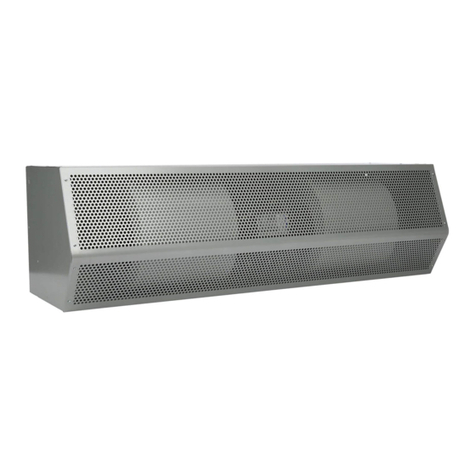
  9. Mars BD1896-1IG-TS User manual

Mars BD1896-1IG-TS User manual

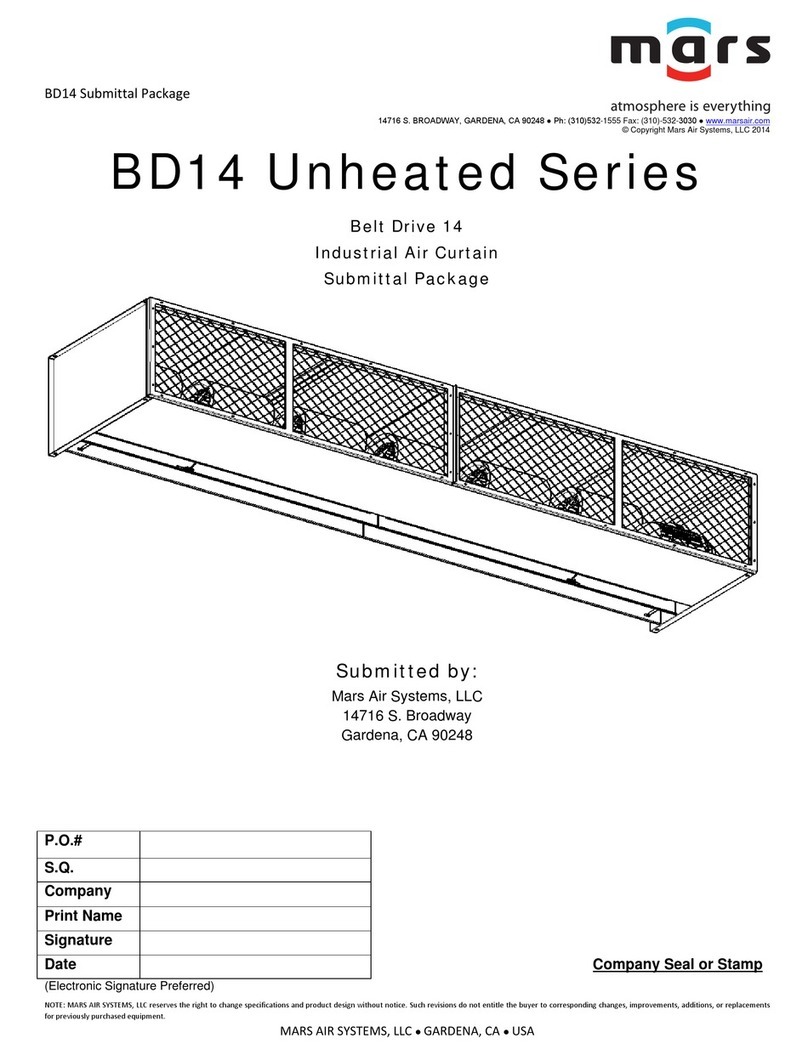
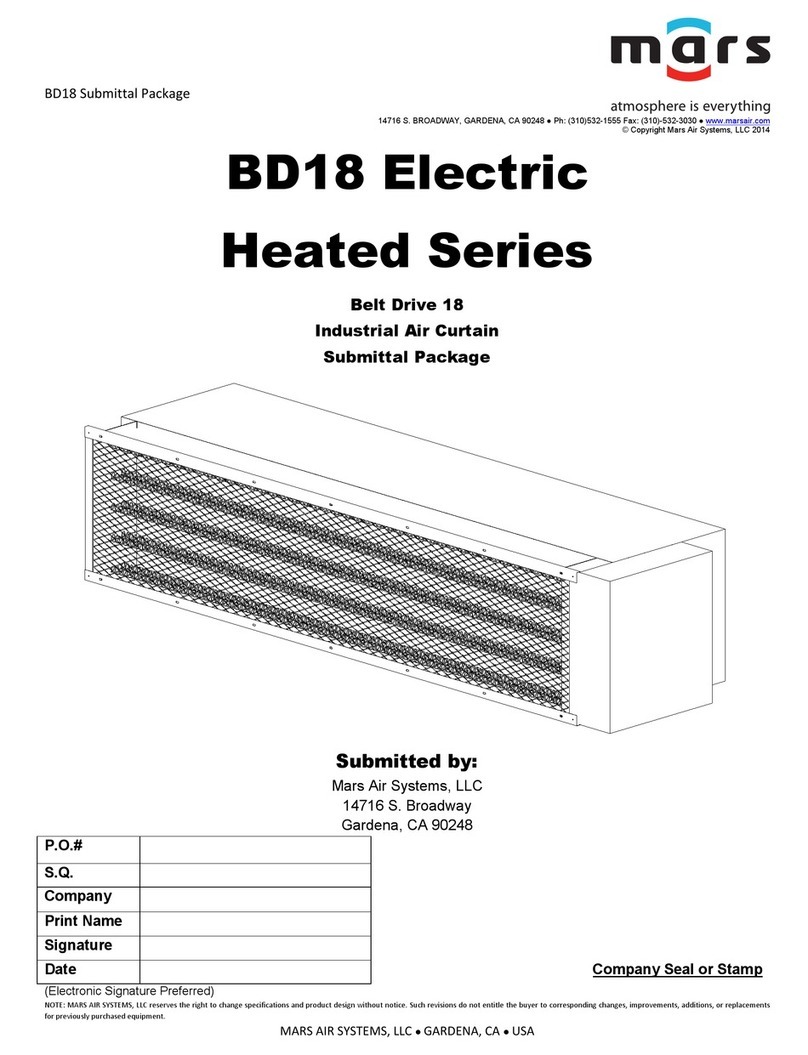
BD18 Submittal Package
14716 S. BROADWAY, GARDENA, CA 90248 ● Ph: (310)532-1555 Fax: (310)-532-3030 ● www.marsair.com
© Copyright Mars Air Systems, LLC 2014
NOTE: MARS AIR SYSTEMS, LLC reserves the right to change specifications and product design without notice. Such revisions do not entitle the buyer to corresponding changes, improvements, additions, or replacements
for previously purchased equipment.
MARS AIR SYSTEMS, LLC ● GARDENA, CA ● USA
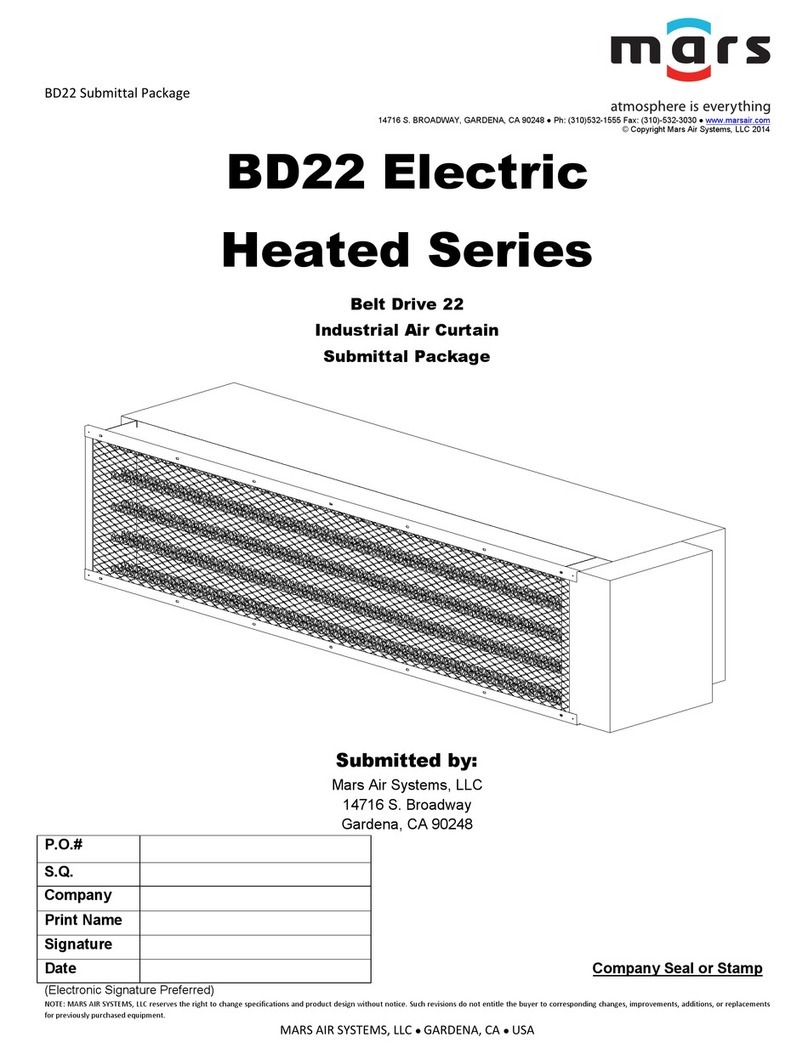
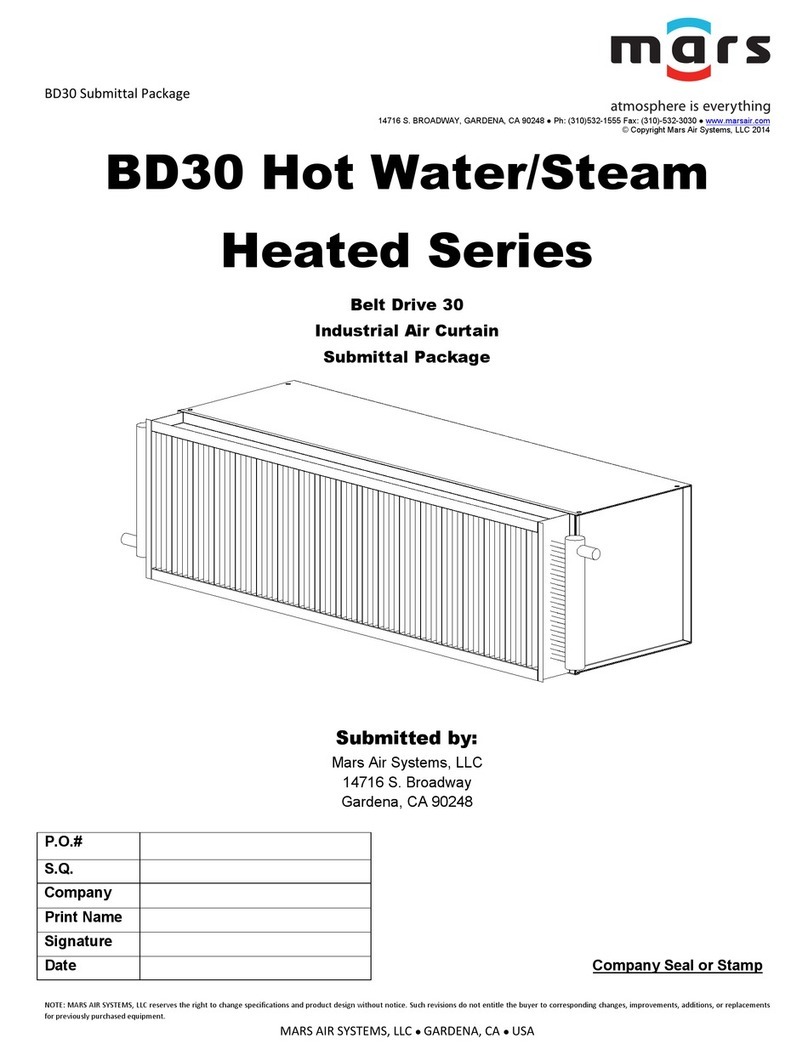
BD18 Indirect Gas Fired
Heated Series
Belt Drive 18
Industrial Air Curtain
Submittal Package
Submitted by:
Mars Air Systems, LLC
14716 S. Broadway
Gardena, CA 90248
P.O.#
S.Q.
Company
Print Name
Signature
Date
Company Seal or Stamp
(Electronic Signature Preferred)
BD18 Submittal Package
14716 S. BROADWAY, GARDENA, CA 90248 ● Ph: (310)532-1555 Fax: (310)-532-3030 ● www.marsair.com
© Copyright Mars Air Systems, LLC 2014
NOTE: MARS AIR SYSTEMS, LLC reserves the right to change specifications and product design without notice. Such revisions do not entitle the buyer to corresponding changes, improvements, additions, or replacements
for previously purchased equipment.
MARS AIR SYSTEMS, LLC ● GARDENA, CA ● USA
Table of Contents
Page # Content
3-4 BD18 Indirect Gas Fired Submittals
5-6 Typical Indirect Gas Fired Wiring Diagrams
7 Thermostat Submittals
8-9 Accessory Installation Supplement
10-13 Installation, Operation and Maintenance
14-15 Troubleshooting Guide
16 Warranty
17-18 Furnace Specifications
19-20 Heated Products Supplement
21-29 CSI Spec
30 Reference Links
BD18 (Belt Drive 18) Series
Indirect Gas Fired
Model Lengths 96” –192”
14716 S. BROADWAY, GARDENA, CA 90248 ● Ph: (310) 532-1555 Fax: (310) 532-3030 ● www.marsair.com
© Copyright Mars Air Systems, LLC 2014
NOTE: MARS AIR SYSTEMS, LLC reserves the right to change specifications and product design without notice. Such revisions do not entitle the buyer to corresponding changes, improvements, additions, or replacements
for previously purchased equipment.
MARS AIR SYSTEMS, LLC ● GARDENA, CA ● USA VM, 06/14/21
BD18
Series: BELT DRIVE 18
144 1 I H TS
LENGTH OF UNIT
# OF MOTORS
VOLTAGE CODE
COLOR
EXAMPLE
Model Number
# of
Furnaces
Input MBH
per
Furnace
Total
Output
MBH
Temp
Rise
(°F)
Flue
Size
Natural Gas
(NPT) CONN
BD1896-1I*-TS 2250 415 28 5" Rnd 1/2"
BD18120-1I*-TS 2400 664 36 6" Rnd 3/4"
BD18144-1I*-TS 2400 664 30 6" Rnd 3/4"
BD18168-1I*-TS 3400 996 38 6" Rnd 3/4"
BD18192-1I*-TS 3400 996 33 6" Rnd 3/4"
* - Use corresponding letters in"Electrical Data" columns to complete the model numbers.
Note: Gas pressure required min/max in (“wc)(kPa): Natural Gas (3.5/14)(0.9/3.5) and LP (10/14)(2.5/3.5)
Indirect Gas Fired Data
Indirect Gas Fired Data Sheet
Applications: Environmental Separation: Max Height 20’ / Insect Control: Max Height 18’
Features:
Air Curtain and Transition
❖7 ½ to 15 HP continuous duty premium efficiency industrial TEFC
motors
❖Air curtain is a self-contained one-piece heavy gauge corrosion proof
paint lock metal design
❖Top mounting holes provided (3/4”)
❖Cabinet has sufficient strength for fastening from overhead on both
ends without intermediate support
❖Adjustable air directional nozzle with 40° sweep front to back
❖Transition is shipped fully assembled and fastened to unit (overhead
support required)
❖Standard color is Titanium Silver
❖Rust preventative electrostatic polyurethane powder coating
❖12-month parts warranty
❖Freight Not Included (FOB Factory)
❖Proudly Made in the USA
Indirect Gas Fired Furnaces
❖ETL verified to be 83% efficient
❖In-shot burner technology
❖Aluminized tubular heat exchanger (20 gauge)
❖Positive pressure 120V impellers (separate 120V, 1Ø power required)
❖Power vented exhaust
❖Single stage gas valve
❖Standard direct spark ignition
❖Certified for Category I and III Venting
❖Natural gas
❖Factory test fired
❖Overhead mounting hardware provided (2 per furnace)
Mars Recommended Accessories (see submittals for additional details):
❖Door limit switches
o99-125, Industrial surface-mounted door limit switch
❖Controllers
oMCPA‐†U*, Motor Control Panel, 120V control voltage († = # of Motors, * = Voltage Code)
▪MCP‐TD, Adjustable time delay, 1sec‐100hr (panel required)
Note: Dry contact provided in panel for monitoring motor. 24Vac signal provided from panel for controlling
motor
❖IDF-2STG, Two-stage heat exchanger
❖IDF-SS, 409 stainless steel heat exchanger
❖IDF-MOD-RS, Room sensor for modulating gas valves (0-10VDC/4-20mA control voltage by others)
Sound Levels: (measured at 10’ in an open field)
7 ½ HP Motor Unit = 74 dBA, 10 HP Motor Unit = 75 dBA, 15 HP Motor Unit = 76 dBA
BD18 (WindGuard)
Model Number
Nozzle Length
(in)
Length
(in)
Depth
(in)
Height
(in)
Motor
(hp)
Total Weight**
(lbs)
Furnace Weight
(lbs)
Max Velocity
(fpm)
Max Volume
(cfm)
BD1896-1I*-TS 96 107 82 1/2 33 7 1/2 1148 2 @ 211 5100 13800
BD18120-1I*-TS 120 131 82 1/2 33 7 1/2 1513 2 @ 335 5100 17255
BD18144-1I*-TS 144 155 82 1/2 33 10 1630 2 @ 335 5100 20700
BD18168-1I*-TS 168 179 82 1/2 33 10 2082 3 @ 335 5100 24100
BD18192-1I*-TS 192 203 82 1/2 33 15 2199 3 @ 335 5100 27600
* - Use corresponding letters in "Electrical Data" columns to complete the model numbers. Note: Data above is for 60 Hz, 17% reduction in the performance data with 50 Hz.
** - Total Weight includes air curtain, transition, and furnace weights.
Lab Data
Mechanical Data
Furnace Only
Furnace
208/230v
(G)
460v
(H)
575v
(I) 115V
BD1896-1I*-TS 21.6/20.0 10.0 8.9 16.0
BD18120-1I*-TS 21.6/20.0 10.0 8.9 27.0
BD18144-1I*-TS 28.0/26.0 13.0 10.3 27.0
BD18168-1I*-TS 28.0/26.0 13.0 10.3 40.5
BD18192-1I*-TS 42.0/40.0 20.0 15.6 40.5
* - Use corresponding letters in"Electrical Data" columns to complete the model numbers.
Alternate voltage codes with FLA (Full Load Amp) data:
380-415V/3Ø/50Hz (W) - 8.3A per motor (7½HP), 11.5A per motor (10HP), 15.5A per motor (15HP)
Note: For ampacity, multiply FLA X 1.25
Unit Voltage
(Voltage Code)
Electrical Data
(FLA)
Thermostats
Line voltage to low voltage Models
14716 S. BROADWAY, GARDENA, CA 90248 ● Ph: (310)532-1555 Fax: (310)-532-3030 ● www.marsair.com
© Copyright Mars Air Systems, LLC 2014
NOTE: MARS AIR SYSTEMS, LLC reserves the right to change specifications and product design without notice. Such revisions do not entitle the buyer to corresponding changes, improvements, additions, or replacements
for previously purchased equipment.
MARS AIR SYSTEMS, LLC ● GARDENA, CA ● USA AR, 5/18/20
5 1/4"
3 3/4"
99-263 – Thermostat, 24 Volt, Digital, Single Stage.,
R.G.W.Y.B.O., Battery Power
Thermostats
Features:
Allows automatic control of heated air
Remote mounted (field installed by others)
Temperature range from 50F to 90F
Regulates the heat near the air curtain
Analog Bimetal Temperature Sensing
Thermostats are UR (UL Recognized)
1 year warranty
Line Voltage (99-063, 99-064)
Standard for LPV2 Electric and All Hot Water/Steam Heated models
Single Phase, Single Pole, 250V max
Remote Wall Mounted by others
Requires Junction Box (J-Box field supplied and installed)
Low voltage (99-264, 99-277, 99-263)
Standard for STD2, HV2, EP2, PH, WM/BD Electric and all Gas Heated models
Low voltage (24V) control
Fan and Heat Control Switch
Remote Wall Mounted by others
*Do not mount low voltage thermostat greater than 30ft from the air curtain. Mounting the low voltage thermostat too far
from the air curtain may cause a voltage drop and cause chattering.
Options and Accessories:
2 Stage Line Voltage Thermostat
Digital Programmable Low Voltage
Thermostat
Digital Low Voltage Thermostat with
Battery Backup
Factory Wired and Installed Thermostat
Lockable clear cover
Thermostat Part # Description Applicable Air Curtain Series
99-063 Thermostat, 801, Line Voltage, Up to 250V, Analog, Single Stage, Single Pole
LPV2, WM/BD Electric & All Hot Water /
Steam
99-064 Thermostat, 802, Line Voltage, Up to 250V, Analog, Two Stage, Double Pole
LPV2 Electric & All Hot Water / Steam
99-264 Thermostat, 9200H, 24 Volt, Analog, Single Pole, R.G.W.Y.B.O.
Elec STD2, HV2, EP2, PH &
All Gas Fired
99-277 Thermostat, IC20-101, 24 Volt, Analog, Single Pole, R.W.
LPV2 Electric (Low Voltage Control option)
99-263 Thermostat, RS4110, 24 Volt, Digital, Single Pole, R.G.W.Y.B.O., Battery Power
Elec STD2, HV2, EP2, PH, WM/BD &
All Gas Fired
99-277 – Thermostat, 24 Volt, Single Stage, R.W.
3 1/4"
5"
99-182 - Cover, Lockable, Clear
6"
2 7/8"
4 3/4"
99-063 – Thermostat, 801, Line Voltage,
Single Stage, Single Pole
99-264 – Thermostat, 24 Volt, Analog, Single Stage,
R.G.W.Y.B.O.
4 1/2"
3 1/4"
Document No: ACC-IOM
Date: 04/13/2013
ACCESSORY INSTALLATION SUPPLEMENT
Door Limit and Magnetic Reed Switches
1. Mars door limit and magnetic reed switches are
available with NEMA 1, 4X and 7 ratings. Contact the
factory for additional ratings and details. (See FIG. 1
for typical single swing, hinged door type, door limit
switch installation)
FIG. 1
2. Use light gauge materials when field fabricating
brackets to activate and deactivate the door limit
switch(s). (FIG. 2) Figure 2 also shows the typical
installation of the combination plunger/roller type
NEMA 1 door limit switch, for all non-hinged style
doors.
FIG. 2
3. All wiring must be per local and NEC (National Electric
Code) codes.
4. Panels or controllers may be required. Refer to wiring
diagram inside the control panel box.
FIG. 3
FIG. 4
Document No: ACC-IOM
Date: 04/13/2013
Bracket Installation
1. Side Extension Plates: For doorways wider than the air
curtain, use combination of Side Extension Plates and
Adjustable Mounting Brackets. (FIG. 5)
FIG. 5 (LPV SHOWN)
2. Adjustable Mounting Brackets: For installation of air
curtain over drum-style roll-up door, use Extended
Wall Mounting Brackets. (FIG. 6)
FIG. 6 (STD SHOWN)
3. Extended Wall Mounting: For Tandem Mounting of air
curtain over sectional style door, use either wall
mounting angle brackets or threaded rods.
4. Top Mounting Brackets: For overhead installation of
units, use in conjunction with the threaded holes
provided on top of unit.
Note: Angle brackets, threaded rods and I Beams are
provided by others. (FIGS. 7 & 8) All optional brackets
are not available for WMI/WMH and BD Series.
FIG. 7 (WMI/WMH Shown)
FIG. 8 (BD Shown)
14716 S. Broadway St., Gardena, CA 90248
(310) 532–1555 ● (800) 421-1266
Fax: (310) 324-3030
www.marsair.com
Document No: BD-IOM
Date: 08/25/20
WINDGUARD BELT DRIVE (BD) INDUSTRIAL SERIES
Installation, Operation and Maintenance Manual
Please read and save these instructions. Read carefully before attempting to assemble, install, operate, or maintain
the product described. Protect yourself and others by observing all safety information. Failure to comply with these
instructions could result in personal injury and/or property damage. Retain these instructions for future reference.
OVERVIEW
Mars Air Curtains are
designed to cover door
openings, providing
both temperature
control/environmental
separation and flying
insect control when the
building’s doors are
opened. Typical
installation heights are:
BD-14 Series
(Environmental Separation up 16’ and Flying Insect
Control 14’), BD-18 Series (Environmental
Separation up 20’ and Flying Insect Control 18’),
BD-22 Series (Environmental Separation up 24’
and Flying Insect Control 22’), BD-26 Series
(Environmental Separation up 28’ and Flying Insect
Control 26’) and BD-30 Series (Environmental
Separation up 32’ and Flying Insect Control 30’).
The units are typically overhead mounted
horizontally above the door opening. They can also
be vertically mounted alongside the opening.
Heated units must be mounted on the inside or the
protected side of the opening. The motors used in
the BD Series range from 5 HP to 30 HP (see
submittal for details).
All the BD Series come standard with an expanded
metal air intake grille(s). The BD Series can be
configured with Flat Bank or V-Bank Sections, as
options.
GENERAL SAFETY
INFORMATION
Use this product only in
the manner intended
by the manufacturer. If
you have any
questions, contact the
manufacturer. Only
qualified personnel
should install this
product. Installing
personnel should have
a clear understanding
of these instructions
and should be aware of general safety precautions.
Improper installation can result in electric shock,
possible injury due to coming in contact with
moving parts, as well as other potential hazards.
WARNING
When servicing the product, motor may be hot enough
to cause pain or injury. Allow motor to cool before
servicing.
WARNING
To reduce the risk of fire, electric shock, or injury to
persons, observe the following.
A. Always disconnect, lock and tag power source before
installing or servicing product.
B. Installation work or electrical wiring must be done by
qualified person(s) in accordance with all applicable
codes and standards, including fire-rated
construction.
C. The combustion airflow needed for safe operation of
fuel burning equipment in the area may be affected
by the product’s operation. Follow
the heating
equipment manufacturer’s guideline and safety
standards, such as those published by the National
Fire Protection Agency (NFPA), the American
Society of Heating,Refrigeration and Air Conditioning
Engineers (ASHRAE) and local code authorities.
D.
When cutting or drilling into a wall or ceiling, be
careful not to damage electrical wiring and other
hidden utilities.
RECEIVING AND INSPECTION
Upon receiving the product, check to make sure all
items are accounted for by referencing the Bill of
Lading to ensure all items were received. Inspect
each carton for shipping damage before accepting
delivery. Notify the freight carrier if any damage is
noticed. The carrier will make notification on the
delivery receipt acknowledging any damage to the
product. All damage should be noted on all copies of
the Bill of Lading which is countersigned by the
delivering carrier. A Carrier Inspection Report
should be filled out by the carrier upon arrival
damaged upon arrival, file a claim immediately with
the carrier. Any physical damage to the unit after
acceptance is not the responsibility of Mars Air
Systems.
UNPACKING
Verify that all parts, components and accessories,
and the correct quantities of each have been
received. If any items are missing, report shortages
to Mars Air Systems directly to arrange for obtaining
the missing items. Again, verify quantities received
against those on the Bill of Lading only, as multiple
shipments may be involved.
INSTALLATION
Typical Mounting – Wall or Ceiling Mounted
Horizontally Above the Door Opening
1. Overhead installation is recommended to
prevent the possibility of the unit falling if the wall
to which the unit is mounted is hit by a truck or
material handling device. If, however, wall or
bracket mounting is preferred, additional holes
may be drilled in the side panels of the housing.
Note: Bracket/Support mounting is not generally
recommended for Air Curtains equipped with
steam or hot water coils. Overhead installation
using threaded rods with independent
suspension of coils is recommended.
2. Center the unit over the opening. The air curtain
shall be equal to or greater than the width of the
opening.
3. Four pre-punched 1/2” mounting holes on the top
of the unit are provided for your convenience.
These holes must be utilized to secure the
product overhead. All hardware is field provided
by others.
4. Mount the product such that the discharge is 1”
above the opening and all obstacles. (FIG. 1)
Note: If the product is installed higher than the
recommended 1” above the opening, then it
must be moved 3/8” away from the wall for every
1” that it is moved up. Any void between the wall
and the product must be sealed, by others, to
optimize performance.
FIG. 1
5. Use four (4) threaded rods for overhead
installation or four (4) threaded bolts for wall
installation. All hardware is field provided by
others. (FIG. 1)
6. If applicable, for tandem installation or products
mounted side by side, allow no more than 6”
between the two products. For overhead
installation using threaded rods, the products
may require a beam, by others, to span the full
distance of the mounting length. (Reference
Accessory Installation Supplement)
7. All wires must be connected to the external
junction box(s) of the unit.
8. The unit must be wired per NEC and local codes.
Electrical Field Wiring
The unit and any optional accessories must be wired
with the proper voltage to the junction box per the
wiring diagram. (FIG. 2, unheated products only)
WARNING
Precaution should be taken in explosive atmospheres.
FIG. 2
START-UP
This product has been assembled and tested at the
factory prior to shipping. The following procedures
should be performed to assure its performance. Before
continuing with the start-up, it is important to recognize
the safety controls furnished with the unit.
NOTE
For accessory installation, reference Accessory
Installation Supplement.
For heated products, reference Heated Products
Supplement.
WARNING
Prevent hazard of electrical shock. More than one
disconnect switch may be required to de-energize this
product.
WARNING
The following items must all be completed by a qualified
installer and checked off when completed
A. Re-
check that the product has been installed
properly and is level and secure.
B. Check all terminal screws are tight and field wiring
is connected in accordance to National Electrical
Code and wired per the enclosed wiring diagram.
For electric heated models, ensure that the coils
are secured and not touching each other on any
metal surface.
C. Verify proper voltage prior to powering the product.
(See product label for reference).
D. Check all field wired components “if supplied” are
wired correctly.
E. Check that the inlet air supply and the discharge air
supply are free of obstructions.
F. Check that all air filter(s) and/or air intake grille(s) are
in place and installed properly, as originally shipped.
G.
Verify voltage to the product once more and turn
power on.
H. Regardless of whether the product is mounted on the
inside or outs
ide of the door opening, set the air
directional vanes in the discharge nozzle slightly
outward to approximately 10-15° towards the outside,
or the wind load. (FIG. 3).
I. For products with control panels, turn the HOA (Hand-
On-Auto)selectorswitch to “On”positionand openthe
door to energize the product. For products without a
control panel or an On/Off switch, open the door to
energize the product.
J. If heated products are installed, reference Heated
Products Supplement.
K. For three phase units, verify direction of rotation of
blower wheels (note direction arrows on the blower
wheel housing). Correct if needed by changing
polarity of three phase power.
L. VERY IMPORTANT Using a clamp meter, measure
the amperage to each motor and ensure that they do
not exceed the amperage listed on the product label.
M. If applicable, adjust the air intake grille(s) such that the
output air stream reaches the floor. For temperature
control and environmentalseparation applications, the
air
stream should reach the floor with sufficient
strength to create an air seal around the door opening
without creating turbulent mixing of the inside and
outside air. For flying insect control applications, the
air stream should reach the floor with maximum
strength. If after proper installation and adjustment,
the product appears to be producing too little or too
much air for the application, contact the manufacturer.
FIG. 3
MAINTENANCE
Routine maintenance is required to keep this product
operating at its peak performance and efficiency. Over
time, the housing, air intake grille, air intake filter,
blower wheels and motor(s) will accumulate a build up
of dust, debris and other residue. It is imperative to
keep these components clean. Failure to do so will not
only lower operational efficiency and performance, but
also reduce the useful life of the product. The time
between cleanings depends on the application,
location and daily hours of use. On average, under
normal use conditions, the product should require a
thorough cleaning once every six (6) months.
To clean the product, perform the following:
1. Verify the product has been disconnected from the
power source.
2. Use a damp cloth and either a warm mild soapy water
solution or bio-degradable degreaser, to wipe down
the exterior components of the housing.
3. To access the interior of the product, remove the air
intake grille(s) and/or air intake filter(s). This is
accomplished by removing the screws on the face of
the air intake grille(s)/filter(s) or top access panels.
4. Thoroughly clean the air intake grille(s)/filter(s) or top
access panels.
5. Thoroughly wipe down the motor, blower wheels and
blower wheel housings. Be careful not to spray the
motor with a water hose.
6. The motor(s) may require additional lubrication. The
cartridge bearings for blowers are permanently
lubricated double sealed ball bearings and do not
require additional lubrication. The pillow block
bearings require periodic greasing depending on use.
The Zerk fittings are provided on bearing.
7. To re-install the product, reverse the procedures
above.
8. Reconnect the power source to the product.
9. If you have any questions regarding the maintenance
of the product, contact the manufacturer.
SPECIAL APPLICATIONS
Outdoor Installation
For outdoor unit special consideration may be required
for enclosure, motor, wheel, and other components to
minimize damage caused by exposure to the outdoor
elements. Contact factory for special construction and
costing.
Freezer and Cooler Installation
Air curtain must be mounted on the warm side for
optimal performance. Variable Frequency Drive (VFD)
is strongly recommended to control the air curtain air
flow velocity at the floor level.
High humid areas may require de-humidifier or
additional defrost cycle to minimize condensation and
freezing for freezer applications. We recommend the air
curtain unit to not replace doors but work in conjunction
with door opening sequence cycle. Contact factory for
details.
DISCLAIMER
Mars reserves the right to change specifications and
product design without notice. Such revisions do not
entitle the buyer to corresponding changes,
improvements, additions, or replacements for
previously purchased equipment.
WARNING
To reduce the risk of fire, electrical shock or injury to
persons, observe the following:
A. Maintenance is to be performed only by qualified
personnel who are familiar with local codes and
regulations and are experienced with this type of
product.
B. Before servicing or cleaning the product switch
power off at service panel and lock service panel to
prevent power from being switched “ON”
accidentally.
TROUBLESHOOTING
PROBLEM
CAUSE
SOLUTION
NO AIR BLOWING
OUT OF DISCHARGE
NOZZLE
- No power being supplied to the unit
from the electrical power source - Confirm power source / check if in on position
- Circuit breaker is tripped
- Reset circuit breaker
- Blown fuses on power supply
- Replace fuses
- Motor overload is open or tripped
- Allow the motor to cool down; motor has auto reset
internal overload; if unit is panel equipped, press
reset button on overload inside panel, or replace
motor overload if overload remains tripped
- Motor contactor / relay defective
(if applicable)
- Check voltage to coil; check contacts to see if they
are pulling in
- Failed switch
- Replace or repair limit switch
MOTOR IS RUNNING
BUT FANS ARE NOT
SPINNING
- Loose or broken coupling (belt drive) - Replace or tighten coupling
- Loose set screws on wheel hubs
- Tighten set screws on motor shaft flats
- Fan spinning inside fan housing
- Tighten fan on shaft or replace fan
- Broken fan hub
- Replace fan wheels
ELECTRICAL
CONTROLS NOT
WORKING WHEN
DOOR IS OPEN
- Switch is in off position - Turn unit's switch to the on position
- Door limit switch is not operating
- Repair or replace door limit switch
UNIT WILL NOT TURN
OFF - Door limit switch is permanently
closed or energized
- Position the door switch in a manner that turns off the
unit when the door closes and turns on the unit when
the door opens. Only light pressure required.
LOW AIR FLOW
- Discharge air vanes out of
adjustment
- Adjust vanes to proper position
(Refer to Start-Up Section in this manual)
- Obstruction on intake or discharge
- Remove obstruction or move air curtain
-
Power leads out of polarity
- Switch power leads to correct polarity
(3 phase models only)
- Blower motor rotating below normal
speed
- Apply proper voltage per unit requirement
(see unit label) / Adjust adjustable motor speed knob
(if applicable)
- Fan rubbing against housing
- Free fan from housing
- Blower wheels clogged with dirt
- Clean and remove dirt from blower wheels
EXCESSIVE AIR
VELOCITY AT DOOR
OPENING
- Nozzle out of adjustment and not
angled far out enough (BD only) - Adjust nozzle angle to outside
- Air temperature too cold
- Add auxiliary heat to overcome wind chill
- Air stream pushing air outside of the
building
- Adjust discharge angle back into building
AIR NOT HITTING
THE FLOOR
- Low air velocity
- Adjust vanes to proper position or check installation
height (Refer to Start-Up Section in this manual)
- Obstruction in the direction of air flow
- Remove obstruction or move air curtain
(Move out 3/8" for every 1" up from the door)
- Negative building pressure
- Provide a make-up air system to relieve negative
building pressure
UNEVEN AIR
- Shaft rotating inside fan
- Replace fan or tighten fan on shaft
- One motor not functioning
- Replace or repair motor
EXCESSIVE NOISE
AND OR VIBRATION
- Loose or broken coupling (belt drive) - Replace or tighten coupling
- Loose set screws on wheel hubs
- Tighten set screws on motor shaft flats
- Fan spinning inside fan housing
- Tighten fan on shaft or replace fan
- Broken fan hub
- Replace fan wheels
- Bearing end caps worn
- Replace Bearing end caps
- Damaged blower wheel
- Replace Blower Wheel
- Bearing end caps worn
- Pillow block bearings make noise
- Replace Bearing end caps
- Grease Bearing
- Balancing clips missing
- Replace Blower Wheel
TROUBLESHOOTING MOTOR
To determine if the motor is in good operating condition, compare measured motor resistance at the motor
terminals to the values shown below.
HIGH SPEED (1750) MEDIUM SPEED (1650) LOW SPEED (1450)
Applicable
Air Curtain
Series
Mars Part # Manufacturer Part # Brand Motor Rating HP Voltage Phase
Black Motor Wire & White
Motor Wire
- -
03-001 7190-1682 Fasco Nema 1 1/6 115 111.5 - -
03-002 7190-1903 Fasco Nema 1 1/6 115 18.4 - -
03-003 7190-1825 Fasco Nema 1 1/6 230 164 - -
03-004 7190-1904 Fasco Nema 1 1/6 230 144.6 - -
Applicable
Air Curtain
Series
Mars Part # Manufacturer Part # Brand Motor Rating HP Voltage Phase
White Motor Wire (T1)
&
Black Motor Wire (T3)
White Motor Wire (T1)
&
Black Motor Wire (T5)
White Motor Wire (T1)
&
Black Motor Wire (T2)
03-010 34G928X169 Baldor Washdown (IP54) 1/2 115 11.2 - -
03-010 34G928X169 Baldor Washdown (IP54) 1/2 208/230 14.6 - -
03-005 7124-1175 Genteq Nema 1 1/2 115 12.6 3.8 5.2
03-006 7124-1560 Genteq Nema 1 1/2 208/230 19.9 15.9 22.5
03-007 48S17T439 Marathon Nema 1 1/2 277 17.7 - -
03-005 K055PWM1736C13H Nidec Nema 1 1/2 115 12.1 3.7 5.2
03-005 K055PWM1736C13H US Nema 1 1/2 115 15.3 3.7 5.4
03-006 US Nema 1 1/2 208/230 18.7 18.2 24.2
Applicable
Air Curtain
Series
Mars Part # Manufacturer Part # Brand Motor Rating HP Voltage Phase
White Motor Wire (T1)
&
Black Motor Wire (T2)
White Motor Wire (T1)
&
Black Motor Wire (T3)
-
03-021 35T276R025G1 Baldor Washdown (IP54) 1115 10.7 - -
03-015-Baldor 35M316S174 Baldor Nema 1 1115 10.6 - -
03-015-Baldor 35M316S174 Baldor Nema 1 1208/230 12.2 - -
03-021 35T276R025G1 Baldor Washdown (IP54) 1208/230 12.8 - -
03-014 7124-0985 Genteq Nema 1 1115 11.6 2.4 -
03-015 7124-1096 Genteq Nema 1 1208/230 16.5 9.2 -
03-015 -Nidec Nema 1 1208/230 14.3 6.5 -
03-014 K55BWJZB-2362 US Nema 1 1115 1 1 2.1 -
03-015 -US Nema 1 1208/230 13.2 6.3 -
Black Motor Wire (L1)
&
Red Motor Wire (L2)
Black Motor Wire (L1)
&
White Motor Wire (L3)
Red Motor Wire (L2)
&
White Motor Wire (L3)
03-008 P55YYDHB-1527 US Nema 1 1/2 208-230 316.1 16.1 16.1
03-008 P55YYDHB-1527 US Nema 1 1/2 460 363.6 63.6 63.6
03-009 48T17T135 Marathon Nema 1 1/2 575 3136 136 136
03-017 56T17T5541 Marathon Nema 1 1208-230 34.3 4.3 4.3
03-017 56T17T5541 Marathon Nema 1 1460 316.5 16.5 16.5
03-018 56T17T5544 Marathon Nema 1 1575 326.6 26.6 26.6
03-022 35N127S902 Baldor Washdown (IP54) 1208-230 35.1 5.1 5.1
03-022 35N127S902 Baldor Washdown (IP54) 1460 319.8 19.8 19.8
03-026 165716 Century Nema 1 3208-230 31.5 1.5 1.5
03-026 165716 Century Nema 1 3460 35.7 5.7 5.7
03-028 35E92Y26 Baldor Nema 1 3575 39.2 9.2 9.2
03-110 36H110-2211G1 Baldor Nema 1 1,2,3 208-230 33.5 3.5 3.5
03-110 36H110-2211G1 Baldor Nema 1 1,2,3 460 313.5 13.5 13.5
03-055 37F932W828G1 Baldor Nema 1 5230 30.7 0.7 0.7
03-055 37F932W828G1 Baldor Nema 1 5460 32.4 2.4 2.4
03-046 37F909X889G1 Baldor Nema 1 7230 30.6 0.6 0.6
03-046 37F909X889G1 Baldor Nema 1 7460 31.6 1.6 1.6
03-033 U639A - 215TTFC6027 Marathon Nema 1 10 208-230 30.4 0.4 0.4
03-033 U639A - 215TTFC6027 Marathon Nema 1 10 460 31.2 1.2 1.2
03-074 GT1128A 170118.60 Marathon Nema 1 25 575 30.5 0.5 0.5
BD
HV2, NH2,
PH12
EP2
WMI
WMH
STD2, N2,
PH10, QP10
Applicable
Air Curtain
Series
Mars Part #
HP
Voltage
Brand
Motor Rating
Manufacturer Part #
Phase
LEAD WIRE OHM READINGS
MOTOR WIRES OR TERMINAL (T) OHM READINGS
Single Phase Motors
MARS MOTOR RESTANCE READINGS
Three Phase Motors
LPV2, LPN2
STD2, N2,
PH10, QP10
HV2, NH2,
PH12
WARRANTY
Mars’ warranty coverage, period, extent, and
limitations apply to the product only. It does not apply
to labor. Mars warrants that Mars product 1) Is free
from defects in materials and workmanship and 2)
Conforms to Mars’ published specifications. The
warranty period for Mars BD product is a twelve (12)
month period commencing on its date of shipment.
The date on customer’s invoice is the date of
shipment, unless Mars or your reseller informs you
and Mars otherwise. Mars will provide free
replacement of any part that fails as a result of a
defect in material or manufacturer’s workmanship.
Changes in operational specification parameters that
are different from those provided on the original
purchase order are not covered. Mars product is
inspected and tested before packaging and is
shipped in working condition. The warranty for Mars
product only covers free-of-charge replacement of
failed parts. The warranty does not cover labor and
transportation expenses that may be required to
provide and to install replacement parts. Because in
many instances, it is impossible to determine the
cause of failure, customer may be responsible for
transportation charges associated with replacement
of failed part. Mars does not warrant uninterrupted or
error-free operation of Mars product. Under no
circumstance is Mars liable for any of the following:
1) Third-party claims against you for damages; or 2)
Special, incidental, or indirect damages or for any
economic consequential damages (including lost
profits and savings), even if Mars, its suppliers, or its
reseller is informed of their possibility. The warranty
does not cover repair or exchange of Mars product
resulting from misuse, accident, modification,
unsuitable physical or operating environment,
improper maintenance and installation by customer,
or failure caused by a product for which Mars is not
responsible. The warranty does not cover damages
caused by mishandling during transportation. The
warranty is voided by removal or alteration of Mars
product or parts identification labels, by improper
installation of product, and resulting non-compliance
to federal, state and local codes and regulations.
Additionally, Mars reserves the right to void the
warranty for non-payment of invoice.
CONTACT FACTORY FOR COMPLETE PARTS
LIST FOR ALL MODELS.
KEEP THIS MANUAL FOR YOUR RECORDS.
Model Number:______________________________
Serial Number: ______________________________
Date Purchased: ____________________________
Dealer Purchased From: ______________________
14716 S. Broadway St., Gardena, CA 90248
(310) 532–1555 ● (800) 421-1266
Fax: (310) 324-3030
Please go to our website at www.marsair.com for a
downloadable version of this document.
Commercial/Light Commercial Unit Heaters
XF/XC SERIES
STANDARD FEATURES OPTIONAL FEATURES
XFC-1
• Standard or separated combustion all-in-one units
• 20-gauge aluminized steel tubular heat exchanger
• 83% thermal efficiency
• Power venter
• 20-gauge steel cabinetry with baked enamel finish
• Direct spark ignition system
• Redundant single stage gas valve
• Rear burner access for ease of service
• Individually adjustable and removable horizontal louvers
• 10-year heat exchanger, flue collector and burner warranty
• Stainless steel heat exchanger, burners, and/or flue collector
• Two stage and various electronic modulation gas controls
• Discharge nozzles (30°, 60° & 90°)
• Combustion air inlet kits (concentric vent)
• Supply voltages: 208 & 230/1/60 and 208, 230, 460,
575/3/60
260 North Elm St., Westfield, MA 01085
(413) 564-5540 Fax: (413) 562-5311
www.sterlinghvac.com
DESCRIPTION
The Sterling “XF/XC” Series Convertible Venting Type Tubular
Gas-Fired Unit Heater offers a highly efficient, extremely durable
alternative to the traditional clam shell design. These propeller
and blower type units combine the latest tubular heat exchanger
and in-shot burner technology with the quality and reliability you
have come to know from Sterling. Units are available in sizes 100
to 400 MBH and have been certified by ETL as providing 83%
thermal (combustion) efficiency.
CONVERTIBLE VENTING - STANDARD OR SEPARATED COMBUSTION
Notably, the Sterling “XF/XC” unit heater is designed so it can
be installed in either standard or separated combustion venting
configurations without requiring modification to the unit itself.
Located on the rear cover panel of each unit, combustion air
inlet collars are left open in a standard combustion venting
configuration. When set up for separated combustion, combustion
air piping is connected to the inlet collars so that the burners, spark
ignitor, and flue system are enclosed within the unit, allowing
the entire combustion process to remain unaffected by the
atmosphere in the space where the heater is located. Separated
combustion venting configurations should be used where dusty,
dirty or mildly corrosive conditions exist, or where high humidity
or slightly negative pressures prevail.
ADDITIONAL VENTING FLEXIBILITY
The Sterling “XF/XC” unit heater is ETL certified in accordance with
categories I and III venting requirements. This certification allows units
to be vented both vertically and horizontally using either single wall or
double wall venting materials. Available as an accessory option, Sterling
offers a Combustion Air Inlet Kit that allows for concentric venting of
both combustion and exhaust air systems through one termination.
TUBULAR HEAT EXCHANGER
The Sterling tubular heat exchanger has been designed to provide
maximum and uniform heat transfer. The low pressure drop
associated with this design enables heated air to be evenly distributed
to the conditioned space. This curved, non-welded serpentine design
experiences less thermally induced stress making it highly durable for
significantly longer service life. All Sterling tubular heat exchangers
are constructed of heavy duty 20-gauge aluminized steel. Optional
409 stainless steel heat exchangers are also available.
DIRECT SPARK IGNITION SYSTEM & CONTROL ACCESSIBILITY
Sterling “XF/XC” units utilize a direct spark pilotless ignition of the
burner, providing fast heat delivery. This highly reliable and efficient
ignition system incorporates an integrated electronic control
board to regulate the system sequence of operation, including
an externally mounted LED indicator for simple troubleshooting.
Designed with the service person in mind, ignition and fan controls
are located in one centrally located control panel.
XF/XC SERIES
Unit Size 100 125 150 175 200 250 300 350 400
PERFORMANCE DATA†
Input - BTU/Hr. 100,000 125,000 150,000 175,000 200,000 250,000 300,000 350,000 400,000
Output - BTU/Hr. 83,000 103,750 124,500 145,250 166,000 207,500 249,000 290,500 332,000
Flue Size Diameter* - in 5 5 5 5 5 5 6 6 6
Gas Inlet, Natural/LP Gas - in 1/2 1/2 1/2 1/2 1/2 3/4 3/4 3/4 3/4
XF PERFORMANCE/DIMENSIONAL DATA
Free Air Delivery - CFM 1,600 2,200 2,400 2,850 3,200 3,450 5,000 5,600 5,800
Air Temperature Rise 47°F 42°F 47°F 46°F 47°F 54°F 45°F 47°F 51°F
Full Load Amps at 120V 6.4 6.9 6.9 8 8 8 11.6 13.8 13.8
MOTOR DATA: Motor HP 1/10 1/4 1/4 1/3 1/3 1/3 1/4 (2) 1/3 (2) 1/3 (2)
Motor Type (ODP) SP PSC PSC PSC PSC PSC PSC PSC PSC
RPM 1,050 1,050 1,050 1,050 1,050 1,050 1,050 1,050 1,050
Amps @ 115V 4.2 4.7 4.7 5.8 5.8 5.8 9.4 11.6 11.6
DIMENSIONAL DATA - inches
Overall Unit Height 33-3/4 33-3/4 33-3/4 33-3/4 33-3/4 33-3/4 34 34 34
Overall Unit Width 25-1/4 25-1/4 25-1/4 37-1/4 37-1/4 37-1/4 55-1/4 55-1/4 55-1/4
Overall Unit Depth 43-1/2 43-1/2 43-1/2 43-1/2 43-1/2 43-1/2 44-3/4 44-3/4 44-3/4
XC PERFORMANCE/DIMENSIONAL DATA
Free Air Delivery - CFM 1,181 1,476 1,771 2,067 2,362 2,953 3,501 4,134 4,724
Air Temperature Rise 65°F 65°F 65°F 65°F 65°F 65°F 65°F 65°F 65°F
Outlet Velocity - FPM 370 463 555 395 451 564 422 498 570
MOTOR DATA: Motor HP 1/4 1/2 1/2 3/4 3/4 1 1 1-1/2 1-1/2
Motor Type ODP** SPH SPH SPH SPH SPH Cap. Start Cap. Start Cap. Start Cap. Start
RPM 1,725 1,725 1,725 1,725 1,725 1,725 1,725 1,725 1,725
Amps @ 115V†† 5.1 7.2 7.2 11.6 11.6 13 13 18.2 18.2
DIMENSIONAL DATA - inches
Overall Unit Height 33-3/4 33-3/4 33-3/4 33-3/4 33-3/4 33-3/4 34 34 34
Overall Unit Width 25-1/4 25-1/4 25-1/4 37-1/4 37-1/4 37-1/4 55-1/4 55-1/4 55-1/4
Overall Unit Depth 49-3/4 49-3/8 49-3/8 56-1/8 56-1/8 56-1/8 53-3/8 56-1/8 56-1/8
† Ratings shown are for unit installations at elevations between 0 and 2,000 ft (0 to 610m). For unit installations in U.S.A. above 2,000 ft. (610m), the unit input must be field
derated 4% for each 1,000 ft. (305m) above sea level; refer to local codes, or in absence of local codes, refer to the latest edition of the National Fuel Gas Code, ANSI Standard
Z223.1 (N.F.P.A. No. 54).
For installations in Canada, any reference to deration at altitudes in excess of 2,000 ft. (610m) are to be ignored. At altitudes of 2,000 ft. to 4,500 ft. (610 to 1372m), the unit must
be field derated to 90% of the normal altitude rating, and be so marked in accordance with the ETL certification. See unit installation manual for field deration information.
†† See installation manual for ODP motor full load amp values at non-standard voltages.
* Flue collar is factory supplied with unit; to be field installed per included instructions.
** LEGEND: SPH = SPLIT PHASE CAP. START = CAPACITOR START ODP = OPEN DRIP PROOF
XF & XC
Document No: HT-IOM
Date: 04/09/2020
HEATED PRODUCTS SUPPLEMENT
Electrically Heated Products
Electrically heated products must be mounted on the
inside of the building. Electrically heated products come
standard with a thermostat (provided and shipped loose,
unless ordered as factory pre-mounted) and is to be field
installed at eye level within 3 feet (1 M) of the unit.
Note:
1. Electrically heated Low Profile, Phantom, Standard2,
High Velocity2 and Extra Power2 units come with
internally mounted controls and comes with 24V
control circuit as standard option (FIG. 1) except the
Low Profile series that is available with an optional
24V controls with line voltage, 115V or 208-240V
controls as typical offering.
2. Wiring connection for the electrically heated Low
Profile units is at the top of the housing which can be
accessed by removing the top cover plate while
internal terminal blocks are provided for electrically
heated Phantom, Standard2, High Velocity2 and
Extra Power2 units.
3. Electrically heated Wind Stopping and WindGuard
units include an electric heater control panel
mounted on the right-hand side, as standard.
Optional motor/unit control panel available, which
includes a remote 24-volt thermostat with On/Off
switch with terminals provided.
The thermostat should be mounted as close to the
product’s discharge air flow as possible in order to best
sense the discharged air temperature around the door
opening. Connect proper voltage to the product per local
and NEC codes.
Thermal overload protection is built into the heater coil
assembly/assemblies. In the event of an overload
condition, electrical power will be disconnected from the
heater coil. Upon diagnosing the problem, electrical
power can be re-instated to the heater coil(s) by
manually resetting the thermal overload lever(s) or
buttons(s) located in the unit or panel.
To operate multiple units mounted side by side, utilizing
a single door switch and single thermostat, a
master/slave configuration is required. (FIG. 2)
For high ampacity units, new holes can be drilled to bring
in electrical wires. Use appropriate bushing for new holes
to protect wire casing. High temperature silicon wires
would be recommended for main supply power.
FIG. 1 (Electrically Heated STD2 unit)
FIG. 2 (Tandem Mounted Master/Slave Units)
NOTE
Before proceeding, refer to the units specific IOM Manual for safety, installation and start information. Verify
proper voltage to the product per local and NEC codes. Ensure proper rotation for units with three phase
motors.
Unobstructed clearance space of 18”-24” must be
provided at the top of air curtain for performance and
service for all heated air curtain.
Steam and Hot Water Coil Heated Products
Steam/Hot Water Coil (coil) heated products must
be mounted on the inside of the building. The coil(s) for
Low Profile, Standard, High Velocity, Extra Power and
Phantom units are shipped internally mounted to the unit.
Wind Stopping and WindGuard units are shipped with
coil(s) factory mounted.
Once the coil has been secured to the cabinet, access to
the motor and fan is through the removable access
panels located on the top of the cabinet for Standard,
High Velocity, Extra Power and Phantom units.
Note: Low Profile and Wind Stopping units require the
removal of the coil to access the motor and/or fans.
All piping should be done by a licensed pipe fitter and in
accordance with local codes and regulations. Connect
the supply and return fittings as required. All traps and
valves are sized and field-installed by others. For
Standard, High Velocity and Extra Power units, front
intake screen must be removed to access vent plugs.
Standard coil configuration is right hand supply and left-
hand return. (FIGS. 3 & 4) Optional temperature controls,
if ordered, are to be field installed by others.
FIG. 3 (Hot Water Heated STD Unit)
FIG. 4 (Steam Heated STD Unit)
Gas Heated Products
Gas heated products must be mounted on the inside of
the building. The product consists of three major
components: the air curtain, transition section(s) and
indirect gas fired duct furnaces(s) (FIG 5).
The transition section(s) are shipped knocked down and
are to be field assembled and installed per their
supplemental instructions. (FIG. 6) (Exceptions are
WMI/H and BD series, fully assembled transitions are
provided).
FIG. 5 (Indirect Fired Gas Heated HV Unit)
Note:
1. Assemble the transition section(s).
2. Measure the width of the transition section(s) to
determine the installation location for the duct
furnace(s).
3. The duct furnace(s) are typically hung from above,
with threaded rods, in order to support the weight of
the duct furnaces. The duct furnace(s) must be
centered and equally spaced with a 2” clearance
between furnaces and the transition(s).
4. Move the adjustable blank off plates to close gaps in the
transition(s) and secure the flanges to the transitions.
All gas piping and duct furnace(s) exhaust venting should be
done by a licensed pipe fitter and in accordance with local
codes and regulations. Power vented exhaust duct runs
should not exceed 100’ for horizontal venting. See furnace
installation manual for piping and other details.
FIG. 6 (Transition Kit Exploded View) In the United
States,
installation must
conform with
local codes or,
in the absence of
local codes, with
Installation of the
National Fuel
Gas Code, ANSI
Z223.1-latest
edition, from the
American
National Standard Institute. Further reference should be
made to the recommendation of your fuel supplier. In
Canada, Installation must conform with local codes or, in the
absence of local codes, with Installation Codes for Gas
Burning Appliances and Equipment, CGA Standard
CAN/CGA 1B-149. Further reference should be made to the
recommendation of your fuel supplier.
14716 S. Broadway St., Gardena, CA 90248
(800) 421-1266 ● Fax: (310) 324-3030 ● www.marsair.com
TYPICAL GAS
INSTALLATION
THREADED RODS BY OTHERS (4 PER AIR CURTAIN)
THREADED RODS BY OTHERS
(TRANSITION LONGER THAN
72" WILL REQUIRE CENTER SUPPORT)
THREADED RODS BY OTHERS
(2 PER FURNACE)
FURNACE
TRANSITION
AIR CURTAIN
EXHAUST
VENTING
BY OTHERS

This manual suits for next models

11

Other Mars Heater manuals

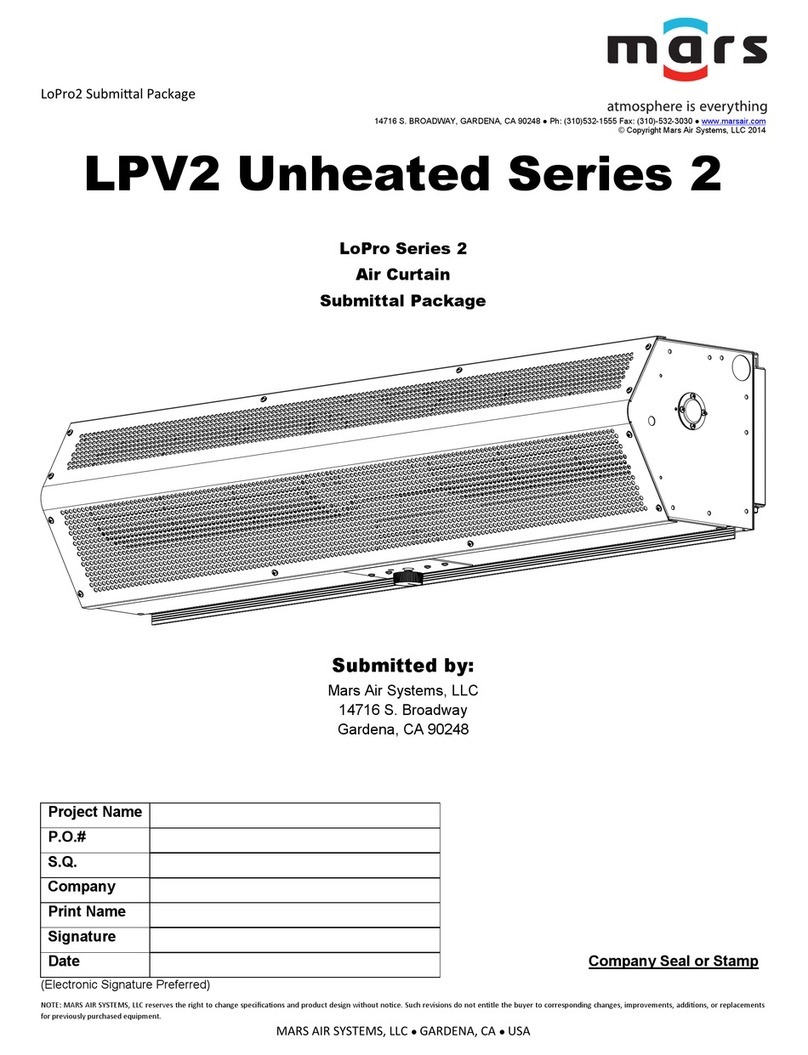
Mars LPV2 2 Series User manual

Mars

Mars LPV2 2 Series User manual

Mars BD2296-1E TS Series User manual

Mars

Mars BD2296-1E TS Series User manual

Mars BD3096-1 TS Series User manual

Mars

Mars BD3096-1 TS Series User manual

Mars BD14 Series User manual

Mars

Mars BD14 Series User manual

Mars High Velocity 2 Series User manual

Mars

Mars High Velocity 2 Series User manual

Mars BD2296-1I-TS User manual

Mars

Mars BD2296-1I-TS User manual

Mars LVP2 2 Series User manual

Mars

Mars LVP2 2 Series User manual

Mars Comfort-Aire Century HG Series Guide

Mars

Mars Comfort-Aire Century HG Series Guide

Mars STD2 Unheated 2 Series User manual

Mars

Mars STD2 Unheated 2 Series User manual

Mars LoPro Series User manual

Mars

Mars LoPro Series User manual

Mars QP10 Series User manual

Mars

Mars QP10 Series User manual

Mars BD1896-1EH-TS User manual

Mars

Mars BD1896-1EH-TS User manual

Mars Phantom 12 Series User manual

Mars

Mars Phantom 12 Series User manual

Mars BD18 Series User manual

Mars

Mars BD18 Series User manual

Mars WMH Series User manual

Mars

Mars WMH Series User manual

Mars WMI Series User manual

Mars

Mars WMI Series User manual

Mars Wind Stopping 16 Series User manual

Mars

Mars Wind Stopping 16 Series User manual

Mars BELT DRIVE INDUSTRIAL Series User manual
Mars

Mars BELT DRIVE INDUSTRIAL Series User manual

Mars BD2296 1I TS Series User manual

Mars

Mars BD2296 1I TS Series User manual

Mars WMH Unheated Series User manual

Mars

Mars WMH Unheated Series User manual
Mars QP10 Series User manual

Mars

Mars QP10 Series User manual

Mars BD22 Series User manual

Mars

Mars BD22 Series User manual
Mars LPV2 Series User manual

Mars

Mars LPV2 Series User manual

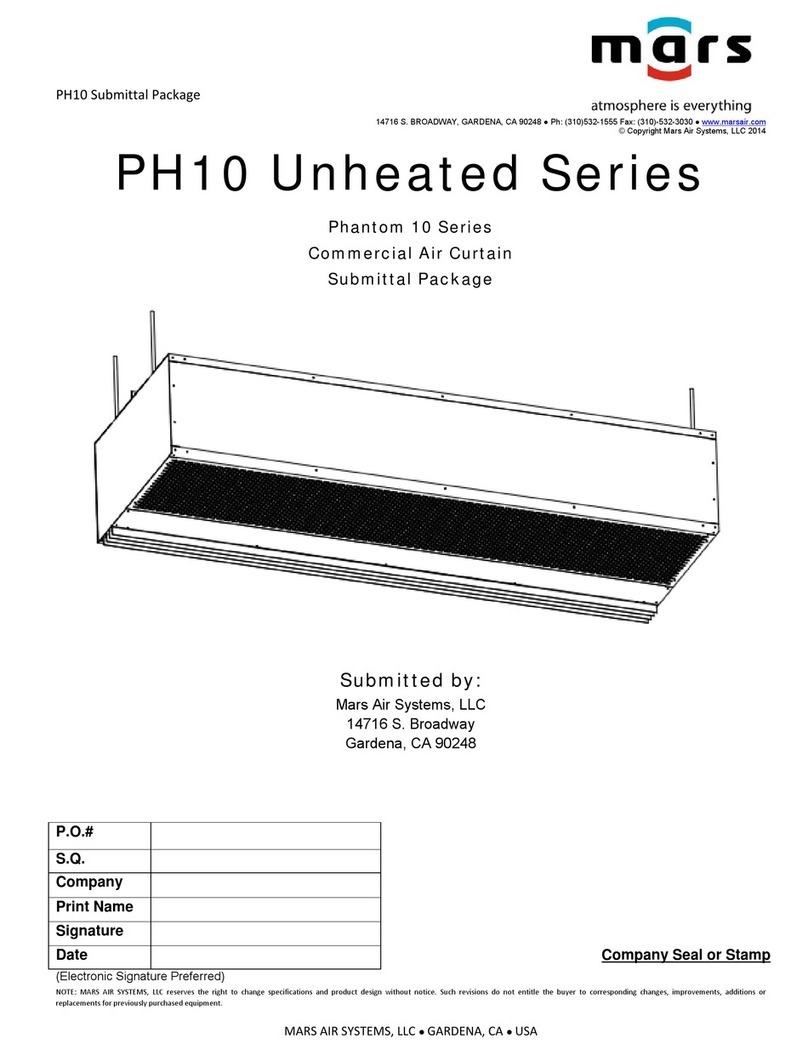
Mars Phantom 10 Series User manual

Mars

Mars Phantom 10 Series User manual

Popular Heater manuals by other brands

RS HIR-55 manual

RS

RS HIR-55 manual

Gnosjo 36-1927 Instructions for use

Gnosjo

Gnosjo 36-1927 Instructions for use

Creda CAR 033 Operating instructions manual

Creda

Creda CAR 033 Operating instructions manual

Sunbeam SCH4062 owner's guide

Sunbeam

Sunbeam SCH4062 owner's guide

Melchioni CALIENTE user manual

Melchioni

Melchioni CALIENTE user manual

S&P RADIANT-1505 manual

S&P

S&P RADIANT-1505 manual

Cadet SoftHEAT owner's guide

Cadet

Cadet SoftHEAT owner's guide

Hearth Trends Oxford Infared Heater user manual

Hearth Trends

Hearth Trends Oxford Infared Heater user manual

dellonda DG177 instructions

dellonda

dellonda DG177 instructions

Smith’s Environmental Products Space Saver Easy guide

Smith’s Environmental Products

Smith’s Environmental Products Space Saver Easy guide

Watlow FIREBAR Installation & maintenance manual

Watlow

Watlow FIREBAR Installation & maintenance manual

Orbegozo BP 5005 A instruction manual

Orbegozo

Orbegozo BP 5005 A instruction manual

Bosch RDE 1821415 Installation and operating instructions

Bosch

Bosch RDE 1821415 Installation and operating instructions

Timberk T-EC1000-X2E-WF instruction manual

Timberk

Timberk T-EC1000-X2E-WF instruction manual

WILL Oil Premium WiFi Series Assembly and instruction manual

WILL

WILL Oil Premium WiFi Series Assembly and instruction manual

Noirot MELODIE user manual

Noirot

Noirot MELODIE user manual

Kampmann Katherm HK Series Assembly and installation instructions

Kampmann

Kampmann Katherm HK Series Assembly and installation instructions

DeLonghi HFX60 Series Instructions for use

DeLonghi

DeLonghi HFX60 Series Instructions for use

manuals.online logo
manuals.online logoBrands
  • About & Mission
  • Contact us
  • Privacy Policy
  • Terms and Conditions

Copyright 2025 Manuals.Online. All Rights Reserved.