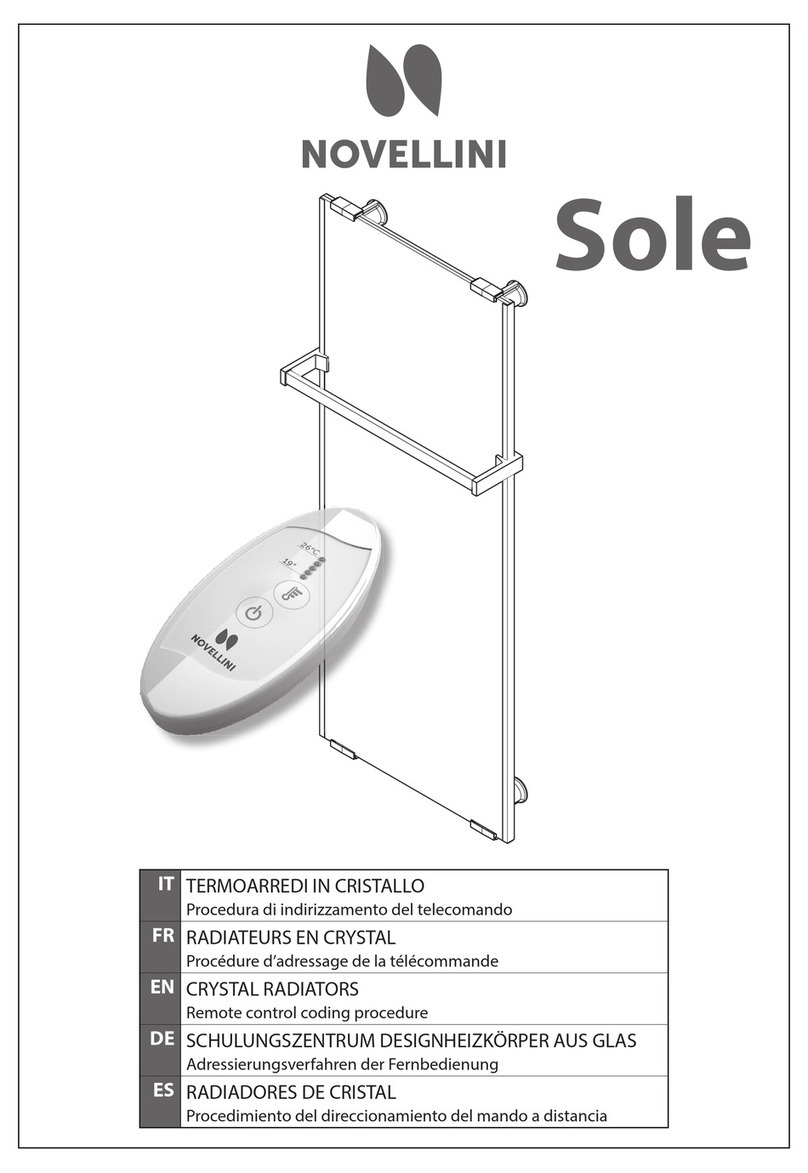
Novellini Sole N0041 User manual

IT
FR
EN
DE
NL
ES
PT
CS
SL
HU
PL
RU
NO
SV
EL
HR
ZH
AR
TERMOARREDO - Documento da conservare
THERMO-AMEUBLEMENT - Document à conserver
RADIATORS - Document to be kept
DESIGNHEIZKÖRPER - Dokument bitte aufbewahren
DESIGN RADIATOR - Dit document moet bewaard worden
RADIADOR DECORATIVO - Documento para conservar
RADIADORES DE DESIGN - Documento a conservar
OHŘEVNÉ TĚLESO - Dokument k uschování
DESING RADIJATOR - Priporočamo, da ta dokument shranite
FORMATERVEZETTFŰTŐTEST-Őrizzemegeztadokumentumot
STYLOWY GRZEJNIK - Dokument do przechowania
ОБОГРЕВАТЕЛЬНЫЙ ПРИБОР - Документ для хранения
RADIATOR - Ta vare på dette dokumentet
DESIGNRADIATOR - Dokument som ska bevaras
ΘΕΡΜΑΝΤΙΚΟ ΣΩΜΑ - Διαφυλλάξτε αυτό το έγγραφο
GRIJAĆA PLOČA - Pohranite ovaj dokument
散热器 - 需保存的文件
-

-2-
≤15 cm
≤15 cm
≤15 cm
≤15 cm
≤ 50 cm
cm 60
cm 225
cm 60
OK
NO NO OK
zona 1 zona 2 zona 3
cm 60
cm 225
cm 60
OK
NO
OK
zona 1 zona 2 zona 3
OK
Placer le radiateur seulement dans la zone 3 o 2 en France
IT - EN - DE - NL - ES - PT - CS - SL - HU
PL - RU - NO - SV - EL - HR - ZH - AR
FR
A
B

-3-
ø8
ø6
4x35 mm x4
S6 x4 x1
B
A
B
A
180 180
50
40
150150
3
4
4
A
B
4
80
A
B
180
40
40
3
3
4
Amm Bmm
400 1000
500 1000
600 1050
600 1250
600 1500

-4-
Installazione
Installation
Installation
Installierung
Installatie
Instalación
Instalação
Montáž
Namestitev
Felszerelés
Montaż
Монтаж
Montering
Installation
Εγκατάσταση
Ugradnja
安装
IT
FR
EN
DE
NL
ES
PT
CS
SL
HU
PL
RU
NO
SV
EL
HR
ZH
AR
4x35 mm x4
S6 x4
ø6 mm
1
2

-5-
3
4
cod. 60090SOL

-6-
ISTRUZIONI PER L’USO
PRIMA DI UTILIZZARE IL PRODOTTO:
Leggere attentamente queste istruzioni, in modo da evitare
danneggiamenti o comunque il vericarsi di situazioni di
pericolo.
Qualsiasi utilizzo del prodotto diverso da quanto indicato nel
presente manuale può causare incendi, pericoli elettrici o ferite
e rende nulla qualsiasi garanzia.
Prima di ogni operazione, rimuovere con cura l’imballo e
controllare la perfetta integrità del prodotto.
Nel caso si evidenziassero dei difetti o danni, non installare nè
cercare di riparare l’apparecchiatura, ma rivolgersi al rivenditore.
Non lasciare l’imballo alla portata dei bambini e smaltirne le
parti in conformità con le disposizioni vigenti.
PER LA VOSTRA SICUREZZA:
Assicuratevi che l’alimentazione di rete corrisponda ai dati di
targa e che l’impianto elettrico sia correttamente dimensionato
all’utilizzo.
Non lasciate mai che animali o bambini giochino o tocchino il
prodotto.
Attenzione! Durante il funzionamento il pannello può diventare
molto caldo (circa 70° C).
Questo prodotto è progettato per uso domestico e non è
adatto per l’utilizzo mobile ed in ambienti pubblici o su veicoli,
imbarcazioni o aeromobili.
Prima accensione:
Tenere premuto in alto a sinistra per entrare in modalità
programmazione“orientamento display”.
FUR 0.99.8.4 uni
Dec 13 2010
08:05:05
Sleve Address : 0x2e0
Stabilire l’orientamento:
Premere sulla lettera corretta per stabilire il giusto orientamento.
Select the correct
view
A
Select the correct
view
A
Select the correct
view
A
Select the correct
view
A
Impostare l’orario:
Tenere premuto per qualche secondo il simbolo indicato (3).
3
Con i simboli (1) e (2) regolare l’ora, premere (3) per confermare.
Con i simboli (1) e (2) regolare i minuti, (3) per confermare.
Proseguire con la medesima modalità per impostare la data.
Al termine premendo (3) ricompare la schermata principale.
16:30
01 GEN 17
2
3
1
Premendo il simbolo indicato si entra in Stand-by visualizzando
l’ora impostata.
Funzioni:
Premendo il simbolo indicato si entra nelle funzioni principali.
16:30
01 GEN 17
Regolazione temperatura:
Premendo il simbolo indicato si entra in modalità “regolazione
termostato”.
ITALIANO

-7-
Premere i simboli (1) e (2) per variare la temperatura da 19° a
26°C. Premere (4) per torare al menu principale.
2
4
1
A questo punto il termoarredo si attiva no al raggiungimento
nell’ambiente della temperatura impostata.
Regolazione timer automatico:
Premendo il simbolo indicato si entra nel menu regolazione
timer.
Le cifre nella sezione ON iniziano a lampeggiare, con i tasti (1)
e (2) aumentare o diminuire l’ora di accensione. Premere (3) per
confermare. Ripetere la sequenza per i minuti e per la sezione
OFF che determina lo spegnimento del termoarredo.
2
4
1
3
Al termine premere il simbolo (4) per tornare al menu principale.
Quando il timer automatico è attivo il menu si presenta come
sotto.
Per disattivarlo in qualsiasi momento premere il simbolo indicato.
Funzione Turbo:
Premendo il simbolo indicato si entra in modalità“turbo”.
La funzione TURBO sul termoarredo SOLE prevede un
funzionamento in continuo, indipendentemente dalla
temperatura ambiente.
Per ragioni di sicurezza la funzione TURBO si autolimita ad
un ciclo di 4 ore.
Trascorse 4 ore il termo arredo continuerà a funzionare in
maniera normale termostatando in funzione della temperatura
ambiente e della temperatura impostata sul display.
Per interrompere anticipatamente la funzione TURBO
(prima che siano trascorse le 4 ore dall’avvio) spegnere il
termoarredo con il tasto (5).
5
Al prossimo riavvio il termoarredo funzionerà in maniera
normale.
ITALIANO

-8-
FRANÇAIS
MODE D’EMPLOI
AVANT D’UTILISER LE PRODUIT:
Lire attentivement ces instructions, an d’éviter tout dommage
ou toute situation de danger.
Toute utilisation du produit ne respectant pas ce qui est
indiqué dans ce manuel peut provoquer des incendies, risques
d’électrocution ou de blessures, et annule la garantie.
Avant toute opération, enlever avec soin l’emballage et contrôler
la parfaite intégrité du produit.
En cas de défauts ou autres dommages visibles, ne pas installer
ni tenter de réparer l’appareil, mais s’adresser au revendeur.
Ne pas laisser l’emballage à la portée des enfants, et recycler les
diérentes parties selon les lois en vigueur.
POUR VOTRE SÉCURITÉ:
Assurez-vous que l’alimentation de secteur correspond bien aux
données reportées sur la plaque et que l’installation électrique
est adaptée à l’utilisation.
Ne laissez jamais les animaux ou les enfants jouer avec le produit
ou le toucher.
Attention ! Pendant le fonctionnement, le panneau peut devenir
très chaud (environ 70°C).
Ce produit a été conçu pour un usage domestique et n’est pas
adapté pour une utilisation itinérante ni pour un lieu public ou
autre véhicule, bateau ou aéronef.
Première mise en marche:
Continuer d’appuyer en haut à gauche pour passer en mode de
programmation“orientation de l’écran”.
FUR 0.99.8.4 uni
Dec 13 2010
08:05:05
Sleve Address : 0x2e0
Stabiliser l’orientation:
Appuyer sur la lettre correcte pour stabiliser l’orientation
correcte.
Select the correct
view
A
Select the correct
view
A
Select the correct
view
A
Select the correct
view
A
Régler l’heure:
Garder appuyé pendant quelques secondes le symbole indiqué
(3).
3
Avec les symboles (1) et (2) régler l’heure, appuyer sur (3) pour
conrmer.
Avec les symboles (1) et (2) régler les minutes, (3) pour conrmer.
Faire de même pour régler la date.
Pour nir, appuyer sur (3) pour retourner à l’écran principal.
16:30
01 GEN 17
2
3
1
En appuyant sur le symbole indiqué on entre en mode Veille
avec l’heure réglée.
Fonctions:
En appuyant sur le symbole indiqué on entre dans les fonctions
principales.
16:30
01 GEN 17
Réglage de la température:
En appuyant sur le symbole indiqué on passe en mode “réglage
du thermostat”.

-9-
FRANÇAIS
Appuyer sur les symboles (1) et (2) pour changer la température
entre 19 et 26 °C. Appuyer sur (4) pour revenir au menu principal.
2
4
1
À ce point, le thermostat s’active jusqu’à ce qui atteigne la
température réglée.
Réglage du minuteur automatique:
En appuyant sur le symbole indiqué on entre dans le menu du
minuteur.
Les chires dans la section ON commencent à clignoter, avec les
touches (1) et (2) avancer ou reculer l’heure de mise en marche.
Appuyer sur (3) pour conrmer. Répéter la séquence pour les
minutes et pour la section OFF déterminant l’arrêt de l’appareil
de chauage.
2
4
1
3
Pour nir, appuyer sur le symbole (4) pour retourner au menu
principal. Lorsque le minuteur automatique est activé, le menu
s’ache comme ci-dessous.
Pour le désactiver, appuyer sur le symbole indiqué.
Fonction Turbo:
En appuyant sur le symbole indiqué on passe en mode“turbo”.
La fonction TURBO de l’appareil de chauage SOLE assure un
fonctionnement constant, indépendamment de la température
ambiante.
Pour des raisons de sécurité, la fonction TURBO se limite à un
cycle de 4 heures.
Au bout de 4 heures, l’appareil de chauage continuera
à fonctionner de manière normale en chauant selon la
température ambiante et la température réglée sur l’écran.
Pour interrompre d’avance la fonction TURBO (avant que
les 4 heures ne se soient écoulées) éteindre l’ appareil de
chauage avec la touche (5).
5
Lors du prochain redémarrage, le radiateur fonctionnera en
mode normal.

-10-
ENGLISH
INSTRUCTIONS FOR USE
BEFORE USING THE PRODUCT
Read these instructions carefully so as to avoid damages and,
however, to check on hazardous situations.
Using this product for purposes other than those specied in
this manual may cause res, electrical hazards or wounds thus
invalidating any warranties.
Before operating, carefully remove the packaging and check
that the product is intact.
Should you see any defects or damages, do not install or attempt
to repair the equipment; instead, you should inform the retailer.
Do not leave the packaging within the reach of children, and
dispose of the parts in conformity with the norms and provisions
in force.
FOR YOUR SAFETY
Ensure that the electricity corresponds to the data on the
product’s license plate and that the electric system is suitable to
the use of the product.
Never allow animals or children to play with or touch the product.
Attention! When turned on, the panel may be very hot (about
70°C).
This product was designed for home use and is not suitable for
use in public places or on vehicles, boats or aircrafts.
First activation:
Pressandholdinthetopleftcornertoenterintotheprogramming
mode“display orientation”.
FUR 0.99.8.4 uni
Dec 13 2010
08:05:05
Sleve Address : 0x2e0
Choose the orientation:
Press the correct letter to choose the correct orientation.
Select the correct
view
A
Select the correct
view
A
Select the correct
view
A
Select the correct
view
A
Set the time:
Press and hold for a few seconds the symbol shown (3).
3
With symbols (1) and (2) set the hour, press (3) to conrm.
With symbols (1) and (2) adjust the minutes, (3) to conrm.
Continue with the same method to set the date.
After by pressing (3) the main screen reappears.
16:30
01 GEN 17
2
3
1
By pressing the symbol shown you enter in Stand-by showing
the set time.
Functions:
By pressing the symbol shown you enter the main functions.
16:30
01 GEN 17
Temperature regulation:
By pressing the symbol shown you enter in the “thermostat
setting”mode.
Press symbols (1) and (2) to change the temperature from 19° to
26° c. Press (4) to return to the main menu.

-11-
ENGLISH
2
4
1
At this point the towel warmer is activated until the desired
temperature setting.
Automatic timer setting:
By pressing the symbol shown you enter the timer setting menu.
The gures in the ON section begin to Flash, with the buttons (1)
and (2) increase or decrease the start time. Press (3) to conrm.
Repeat the sequence for the minutes and for the OFF section
which determines when the radiator will be switched o.
2
4
1
3
When nished, press the symbol (4) to return to the main menu.
When the automatic time is active, the menu appears as below.
To deactivate it at any time press the symbol shown.
Turbo function:
By pressing the symbol shown you enter in the“turbo”mode”.
The TURBO function on the SOLE radiator provides for
continuous operation, regardless of the room temperature.
For safety reasons the TURBO function limits itself to a cycle
of 4 hours.
After 4 hours the radiator will continue to operate normally
regulating the thermostat according to the room temperature
set on the display.
To discontinue the TURBO function (before the 4 hours
from switching on have passed) switch o the radiator by
pressing (5).
5
When next switched on, the radiator will operate normally.

-12-
DEUTSCH
GEBRAUCHSANLEITUNG
BEVOR SIE DAS PRODUKT VERWENDEN
Lesen Sie diese Anweisungen sorgfältig, um das Auftreten von
Schäden oder Gefahrsituationen zu vermeiden.
Jegliche Nutzung des Produktes anders als hier beschrieben
kann zu Bränden, elektrische Gefärdungen oder Verletzungen
führen und anulliert jegliche Garantieleistung.
Vor dem Gebrauch, entfernen Sie vorsichtig die Verpackung und
überprüfen Sie die perfekte Integrität des Produkts.
In dem Falle von Mängeln oder Schäden, soll das Produkt nicht
installiert werden und Reparturversuche vermieden werden;
wenden Sie sich in diesen Fällen an Ihrem Fachhändler.
Lassen Sie die Verpackung außerhalb der Reichweite von
Kindern und entsorgen Sie diese in Übereinstimmung mit den
Bestimmungen in Kraft.
FÜR IHRE SICHERHEIT
Achten Sie darauf, dass die Stromversorgung dem Typenschilds-
Daten entspricht und dass die elektrische Anlage für den
Gebrauch richtig dimensioniert ist.
Lassen Sie niemals Kinder oder Haustiere mit dem Produkt
spielen oder in Berührung kommen.
Achtung! Während des Betriebs kann das Paneel sehr heiß
werden (ca. 70 ° C).
Dieses Produkt ist für den privaten Gebrauch entwickelt und
ist nicht für den mobilen Einsatz, in öentlichen Räumen,
Fahrzeugen, Booten oder Flugzeugen geeignet.
Erste Inbetriebnahme:
Oben links gedrückt halten, um in den Programmiermodus
“Displayausrichtung”zu gelangen.
FUR 0.99.8.4 uni
Dec 13 2010
08:05:05
Sleve Address : 0x2e0
Festlegen der Ausrichtung:
Auf den richtigen Buchstaben drücken, um die korrekte
Ausrichtung festzulegen.
Select the correct
view
A
Select the correct
view
A
Select the correct
view
A
Select the correct
view
A
Einstellen der Uhrzeit:
Das angegebene Symbol (3) einige Sekunden lang gedrückt
halten.
3
Über die Symbole (1) und (2) die Stunden einstellen und (3)
drücken, um zu bestätigen.
Über die Symbole (1) und (2) die Minuten einstellen und (3)
drücken, um zu bestätigen.
Auf gleiche Weise vorgehen, um das Datum einzustellen.
Danach erscheint durch Drücken von (3) erneut der
Hauptbildschirm.
16:30
01 GEN 17
2
3
1
Durch Drücken des angegebenen Symbols gelangt man in den
Standby-Modus, und die eingestellte Uhrzeit wird angezeigt.
Funktionen:
Durch Drücken des angegebenen Symbols greift man auf die
Hauptfunktionen zu.
16:30
01 GEN 17
Temperaturregelung:
Durch Drücken des angegebenen Symbols gelangt man in den
Modus “Thermostatregelung”.

-13-
DEUTSCH
Über die Symbole (1) und (2) die Temperatur zwischen
19° und 26 °C einstellen. (4) drücken, um zum Hauptmenü
zurückzugelangen.
2
4
1
Nun aktiviert sich der Heizkörper, bis in der Umgebung die
eingestellte Temperatur erreicht ist.
Einstellen der automatischen Zeitschaltuhr:
Durch Drücken des angegebenen Symbols gelangt man in das
Menü zur Einstellung der Zeitschaltuhr.
Die Zahlen im Bereich ON beginnen zu blinken. Über die Tasten
(1) und (2) die Einschaltstunde erhöhen oder verringern. (3)
drücken, um zu bestätigen. Die Sequenz für die Minuten und den
Bereich OFF wiederholen, der die Ausschaltung des Heizkörpers
festlegt.
2
4
1
3
Danach (4) drücken, um zum Hauptmenü zurückzugelangen.
Wenn die automatische Zeitschaltuhr aktiviert ist, erscheint das
Menü wie nachstehend gezeigt.
Durch Drücken des angegebenen Symbols lässt sie sich jederzeit
deaktivieren.
Turbofunktion:
Durch Drücken des angegebenen Symbols gelangt man in den
Modus “Turbo”.
Die TURBOFUNKTION beim SOLE Heizkörper sieht eine
Dauerfunktion unabhängig von der Umgebungstemperatur vor.
Aus Sicherheitsgründen ist die TURBOFUNKTION auf eine
4-stündige Laufzeit begrenzt.
Nach Ablauf der 4 Stunden wird der Heizkörper normal
weiterbetrieben und regelt die Temperatur über den
Thermostaten in Funktion der Umgebungstemperatur und der
auf dem Display eingestellten Temperatur.
Um die TURBOFUNKTION vorzeitig zu unterbrechen (bevor
die 4 Stunden nach dem Start abgelaufen sind), den
Heizkörper über die Taste (5) ausschalten.
5
Bei der nächsten Inbetriebnahme wird der HK in Standard
Modalität funktionieren.

-14-
NEDERLANDS
GEBRUIKSAANWIJZINGEN
VOORDAT HET PRODUCT WORDT GEBRUIKT
Lees deze aanwijzingen aandachtig door zodat beschadigingen
en/of gevaarlijke situaties worden vermeden.
Eender welk ander gebruik van het product dan hetgene dat in
deze handleiding wordt aangeduid, kan brand, elektrisch gevaar
of letsels veroorzaken, en doet de garantie vervallen.
Voordat eender welke handeling wordt uitgevoerd, moet
de verpakking zorgvuldig verwijderd worden en moet
gecontroleerd worden of het product intact is.
In geval van defecten of schade mag het toestel niet geïnstalleerd
worden, en mag niet geprobeerd worden om het te herstellen,
maar moet de verkoper gecontacteerd worden.
Houd de verpakking uit de buurt van kinderen, en zamel de
delen in overeenkomstig de geldende wetsbepalingen.
VOOR UW VEILIGHEID
Controleer of de huiselijke stroomtoevoer overeenstemt met de
gegevens die worden aangeduid op de plaat, en of de elektrische
installatie correct is gedimensioneerd voor het gebruik.
Sta niet toe dat kinderen of dieren met het toestel spelen of het
aanraken.
Aandacht! Het paneel kan tijdens het gebruik erg heet worden
(ongeveer 70° C).
Dit product werd ontworpen voor huiselijk gebruik, en is
niet geschikt voor mobiel gebruik en gebruik in openbare
omgevingen of in voertuigen, boten of vliegtuigen.
Eerste activatie:
Houd de knop in de linkerbovenhoek ingedrukt om de
programmamodus“schermstand” te openen.
FUR 0.99.8.4 uni
Dec 13 2010
08:05:05
Sleve Address : 0x2e0
De richting kiezen:
Druk op de juiste letter om de juiste richting te kiezen.
Select the correct
view
A
Select the correct
view
A
Select the correct
view
A
Select the correct
view
A
De tijd instellen:
Houd het weergegeven symbool gedurende enkele seconden
ingedrukt (3).
3
Met de symbolen (1) en (2) kunt u de uren instellen. Druk op (3)
om te bevestigen.
Met de symbolen (1) en (2) kunt u de minuten instellen. Druk op
(3) om te bevestigen.
Ga verder met dezelfde methode om de datum in te stellen.
Als u op (3) drukt, wordt het hoofdscherm weergegeven.
16:30
01 GEN 17
2
3
1
Door op het onderstaande symbool te drukken, wordt de stand-
bymodus geactiveerd en de ingestelde tijd weergegeven.
Functies:
Door op het onderstaande symbool te drukken, worden de
hoofdfuncties geopend.
16:30
01 GEN 17
Temperatuurregeling:
door op het onderstaande symbool te drukken, opent u de
modus“thermostaatinstelling”.

-15-
NEDERLANDS
Druk op de symbolen (1) en (2) om de temperatuur van 19
naar 26 °C te wijzigen. Druk op (4) om terug te gaan naar het
hoofdmenu.
2
4
1
Nu wordt de handdoekverwarming geactiveerd tot de gewenste
temperatuurinstelling is bereikt.
Instelling voor de automatische timerinstelling:
Door op het onderstaande symbool te drukken, wordt het
instellingsmenu van de timer geopend.
De cijfers in het gedeelte AAN beginnen te knipperen, waarbij
u de starttijd kunt verhogen of verlagen met de knoppen (1) en
(2). Druk op (3) om te bevestigen. Herhaal deze volgorde voor
de minuten en voor het gedeelte UIT, waarmee wordt bepaald
wanneer de radiator wordt uitgeschakeld.
2
4
1
3
Wanneer u klaar bent, drukt u op het symbool (4) om terug te
gaan naar het hoofdmenu. Wanneer de automatische tijd actief
is, wordt het menu als volgt weergegeven.
Om deze te deactiveren, drukt u op elk gewenst moment op het
weergegeven symbool.
Turbofunctie:
Door op het weergegeven symbool te drukken, wordt de modus
“turbo”weergegeven.
De functie TURBO op de ENIGE radiator biedt een continue
werking, ongeacht de ruimtetemperatuur.
Om veiligheidsredenen wordt de TURBO-functie beperkt tot
een cyclus van 4 uur.
Na4uurblijftderadiatornormaalwerken,waarbijde thermostaat
wordt geregeld volgens de temperatuur die is ingesteld op het
display.
Om de functie TURBO te stoppen (voordat de 4 uur na het
inschakelen zijn verstreken), schakelt u de radiator uit door
op (5) te drukken.
5
Bj de volgende reboot zal de radiator in de normale stand
werken.

-16-
ESPAÑOL
INSTRUCCIONES DE USO
ANTES DE UTILIZAR EL PRODUCTO
Leer estas instrucciones atentamente para evitar daños o
situaciones de peligro.
Cualquier uso del producto que diera del indicado en este
manual puede causar incendios, peligros por la presencia de
electricidad o heridas, y hará caducar todo tipo de garantía.
Antes de realizar cualquier operación, retirar con cuidado el
embalaje y controlar la integridad del producto.
Si se detectaran defectos o daños, no instalar ni intentar reparar
el producto. Dirigirse inmediatamente al distribuidor.
No dejar el embalaje al alcance de los niños y desechar las partes
de conformidad con las disposiciones vigentes.
POR SU SEGURIDAD
Asegúrese de que la alimentación de la red corresponda a los
datos de la placa de características técnicas y que la instalación
eléctrica sea apta para el uso.
No permita que animales o niños toquen o jueguen con el
producto.
¡Atención! Durante el funcionamiento, el panel puede estar muy
caliente (aproximadamente 70° C).
Este producto ha sido diseñado para uso doméstico y no
es apto para uso móvil o en ambientes públicos, vehículos,
embarcaciones o aeronaves.
Puesta en marcha:
Mantenga pulsada la esquina superior izquierda para acceder al
modo de programación“orientación de la pantalla”.
FUR 0.99.8.4 uni
Dec 13 2010
08:05:05
Sleve Address : 0x2e0
Elección de la orientación:
Pulse la letra correcta para elegir la orientación adecuada.
Select the correct
view
A
Select the correct
view
A
Select the correct
view
A
Select the correct
view
A
Conguración de la hora:
Mantenga pulsado durante algunos segundos el símbolo
indicado (3).
3
Establezca la hora con los símbolos (1) y (2), pulse (3) para
conrmar.
Ajuste los minutos con los símbolos (1) y (2), pulse (3) para
conrmar.
Prosiga con el mismo método para establecer la fecha.
Al nalizar, aparecerá la pantalla principal pulsando (3).
16:30
01 GEN 17
2
3
1
Pulsando el símbolo indicado se accede al modo “en espera”
mostrando la hora establecida.
Funciones:
Pulsando el símbolo indicado se accede a las funciones
principales.
16:30
01 GEN 17
Regulación de la temperatura:
Pulsando el símbolo indicado se accede al modo “programación
del termostato”.

-17-
ESPAÑOL
Pulse los símbolos (1) y (2) para cambiar la temperatura entre 19°
y 26°C. Pulse (4) para volver al menú principal.
2
4
1
En este momento, el radiador se activa hasta alcanzar la
temperatura ambiente programada.
Conguración del temporizador automático:
Pulsandoelsímbolo indicadoseaccedeal menúde conguración
del temporizador.
Los números de la sección ON comienzan a parpadear y con
las teclas (1) y (2) se aumentará o disminuirá la hora de inicio.
Pulse (3) para conrmar. Repita la secuencia para establecer los
minutos así como la sección OFF, que establece el apagado del
radiador.
2
4
1
3
Al nalizar, pulse el símbolo (4) para volver al menú principal.
Cuando el temporizador automático se activa, el menú tiene el
aspecto mostrado a continuación.
Para desactivarlo, pulse el símbolo indicado en cualquier
momento.
Función turbo:
Pulsando el símbolo indicado se accede al modo “turbo”.
La función TURBO del radiador decorativo SOLE proporciona
un funcionamiento continuo, independientemente de la
temperatura ambiente.
La función TURBO se autolimita, por razones de seguridad, a
un ciclo de 4 horas.
Una vez transcurridas 4 horas, el radiador seguirá funcionando
de manera normal, ajustándose mediante el termostato a la
temperatura ambiente programada en la pantalla.
Para interrumpir la función TURBO (antes de que hayan
transcurrido las 4 horas desde su comienzo), apague el
radiador pulsando la tecla (5).
5
Al volver a ponerlo en marcha, el radiador decorativo
funcionará de manera normal.

-18-
PORTUGUÊS
INSTRUÇÕES DE USO
ANTES DE UTILIZAR O PRODUTO
Leia atentamente essas instruções a m de evitar danos ou
situações de perigo.
Qualquer uso do produto diferente do indicado no presente
manual pode causar incêndios, perigos elétricos ou lesões e
anula todo e qualquer tipo de garantia.
Antes de iniciar qualquer operação, remova cuidadosamente a
embalagem e observe a perfeita integridade do produto.
Em caso de defeitos ou danos, não instale o equipamento, não
tente repará-lo e dirija-se ao revendedor.
Não deixe a embalagem do produto ao alcance das crianças e
descarte as peças em conformidade com as disposições vigentes.
PARA A SUA SEGURANÇA
Assegura-se de que a alimentação de rede corresponda aos
dados de placa e que a instalação elétrica esteja corretamente
dimensionada ao uso.
Nunca deixe que animais ou crianças brinquem ou toquem no
produto.
Atenção! Durante o funcionamento, o painel pode car muito
quente (cerca de 70 °C).
Este produto foi projetado para uso doméstico e não é indicado
para uso móvel, em ambientes públicos, veículos, embarcações
ou aeronaves.
Primeira ativação:
Pressione e mantenha pressionado o canto superior esquerdo
para entrar no modo de programação“orientação do ecrã”.
FUR 0.99.8.4 uni
Dec 13 2010
08:05:05
Sleve Address : 0x2e0
Selecione a orientação:
Pressione a letra correta para selecionar a orientação correta.
Select the correct
view
A
Select the correct
view
A
Select the correct
view
A
Select the correct
view
A
Denir a hora:
Pressione e mantenha pressionado durante alguns segundos o
símbolo apresentado (3).
3
Dena a hora com os símbolos (1) e (2), pressione (3) para
conrmar.
Dena os minutos com os símbolos (1) e (2), (3) para conrmar.
Siga o mesmo método para denir a data.
Depois de pressionar (3), volta a ser apresentado o ecrã principal.
16:30
01 GEN 17
2
3
1
Ao pressionar o símbolo apresentado, entra em modo suspenso,
sendo apresentada a hora denida.
Funções:
Ao pressionar o símbolo apresentado, pode aceder às funções
principais.
16:30
01 GEN 17
Regulação da temperatura:
Ao pressionar o símbolo apresentado, entra no modo“regulação
do termóstato”.

-19-
PORTUGUÊS
Pressione os símbolos (1) e (2) para alterar a temperatura entre
19° C e 26° C. Pressione (4) para voltar ao menu principal.
2
4
1
Neste momento, o aquecedor de toalhas é ativado até à
temperatura denida.
Regulação do temporizador automático:
Ao pressionar o símbolo apresentado, entra no menu de
regulação do temporizador.
Os números na secção ON começam a piscar, com os botões (1)
e (2) pode aumentar ou diminuir a hora de ativação. Pressione
(3) para conrmar. Repita a sequência para os minutos e para
a secção OFF que determina a hora em que o radiador será
desligado.
2
4
1
3
Quando terminar, pressione o símbolo (4) para voltar ao menu
principal. Quando o temporizador automático estiver ativo, o
menu é apresentado da seguinte forma.
Para o desativar a qualquer momento, pressione o símbolo
apresentado em baixo.
Função Turbo:
Ao pressionar o símbolo apresentado, entra no modo“turbo”.
A função TURBO no radiador SOLE assegura um funcionamento
contínuo, independentemente da temperatura ambiente.
Por razões de segurança, a função TURBO está limitada a um
ciclo de 4 horas.
Após 4 horas, o radiador continuará a funcionar normalmente,
regulando o termóstato de acordo com a temperatura ambiente
denida no ecrã.
Para interromper a função TURBO (antes de terem decorrido
4 horas desde a ativação), desligue o radiador ao pressionar
(5).
5
Ao ser ligado novamente, o radiador funcionará no modo
normal.

-20-
ČESKY
NÁVOD K POUŽITÍ
PŘED POUŽITÍM VÝROBKU
Pozorně si přečtěte tento návod, aby nemohlo dojít k poškození
výrobku či vzniku nebezpečných situací.
Jakékoliv jiné použití výrobku než to, které je uvedeno v této
příručce, může způsobit požár, elektrické nebezpečí nebo
zranění a ruší platnost jakékoliv záruky.
Před jakoukoliv operací z výrobku opatrně odstraňte obal a
zkontrolujte, zda není poškozen.
V případě, že byste na výrobku zjistili závady či poškození,
nemontujte ho a nesnažte se ho opravit, ale obraťte se na
prodejce.
Nenechávejte obal v dosahu dětí a jeho části zlikvidujte podle
platných předpisů.
PRO VAŠI BEZPEČNOST
Zkontrolujte, zda síťové napájení odpovídá údajům na štítku a
zda je elektrický systém vhodně strukturován k použití výrobku.
Nikdy nedovolte, aby si zvířata nebo děti hrály s výrobkem nebo
aby se ho dotýkaly.
Upozornění! Během fungování může panel dosahovat vysokých
teplot (zhruba 70° C).
Tento výrobek byl vyprojektován k použití v domácnostech
a není vhodný pro přenosné použití a použití ve veřejných
prostorách či na vozidlech, lodích nebo letadlech.
První aktivace:
Stiskněte a podržte tlačítko v levém horním rohu, abyste se
dostali do programovacího režimu“orientace displeje”.
FUR 0.99.8.4 uni
Dec 13 2010
08:05:05
Sleve Address : 0x2e0
Vyberte orientaci:
Stiskněte správné písmeno, abyste zvolili správnou orientaci.
Select the correct
view
A
Select the correct
view
A
Select the correct
view
A
Select the correct
view
A
Nastavení času:
Stiskněte a podržte po dobu několika sekund stisknutý
zobrazený symbol (3).
3
Pomocí symbolů (1) a (2) nastavte hodinu, pak stiskněte tlačítko
(3) pro potvrzení.
Pomocí symbolů (1) a (2) nastavte minuty, pak stiskněte tlačítko
(3) pro potvrzení.
Pokračujte stejným způsobem, abyste nastavili datum.
Po stisknutí tlačítka (3) se znovu objeví hlavní obrazovka.
16:30
01 GEN 17
2
3
1
Stisknutím zobrazeného symbolu se dostanete do nastavení
času, který se zobrazuje v režimu stand-by.
Funkce:
Stisknutím zobrazeného symbolu se dostanete k hlavním
funkcím.
16:30
01 GEN 17
Regulace teploty:
Stisknutím zobrazeného symbolu se dostanete do režimu
“nastavení termostatu”.
Other manuals for Sole N0041
2
This manual suits for next models
40
Table of contents
Languages:
Other Novellini Heater manuals
Popular Heater manuals by other brands

Safire
Safire 3200B Installation, operation and maintenance guide

Williams
Williams CARMEL AC2030TNA owner's manual

United States Stove
United States Stove LOGWOOD 2421 owner's manual

Ouellet
Ouellet OCC Series instructions

Polaris
Polaris PCSH 0420 RCD Manual Instruction / Guarantee

SGB YOUNGMAN
SGB YOUNGMAN 10BY150ECB owner's manual