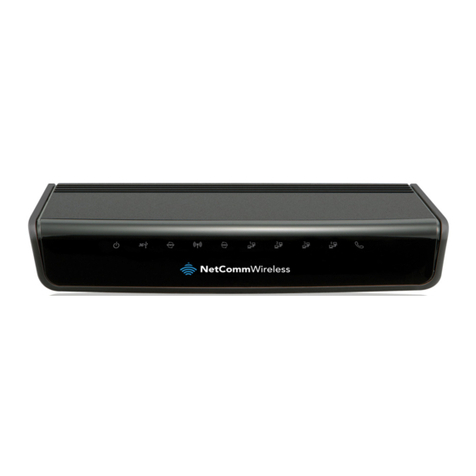
BeWAN ADSL Router User manual

User’s guide

Warning
The information in this manual may be modified without prior notice.
THE MANUFACTURER CANNOT BE HELD RESPONSIBLE IF THERE IS A PARTIAL
DISCREPANCY BETWEEN THE MANUAL AND THE PRODUCT IT DESCRIBES, OR IF
ACCIDENTAL DAMAGE OCCURS DUE TO USE OF THIS MANUAL AND PRODUCT.
The manual and the software provided is protected by Copyright law, and may not be copied or
distributed in any way for any purpose. The use of the software is intended for one product only.
Violation of these rules may result in prosecution by law and the person to be held responsible
economically for any inconvenience and loss to the copyright owner.
Copyright © 2001-2002, BeWAN systems. All rights reserved.
June 2002 edition
BeWAN and the BeWAN systems logo are the registered trademarks of BeWAN systems.
All other trade names are the trademarks or registered trademarks of their respective holders.

BeWAN ADSL Router User’s guide 3
Table of contents
Introduction ................................................................................................ 5
Before starting...................................................................................................................... 5
Contents of the BeWAN ADSL Router box........................................................................ 5
Indicator lights and connectors ............................................................................................ 6
Indicators .....................................................................................................................................6
Connectors ...................................................................................................................................6
Ethernet Connection .................................................................................. 7
Direct connection ................................................................................................................. 7
Indirect connection to an external hub................................................................................. 7
The ADSL Configurator ............................................................................ 9
Installing the ADSL Configurator ....................................................................................... 9
De-installing the ADSL Configurator................................................................................ 11
With Windows 98/Me..................................................................................................................11
With Windows 2000....................................................................................................................11
With Windows XP.......................................................................................................................12
Using the ADSL Configurator................................................................. 13
Creation / Modification of a profile................................................................................... 13
PPPoA (RFC 2364)....................................................................................................................14
PPPoE (RFC 2516)....................................................................................................................20
Saving a profile .................................................................................................................. 22
Updating a profile ..............................................................................................................23
Firmware updating ............................................................................................................. 24
Configuration of the computers .............................................................. 26
PC running Windows 95/98/Me ........................................................................................ 26
Verification of the protocols.......................................................................................................26
PC parameterisation ..................................................................................................................28
Configuration verification..........................................................................................................32
PC running Windows NT................................................................................................... 34
Verification of the protocols.......................................................................................................34
PC parameterisation ..................................................................................................................36
Configuration verification..........................................................................................................40

BeWAN ADSL Router User’s guide 4
PC running Windows 2000................................................................................................ 42
Verification of the protocols.......................................................................................................42
PC parameterisation ..................................................................................................................43
Configuration verification..........................................................................................................47
PC running Windows XP................................................................................................... 49
Verification of the protocols.......................................................................................................49
PC parameterisation ..................................................................................................................49
Configuration verification..........................................................................................................53
Macintosh (Mac OS 8.x to 9.x).......................................................................................... 55
Verification of the protocols.......................................................................................................55
Macintosh parameterisation ......................................................................................................55
Macintosh (Mac OS X.1) ................................................................................................... 58
Macintosh parameterisation ......................................................................................................58
Installing via the USB port ...................................................................... 61
USB connection ................................................................................................................. 61
Installing the USB drivers.................................................................................................. 62
Installation with Windows 98.....................................................................................................62
Installation with Windows Me....................................................................................................67
Installation with Windows 2000.................................................................................................72
Installation with Windows XP ....................................................................................................79
Appendix.................................................................................................... 84
Telnet commands ............................................................................................................... 84
Basic Telnet principles ...............................................................................................................84
Opening a Telnet session............................................................................................................84
List of main commands...............................................................................................................85

BeWAN ADSL Router User’s guide 5
Introduction
Congratulations, you have just acquired the BeWAN ADSL Router, an ergonomic and high-
performance router offering dynamic management of an ADSL-based Internet connection and its
sharing over a local network. Your Internet access can use either the Ethernet cable or the USB
port. Before using it, you will require a subscription with an ADSL service provider and an Internet
service provider using ADSL.
Before starting
In this manual, we consider that the following conditions are true:
1. You have a Analog line with an ADSL access.
2. You have a subscription with an Internet service provider (ISP), who has confirmed your
connection parameters (identifiers, password, DNS servers, etc.).
Contents of the BeWAN ADSL Router box
In addition to the modem, the BeWAN ADSL Router box also contains the following elements:
BeWAN ADSL CD-ROM containing the
software and manual
ADSL RJ11 cable
Power supply cable
Crossed Ethernet cable (red)
USB cable

BeWAN ADSL Router User’s guide 6
Indicator lights and connectors
Indicators
Located on the front of the BeWAN ADSL Router, the indicators provide information on the status
of the BeWAN ADSL Router and of its connections.
Indicator
name
Indicator
colour
Position Corresponding
connector
ACT Orange Blinks when packets are sent or received over
the network
POWER
ADSL Orange Blinks while establishing the synchronisation
On when synchronised
ADSL
Eth Orange Blinks when initialising
On when the connection is operational
LAN
USB Orange Blinks when initialising
On when the connection is operational
USB
Power Green On when the BeWAN ADSL Router is
connected
POWER
Connectors
All of the connectors for the BeWAN ADSL Router unit are on the back.
Refer to the connection diagrams in the “Ethernet Connection” chapter on page 7.

BeWAN ADSL Router User’s guide 7
Ethernet Connection
This chapter provides the various connection diagrams for the BeWAN ADSL Router. If you have
an Ethernet card, this type of connection is preferred over a USB connection (refer to the “Installing
via the USB port” chapter on page 61).
Note: before beginning, you must have installed an Ethernet 10Base-T card in your
computer.
Note: when using your ADSL connection, you can simultaneously use your telephone or fax.
Direct connection
Proceed as follows to directly connect a computer to the BeWAN ADSL Router:
1. Locate the crossed Ethernet cable (red). Connect one end of this cable to the modem’s LAN
port, and the other end to the RJ45 on the computer’s Ethernet card.
2. Locate the RJ11 cable. Connect one end of this cable to the ADSL port on the BeWAN ADSL
Router, and the other end to your phone jack.
3. Locate the power supply cable. Connect one end of this cable to the Power port on the BeWAN
ADSL Router, and the other end to an electrical outlet which complies with the specifications
indicated on the power pack.
Indirect connection to an external hub
To indirectly connect a computer to the BeWAN ADSL Internet, using an external Ethernet hub
(not supplied), proceed as follows:
1. Obtain a straight Ethernet cable (cable not supplied). Connect one end of this cable to the LAN
port on the BeWAN ADSL Router, and the other end to one of the Ethernet ports on the
external hub.
2. Then connect the computer to the external Ethernet hub (additional cable not provided).
Note: of course, you can connect other computers and equipment to the external hub.

BeWAN ADSL Router User’s guide 8
3. Locate the RJ11 cable. Connect one end of this cable to the ADSL port on the BeWAN ADSL
Router, and the other end to your phone jack.
4. Locate the power supply cable. Connect one end of this cable to the Power port on the BeWAN
ADSL Router, and the other end to an electrical outlet which complies with the specifications
indicated on the power pack.

BeWAN ADSL Router User’s guide 9
The ADSL Configurator
Installing the ADSL Configurator
In order to set the parameters of your BeWAN ADSL Router, you must install the ADSL
Configurator.
1. Insert the BeWAN ADSL CD-ROM in your drive. If your PC’s configuration is set up for it, the
installation program will launch automatically. If it does not, run the autorun.exe program
which is located at the root of the CD-ROM.
2. Click on the product BeWAN ADSL Router, and then select your language.
3. Click on Software and then on ADSL Configurator.
4. The ADSL Configurator installation Wizard appears. Click on Next.
5. Read the Readme, then click on Next.

BeWAN ADSL Router User’s guide 10
6. The Wizard is now ready to install the software. It has defined the default destination directory.
Click on Next.
7. Select the program folder and then click on Next.
8. After a verification of the configuration, you can begin copying the files. Click on Next.

BeWAN ADSL Router User’s guide 11
9. The installation of the ADSL Configurator is finished. Click on Finish.
Note: if you would like to launch the application right away, check the I would like to launch
ADSL Configurator box and then click on Finish.
De-installing the ADSL Configurator
With Windows 98/Me
1. Click on Start, then point to Settings, and then click on Control Panel.
2. Double-click on the Add/Remove Programs icon.
3. In the Install/Uninstall window, select the ADSL Configurator and then click on
Add/Remove….
4. A confirmation window opens. Click on Yes.
5. The de-installation procedure takes place. Click on Finish.
With Windows 2000
1. Click on Start, then point to Settings, and then click on Control Panel.
2. Double-click on the Add/Remove Programs icon.
3. In the Install/Uninstall window, select the ADSL Configurator and then click on
Modify/Remove.
4. A confirmation window opens. Click on Yes.
5. The de-installation procedure takes place. Click on Finish.

BeWAN ADSL Router User’s guide 12
With Windows XP
1. Click on start, and then on Control Panel.
2. Click on Add or Remove Programs.
3. From the menu on the left, select Change or Remove Programs.
4. Then select ADSL Configurator.
5. Click on Change/Remove.
6. A confirmation window opens. Click on OK.
7. The de-installation procedure takes place. Click on Finish.

BeWAN ADSL Router User’s guide 13
Using the ADSL Configurator
You need this configuration tool to create your profiles. You can then:
•create another profile or modify the existing profile;
•save your profile;
•update your profile (i.e. load this profile to the router).
This tool is also used to update the firmware of your BeWAN ADSL Router.
Creation / Modification of a profile
1. Click on Start, point to Programs, ADSL Configurator, and then click on ADSL
Configurator to launch the application.
2. If the connection has been made correctly, your router must be visible in the configurator. Select
it, and then click on Edit/new profile.
3. In the File name field, enter the name which you would like to assign to your new profile, or
select a pre-existing profile in order to modify it. Click on Open.

BeWAN ADSL Router User’s guide 14
4. If you create a profile, the following window appears; it is used to select the protocol required
by your ADSL service provider. In this manual, we outline the most commonly used protocols,
i.e. those which are most often required by ADSL service providers. In order to determine
which protocol to use, check with your telecom operator.
If you are only modifying your profile, continue directly to the next step, i.e. your profile’s
parameterisation window.
PPPoA (RFC 2364)
1. Select PPPoA (RFC 2364) as the protocol type, and then click on OK.
2. Enter the characteristics of your profile:
•Under the Username and Password headings, enter the identification parameters provided
by your Internet access provider.
•Select your authentication protocol. The CHAP protocol is most often used by ADSL service
providers.
•In the VPI and VCI headings, enter the required parameters of your ADSL service provider.
•Select your interface type: if your router is connected via the Ethernet port, select Ethernet.
If, however, you are connected via the USB port, select USB.
•In the LAN IP settings field, indicate your router’s IP address as well as the corresponding
sub-network mask.
Note: the BeWAN ADSL Router’s IP address must imperatively be within the same
addressing range as that of your local network.
•Select the modulation type required by your telecommunications operator. We recommend
that you use the Multimode modulation.
Note: Multimode takes in all of the modulations used for appendix A (G.Lite, G.DMT
Appendix A and T1.413).

BeWAN ADSL Router User’s guide 15
3. In the part DNS Relay, check Assigned by PPP. Indeed, if this is not the case and if you have
entered the IP address of the router in order to use the Proxy DNS function, you will not able to
navigate. This method, on the contrary, will optimise your navigation. When making the
connection, the DNS will be assigned to you dynamically.
4. Click OK to validate your profile. Your newly created profile can now be loaded to the router.
Refer to the section “Updating a profile” on page 23 and follow the steps in the update
procedure.
Note: if you would like to activate the DHCP server, see the following section.

BeWAN ADSL Router User’s guide 16
Configuring the DHCP server
Here is an example of DHCP server configuration. This is used to automatically manage the
assignment of IP addresses for the machines on the network. Each machine which is to connect to
an Internet network must have a unique IP address. The DHCP server avoids having to manually
assign an address for each machine, by dynamically assigning an available IP address. The DHCP
server provides a reliable and simple TCP/IP network configuration, it prevents address conflicts
and makes it possible to verify the use of the IP addresses by means of the centralised management
of the address assignments.
1. In your profile’s parameterisation window, check the DHCP Server box and then click on
Configuration.
2. Click the Add button.

BeWAN ADSL Router User’s guide 17
3. Fill in your sub-network and the corresponding mask. The sub-network must imperatively be in
the same range as the BeWAN ADSL Router’s IP address. Click on OK.
4. Indicate the range of IP addresses which you would like to use, and then click on Add.
Note: this address range must not include the BeWAN ADSL Router’s IP address.

BeWAN ADSL Router User’s guide 18
5. In the Max lease time field, indicate the number of seconds during which this IP address is
assigned to you. After this period, the DHCP server well assign a new IP address to you.
6. In the Routers field, indicate the BeWAN ADSL Router’s IP address, and then click on Add.

BeWAN ADSL Router User’s guide 19
7. Click OK to validate your parameters.
8. When you have finished entering these parameters, click on OK. Your profile will be saved in
the folder of your choice.
9. Your newly created profile can now be loaded to the router. Refer to the section “Updating a
profile” on page 23 and follow the steps in the update procedure.

BeWAN ADSL Router User’s guide 20
PPPoE (RFC 2516)
1. Select PPPoE (RFC 2516) as the protocol type, and then click on OK.
2. Enter the characteristics of your profile:
•Under the Username and Password headings, enter the identification parameters provided
by your Internet access provider.
•Select your authentication protocol. The CHAP protocol is most often used by ADSL service
providers.
•In the VPI and VCI headings, enter the required parameters of your ADSL service provider.
•In the WAN IP settings, check Clamp TCP’s MSS. This allows dynamic management of
the packet sizes on the basis of the Web servers visited. If you do not select this option, some
sites may not be accessible.
•Select your interface type: if your router is connected via the Ethernet port, select Ethernet.
If, however, you are connected via the USB port, select USB.
•In the LAN IP settings field, indicate your router’s IP address as well as the corresponding
sub-network mask.
Note: the BeWAN ADSL Router’s IP address must imperatively be within the same
addressing range as that of your local network.
•Select the modulation type required by your telecommunications operator. We recommend
that you use the Multimode modulation.
Note: Multimode takes in all of the modulations used for appendix A (G.Lite, G.DMT
Appendix A and T1.413).
Table of contents
