manuals.online logo
Brands
  1. Home
  2. •
  3. Brands
  4. •
  5. Technicolor
  6. •
  7. Network Router
  8. •
  9. Technicolor TG588v Operating and maintenance instructions

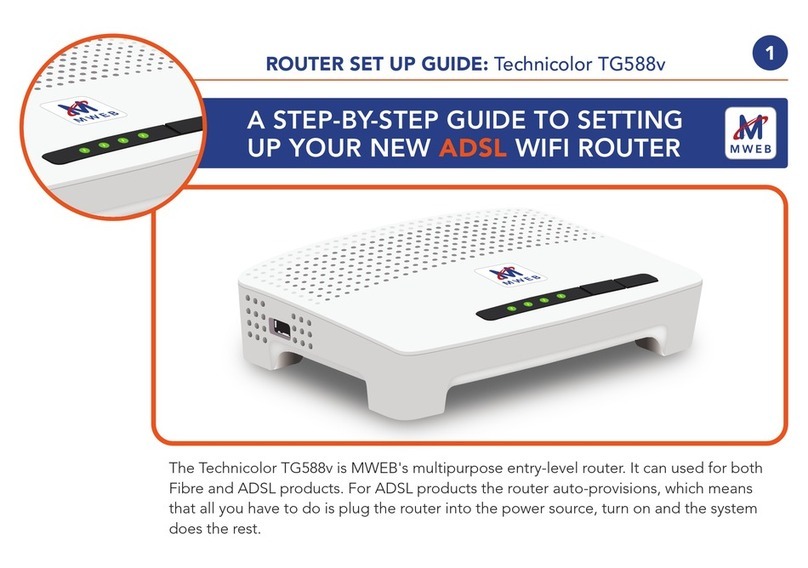
Technicolor TG588v Operating and maintenance instructions

WELCOME PACK CONTENTS
Once you have been notied by your service provider that your
Broadband service has been activated you can continue to set
up your TG588v gateway.
Note: Installation before the service activation date will cause the
set up to fail.
During installation you may be prompted by the gateway to enter
the broadband service (PPP) username and password provided
by your service provider.
In order to connect using a wireless connection you will need
the wireless details provided with your TG588v. These are
conveniently printed on the supplied wireless ‘Keep Me’ card
and reproduced on the rear label of the TG588v.
Please take a moment to consider the passwords needed to
secure your gateway, wireless network and internet connection
from unauthorised access.
Broadband Service: Sometimes referred to as the PPP
username and password. If your service provider does not
provide automatic conguration of your gateway you will be
prompted by the gateway for this password. The username is
usually in the format [email protected]
Gateway: This is the password to your TG588v
administration pages at http://192.168.1.1. The default
username is “admin” and the default password is “admin”. You
will be prompted to change this password when rst accessing
the gateway. Choose a memorable password that is difcult for
an unauthorised person to guess. Using a long password that is
a mix of upper and lower case, numbers and special characters
will make your gateway more secure.
Wireless: The TG588v provides by default a unique wireless
network name (SSID) and a randomly generated WPA password.
This password can be changed using the admin pages of the
TG588v. Note that it is important that this password is difcult
for anyone trying to access your network to guess. It must
also be between 8 and 63 characters long using alphanumeric
characters only, e.g. MyWiFi15.
21
ABOUT PASSWORDS
BROADBAND CONNECTIONS
If you have been supplied a
two part power supply unit, clip
the two parts together before
connecting to the AC mains
power socket.
Your TG588v can be used with both standard ADSL
and VDSL (FTTC / Innity) broadband services.
Once connected to an active broadband service (solid
green broadband LED) your TG588v will automatically
switch between ADSL and VDSL service types.
Some service providers will remotely congure your
TG588v so that it automatically connects to your
broadband service. This automatic conguration can
take a few minutes.
If your service provider does not provide automatic
conguration you will be prompted to enter the
broadband service password provided in your welcome
pack supplied by your service provider. This prompt is
automated by the TG588v when you rst open a web
browser to any HTTP website.
As shown above enter your broadband username and
password and select Apply.
Once connected both the broadband and Internet
LED’s will be solid green
If you have a Master socket with a single phone
connection you will need to t a DSL lter to every
telephony device in the home. This includes telephones,
DECT phone base stations, Satellite TV boxes,
Connected alarm systems and emergency call diallers.
If you have a Master socket with a central lter it will
have a telephone socket and a broadband socket. In
this case you can connect your TG588v directly to the
broadband socket.
BEFORE INSTALLATION
Ethernet
cable (yellow)
Stand
WiFi Set Up
Card
DSL Filter
(*optional)
2 Part
Power Supply
Technicolor
TG588v Router
DSL cable
(grey)
CABLE SATELLITE TERRESTRIAL
TELECOM
QUICK START GUIDE: TG588v
Thank you for purchasing and making Technicolor gateways part
of your broadband experience. For more information on your
Technicolor gateway please visit us at:
www.technicolor.com
*DSL lters: The number of Inline DSL lters included with your
gateway is determined by your retailer or service provider.
Additional lters can be purchased online at
www.technicolordslshop.com or from your service provider.
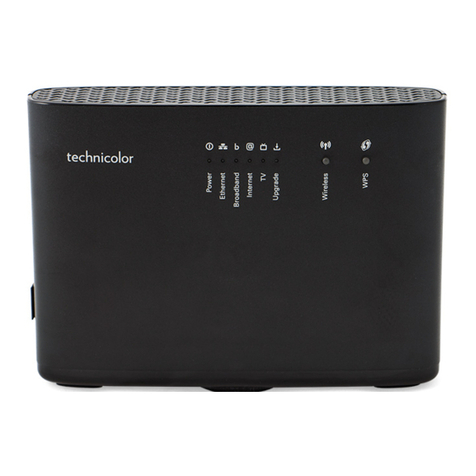
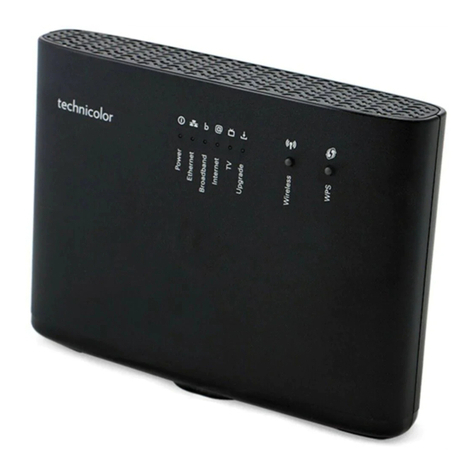
Power
Ethernet
Broadband
Internet
Wireless
WPS
TV
Upgrade
BEFORE INSTALLING YOUR
TECHNICOLOR GATEWAY
Please ensure that your broadband service has
been activated by your service provider.
1401-2200
Network Name:
wireless user codes
TNCAP0QQP00
111AB0C22CD
Wireless Key:
Rated Input: 12V 1AMade in China
SN: CP0001ABZYX
GW: DSLABC588EFG
MAC: 0123A0BCD22
ACCESS KEY: H0JK33L1
TG588v v2
DSL 1 2 3 4 Reset
1401-2200
Network Name:
wireless user codes
TNCAP0QQP00
111AB0C22CD
Wireless Key:
Rated Input: 12V 0.75AMade in China
SN: CP0001ABZYX
GW: DSLABC588EFG
MAC: 0123A0BCD22
ACCESS KEY: H0JK33L1
TG588v v2
DSL 1 2 3 4 Reset
Safety Leaet &
Set Up Guide
3CONNECTING YOUR TG588v
4WIRELESS CONNECTION TO YOUR TG588v
WINDOWS 7 WINDOWS 8
TROUBLESHOOTING
CONNECTING AN iPHONE & iPAD CONNECTING AN ANDROID DEVICE
You will nd the following information on your wireless ‘Keep Me’
card, and also on the label on the reverse side of the TG588v:
• SSID Name: The name of your wireless network associated with
your TG588v
• Wireless Key: The password you will need to enter on your PC,
smart phone or tablet to gain access to this network
You can connect to your TG588v using WPS Push Button
Connect by pressing the WPS button on your TG588v and on your
client device.
Alternatively a wireless connection can be established manually
depending on your device type:
Tap the settings icon on your home screen.
Ensure Wi-Fi is switched on and select your Wireless network
from the list shown
When prompted enter your wireless security key exactly as
shown on your Keep me card. Then select Join
Tap Apps icon on your home screen then tap the settings icon.
Select Wi-Fi and ensure Wi-Fi is ON. Next select your Wi-Fi
network from the list
When prompted enter your wireless security key exactly as
shown on your Keep me card. Then select Connect
Power
Ethernet
Broadband
Internet
Wireless
WPS
TV
Upgrade
1. Open “Connect to a Network” by clicking the network icon
( or ) in the notication area - bottom right hand corner
of the screen.
2. In the list of available wireless networks, select the network
coresponding to the SSID of your TG588v, and then click
Connect. Once you hit connect you will be asked for a wireless
key which can be found on your wireless ‘Keep Me’ card or on
the label on the reverse side of the TG588v.
3. Enter the security key and click OK. Wait a minute and you
should now be online.
1
3
1. Select the wireless icon from the panel at the bottom of the Charms
bar.
2. You’ll see a list of networks you can connect to. Choose your router’s
Wireless name on the list and select Connect.
3. You’ll be asked for the network security key. This is the Wireless key
printed on your wireless ‘Keep Me’ card. Enter the key and click OK.
4. Next you’ll be asked about setting up sharing.
Choose the appropriate option to continue.
You should now be connected to your wireless network.
1
2
34
Wireless user codes
Network Name:
TNCAP400B00
Made in China Rated Input: 12V 1.5A
Wireless Key:
CFDA00FB00
4746-7279
TG588v v2
SN: CP01234ZZKRG
GW: DSLABC008BUBH
MAC: 0AB1C234C56
ACCESS KEY: X1YZWVUTS2
Broadband
Off - No cable/connection
Green - Flashing (fast) - Syncronising
Solid - In sync
USB port
Disabled
WPS (+ button)
Off - Inactive
Flashing orange - Pairing
Red - Pair failed
Green - Pairing sucess
Wireless (+ button)
Off - Disabled
Green - Enabled
Green ashing - Data transfer
Button - Push and hold (5 secs) to
disable/enable Wi-Fi
Ethernet
Green - Cable connected
Flashing - Data transfer
TV
Not used in this release
Power
Orange - Device starting up
Green - Ready
Upgrade
Blue - Receiving rmware update
Note: Do not switch off router
Internet
Off - No Broadband / Disabled
Red ashing - Trying to connect
Green - Connected
Green ashing - Data transfer
Broadband (Grey cable/socket)
If the light is off or continues ashing check your home wiring. If using DSL
lters check that all telephony devices have a lter installed. Also check that
your service activation date has been reached.
Power
If the light fails to show green, check that you are using the power supply
provided with the TG588v gateway and that you have correctly pressed the
power button.
Internet
If continually ashing red, check that your service activation date has been
reached. Then login to the gateway at http://192.168.1.1 and check that
the broadband username and password are correctly entered.
Enter your
wireless
password
here

Other manuals for TG588v

1

Other Technicolor Network Router manuals

Technicolor TG789vac Setup guide

Technicolor

Technicolor TG789vac Setup guide

Technicolor TG588v v2 Instruction sheet
Technicolor

Technicolor TG588v v2 Instruction sheet

Technicolor TG589vac Safety guide

Technicolor

Technicolor TG589vac Safety guide

Technicolor DGA0122 User manual

Technicolor

Technicolor DGA0122 User manual

Technicolor TG588 User manual

Technicolor

Technicolor TG588 User manual

Technicolor DGA4130 Safety guide

Technicolor

Technicolor DGA4130 Safety guide

Technicolor TG789vac v2 Safety guide

Technicolor

Technicolor TG789vac v2 Safety guide

Technicolor TG582n User manual

Technicolor

Technicolor TG582n User manual

Technicolor TG588v User manual

Technicolor

Technicolor TG588v User manual

Technicolor CGA4233 User manual

Technicolor

Technicolor CGA4233 User manual

Technicolor TG650S User manual

Technicolor

Technicolor TG650S User manual

Technicolor TG590 Safety guide

Technicolor

Technicolor TG590 Safety guide

Technicolor TG582n User manual

Technicolor

Technicolor TG582n User manual

Technicolor TG789vac v2 Setup guide

Technicolor

Technicolor TG789vac v2 Setup guide

Technicolor DGA4134 User manual

Technicolor

Technicolor DGA4134 User manual

Technicolor TG589 User manual

Technicolor

Technicolor TG589 User manual

Technicolor TG789vac v2 Setup guide

Technicolor

Technicolor TG789vac v2 Setup guide

Technicolor DWA0120 User manual

Technicolor

Technicolor DWA0120 User manual

Technicolor TG588 User manual

Technicolor

Technicolor TG588 User manual

Technicolor DWA1230 User manual

Technicolor

Technicolor DWA1230 User manual

Technicolor MediaAccess TG589vac v2 User manual

Technicolor

Technicolor MediaAccess TG589vac v2 User manual

Technicolor DGA4134 User manual

Technicolor

Technicolor DGA4134 User manual

Technicolor TC4400 User manual

Technicolor

Technicolor TC4400 User manual

Technicolor TG670 Instruction Manual

Technicolor

Technicolor TG670 Instruction Manual

Popular Network Router manuals by other brands

Belkin P73956EH Quick setup guide

Belkin

Belkin P73956EH Quick setup guide

HARTING Ha-VIS FTS 3100s-A Installation notes for electrical personnel

HARTING

HARTING Ha-VIS FTS 3100s-A Installation notes for electrical personnel

Asus TUF Gaming AX4200 Quick setup guide

Asus

Asus TUF Gaming AX4200 Quick setup guide

Dynex DX-E402 - EN Broadband Router install guide

Dynex

Dynex DX-E402 - EN Broadband Router install guide

H3C MSR 800 Installation, quick start

H3C

H3C MSR 800 Installation, quick start

TP-Link TL-WR802N Quick installation guide

TP-Link

TP-Link TL-WR802N Quick installation guide

Asus RT-AC68U V3 quick start guide

Asus

Asus RT-AC68U V3 quick start guide

Westermo MRD-315 user guide

Westermo

Westermo MRD-315 user guide

Wheatstone Corporation Bridge 2001 Technical manual

Wheatstone Corporation

Wheatstone Corporation Bridge 2001 Technical manual

LevelOne WBR-6801 Quick installation guide

LevelOne

LevelOne WBR-6801 Quick installation guide

SMC Networks 7208SBR user guide

SMC Networks

SMC Networks 7208SBR user guide

Asus RT-AC1750B1 manual

Asus

Asus RT-AC1750B1 manual

NetComm NTC-140W-02 quick start guide

NetComm

NetComm NTC-140W-02 quick start guide

TP-Link TL-R4199G user guide

TP-Link

TP-Link TL-R4199G user guide

Kasda KW5813 user manual

Kasda

Kasda KW5813 user manual

Make Noise Rosie manual

Make Noise

Make Noise Rosie manual

Avaya 8000 Series Technical configuration guide

Avaya

Avaya 8000 Series Technical configuration guide

Mellanox Technologies SX1018HP overview

Mellanox Technologies

Mellanox Technologies SX1018HP overview

manuals.online logo
manuals.online logoBrands
  • About & Mission
  • Contact us
  • Privacy Policy
  • Terms and Conditions

Copyright 2025 Manuals.Online. All Rights Reserved.