manuals.online logo
Brands
  1. Home
  2. •
  3. Brands
  4. •
  5. H3C
  6. •
  7. Network Router
  8. •
  9. H3C CR16000-M Operating and maintenance manual

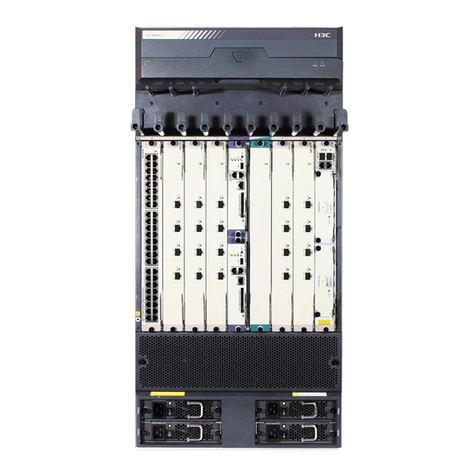
H3C CR16000-M Operating and maintenance manual

Operating: 0 to 45°C (32°F to 113°F)
Storage: –40°C to +70°C (–40°F to +158°F)
RequirementItem
Temperature
Relative
humidity
Cleanness
Ventilation
Space
Operating: 5% RH to 95% RH (noncondensing)
Storage: 5% RH to 95% RH (noncondensing)
• Dust buildup on the chassis might result in electrostatic adsorption, which causes poor
contact of metal components and contact points. In the worst case, electrostatic
adsorption can cause communication failure.
• Prevent corrosive gases from entering the installation site.
• A minimum clearance of 10 cm (3.94 in) is reserved around the inlet and outlet air vents.
• The rack for the router has a good cooling system.
• The installation site has a good cooling system.
• As a best practice, reserve a minimum clearance of 1 m (3.28 ft) between the rack
and walls or other devices.
• Reserve enough space around the rack for cable routing.
Safety recommendations
To avoid equipment damage or bodily injury, read the following safety recommendations before
installation. Note that the recommendations do not cover every possible hazardous condition.
Examining the installation site
The router can be used only indoors. For the router to operate correctly and have a prolonged
service time, the installation site must meet the following requirements.
Tool list
• Pay attention to the warnings and safety symbols on the router and operate the
router accordingly.
• Always wear an ESD wrist strap and make sure it is reliably grounded before you
install the removable components.
• Do not install the chassis, FRUs, or cables when the router is powered on.
• To avoid equipment damage or bodily injury, make sure the router is reliably grounded
before powering on the router.
• To ensure good ventilation, install a filler panel in an unused slot.
• This document provides a brief guide for installing H3C CR16000-M routers. For more
installation information, see H3C CR16000-M Routers Installation Guide.
• The figures in this document are for illustration only.
• The installation procedure is similar for the CR16000-M routers. The following uses a
CR16000-M8 router as an example unless otherwise specified.
• Paper manuals cannot be updated in real time with product changes.For most recent
product information,see the E-manuals at the official website.
Installation accessories
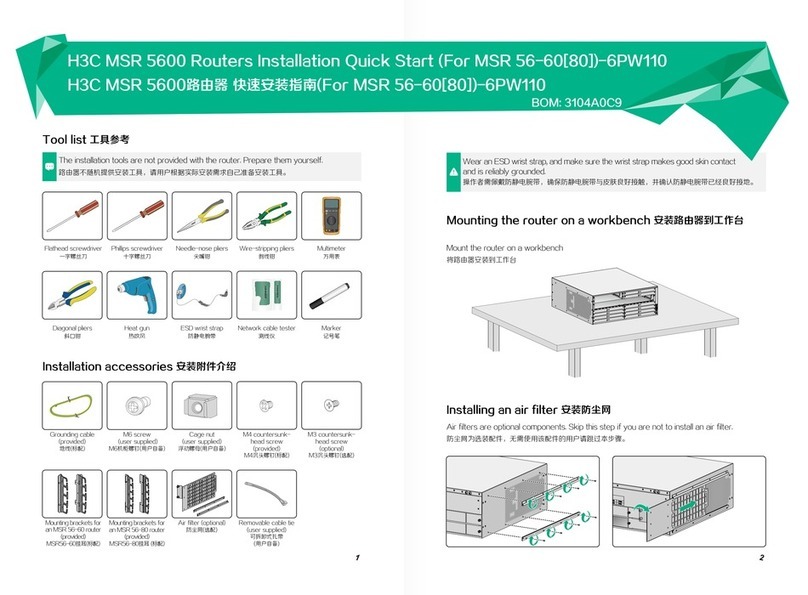
Prepare the following installation tools yourself as required.
Flat-blade
screwdriver
Phillips
screwdriver
Needle-nose
pliers
Diagonal
pliers
MarkerClaw
hammer
Wire-stripping
pliers
Cable
management
bracket
Grounding
cable
Cage nut M6 screw ESD
wrist strap
cable tie
Installing the router
Use a minimum of two people to move the router. As a best practice, use a mechanical
lift for heavy models.
Attaching cage nuts to the rack
Installing the router in a rack
1. Use a pattern tool to record the installation holes of the mounting brackets and mark the
cage nut holes on the rack posts accordingly.
2. Install cage nuts on the square holes.
H3C CR16000-M Routers Installation Quick Start-6PW103
BOM:3104A0V1
This section only lists the most commonly used installation accessories.
01
02
03
04
05
06
07
08
09
10
1
1
12
13
14
01
02
03
04
05
06
07
08
09
10
11
12
13
14
Grounding the router
Installing FRUs
• Do not hold the handle of the fan tray, power module, or the rear panel of the chassis, or
the air vents of chassis to carry the chassis. Any attempt to carry the router with these
parts might cause equipment damage or even bodily injury.
• After placing the router on the slide rails, do not leave go of your hands immediately,
because this might tip the router, damaging the router or even causing bodily injury.
• Use the supplied grounding cable.
• Connect the grounding cable to the grounding system in the equipment room.
Do not connect it to a fire main or lightning rod.
Before installing an MPU or interface module in the chassis, make sure the connectors
on the module are not broken or blocked.
Installing MPUs and interface modules
The installation procedures for MPUs and interface modules are the same. This example
installs an MPU.
Removing the filler panel
Installing the MPU
5
6
3
4
1
2
1
1
2
2
2
1
2
1
3
4
Installing the switching fabric module
Removing the filler panel
Before installing a switching fabric module in the chassis, make sure the connectors
on the module are not broken or blocked.
Installing switching fabric modules
Make sure the circuit breaker at the power input end is off when you connect the power
cord to the terminals on the power source.
Connecting a power cord
Installing cable management brackets
Installing power modules
The installation procedures for AC power modules and HVDC power modules are the same.
This example installs an AC power module.
• Press the power module handle inward until it is secured in place before fastening
screws.
• Provide a circuit breaker for each power module and make sure the circuit breaker
is off before installation.
• Do not install power modules of different models on the same router.
• To avoid power module damage or bodily injury, move a power module by supporting
its bottom instead of holding its handle.
1
1
2
1
2
3
4
1
2
• Verify that the fuse capacity for the power supply system is as required by the router.
• Verify that the voltage of the power supply system is as required by the router.
• Before the power-on check, turn off all switches on the router and power supply system.
Powering on the router and verifying its operation
Checking before power-on
Powering on the router
Checking after power-on
Verify that the router is operating correctly by observing the LEDs on the router. For more
information about the LEDs, see H3C CR16000-M Routers Hardware Information and
Specifications.
The connection procedures for AC power cords and HVDC power cords are the same.
This example connects an AC power cord.
To access the router for the first time, use a console cable to connect the console
port on the router.
Connecting the console cable
Copyright © 2021-2023, New H3C Technologies Co., Ltd.
The information in this document is subject to change without notice.
2
1
3
2
1

Other manuals for CR16000-M

1

Other H3C Network Router manuals

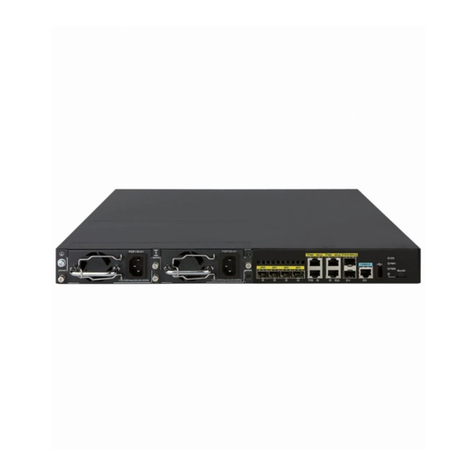
H3C S3100-52P User manual

H3C

H3C S3100-52P User manual

H3C S5500-HI Switch Series User manual

H3C

H3C S5500-HI Switch Series User manual

H3C MSR2600-6-X1-GL User manual

H3C

H3C MSR2600-6-X1-GL User manual

H3C CR16000-FA Series Instruction Manual

H3C

H3C CR16000-FA Series Instruction Manual

H3C H3C S7500E Series User manual

H3C

H3C H3C S7500E Series User manual

H3C S5500-SI Series User manual

H3C

H3C S5500-SI Series User manual

H3C CR19000-16 User manual

H3C

H3C CR19000-16 User manual

H3C SR8800-X User manual

H3C

H3C SR8800-X User manual

H3C SR6600 SPE-FWM Installation manual

H3C

H3C SR6600 SPE-FWM Installation manual

H3C MSR3600-28 User manual

H3C

H3C MSR3600-28 User manual

H3C MSR810 User manual

H3C

H3C MSR810 User manual

H3C S3100-52P User manual

H3C

H3C S3100-52P User manual

H3C SR6602 User manual

H3C

H3C SR6602 User manual

H3C SR6600 SPE-FWM User manual

H3C

H3C SR6600 SPE-FWM User manual

H3C S5500-SI Series User manual

H3C

H3C S5500-SI Series User manual

H3C SR6600 SPE-FWM Installation manual

H3C

H3C SR6600 SPE-FWM Installation manual

H3C MSR 900 Series User manual

H3C

H3C MSR 900 Series User manual

H3C SR6602-X1 User manual

H3C

H3C SR6602-X1 User manual

H3C S5120-SI Series Installation manual

H3C

H3C S5120-SI Series Installation manual

H3C RA5100 User manual

H3C

H3C RA5100 User manual

H3C CR16000-F Operating and maintenance manual

H3C

H3C CR16000-F Operating and maintenance manual

H3C S5510 Series User manual

H3C

H3C S5510 Series User manual

H3C H3C MSR 30-20 ROUTER User manual

H3C

H3C H3C MSR 30-20 ROUTER User manual

H3C MSR 20-20 Manual

H3C

H3C MSR 20-20 Manual

Popular Network Router manuals by other brands

swissonic Professional Router 2 MKII user manual

swissonic

swissonic Professional Router 2 MKII user manual

Ubiquiti airCube Configuring and Installing

Ubiquiti

Ubiquiti airCube Configuring and Installing

Cisco ASR 920 series Installing guide

Cisco

Cisco ASR 920 series Installing guide

Advantech ICR-1601 Start guide

Advantech

Advantech ICR-1601 Start guide

Cisco Router Cisco 831 Hardware installation guide

Cisco

Cisco Router Cisco 831 Hardware installation guide

LevelOne GSW-0507 user manual

LevelOne

LevelOne GSW-0507 user manual

CTC Union atu-r130 user manual

CTC Union

CTC Union atu-r130 user manual

Huawei EG8147X6 troubleshooting manual

Huawei

Huawei EG8147X6 troubleshooting manual

TP-Link TD-W8901N Quick installation guide

TP-Link

TP-Link TD-W8901N Quick installation guide

Cisco Cisco 888 Hardware installation guide

Cisco

Cisco Cisco 888 Hardware installation guide

Cisco Catalyst IR1800 Rugged Series Hardware installation guide

Cisco

Cisco Catalyst IR1800 Rugged Series Hardware installation guide

Perle IRG5540 Hardware installation guide

Perle

Perle IRG5540 Hardware installation guide

FHP RoutePoint RP-01-00C-C-N-00 Hardware installation guide

FHP

FHP RoutePoint RP-01-00C-C-N-00 Hardware installation guide

V-Sol V2802W manual

V-Sol

V-Sol V2802W manual

Cisco 2501 - Router - EN user guide

Cisco

Cisco 2501 - Router - EN user guide

ADB P.DG A4001N user manual

ADB

ADB P.DG A4001N user manual

Allied Telesis AlliedWare NetScreen Routers Network guide

Allied Telesis

Allied Telesis AlliedWare NetScreen Routers Network guide

Teldat RXL15000 installation manual

Teldat

Teldat RXL15000 installation manual

manuals.online logo
manuals.online logoBrands
  • About & Mission
  • Contact us
  • Privacy Policy
  • Terms and Conditions

Copyright 2025 Manuals.Online. All Rights Reserved.